9 TIPS AND TRICKS FOR QUICK COLORING USING FILL TOOL
Hey guys, in this tutorial I'm gonna give you guys 9 tips and tricks that will make your process of coloring your flats using the fill tool much easier . either you are a comic artist or if your illustration requires a lot of flat color i’m sure you will find these tips very helpful so lets start .
----------------------WATCH THE VIDEO FOR VISUAL EXPLANATION --------------------------
INTRODUCING FILL TOOL AND ITS SUBTOOL
Before getting into the tips I will give you guys a basic introduction to how to use these tools!
You can find your "fill tool " in the toolbar . Once you click on it you will be provided with a sub tool and tool property .
If you can't find sub tool and tool property then you can enable them in the window menu
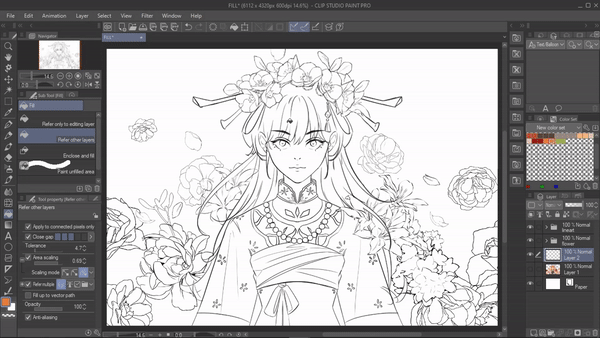
For todays tutorial I will be using the lineart below as an example for all the tips .
The layer where I fill in the color will always be below the lineart layer .
THE SUBTOOLS
============
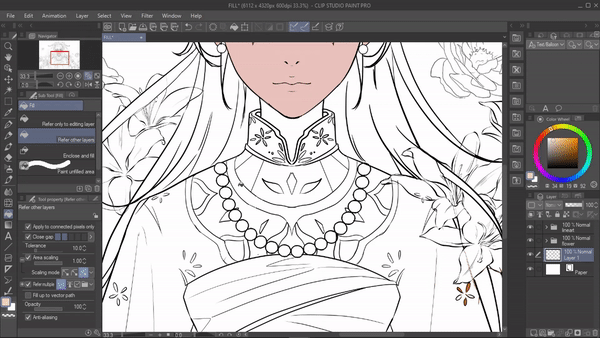
1. Refer to editing layer / Refer other layer :
Refer to editing layer or refer other layer almost works the same , you can select any one of them ,pick a color and then click inside the area you want to fill in . And that area will be filled
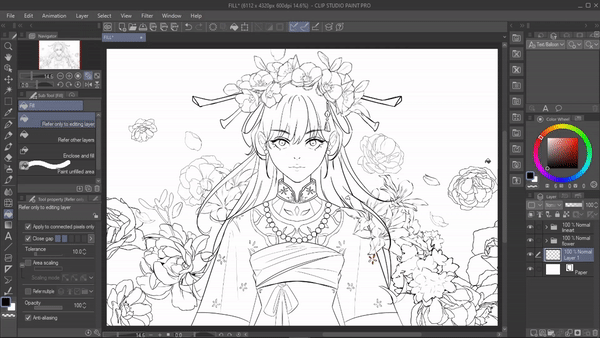
There is something cool you can do with this sub tool , we can just drag the tool and it will fill in all the areas that you dragged it through .
----------------------------------------------------------
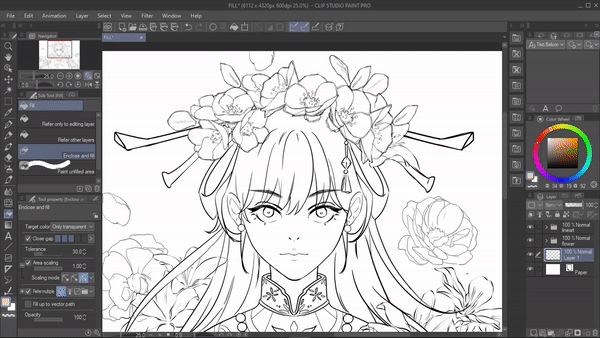
2. Enclose and fill :
This tool looks like a lasso tool but it will fill in the color on the areas when you draw around the area you want to fill .
----------------------------------------------------------
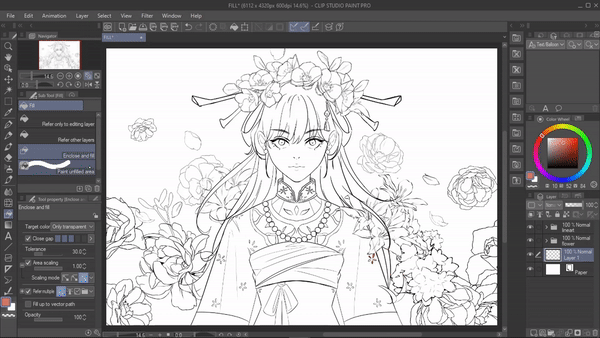
3. Paint unfilled areas :
Lastly we have “paint unfilled areas “ , you can just draw or swash it around your line art and it will fill in those (enclosed) areas .
----------------------------------------------------------
Now that we have talked about all the tools let's quickly move on to the tips .
TIP#1 : > USING SYMMENTRY RULER
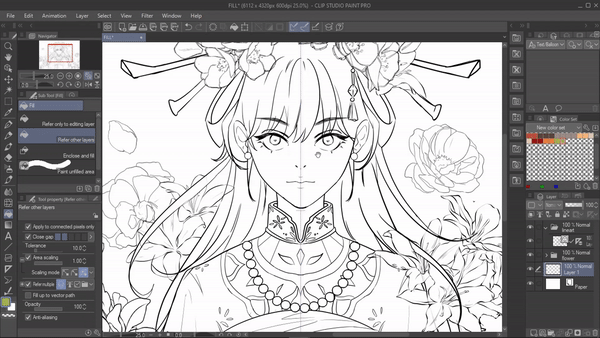
If you have used a symmetry ruler to draw your lineart like I have did here
In the layer palette go to “ set showing area of ruler “ and select “ show in all layers “
Now select any of these two, I'm gonna use “ refer to another layer “ fill tool here . Go to its setting and enable “ snap to symmetry ruler” .
Now when you try to fill in color , it will be applied to both sides at the same time . This is such a time saver so do try it out yourself .
----------------------------------------------------------
TIP#2 : > TARGETING A LAYER TO COLOR
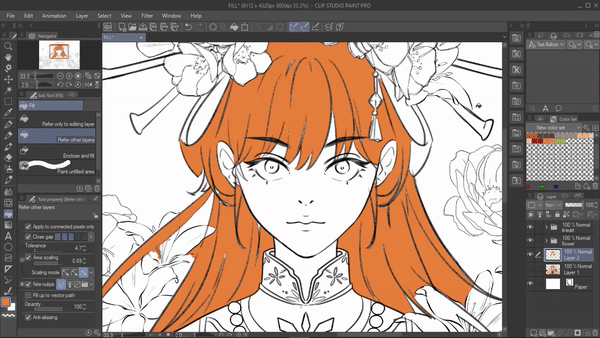
Have you faced this problem ? , whenever you try to fill color in a particular layer it overflows to other layers .
For example : when i try to color the characters hair it over flows to other layer .
To prevent that you can target a specific layer or folder to color on .
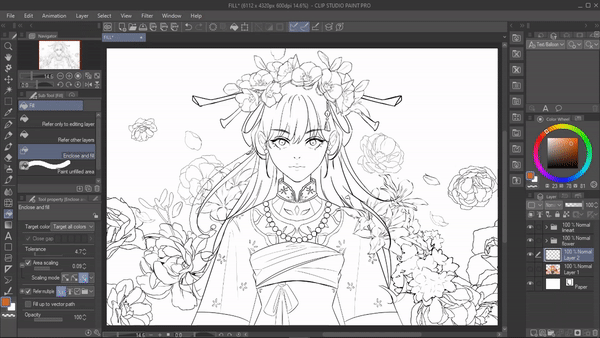
For that
1. Set the layer/ folder you want to target as reference layer .
2. And in the tool property of fill tool under “refer multiple “ select “ reference layer “
Now when you try coloring , the color it will not overflow to other layers because we are only referring a particular layer here .
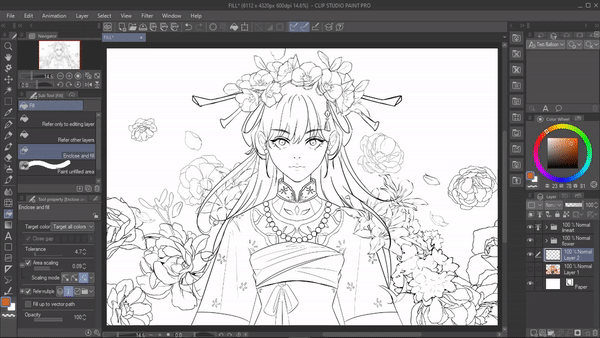
Likewise we can also just select layer to target
For ex : now lets say I wanna target flower folder to color ,
for that ,
1. select that particular layer/ folder
2. And then in the tool property set the refer multiple as “selected layer "
Now you can only fill color in that selected layer/ folder .
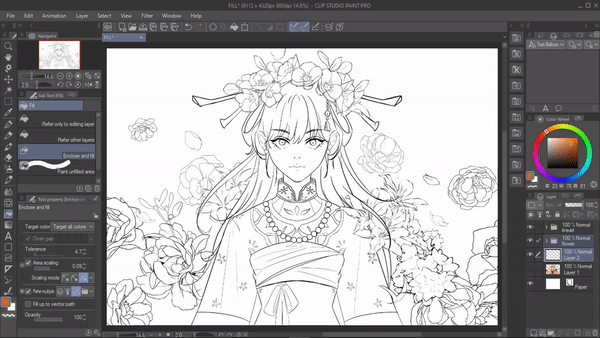
Likewise we can also target folders to fill color on by setting " folder " as refer multiple , just make sure the layer you're gonna fill in color is also inside the folder only then it will target/ refer that folder .
----------------------------------------------------------
TIP#3 : > CHANGING / ERASING SAME COLOR
Using the trick I'm about to tell you can change or erase a particular color at once !
For ex: here I want to change the hair color , which is orange . I want to change it to blue , for that first disable “ apply to connected pixel “ under the tool property .
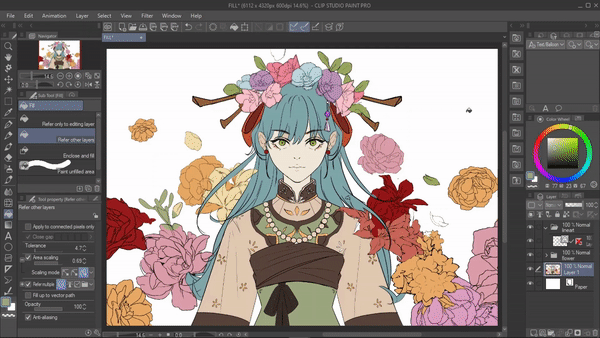
Now pick the blue color from the color wheel , and simply just click inside the hair and it wil change all the orange color to blue .
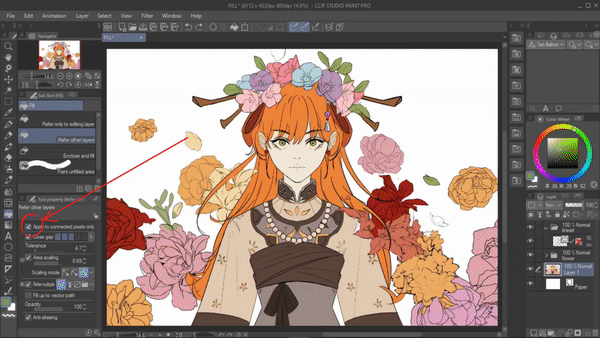
[NOTE : When using this trick make sure the value of tolerance is low or else it will consider a set of range colors as the same color and will change the color of those too . ]
Moving on , using this same trick you can also erase a particular color at the same time , for tat instead of a color select “ transparent “ and now click inside the color which you wanna erase and that color will be erased from the whole canvas .
----------------------------------------------------------
TIP #4 : > AVOIDING OVERFLOW TO AN ALREADY COLOR AREA
I use to face this problem a lot , until i discovered this trick
while coloring it's possible that your color bleeds to an already colored region
this especially happens when a lot lineart are next to each other .
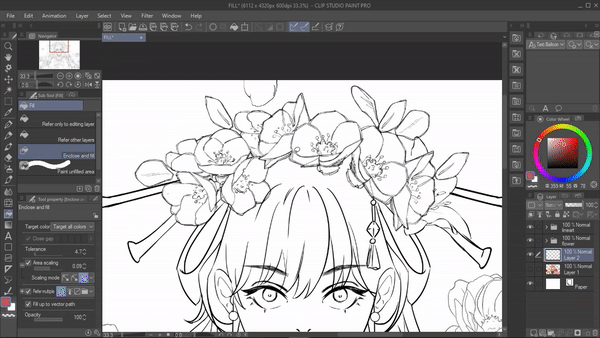
so to prevent this
Go to , tool property under target color and select “ only white and transparent “
Now when you try to fill in the color , it will not bleed into an already colored area
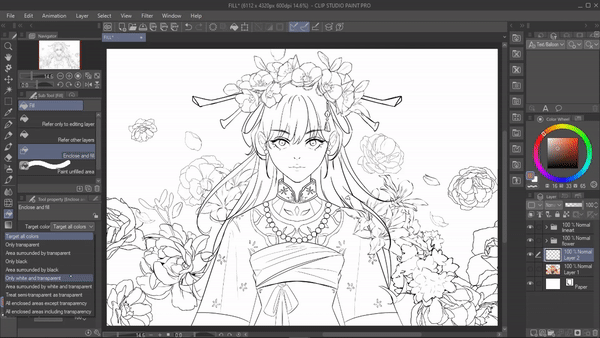
This is because it recognises the areas with white n transparent as the only area where we can fill in colors and will not allow you to change the color of an already color filled area
That means you can freely fill in your color without having to worry about one color gettin into another .
----------------------------------------------------------
TIP #5 : > FILLING THE NARROW AREAS
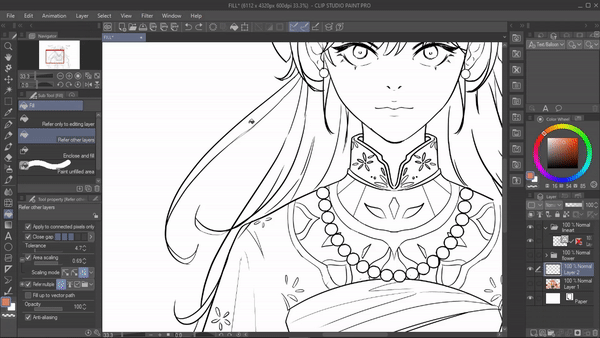
You might face this issue a lot especially when coloring a narrow areas like hair because hair has a lot of narrow and small unreachable areas , that just cannot be filled at once , leaving us with a lot of unfilled areas
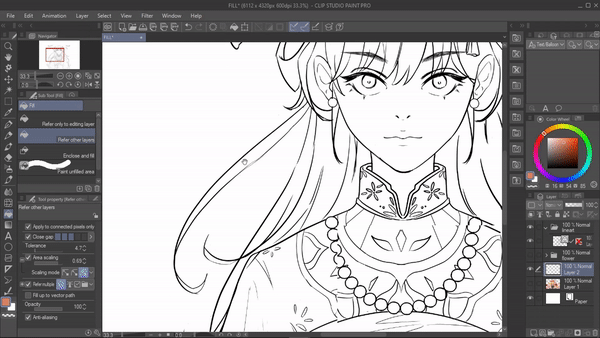
To avoid this , go to the “ setting “ of the tool .
A sub tool detail box will appear
In fill , under “ close gap “ enable the “ fill narrow areas “
Then just exit from the setting
Now if you try to fill in the color , it will cover all the narrow and small spots in one go !
----------------------------------------------------------
TIP #6 : > COLORING WITH LINE GAPS
If you’re like me and have a lot of line gaps in your linearts , this tip is for you
When you have big gaps like these , you will not be able to fill in your color properly because it is not considered as a closed area . instead of searching for all these gaps and connecting them . you can instead use the “ close gap “ feature
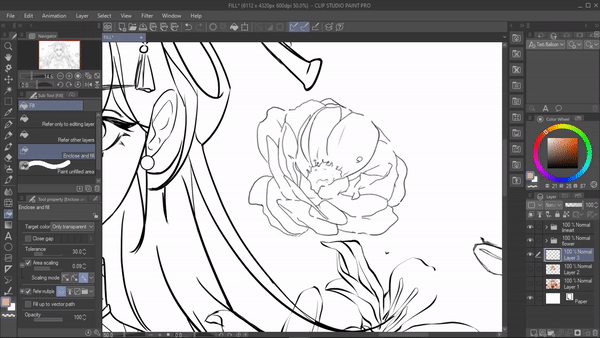
you can instead use the “ close gap “ feature
You can find this feature on the tool property , enable it and then increase its value
Now when you try to fill areas with the gaps , it will be filled .
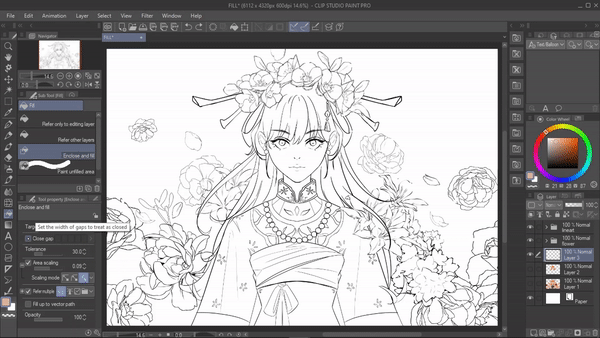
This is because csp now considers this a closed area , so now you don't have to worry about your lineart not being closed properly .
----------------------------------------------------------
TIP #7 : > FILLING UNFILLED AREAS OF A TEXTURE PEN
If you use a textured pen to draw your linearts , you might come across this problem .
When you fill in color in your textured lineart , as you can see it's not filled properly especially on the lineart areas ,
Instead of using a pen tool and filling those unfilled areas which will probably take hours .
You can use the subtool “paint unfilled areas “
Select the “ paint unfiled area “ tool and just swash it around the unfilled areas , and those areas will be filled .
----------------------------------------------------------
TIP#8 : > MORE THAN JUST FLATS
Now there is misconception that using the fill tool you can only color your base flat colors
Which is absolutely untrue
By changing your target color to “all enclosed areas including transparency “ you can use your fill tool almost like a lasso fill tool . Basically it will fill color in whatever shape you draw using your enclose and fill tool .
but the fill in can be only applied to areas that have color (including transparency) .
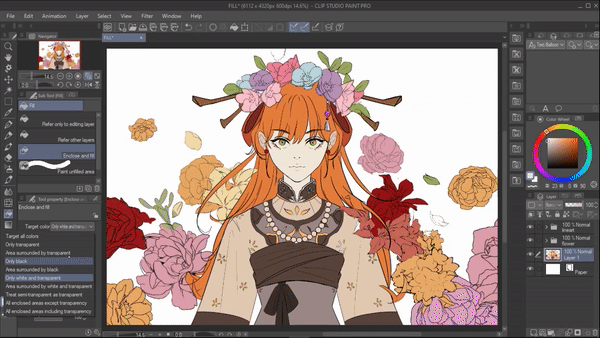
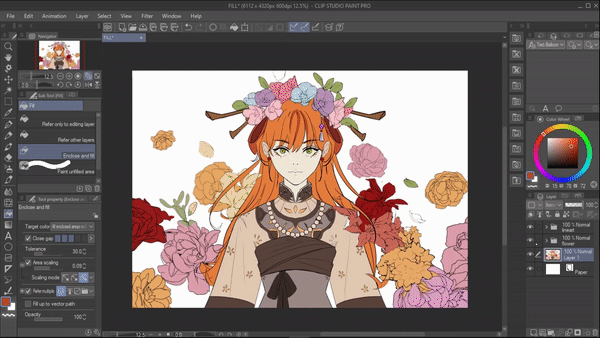
I can even do shadows in a different layer . I can just create a new layer, set its mode to “ multiply “ and just start coloring and it will not bleed out of the already colored areas ! How cool is that? so do try it out yourself .
----------------------------------------------------------
TIP #9: > CUSTOMIZED FIGURE FOR ENCLOSE AND FILL
As you know the “ enclose and fill “ tool has this free of shape kinda thing which we can use to fill . Even though this is just an easy thing to use , it might not be favorable in all situations .
For example : to fill color in the building instead of using the normal enclose and fill tool , I would rather use a rectangle-figured enclosed and fill tool .
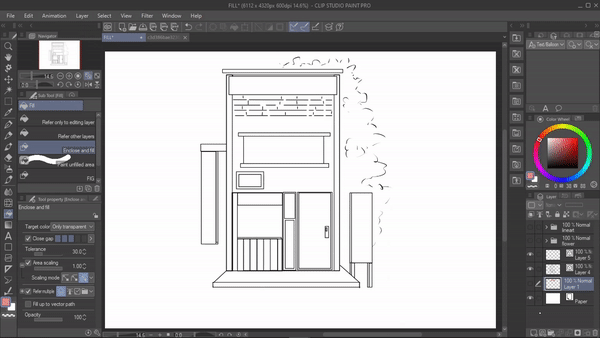
To create your own customized enclose and fill figure click on this icon and then select “ create custom sub tool “
A "create custom sub tool " box will appear .
>Name your tool. >In the input process select “ figure “ or even “continuous curve “ if you want to . but for now I will be selecting figure and then click on ok
once you click on okay a “ sub tool detail “ box will appear in that select “ reference “ and enable ‘ refer multiple ‘ and then close it
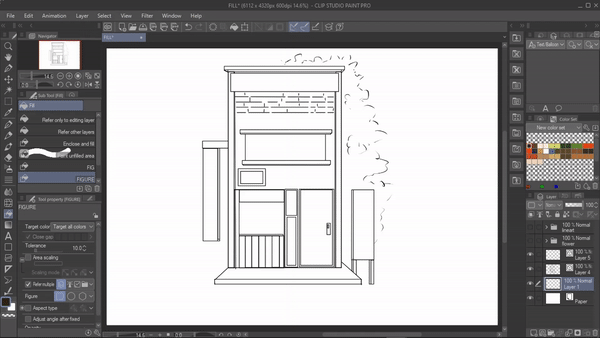
Now if you look at the tool property you have multiple figures which you can use to fill
Now using these enclose and fill figures you can fill in your colors >
----------------------------------------------------------
And that is all the tips and tricks I wanted to share ! I hope you guys find this tutorial helpful .


Comment