
Hi, My name is N or Ann! =)
and this tutorial will go over the how-to express light in your artworks, mostly with portraits at both a technical level and a more cinematic and thematic level to create the scenic impacts you might be looking to use in your works.
I wanted to make this tutorial much earlier, but due to being amid finding a new abode to dwell in, I am here a bit late in the month!
The Video Tutorial can be found here:
Introduction to Expressing Light
Light and shadow in our artworks set the scene, the tone, mood, and even the composition.
How much do we show the viewer by using shadow and light lets us engage our viewers' imagination, which hands us the power to invoke various feelings.

Everything we see is light bouncing back into our eyes after hitting different objects.
And as we get more experienced, we tend to slowly wrap our heads around how to utilize light in our art.
I am here to try and help organize things a bit so you can rest assured and follow along with me to understand better how to express light in your artwork.
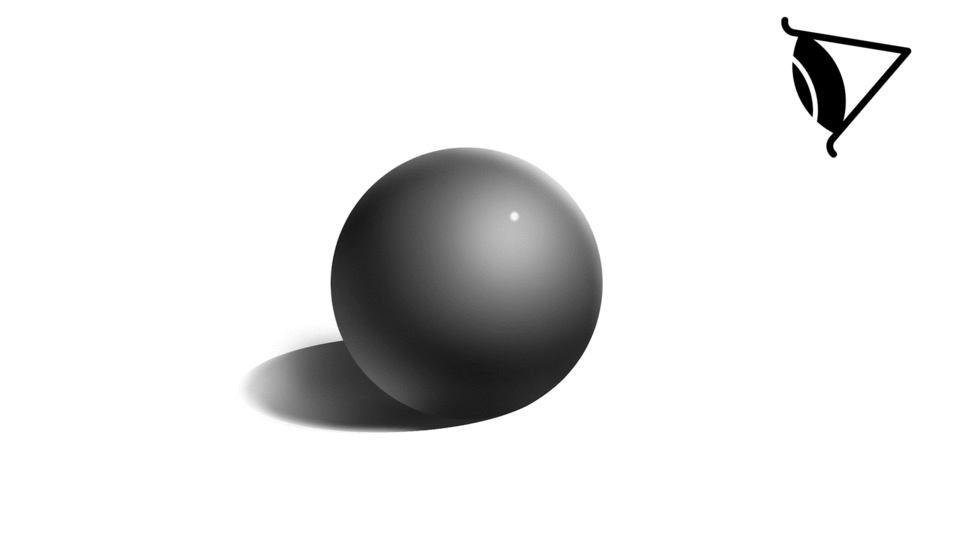
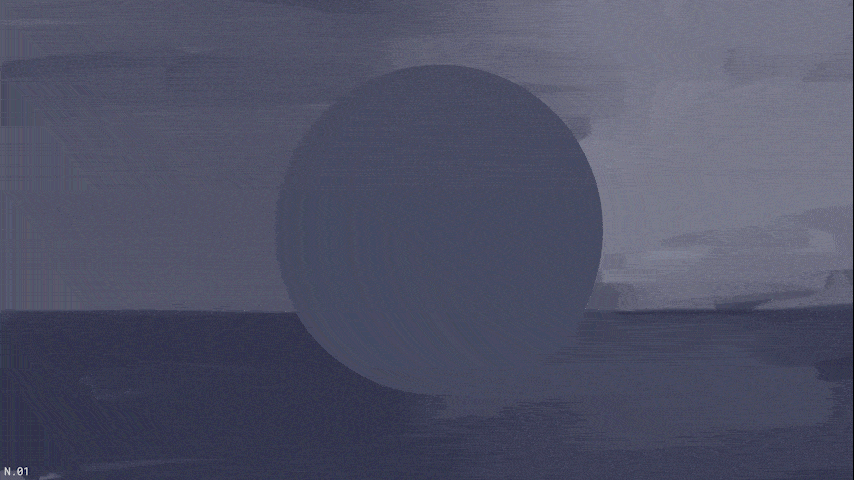
3D Objects in Space
The first thing we should consider with everything we draw is that it is a three-dimensional object in space, meaning it has depth and form.
Meaning light will hit from one direction and be obscured in the other, and in the lack of light, there is shadow.

This line that appears using shadow and light is called the terminator,
And Since there is depth to our sphere, and our light will hit the front of the sphere, meaning the light won't be a sharp diagonal horizontal line across the sphere. But a curved line as the light hits the sphere and its depth.
Unless it's directional light, and we view it accordingly

While some of the light will hit the environment around the sphere and have it bounce back, establishing Ambient light and creating bounce light.

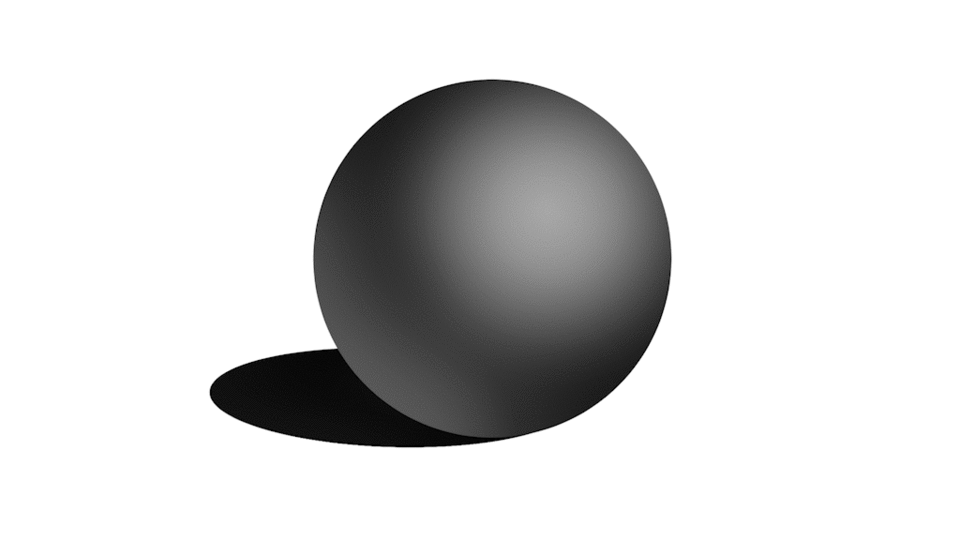
Ambient Light
So, now we need to briefly discuss the topic of Ambient Light.
Since there is almost always a bit of light in a room, it determines the color of the shadow we will use.

As if the shadow was utterly engulfing our subjects, we would see a blank black page.
For example, if we had a white ball in a blue room, it would look slightly blue even without any direct light, which is the room's ambient light.
This happens because the light bounces off surfaces the same way it does into our eyes, unto other objects.
And if we then add a direct light to the ball, we will illuminate the ball, however, pay attention that the ball’s shadow is now blue due to the ambient light present in our scene.
The shadow will be the color of the ambient light that lights our object just enough to hardly see, meaning whenever you choose the color of the light and shadow for your characters, you should always keep in mind what might be in the background.
The shadow is affected by the ambient light and the temperature of the light. Usually, a good rule of thumb is if you have a warm yellow lantern light, shade with a dark, cold blue color.
Or if you have Cold blue lights like a morning skylight, shade with warm orange shadows.
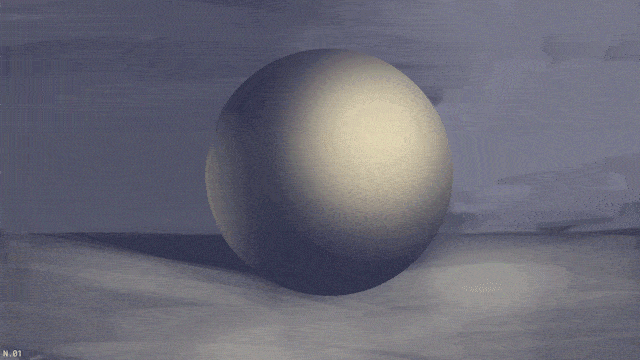
A good tip is to use a mix of warm light and cold shadow or vice versa.
*Tip, Don't shade using pure black. Try using colors such as dark blue or orange colors; shading with pure black will cause your image to look flat and muddy.
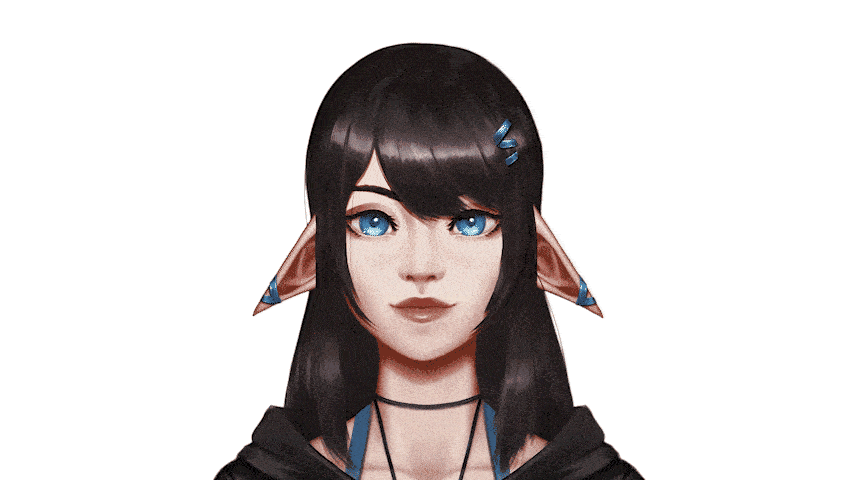
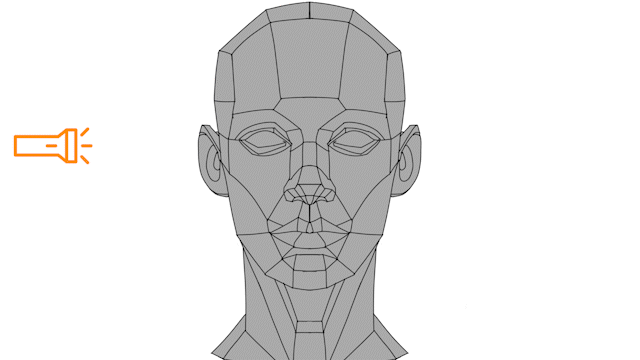
The Humanoid Head
Taking that principle to a human face, we can treat it more like a three-dimensional object in space. A human head is constructed out of different planes, Creating The Planes of the Face, and they look somewhat like this:
And wherever the light hits, the more information we have, the less light bouncing off something, the less we see, which means less information.
So as we apply directional light, you can see clearly the part of the face that is well lit, and barely anything in the enshadowed area, including any texture.
Yet, we get some details even in shadow due to the bounce light principle we established earlier.
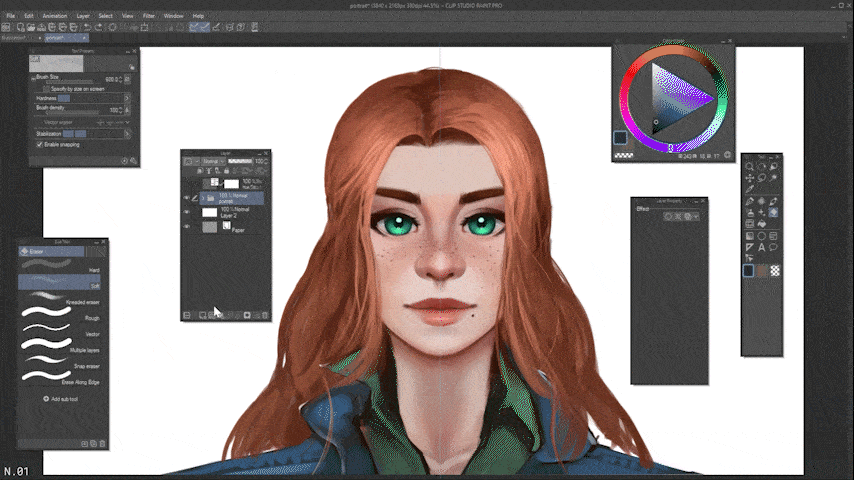
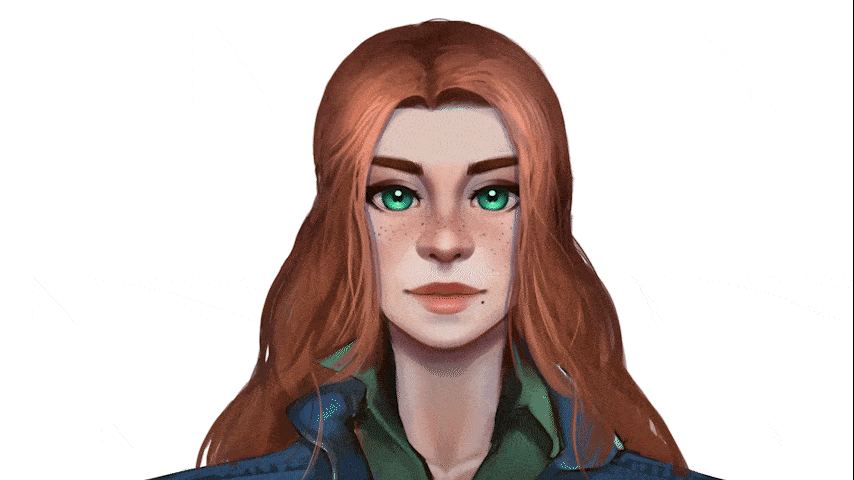
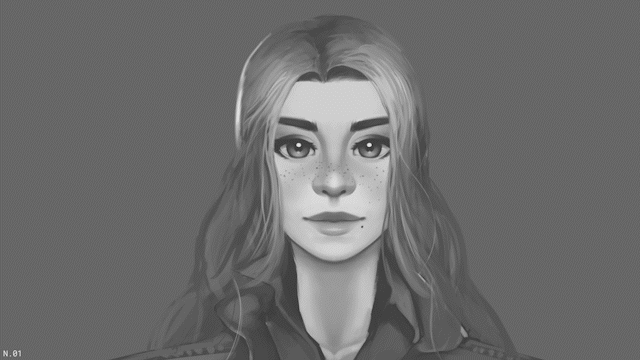
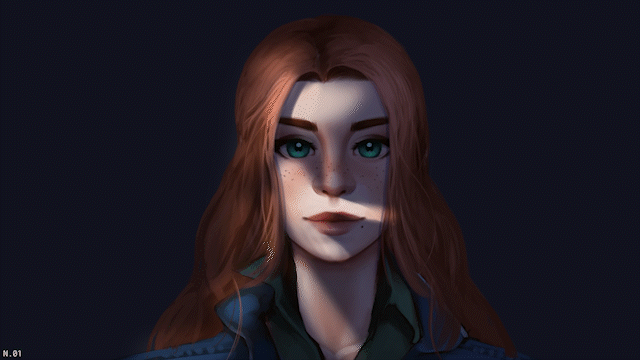
To explain the effect of light and shadow and how we can use them to set the scene's tone visually, I painted this quick portrait here without any established lighting.
for planning out where we want to put our shadows, I’d recommend you make a new layer above your sketch or painting and set it to multiply
Depending on where we put our light in the scene, it will affect the shadow, which will affect what kind of tone we set for our scene.
So, I’ll try to demonstrate many of those and what tone, feeling, or purpose they have.
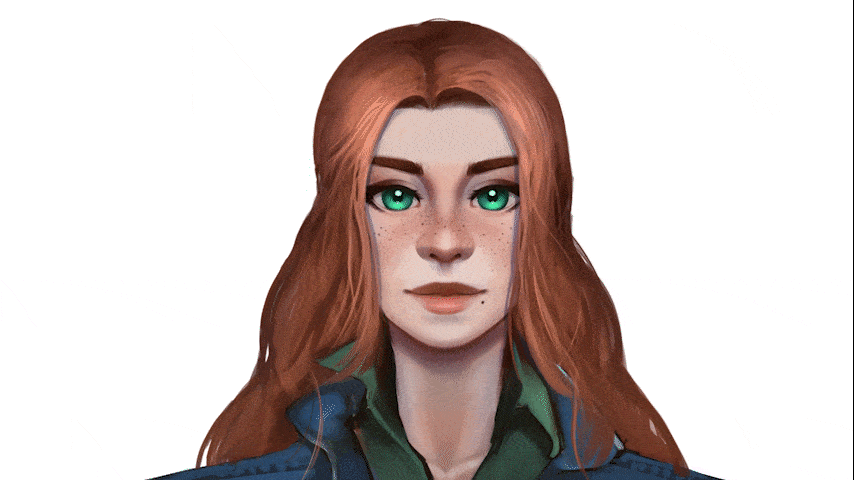
Soft Lighting
Soft lighting is usually a flattering lighting scheme for humanoids and has wrap-around shadows that add more depth and tend to look softer, and by having diffuse shadows that aren't harsh, it makes the character look more appealing.
So, When you want to make your character look more appealing and smooth, diffuse shadows and soft lights will hide or eliminate most of the hard shadows.
That, in turn, smooths over the imperfections that a character might have, making it look more attractive.
And it's good to remember that we still have cast shadows in soft lighting so the hair will still cast a shadow over our face, which adds more depth!
You might notice that the neck of the character still has a sharp shadow.
The shadow’s edge at the neck is sharp because there is an important concept in lighting that relates to distance.
The stronger the light and the closer the object is to the light, the sharper the shadow is, the further the object is from the light, and the weaker the light, the softer it becomes.
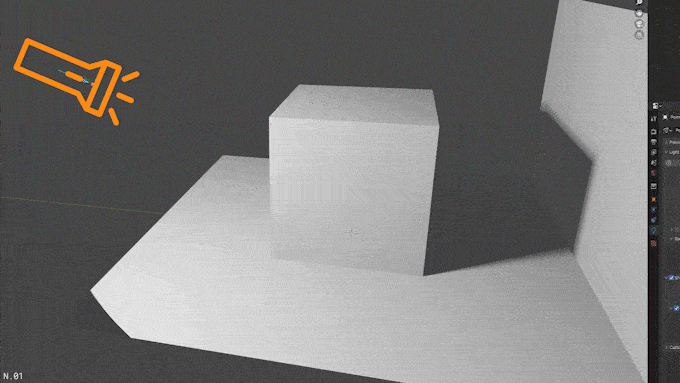
And since our character’s chin casts a shadow on the neck, which are two close 3d objects a sphere and a cylinder, the shadow is sharp in this case.
To summarize, Soft Light is used for an appealing and soft look. It is great when you want to simply present your character in full detail, making it a great for a character sheet !
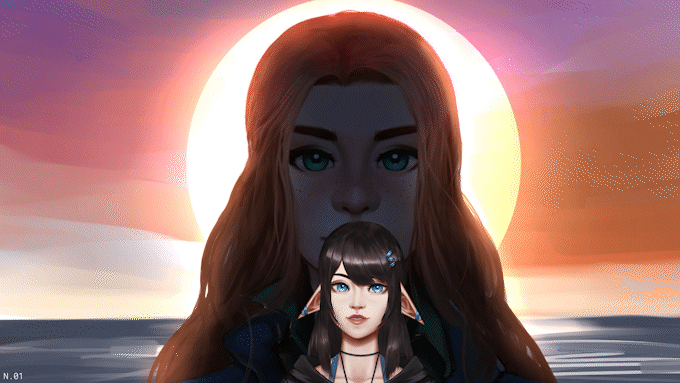
Backlight
Backlighting is when we take a source of light and place it behind our character, creating a light halo effect around them, it's a great tool to separate the character from the background, and it adds a bit more impact to the silhouette.
Backlighting is used frequently whenever you have a character in front of a sunset or an intense artificial light.
It's a great tool when you want to emphasize the shape of the character you are portraying, meaning if you have a large burly character or a small petite one, and you want to accentuate their shape, using a Backlight might be beneficial.
I filled the layer with shadow and reduced the opacity, Then I deleted the edges slightly.
Made a new overlay mode layer, that isn't clipped to the portrait.
And with a soft brush went over with a warmer light color near the edges of the portrait.
To summarize, Backlighting accentuates the character's silhouette and gives it some depth and impact.
It's a great way to show that a character is particularly small, large, or has a familiar-looking silhouette
Rim Light
Rim Light is a form of Backlighting so they go hand in hand and I wanted to separate them a bit because you can usually combine rim lighting with multiple other lighting schemes,
You can use rim lights, even soft ones in multiple different ways from the sharp crisp Rim lights like these that add a mysterious aspect to the character and accentuates the silhouette,
to more thick, soft rim light that hugs and envelops the edge of the form to separate the character from the background but without adding too much drama or intensity. And combine well with ambient light
You can see that with adding a bit of rim light i can separate the character from the background even though they are both relatively around the same value range.
To summarize, rim light is a diverse tool that can add drama, flair, mystique, or just help pop out the character from the background.
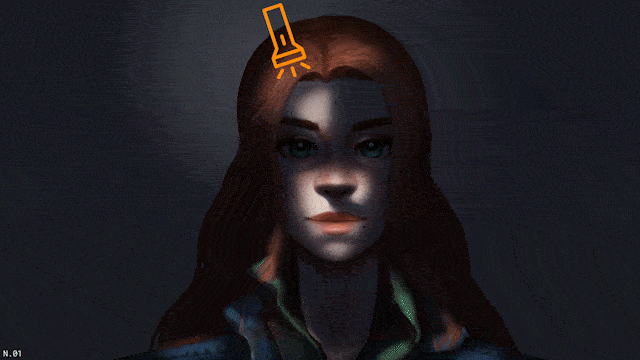
Side Lighting
Side lighting creates more sharp and harsh shadows and, by doing so, creates more contrast, which in turn dramatizes the scene.
However, side lighting is also a great tool to emphasize the distance of the character from something else in the background, such as a window or a neon sign.
This lighting reveals a lot of information about the planes of a face, so when you paint in shadows for this type of shading, you will need to think about where the lights come from a lot more intently.

As some of the planes in the face will be hit by light rays and some won’t, determining where the light is hitting the face will be crucial for correctly applying this lighting scheme. Of course, I’ll use a multiply layers again to paint the shadow on top
Yet I'll be using an overlay layer to pop out the parts where the face is hit by light rays a bit more, using our original light color to create that contrast mentioned above.
And due to the light hitting the face from a specific direction will more intently reveal textures on the skin such as scars and blemishes.
To summarize, Side Lighting is used to create a more dramatic lighting scheme, emphasizing some features of the character, such as prominent scars and other features, and creating a feeling of distance from the light source.
Hard light
Hard lights help intensify the scene and are great to show off rough edges on your character, be it a strong jawline or muscles.
Using hard lights in your scene usually increases the situation's intensity and drama and nets a masculine or harsh look to the scene.
It can be used to significant effect when you want to show off a villain's features such as high cheekbones or make a female character have sharper features,

Hard light also causes stronger, deeper shadows, which creates more contrast, so it is excellent to direct our eyes to the focal point, usually the spot in a painting with the most contrast.
Choosing where the light comes is essential in hard lighting as we have to determine where the shadows are cast.
In Hard lighting, we usually don't have a lot of bounce light, and its shadow tends to obscure almost completely.
So when we create our Multiply layer on top, I’d recommend keeping the opacity relatively high as we erase out our shadow and the overlay layer’s opacity just a bit less than that.
which is similar to what we did in the side lighting with its cast shadows
It's a great light scheme to use for portraits and dramatic moments.
Using it might allow for even more significant impact if used sparingly in a comic or a story such as a visual novel.
Leaf-Shade
This is a variant of hard shadows that does include some bounce light and is meant to create a bit of a scene quickly a classic leaf-shading
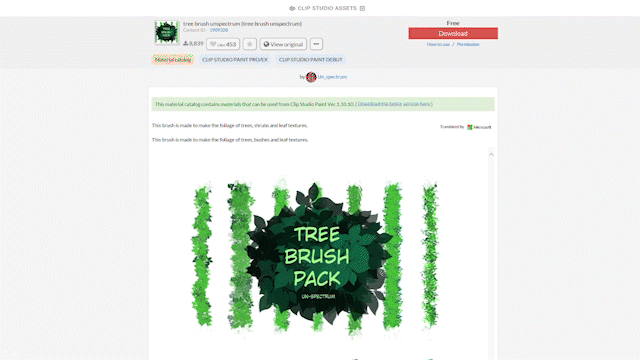
to make a pretty classic “leaf” shadows shining through the tree branches, by using a leaf brush that we found on Clip Studio Assets, free ones work great!
And set them on top with a multiply layer using a dark blue.
Then we make an overlay layer on top, going over with a soft brush give this heated look to the shadow with a vibrant red.
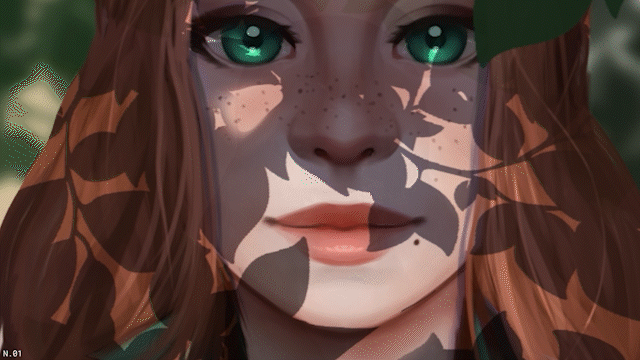
We can even add another layer for extra light, and a layer on top with just green leaves to suggest some foreground and add depth.
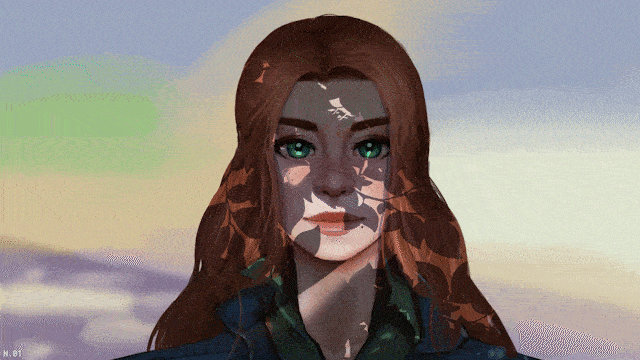
And finally, add a tone shift the drawing towards a more orange-yellow with an adjustment layer.
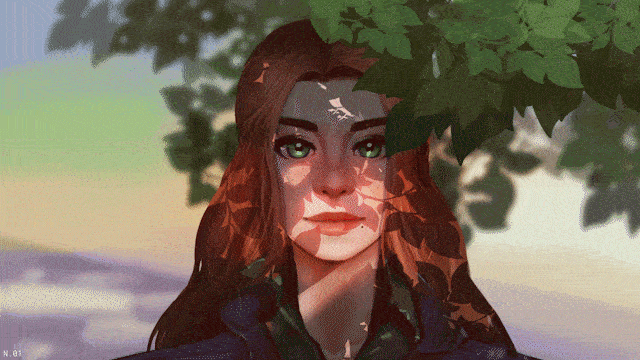
And that's how we get a leaf-shade effect =)
And that's it! A more day to day hard lighting example
It's a great light scheme to use for portraits!
I hope you found this tutorial helpful and if you have any questions please feel free to comment! I'll do my best to get back to you ♥
Users who liked this post


Comment