
Welcome to the second part of "Time-saving tools on Clipstudio"
This tip will consist of two parts.
First part will focus on tools or functions that will help you draw efficiently.
Here is the link for the first part:
Second part will solely focus on Companion Mode, the newly added version of Clip Studio Paint.
The function can be used either with an Android or Apple. It also works with computers.
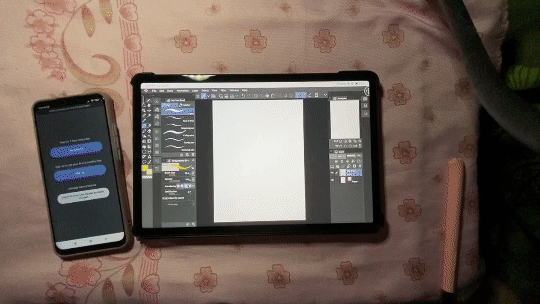
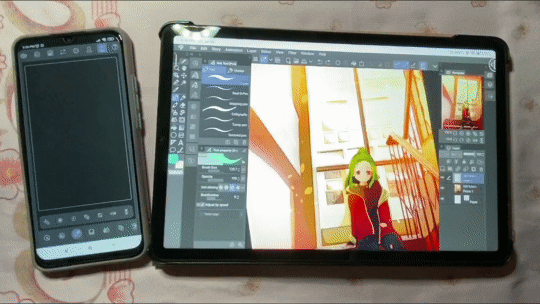
I am using an Android tablet with a PRO version and an android phone with no subscription. Of course, Companion mode can also be used with Apple gadgets and computers.
Introduction to Companion Mode
Companion Mode is a feature that allows the smartphone to become a handheld controller that connects to tablet or computer.
Where to find Companion Mode?
1. Default setting on Command Bar.
Please remember that you should have the updated version of Clip Studio Paint. Once updated, [Connect to smartphone] will appear on the [Command Bar].
2. Click Clipstudio icon, Connect to smartphone
You can also click the [Clipstudio icon] that is usually placed on the upper left side of the screen.
[Clipstudio Icon] > [Connect to smartphone]
3. Adding [Connect to smartphone] to [command bar]
If by chance [Connect to smartphone] does not appear on your command bar, cases are your application is not updated or you accidentally deleted it.
Don't worry you can re-add the function back on your command bar.
Hold [command bar] > [click command bar setting] > [clip studio paint] > [add Connect to smartphone]
How to paired up devices?
Good news is smartphones can be paired up even if they don't have the paid version.
🌟HOW TO PAIR?
First, make sure to download the latest update of Clip Studio Paint on your tablet and smartphone.
On your tablet,
Simply click the [Connect to smartphone], a QR code will appear waiting for your phone to scan.
On your smartphone,
Open Clip Studio Paint, click [Get Started] then click [Companion Mode] > [Scan QR code].
Note: The one hour free daily on your smartphone will not be active. You can use companion mode with your phone as long as you want since Clip Studio is kind enough to place the function on the menu section.
➤ Quick Access
Since our smartphone is linked to our tablet, all registered sets either default or customize set will show on our smartphone.
There's also a default [companion set], which is very useful since there are [Pencil] and [Eraser] unlike from the default [Set 1] of Quick Access.
It also has [Show/hide all palette] which is a must if you are using Companion mode. It will hide all your palette giving your screen a larger canvas.
►► How to customize Quick Access for Companion mode?
This section is already discussed in the first part of "Time-saving tools on Clipstudio". For this part, I won't discuss how to add and manage sets. We will only focus on the default [Companion Set] and how to customize it.
It'll be a bit similar but for the companion mode, I'll emphasize how to add additional tools like pen or airbrush. You can also add color that you usually use if you don't like switching modes often.
To customize a set, click [Quick Access setting] on your smartphone and it will be redirect to the tablet screen. Choose the desired function and click [Add]
►► How to add other tools like pen or airbrush for Quick Access?
Click [Quick Access setting] either on tablet or smartphone > [Menu command]
Photo
By clicking menu command, you can find [pop-up palette], [Options], [Tools], [Auto Action], and [Drawing color]
To add pen function,
Click [Tool] > [Pen] > [Add]
You can actually add a specific tool if you want, like G-Pen.
Click [Tool] > [Pen] > [G-pen] > [Add]
►► How to rearrange Quick Access tool / function?
[Hold any function under quick access] > [click Change Order]
You can either choose [Ctrl+drag] or [drag]. Since I am using a tablet, it is much more efficient to choose [drag] mode
You can also add a separator if you want to organize your quick access.
►► How to remove a function in Quick Access?
Just [Hold desire function under quick access] > [delete]
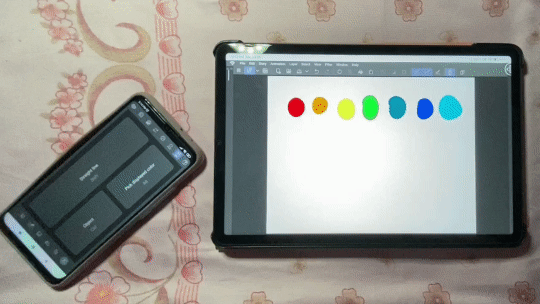
➤ Color Wheel
You can use Color Wheel as the same way in your color palette. Since the phone is linked to the tablet. Any color you will pick will be registered in your main device (tablet).
➤ Gesture Pad
You can do simple gesture shortcuts using your smartphone.
🌟Single Swipe = Move canvas screen
🌟Two finger rotation = rotate canvas
🌟Two finger pinch = can either Zoom in or zoom out canvas
🌟Two-finger tap = Undo
🌟Three-finger tap = Redo
Not to mention, [Flip horizontal] and [Flip Vertical] is also here on Gesture Pad. Flip horizontal is very useful for identifying errors in your drawing so you will use it often.
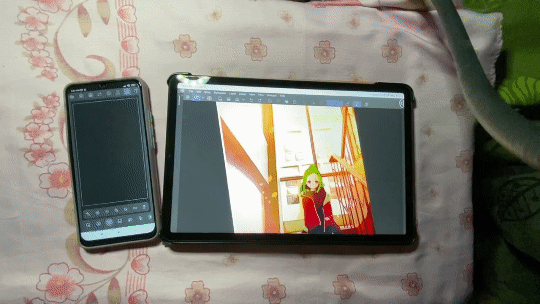
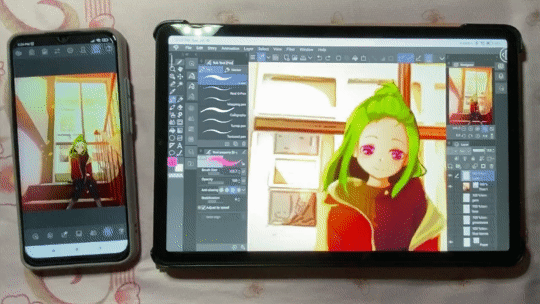
➤ Subview Palette

You can upload a photo and view it on your phone. This can be used for reference or character sheets. You can choose from the colors below the image as the set of colors are picked up from the photo. You can also select color using [Eyedropper] and will be registered in the tablet.
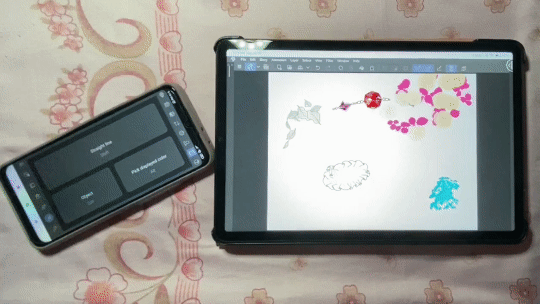
➤ Color Mixing
Color Mixing Function is similar to the real life palette.
It consist of:
1. Delete canvas.
2. Change Brush size to small, medium, large.
3. Use Brush
4. Smudge or mix colors to create a different one.
5. Use Eyedropper to copy color.
🌟CHANGE BACKGROUND COLOR
[Menu] > [Background color] > [pick color]
🌟OTHER FUNCTION:
A. You can add the color for the Color swatch
B. Hold [Color Icon] and tap [X] to delete
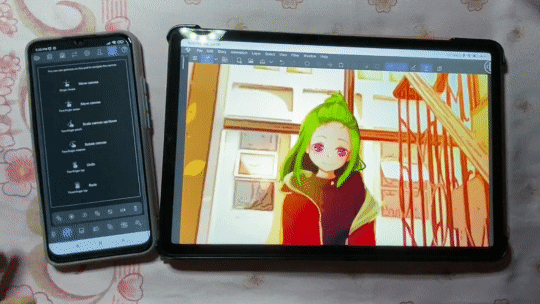
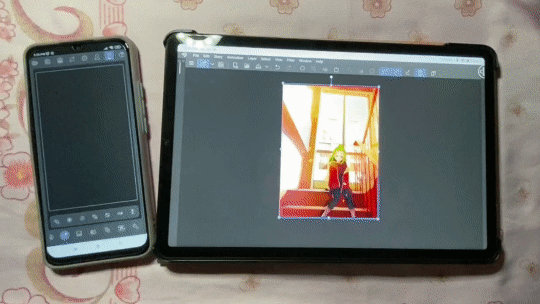
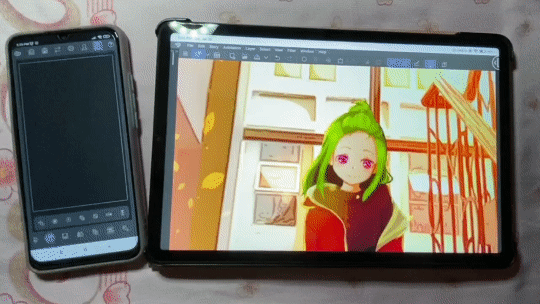
➤ Webtoon Preview
If you're a Webtoon artist, this function will show your art how it will appear on your smartphone. You can also use this for simple illustration. The best part of it, every edit you make on your tablet will appear on the Webtoon preview.
➤ Mode Switch
Mode Switch is my favorite function in Companion Mode. It is similar to Edge Keyboard and you can edit the commands from the [Modifier Keyboard Setting].
Default setting are:
🌟CTRL MODE = Drag Object (regardless of layer)
🌟CTRL + ALT Mode = Change Brush Size
🌟ALT Mode = Eyedropper
🌟SHIFT Mode = Straight Line
►► Modify the commands of Mode Switch.
Mode Switch and Edge Keyboard has the same program. Meaning if you modify the command for Edge Keyboard it will automatically apply to the Mode Switch.
Let's change the program for SHIFT + ALT mode to simple eraser tool.
To change command:
1. Go to [Menu] > [[Modifier Key Setting]
2. Click [Tool Specific setting] > [Refine: Shift + Alt]
3. [Change tool temporarily ] > [Eraser]
4. [OK]
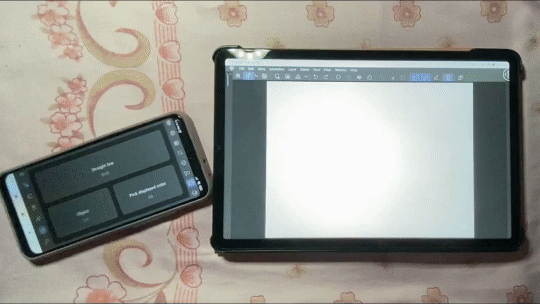
Before SHIFT+ ALT MODE = Pick displayed color
After SHIFT + ALT MODE = Rough (one of the available erasers of Clip Studio)
This change will also be the same for Edge Keyboard.
End note
There are many hotkeys available for Clip Studio. Just pick the one you preferred the most.
I specially like the Auto Action Function and the Pen shortcut.
For the Companion Mode, the Mode Switch was the best one for me since I can change it's command anytime I want. However, no matter how many times I used Clip Studio Paint, [Quick Access] is hard to let go since I've been using it from the time I started using the application.
I hope you can find the shortcut that suits you the most.
Thank you for reading!
Users who liked this post


Comment