
Introduction
Hello! Welcome to my tutorial on how to paint raindrops.
In this tutorial I will discuss the steps and tips on how to paint raindrops in a rainy weather. Have fun painting your raindrops.
Choose a reference
Any photographs of raindrops on glass maybe useful for you, as long as they are clear and suit your preference. Use them as your copy for painting your rain drops.
Moreover, during a rainy day, you may observe the raindrops outside your window and paint them on your canvas. Just like I did.
Sketch and paint a background
If you want to have your background, create your preferred background for the raindrops. Any background will suffice.
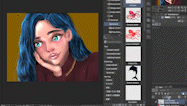
In this tutorial, I sketched and painted a girl as my background.
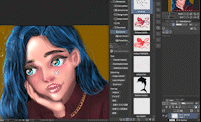
Here is the finished illustration.
Paint raindrops on a new project
Click on the New icon.
Then, follow the details below, shown in the dialogue box.
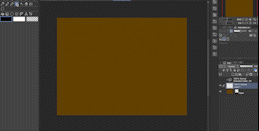
Project is illustration.
Paper color is any dark colors.
The File name is raindrop.
Click OK.
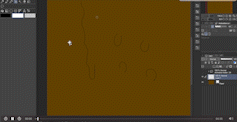
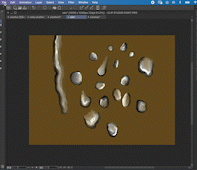
Start painting raindrops. Click on Airbrush(B) icon. Choose black color and begin drawing irregular curves on Layer 1.
Below are the sample drawings.
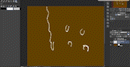
Then, add white color inside the black outline
Under the tool, click on the Blend (J) icon.
Under sub tool, choose Blend.
Blend the white color like the picture below.
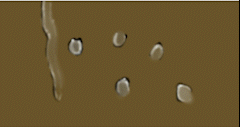
Add more details. Below is a sample illustration of a detailed raindrops
Register your raindrops
Click Layer 1.
Then, click edit, register material, and image.
In the dialogue box, the material name is raindrops. You may choose other names if you like. Choose a folder to locate your registered material. If you’re done, click OK.
Locate and search your registered material inside a folder by clicking the folder with a star icon.
Add raindrops on your background
Add a new folder at the topmost. Then, click the new folder. Name it as raindrops
Drag your raindrops from the side to the canvas.
Click on the Scale/Rotate icon.
Decrease the size of the raindrops and click OK if you’re done with your preferred size.
Adjust the opacity to 30%.
Add more raindrops by following the same steps from drag the raindrops to your canvas and organize them until the entire background is filled with raindrops. Like the image below.
Add moist effect using air brush and a wide brush size to improve the illustration.
Here is the finish product.
Conclusion
Follow the steps if you think they are more convenient and efficient ways to paint your own raindrops. Save and register your illustration for future use. Feel free to ask me if you have any questions. I’ll try my best to respond to your inquiries as soon as I read them. Good luck and enjoy painting raindrops.
Thank you for reading, viewing and watching my tutorial. Your likes are greatly appreciated.
You may follow me on:
Disclaimer
You acknowledge by your use of the information of this tutorial and site, that your use of the information and site is at your sole risk.
The tutorial is not intended to replace the official tutorial made by Clip Studio Paint Official Tips and Tutorials or any advice from a professional multimedia or digital artist.
The content of the tutorial is for educational purpose. It does not guarantee accuracy of the information, nor absence of discrepancies. The creator of this tutorial disclaims all liabilities including but not limited to errors and inaccuracy of the information, all warranties, express or implied and other liabilities due to irresponsible use of the user or beneficiaries.
The creator reserves the right to edit the information. The creator prohibits copying, reproducing, publishing, selling, modifying and storing of the information and images in the tutorial without prior permission from the copyright creator. Please contact the creator of this content via direct messages for permission.
Users who liked this post


Comment