
In this guide you will understand the most practical ways to improve the poses of your characters, and you will know which Clip Studio Paint tools can help you to make it possible.
This guide is divided into difficulty levels, from Easy to Hard but that doesn't mean that some tips are more important than others. Being able to master the easiest levels might work wonderfully with your drawings.
Try to use the tips from each section that works better or will upgrade your art accordingly and do not have fear to experiment with them.
Remember that having fun is why we are here to begin with!
Section 1: What is dynamic posing about?
A character pose can express as much as the outfit or the history you built behind it. This will make flourish every personality trait to the exterior. The pose choices you make will greatly affect how your viewers see it, as we do in real life!
Easy Level: Basics
Our eyes do not like perfect symmetry since it is something unnatural, as we will not find it in humans or most alive things. But you can use it to your advantage in the case that you want to express unnaturality and rigidity.
I bet sometimes you felt that your pose is boring, but at the same time, you are not sure what you can do about it. Try to make this simple method to engage yourself into thinking more dynamically!
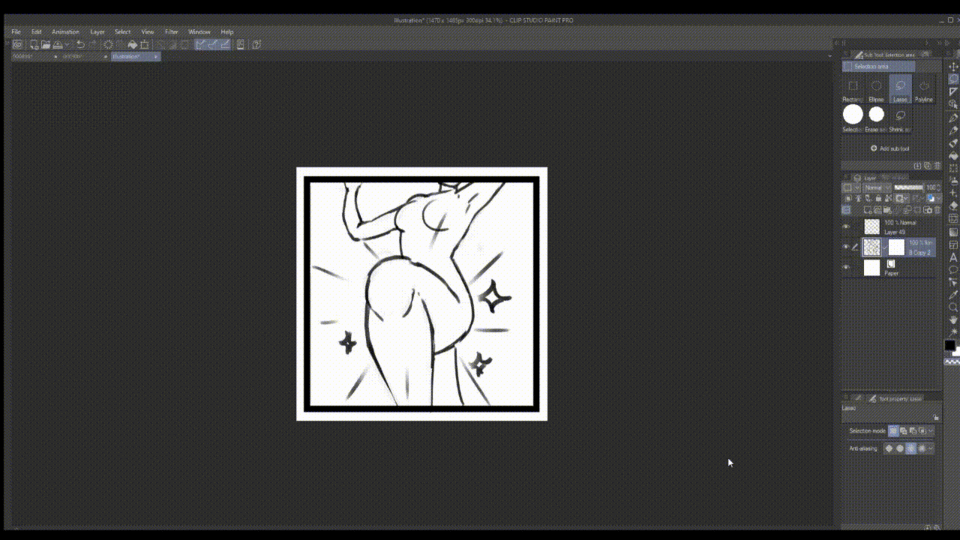
The use of silhouette is really devalued or even unknown by some artists, but knowing how to use it to your advantage will give you the power to change a pose with great ease. This is a lot more complicated if you jump straight to a line/painting phase really early in a drawing.
Medium Level: The movement
As we talked about in the easy level, our brains understand perfect symmetry as something that feels unnatural and rigid. If you want to make more dynamic poses, you should be aware that the more asymmetrical a pose is, the more energy it will transmit.
In addition to a pose being asymmetrical, to make it really pop out we should try to transmit the energy of the movement through all our body in the most harmonic way possible. That way we will be able to transmit the feeling that our character is in movement.
Hard Level: Foreshortening
This is where things get a bit complicated and in this level, you will find everything I can teach about foreshortening. This is an extended subject, but I will give you tips on how to make it easier for you in case you are struggling with it.
To have a good understanding of how foreshortening works, you will have to always keep in mind that the character we are drawing is in front of a camera. Our objective will be to work really close to it, so we can capture the action of the movement as close as we intend it to be, usually being almost in the lens of our imaginary camera.
The silhouette can be of great use when you are working with difficult posing like this one! Be aware that having a good foundation will strongly affect the final image and a bad decision or error made in the primary phase of our drawing will impact us negatively in the final part of it.
Make your life as easy as possible, as being more collected through the process will make it more enjoyable and you will be more engaged to work with it again. If you are in the early learning process, do not fear to experiment. From these errors and how you overcome them you will be able to find your own voice in your art and your style from it!
For this final part of the foreshortening section, I will show you how to map a segment of your character's body to affect it with the power of foreshortening!
For the first part, you will have to divide the desired volumes into each of its moving parts. In my case, I have divided the leg into four parts to make it simpler. Be aware that the feet have their own moving parts, and the best way to obtain results would require dividing them into each of their own.
After that, and since I wanted to exaggerate Character's leg pose, I selected each one of her leg segments and progressively enlarged them from the closest part of the body to the one closest to the camera. This process will deform progressively the upper and lower part of the leg too. The original cylinders will shape into more of a conic form to help us with the perspective.
Since the leg is pointing towards the camera now, I must stack the volumes closer to each other and also change the angle of the leg a bit since now the knee is facing us.
Section 2: Tools that will make your life easier!
These tools will greatly help you to reduce the number of obstacles in each work, making it much easier for you to overcome the difficulties you may face in your way of giving strength and personality to your character's poses!
This is something I have been seeing more used over the years and if you harness this tool, it will permit you to work a lot forward in your capabilities, especially if you are beginning in the world of character pose.
You can find the 3D model in Window>Material>Pose. To add the character to your canvas, just drag it inside the working space and It will just appear. I recommend using the poses from the [Pose] sub-menu if you are unsure how to modify the mannequins since it will save you a lot of time.
To change anything on the mannequin you are going to need to use the [Operation] tool, then refer to the upper menu to be able to rotate, move and zoom the character or the camera.
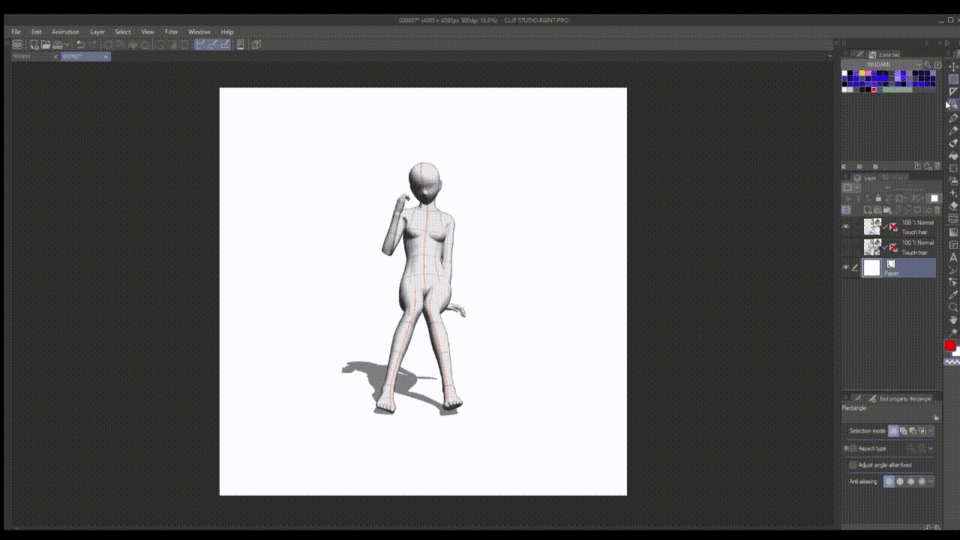
You can also rotate the camera by dragging around without selecting any part of the character. If you press one time the character, a basic interface to edit the pose will open. In that interface you can [left-click] one part of the body, and you will be able to edit one segment of it. You can block that segment by doing a [right-click] instead.

Experiment with the tool since the first time can be a bit chaotic and explaining carefully how to use it could be a whole guide itself.
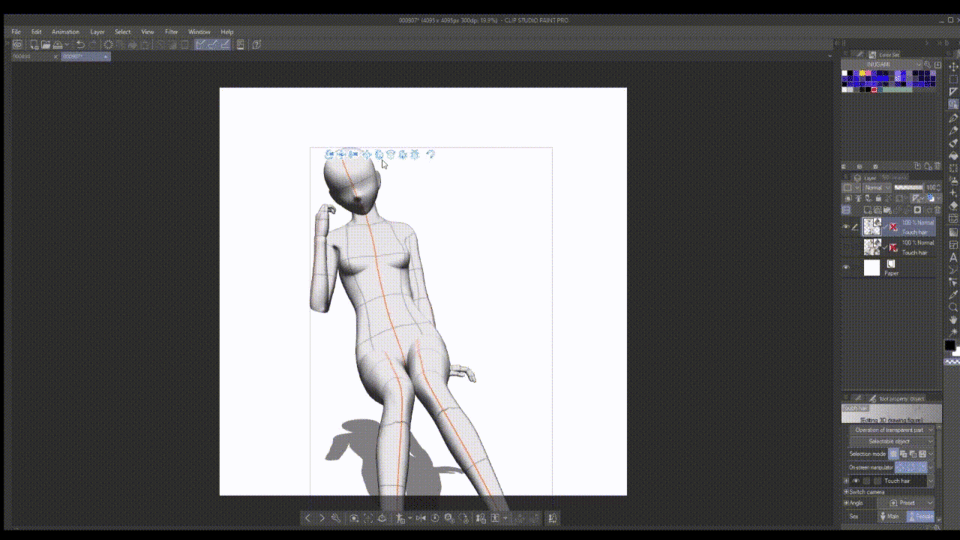
For the last thing about the 3D mannequin you need to know that by scrolling up or down when you have the mannequin selected, you will be able to exaggerate the perspective. This can be a lot of fun but if you are not careful it can be a whole mess.
This is one of the best friends that I have made along the way. You can truly make miracles by combining the [Lasso tool] and the [Transform tool].
You will find lasso under the [Selection area] tool. With it, you will be able to select the zones of your drawing that you desire to change. Then you can use the transformation tool in the selection pop-up menu.
After this, you can scale and rotate the selection, but if you hold Ctrl, you will also be transforming freely the selection, deforming it partially, which will give you a lot of potential to correct volumes and shapes that are not working.
This effect will be similarly found if you change the transform mode from [Scale/Rotate] to [Free transform]. Keep in mind that if you are using a ruler in your layer, free transform effects will not apply.

Another thing that can help you to correct your drawing, especially if it is in a silhouette or sketch phase, will be the [Mesh transformation] tool which can be found under Edit>Transform>Mesh transformation. In the tool property tab, you will be able to choose the number of divisions desired for your selection. This is going to give you a lot of freedom to distort the selected parts of the drawing that need to be improved.
This powerful tool can be found within the blend tool and was upgraded in the 2.0 CSP update. Now it can be used in multiple layers at once, so if you like to keep your layers apart you can still use this method. Otherwise, you would need to make a new layer with everything you want to modify.
You have several modes to deform the layer but I mostly use the first one [Push]. Try them all anyway, so they might assist you in a time of need.
Section 3: Bonus points if you do one or more of these tips!
Things in this list will greatly help you if you combine them with all the previous knowledge you have learned through the tutorial.
It might seem pointless at first but investing 10 minutes a day to draw can improve a lot your comprehension of the body. It is a difficult subject and you would need time to totally understand it to begin with. Forcing yourself to make quick studies will save you time so you do not need to invest hours studying and will also be really beneficial over the course of months.
Having a good mindset is a really important skill for today's artists since you are constantly fighting your weaknesses and pushing yourself to do it better. Trying to stay calm and collected over time will help preserve your mental health, making your work better and being able to learn faster.
Finding a good and healthy art friend group or community will also benefit you, getting precious feedback and making the journey more enjoyable for every one of you.
I hope this guide was fairly understandable for everyone and it helps get your drawings to another level using the knowledge of how the body works and how we see it!
You can check my socials below:
Users who liked this post


Comment