
Hello! I want to share how to quickly draw dynamic frills & make the most out of lace brush to complement your art instantly 🌟
This is my first drawing tip, and I'm excited to share it with you. I hope this tutorial will provide valuable insights and help you along your art journey
Making Dynamic Frills
1. Understanding how frill is made
When a piece of fabric gets pinched on one of the edges, the tension will cause the object to form small waves or folds. To create the characteristic wavy or ruffled appearance of frills, the rectangular plane (in this case, fabric or any other material) is gathered and sewn or pleated along one edge.
2. How to make dynamic frill easily
Using a premade lace brush is useful for decorating the cloth quickly, but sometimes the lace brush will look stiff if you put it at a certain angle, especially in a moving (dynamic) fabric fold even after you have adjusted it with transform and mesh tool.
In this case, if you want to make the illustration feel more alive, there’s a simple step to fix this.
Imagine the flat rectangular fabric folded into a circle, and you will get yourself a cylinder.
By making the cylinder the base form, it’s much easier to navigate the flow (wave) of the bottom part of the cylinder.
Drawing Steps
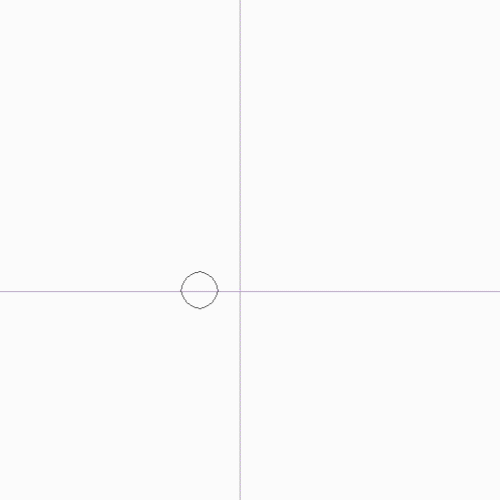
1. First make a proportional circle using Sub Tool : Figure > Eclipse then transform it into flat circle as pictured above. Then, copy and paste the circle with smaller circle on top and the bigger one underneath
2. Make wavy line on the bottom part of the circle
3. connect the both circles by drawing vertical lines. Please keep in mind the direction of the line. In this case, I want the frill to swirl to the right side, so I draw the vertical lines leaning to the left part of the circle.

4. Now it’s time to draw the folds. If you have difficulites on remembering the complex shape of the frill folds, you can start by drawing basic outline of the fold in zig zag line with a little bit of curve in the middle.
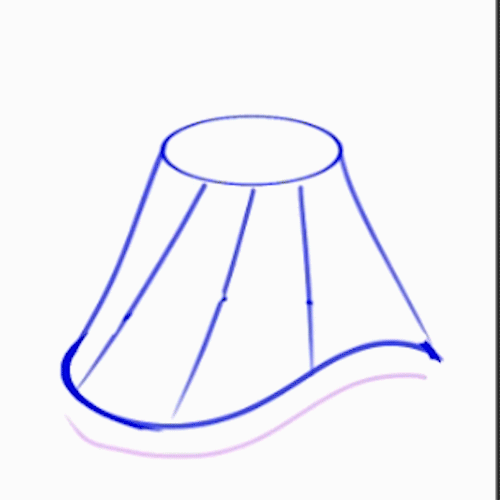
Tips : You can make any variation of waves as long as they stick around the circle area.

How to be resourceful with the lace material
Usually, the lace material is used to decorate the art as a pattern or embroidery on the cloth. What if I told you we could make crowns, earrings, and any other accessories or items out of lace brushes?
First, we need to decide the basic shape of the object we want to create with the lace brush so we can determine which shape of lace will suit us best. For now, I will create a crown and earrings as an example.
1. Making crown from lace brush
Let’s find a lace brush with a pointy shape on the end. There are tons of crown shapes out there, and other lace brush shapes would work, but the common depiction of a crown has points and spikes. So for a start, we can start by using a lace brush with pointy ends because it will mostly fit as a crown. You can explore more other crown shapes with different brush shapes later.
I’ll be using laced ribbon (レースリボン) by 可惜夜の春 for this example
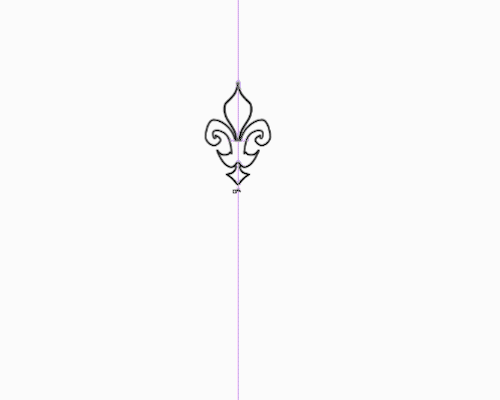
If you’re feeling adventurous and want to make your own lace, you can start by using Ruler tool > Symmetrical Rules > On the Tool property palette, turn on Line symmetry > Set Number of Lines to “2”. Then draw your lace design
Place the ruler on the center of the canvas and start drawing your lace
After you’re satisfied with the result, activate the selection on the current layer: Edit > Register Material > Image > Check “Use for Brush Tip shape”
Duplicate any lace brush you have > rename it > go to Settings > change the brush tip
2. Making an earring from lace brush
lace brush with linear end works best to retain the shape of your initial design, so I recommend a brush with similar design like this one
I’m using “Lace ribbon B” from previous set and “문양-3 “ by Dopamine from this set for this example
Same as before, create Ruler tool > Symmetrical Rules > On the Tool property palette, turn on Line symmetry > Set Number of Lines to “4”. Then draw your lace design
*If the lace facing the wrong way, uncheck the “Line symmetry” on the symmetrical rules properties
Tips : Prepare 1-3 images as reference beforehand. It’s easy to get lost to the complex shape of the brush & the final result can’t be read as the intended item
Tadaa! Now you got yourself a pretty earrings✨ !
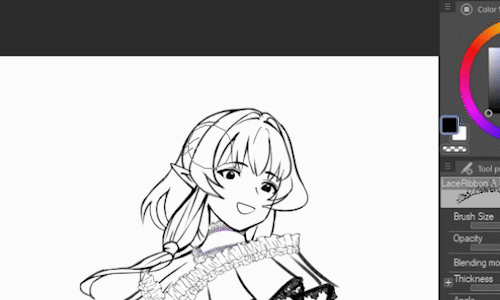
Let's put it into practice!
Drawing a princess with cute frilly dress
For this example, I have a drawing of a girl with flowy dress.
We can start by drawing a circle beneath the dress as a guideline
Then draw the zig zag line
Draw vertical lines to connect the frills with the dress
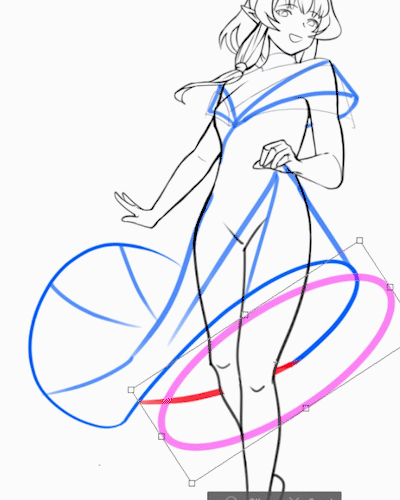
Tips : use a bright saturated color for the guideline so it’s easier to spot and not getting overlapped with the main lineart
For the upper part of the dress, I want to make long flowy frill as her sleeves. Using the same principle as above I can make the frill more alive and believable
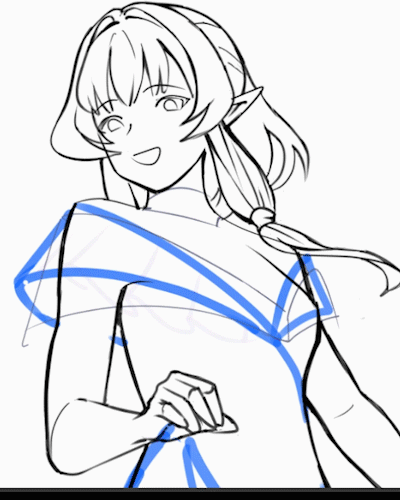
After the main frill is complete we can add more details on other part using these frill brushes.
Adjust the frill brush with Mesh Transformation tool by following the previous guideline and taking the body shape into consideration
I also add this lace image material “Snow fill White” to complete the dress. Create a group layer with mask then drop the image material inside the folder
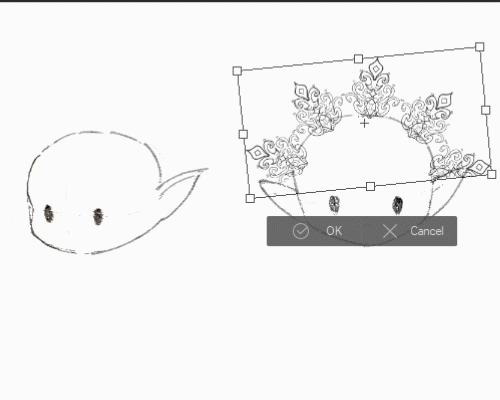
Lastly, we can add a crown on top of her using the lace brush to complement the overall look and the earrings we’ve made before.
…and we’re done!! 🥳
Closing
Congratulations on making this far! You’ve reached the end of the post. I’m so proud of you!
There are lots of ways to draw, use frills and lace aside from this post, but i hope my personal tips could be useful for you 🌻
When you encounter a difficulty in drawing, always start from the basic shape and build more details from there. Never stop to explore and learn a new way when creating art and don’t be afraid to use reference in the time of need 🌟
If my you find my tips useful, please share it with your friends.
It would also be greatly appreciated if you could favorite and bookmark this post.
Thank you for reading my post. I wish you all good luck on your art journey
Until next time
Users who liked this post


Comment