
Hello! In this tutorial I will show you the whole process of character animation in Clip Studio Paint Pro.
It's much easier than you might expect. You just need to create a new animation project, turn on Timeline and draw first frame. You can create new animation folders, one for line art, one for color, and so on.
I started by drawing the background. Make sure you drag the background layer separately from the animation folders.
Then I loaded the 3D model onto the canvas and moved it around creating frames. This is the perfect way to quickly and coolly draw a character's body animation.
Also see the whole drawing process here:
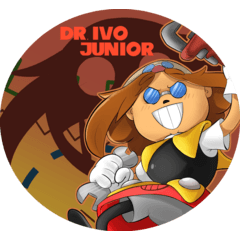
Animation gif:

1. Create project
Let’s create new animation project by clicking File -> New.
Choose animation project and click OK.
2. Background
So, let’s draw background for animation. If this background don’t moving, make sure you drag the background layer separately from the animation folders.
You may see some blue frame on the canvas. When we export the animation, nothing outside of this blue frame will be visible.
3. 3D model animation
First of all we need to turn on the Timeline. Tap Window -> Timeline.
Create new animation folder for our 3D model animation:
Open Materials menu and import 3D model. This is hiding in Body types, but I customize one of the body types and save it separately.
Move 3D model as you want, create new frame, move again, create new frame and so on.
Finally 3D animation look like:

If you need to speed up or slow down the animation, tap Animation -> Timeline -> Change frame rate. Then play with this value and choose a perfect number.
4. Animation of sketch folder
Create new animation folder for sketch animation. Make opacity of 3D folder lower and use it to draw body of your character. This is still now final line art, so feel freely about drawing lines.
Turn on this to see previous frame:

5. Animation of line art folder
Create new animation folder, reduce the opacity of sketch animation folder and draw.
Choose the pen carefully, because now the lines should be high-quality, not the same as in the sketch. I recommend increasing Stabilization to 100.

6. Animation of main colors
Great, now hide 3D animation and sketch folders at all, create new animation folders under line art animation.
Tip: Create a new animation folder for each object separately. For hair, skin, clothes and just every thing. But of course, if these two objects are located far enough away, for example, a hat and a bracelet on a hand, then you can draw them in one animation folder.

7. Animation of shadows folders
Create new animation folder above each color object of your character. Then attach them to these layers below so that the drawing doesn't stick out. Change the mode of the shadow animation folder to Multiply.
Simply draw shadow animation, just like main colors animation.

8. Additional details animation
I want to add umbrella animation. So create new animation folder and start. To make it easier, I first animated the simple shapes of the umbrella. This is an ellipse and a stick.

9. Effects and improvings
When you finish drawing the animation, you may notice that if you adjust the colors, it will look better. For example, you can make the background lighter to visually separate it from the character.
You can also add interesting animations of small stars that will look magical. Just draw new stars every new frame, and in the animation it will look like they are shining like sequins.
10. Export animation
Export animation by clicking File -> Export animation. Then choose in which format it should be. Movie is video format mp4.
Perfect! Character animation is ready. Clip Studio Paint has many features that make animation easier and more fun. So I wish you inspiration and good cartoons/anime of your own.

You can subscribe to my YouTube channel:
Thank you ❤️
Users who liked this post


Comment