
Hi, welcome to this tutorial. I'll be guiding you on how to adjust your pen pressure settings appropriately and sharing six effective ways and 4 lines exercises to improve the quality of your digital line drawings in Clip Studio Paint. Without further ado, Let's get started!
Setting up the optimum Pen pressure in Clip Studio Paint
You can either adjust the pen pressure universally for all the subtools or selectively for each sub tool. For universal adjusting, go to file and click 'pen pressure settings'.
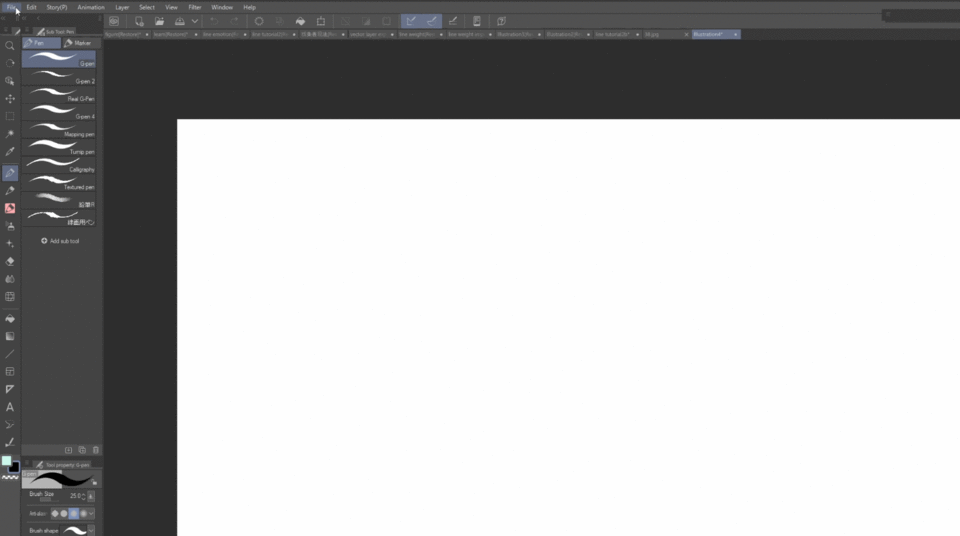
For selectively adjusting, Click this icon in your sub tool property and tick the first box to activate pressure . If you cant find it , go to windows and tick 'tool property'.
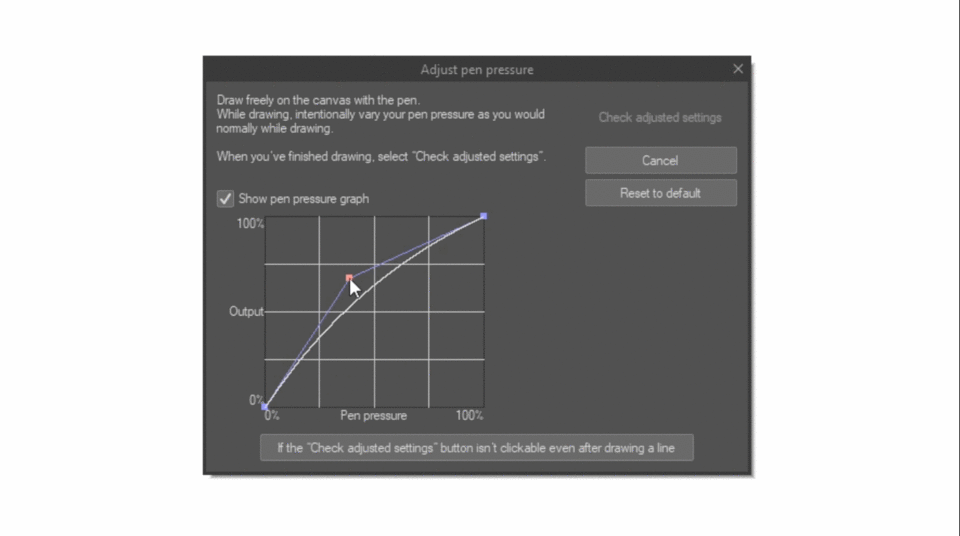
Now Lets look at the universal setting for the pressure graph. You should see a linear graph at a constant rate, if you cant, click "Reset to default".
The default setting works well for most average people, including myself. However, If you are a person who draws harder than average people, you may find the default setting makes it easy to draw thick lines but challenging to draw thin lines.
Or ,if you are a person who draws lighter than average people, you may find it the opposite way.
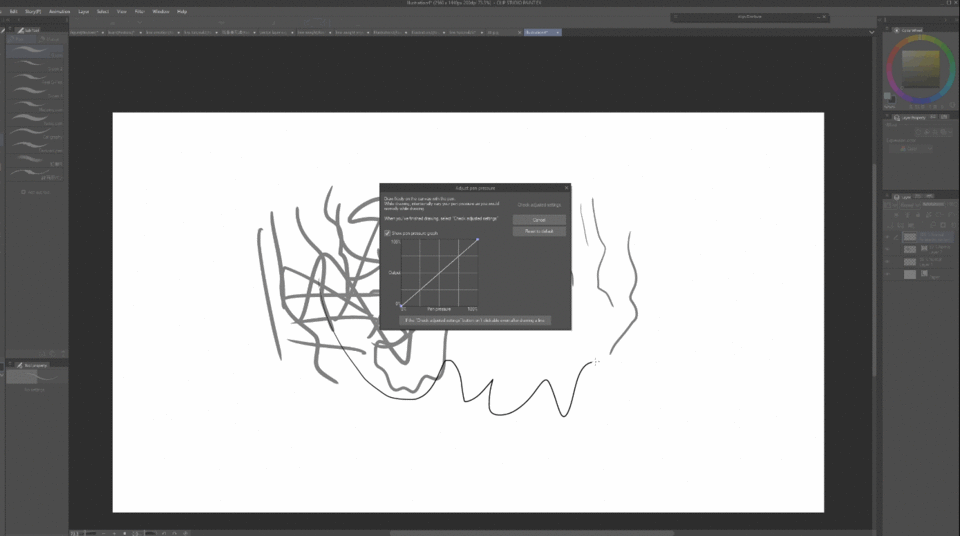
In such cases, You can let clip studio to auto adjust the optimum pressure setting for you by drawing intentionally with a variety of pen pressure on the canvas but this method can be subjective as some people don’t find it helpful .

I recommend adjusting the pen pressure in a mild way. Click on 'Adjusted Setting'. If you draw harder then average people , click 'Stronger' to reduce the output pressure. If you draw lighter then average people , click 'Lighter' to increase the output pressure. You can click multiple times to stack up the effect, or click the reverse function to undo the adjustment.
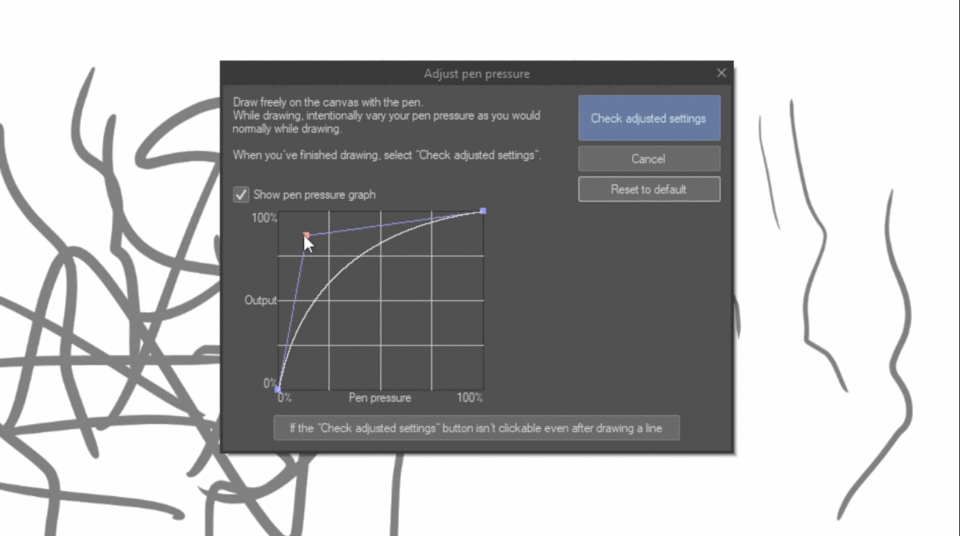
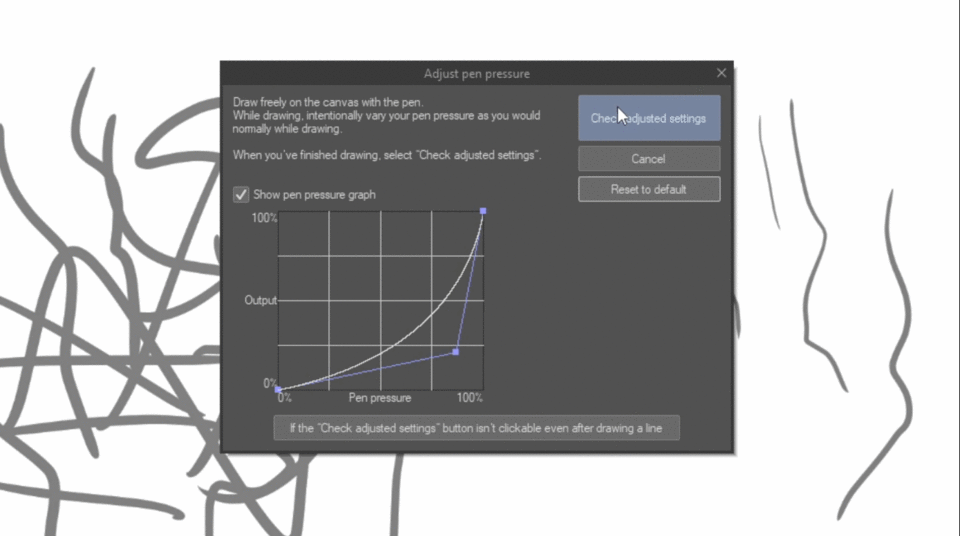
You can also adjust the pressure graph manually. Long story short, the appropriate way to adjust is to ensure a smooth C curve so that the line thickness dont change abruptly while you are drawing.

To remove a control point, hold and drag it out of the box or click 'Reset to Default.'
Once you're done adjusting, click 'Check Adjusted Setting' and select 'Done.' ' You can test out the adjusted setting by drawing on a canvas, and if you are not satisfied, you can always come back to readjust the settings."
Now Lets look at the selective pressure setting for these sub tools. Each of these sub tools has its own pressure setting.
This pressure graph works the same way like the one in universal setting. You generally don't need to readjust the pen pressure here since you've already done that in the universal setting, unless, you want a different pen pressure setting specifically for this sub-tool.
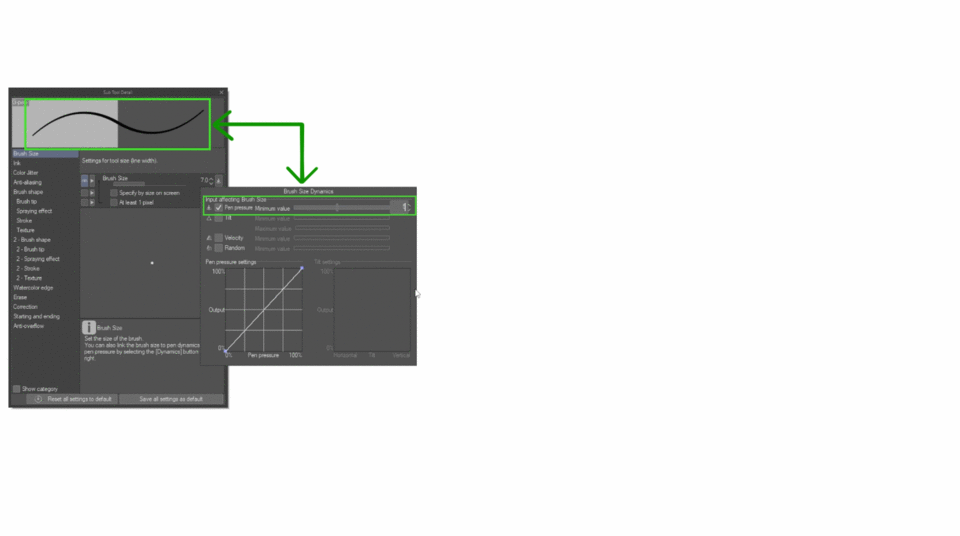
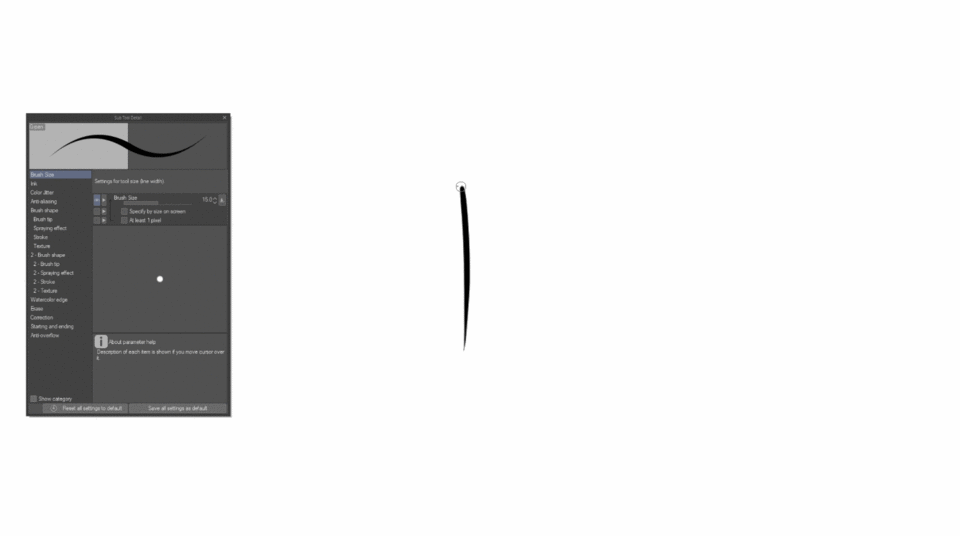
One crucial thing to note is the 'minimum value' setting. Essentially, this determines the minimum thickness of your lines. If you set it to 50, you won't be able to draw thin lines because the minimum value starts at 50, you only can draw the line thickness within the range of 50to 100, which is medium and thick line.
If you increase the value to 100, you wont be able to draw any varierty in line thickness, basically no pressure because the minumum value starts and ends at 100.
Keep the minimum value to 0 if you want to draw a full range of line thickness in your artwork.
However, Some artists find the default settings not to their liking because the lines tend to taper too easily at the ends as they draw. In such cases, you can increase the minimum value of line thickness to avoid the lines getting too thin.
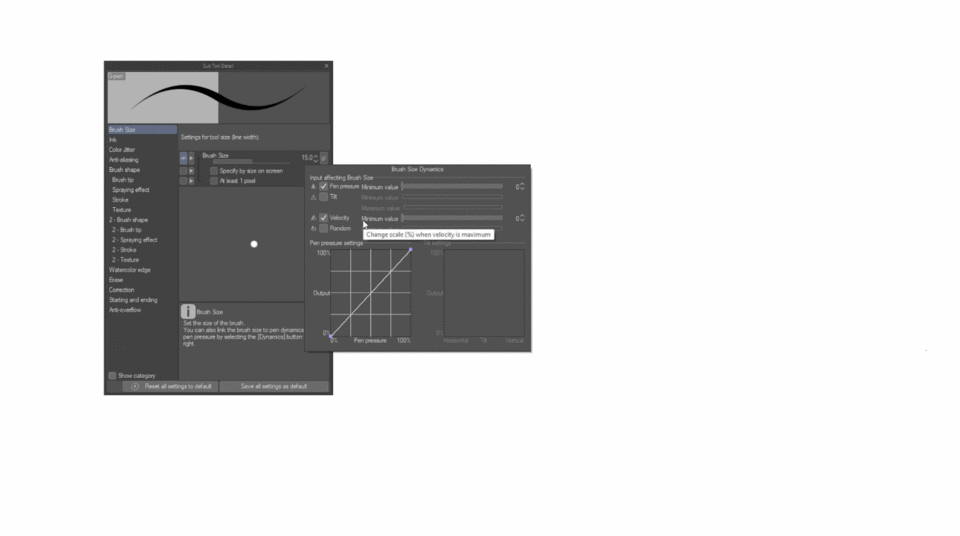
For this function, Velocity controls the size of your brush based on how fast you move your stylus. Essentially, the faster you draw, the smaller the brush size becomes, while the slower you draw, the closer the brush size remains to its original size. If you move fast at start and slow down at the end, it will create two dots at each end. This function operates more like a texture brush and is employed to imitate real ink pens in your digital drawing.
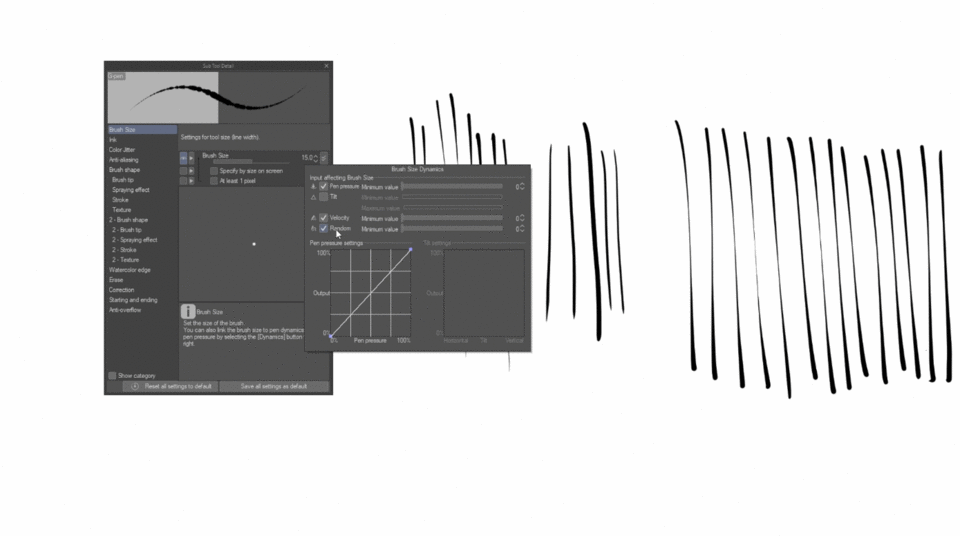
The 'Random' function also works similarly like a texture brush. You don’t need to activate these functions unless you want a specific type of drawing style.
6 ways to improve your Line quality
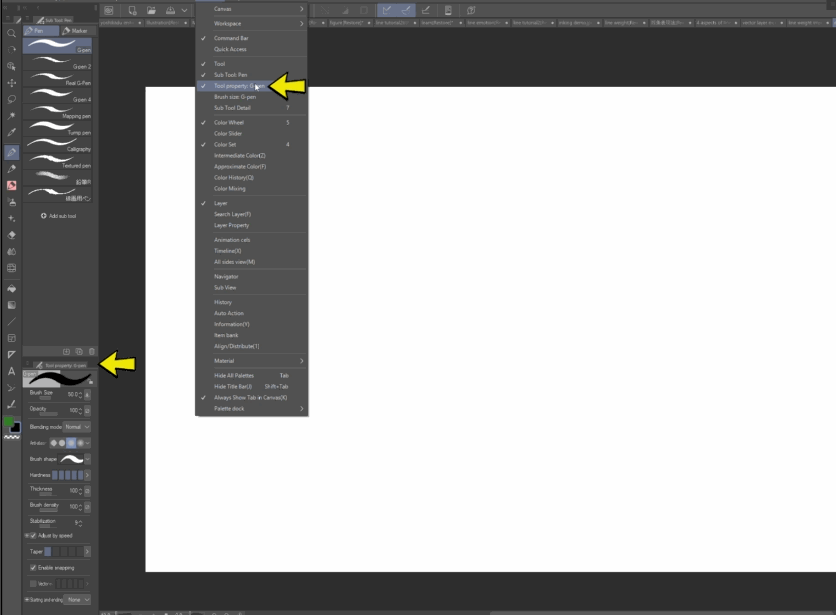
1.Stabilization
To locate stabilization, head over to the 'Tool Property' palette. Click on the wrench icon at the bottom right to bring up the Sub Tool Detail panel, or you can find it under 'Windows.' In the correction tab, toggle this checkbox to add the stabilization feature to your Tool Property palette for easy adjustments. Here, you can fine-tune the amount of stabilization for your selected sub-tool.
Stabilization has three functions working simultaneously.
Firstly, it automatically corrects wobbling in every single line as you draw . If your lines appear wobbly and uneven, increasing the stabilization value will fix the wobbly line, resulting in smoother and more fluid lines. The higher the stabilization value, the smoother your lines will be.
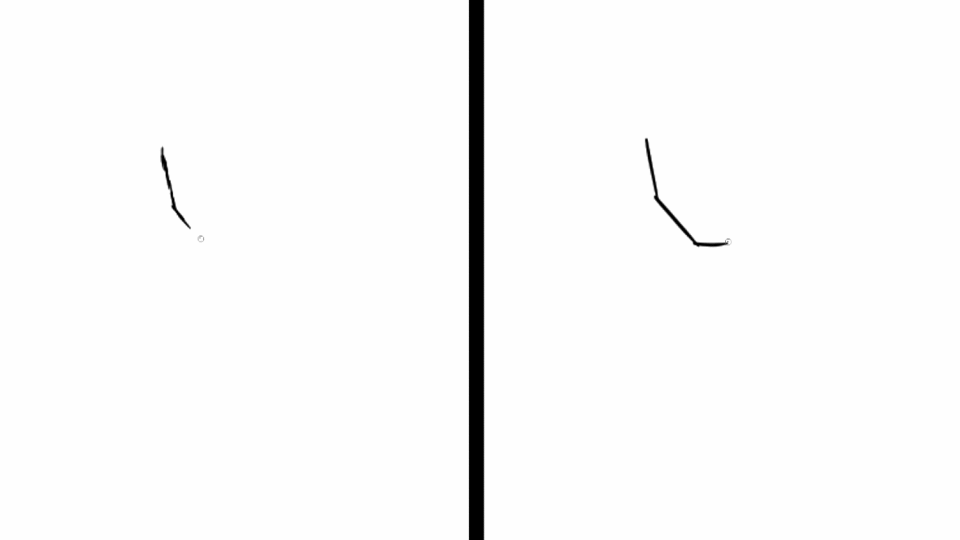
Secondly, stabilization makes it easy to draw tapered lines. The higher your stabilization value, the longer and more tapered lines you can achieve.
Thirdly, there will be a delay in drawing, and the severity of the delay depends on your stabilization value. The higher the value, the more delay you'll experience.
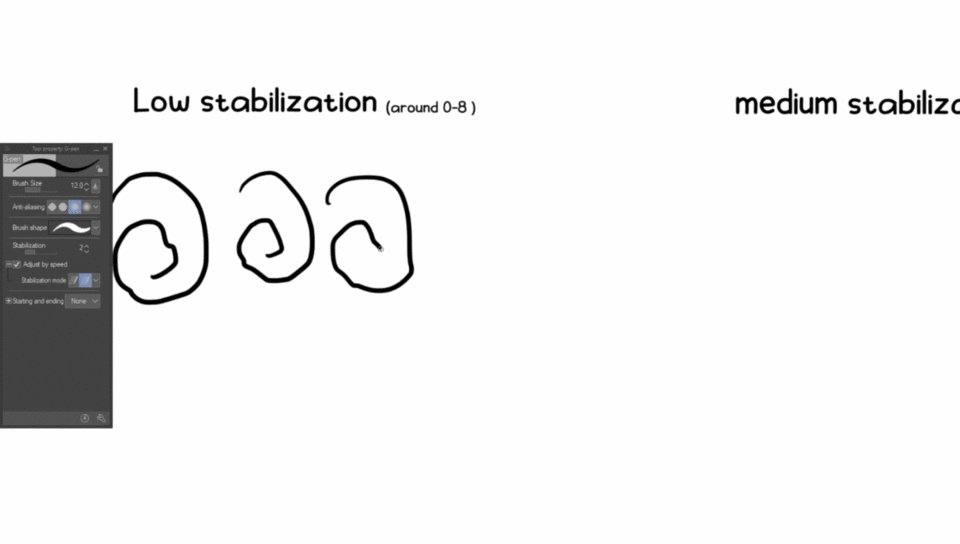
These are the three functions that happening at the same time when you use Stabilization. Going for maximum stabilization is not always necessary and useful while Low stabilization doesn’t necessarily mean useless and unnecessary .
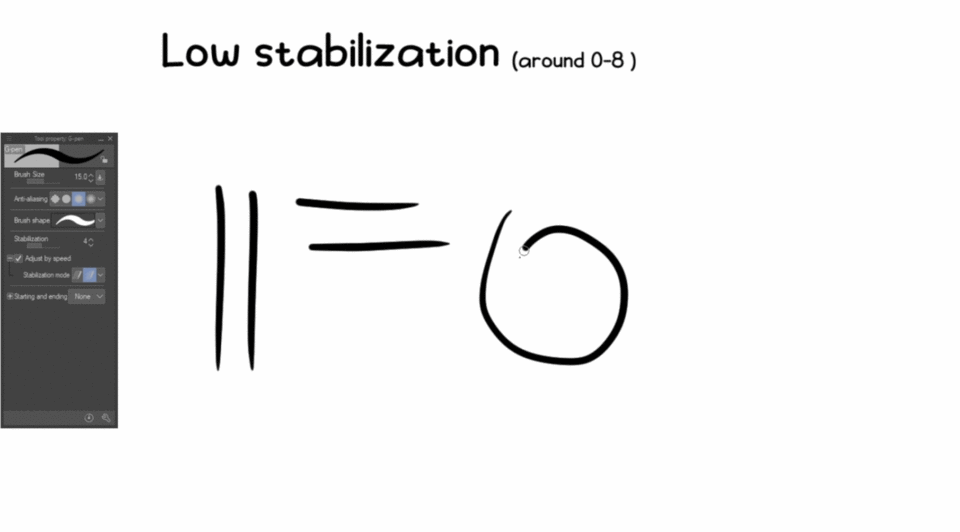
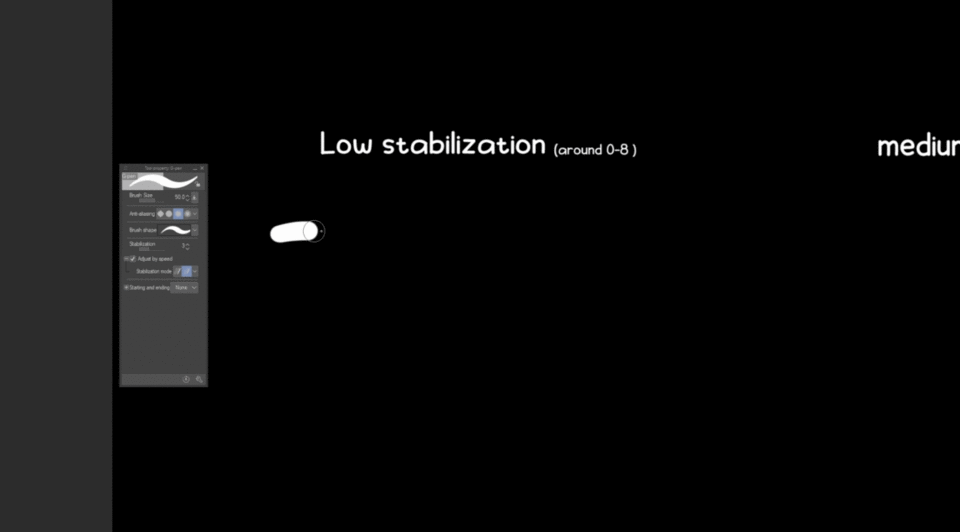
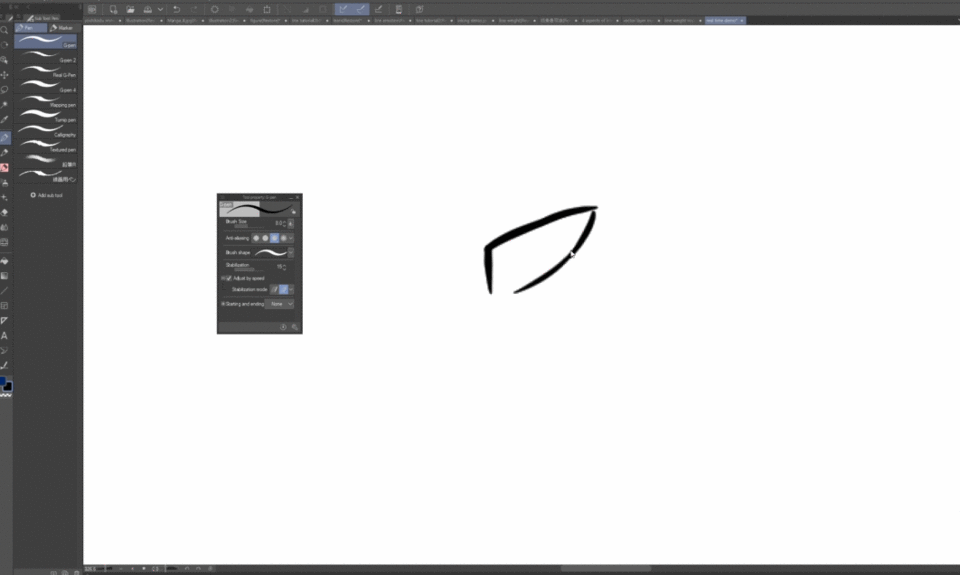
Low stabilization.
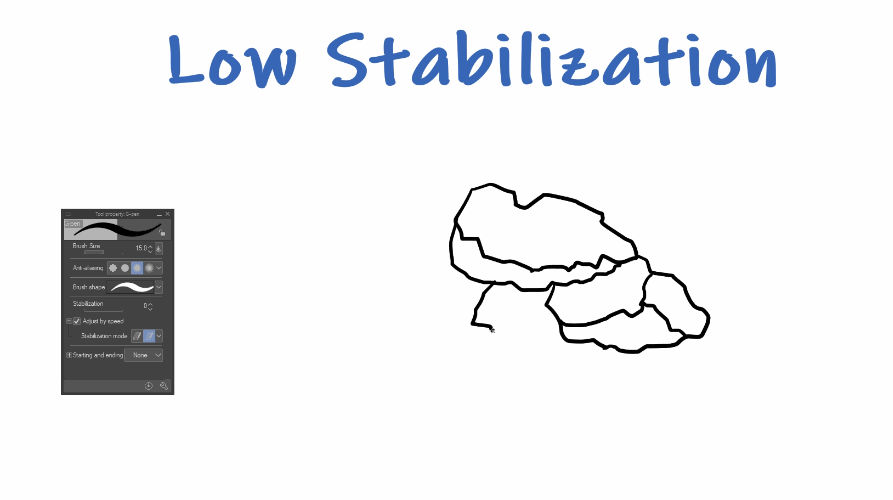

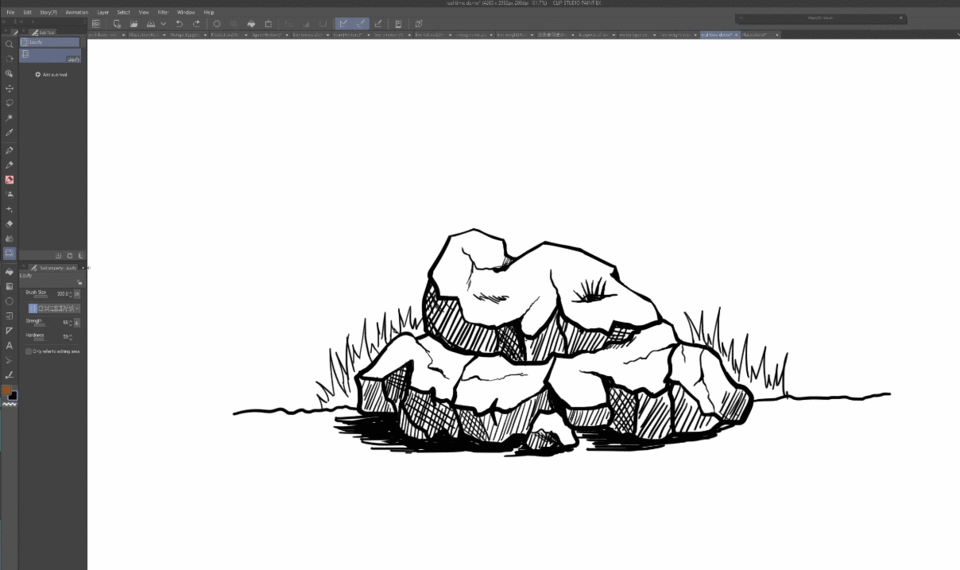
In low stabilization, you get to draw wobbly line easier, and there is almost no delay in this state. This is particularly beneficial when illustrating natural environments like rocks, trees, and textures. A touch of irregularity can add a more natural feel to your work in such cases. While achieving tapered lines is more challenging in this state, you can simply reduce the brush size to draw tapered line or erase the line thickness . If you are drawing on a vector layer, a useful trick is to use 'adjust line width' tool to taper the line. I will cover more about these features later.
Medium stabilization
Medium stabilization is a commonly preferred setting for most artists. I also use medium stabilization most of the time in my drawing. It works great for drawing characters, animals, basically any organic forms that involve a lot of curved lines. In this state, you can achieve decent tapered lines, and there is a slight delay in drawing, which is generally acceptable."
High stabilization
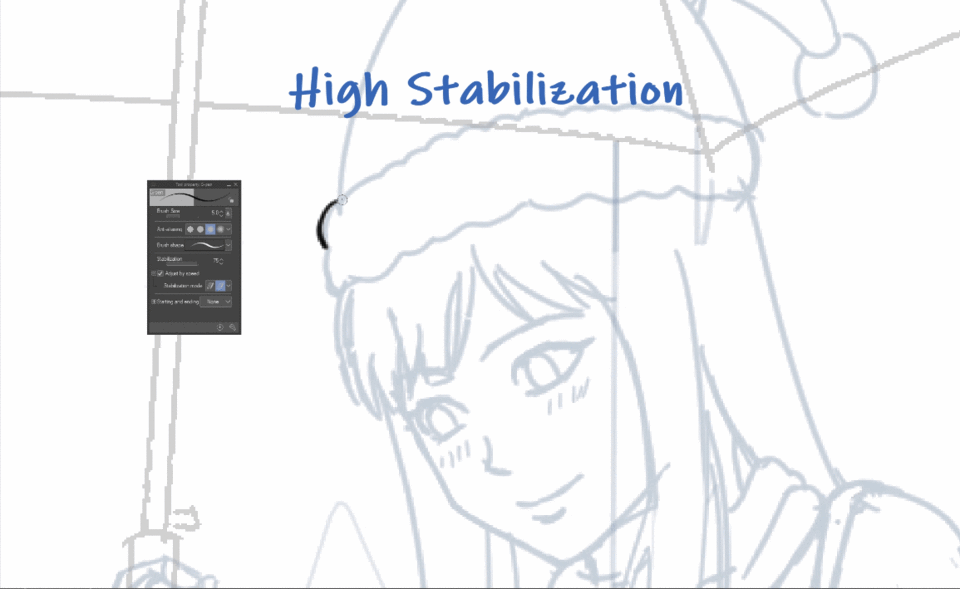
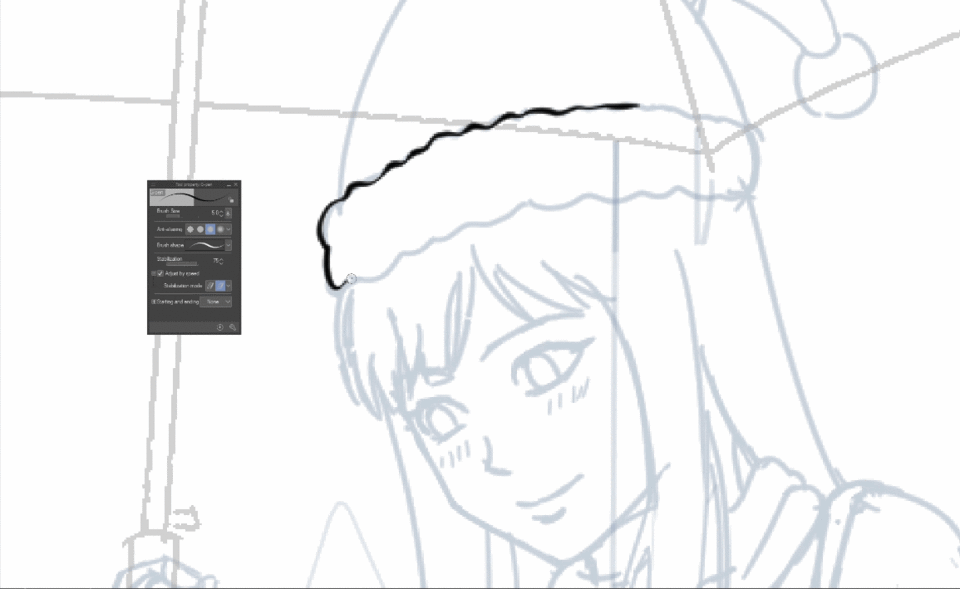
High stabilization, despite offering excellent stability, is not commonly utilized due to its challenging control. This mode generally encourages a slower drawing pace, providing greater precision in tracing, and allowing for better control over line weight variation. However, it is essential that your initial sketch is reasonably presentable for optimal results.
2. Simplify the drawing by drawing longer stroke.
One of the most common mistakes that beginners often make is struggling to create long, smooth lines. Instead, they end up with short, scratchy lines that overcomplicate the drawing. While it's possible to achieve good results with multiple short strokes, it can negatively impact the drawing flow, requiring you to go back and forth countless times. Mastering the ability to draw longer strokes is not only more efficient but also saves a significant amount of time when completing a drawing.
Beginners tend to draw using just their wrist , which limits the coverage to a small area. Instead using your wrist, use your shoulder to draw in a larger coverage. If you're unsure whether you're using your shoulder, Imagine there is a pivot point in your shoulder like in a 3d poser and try to feel the motion from there.
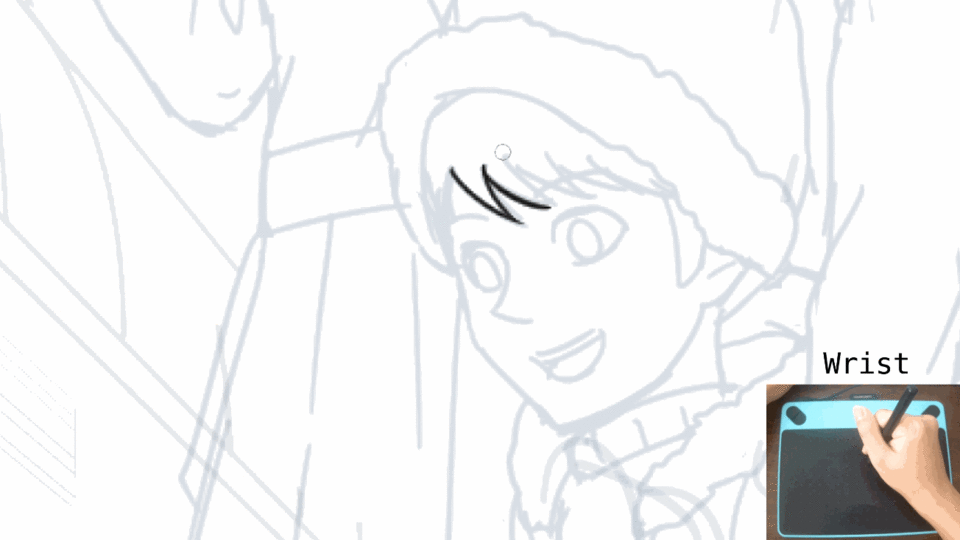
Don’t get me wrong, using wrist is great in drawing short lines like detailing. The key is to learn how to switch between using your wrist and your shoulder for different aspects of your drawing.
3. Rotate the canvas to draw at a comfortable angle.
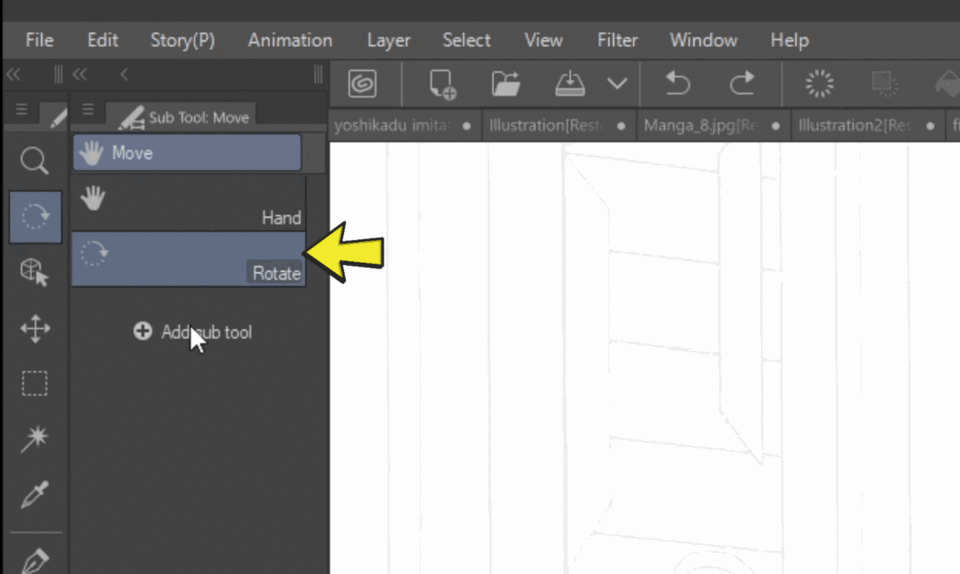
Press 'R' to rotate or select 'Rotate' sub tool from 'Move' tool.
Not every angle of the line we draw feels natural. It can be challenging to draw at certain angles as it may go against the natural movement of our wrist and shoulder. Rotating the canvas allows you to find a more comfortable angle for drawing and sometimes even to visualize things better in a different angle.
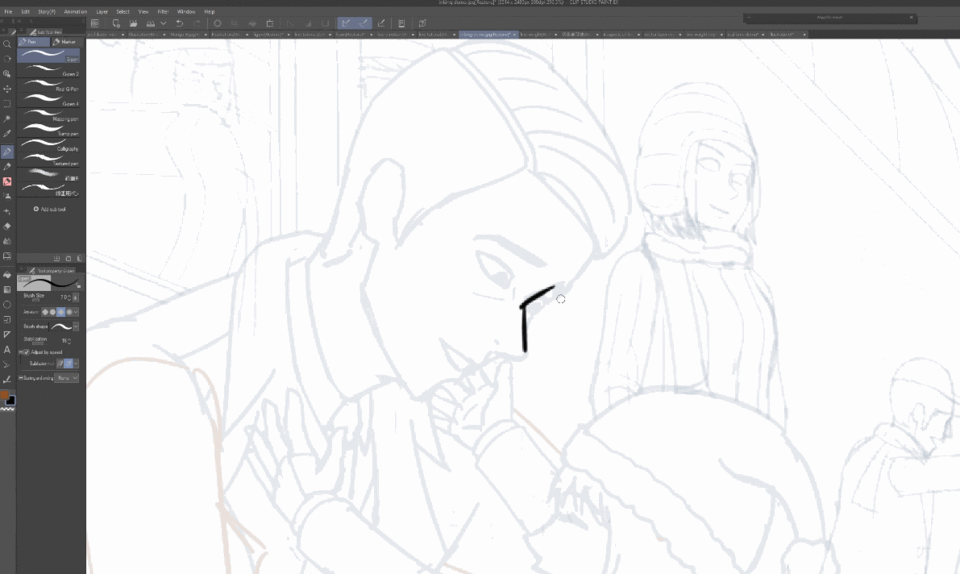
4. Draw the next line before the end point
This is essentially for final inking stage . When you want to connect the lines nicely, instead of drawing the next line from the most end point, you can move a little backward to have a better transition to connect the next line smoothly.
5.Liquify move tool and transform tool

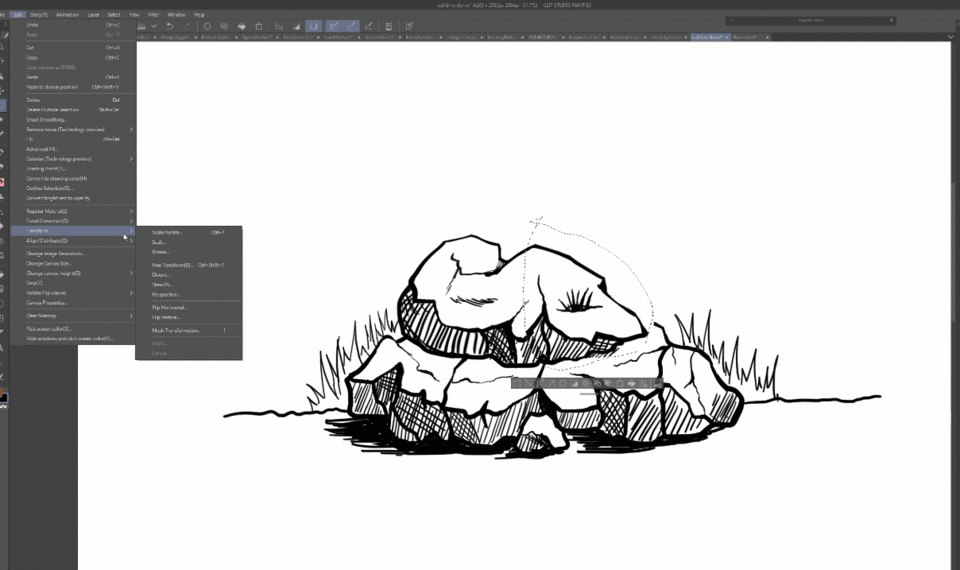
You can adjust the curvature and directions of line by using liquify move tool. You can also use lasso tool to select the lines first, then use transform tool to rotate or drag the lines or you can go to the edit menu and use mesh transformation to adjust the curvature.
6.Line weight
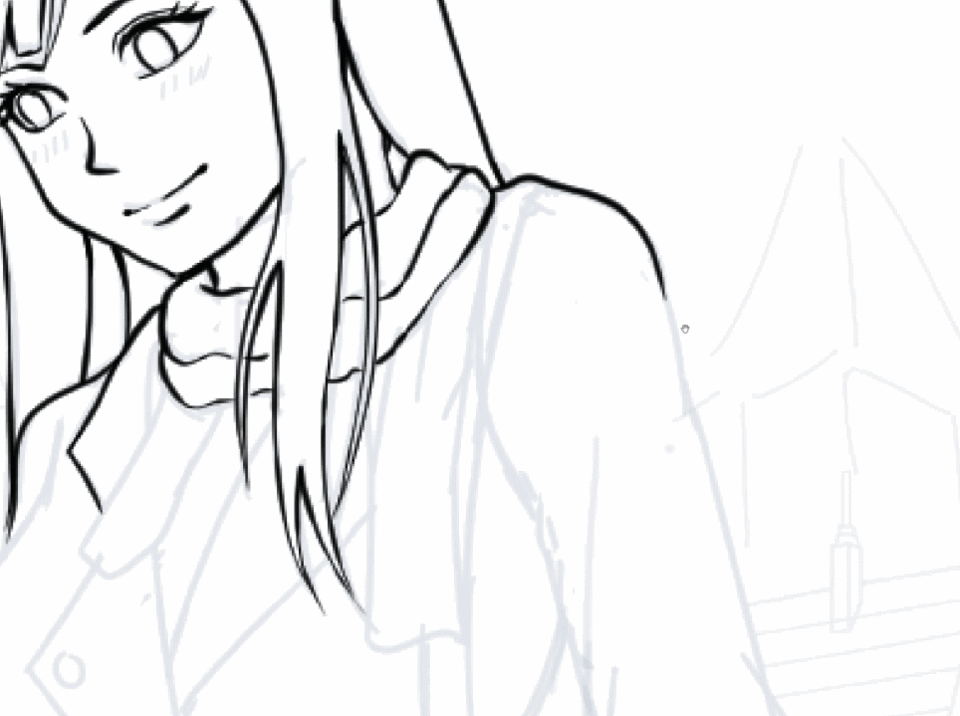
Alright, this is the most important one and it is a big topic. Typically most people tend to think Line Weight is the same as Line thickness, but it's actually a bit more than that . It involves Shape, Value, and Edge. I will be focusing only on the Shape, essentially line thickness because it plays the most crucial role in determining line weight for lineart.
5 ways to control line thickness in clip studio paint
The first way is by by controlling your pen pressure . Pressing the stylus harder gives you thick lines while pressing the stylus softer gives you thin lines.
Second way is by adjusting the brush sizes and drawing back and forth to smoothen the lines
Third way is by erasing a thick line to get a thinner one or repeating drawing thinner lines to get a thicker line.
Fourth way is by using the expand or pinch features from the liquify tool. Use expand sub tool if you want to thicker the line or Use pinch tool to narrow the line. Be careful not to over do it because the line resolution will degrade.
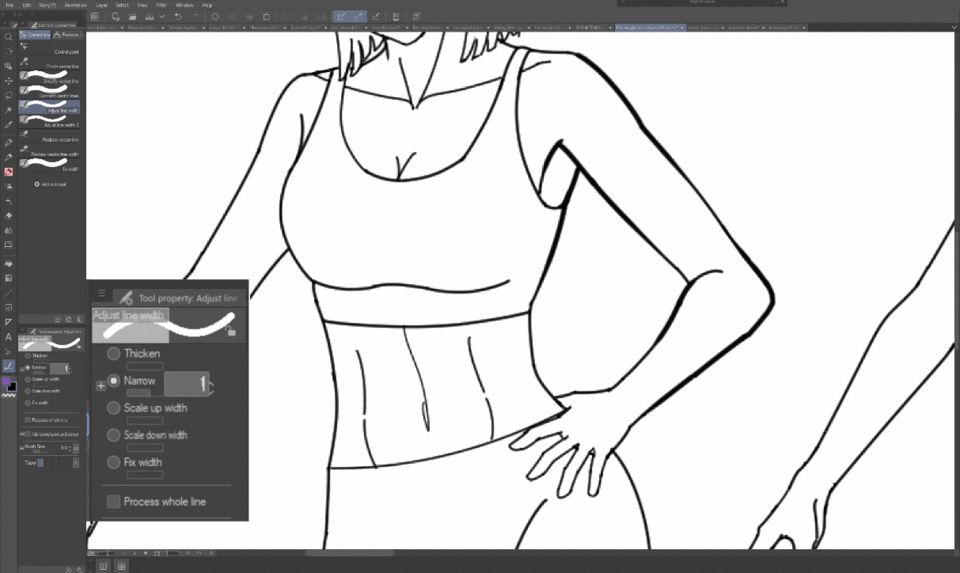
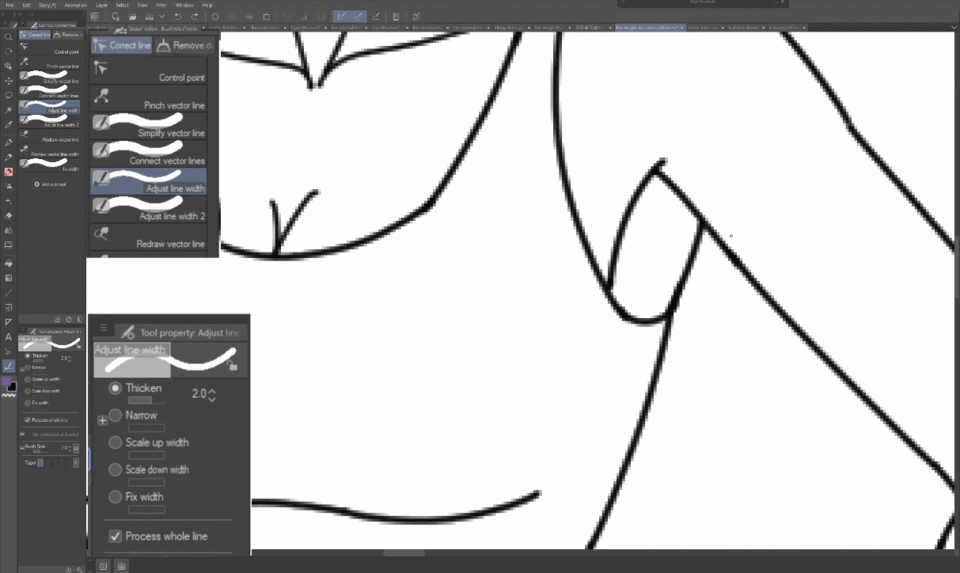
The fifth way is by far the most convenient and powerful way for adjusting line thickness in Clip Studio Paint. Which is by using vector layer and 'correct line tool' together.
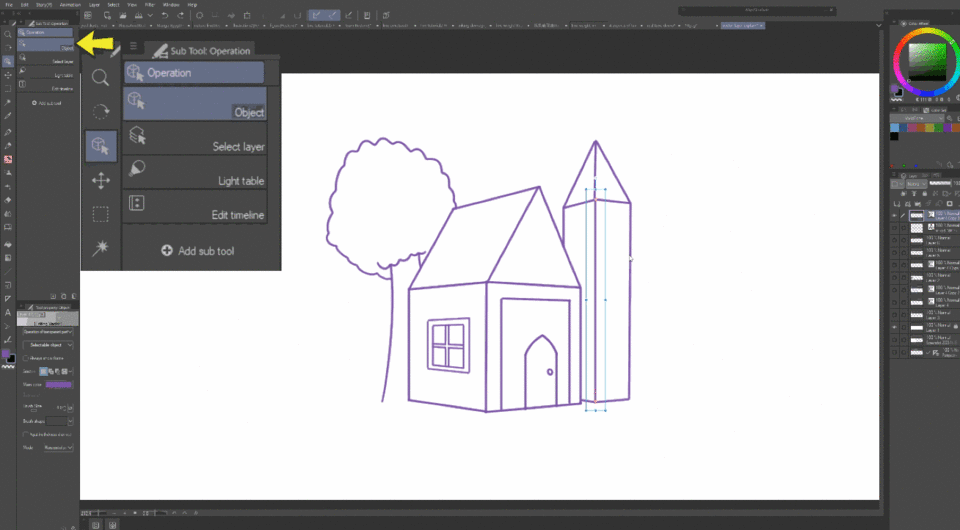
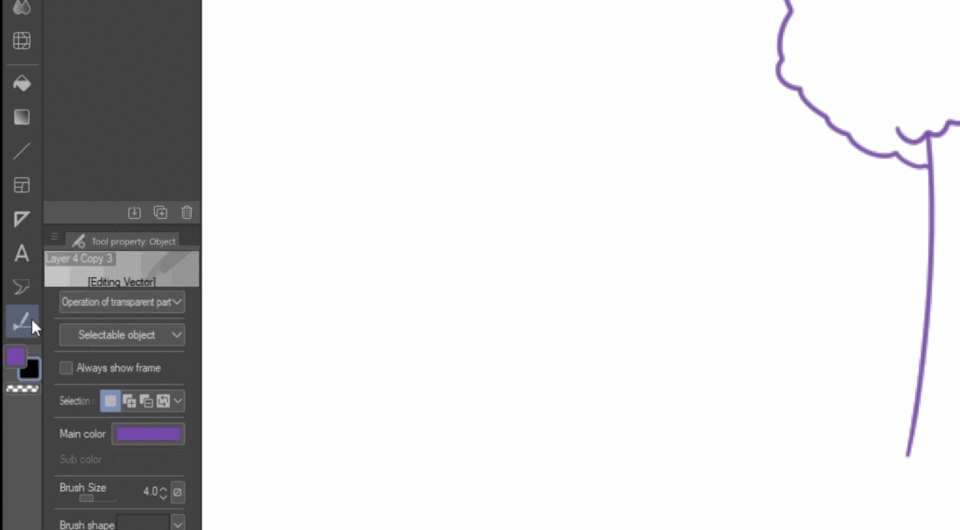
In vector layers, if you hold control key or using object sub tool to select any of the lines , you can see multiple points created between each stroke/path you draw. This lets you to adjust your linework countlessly without losing the resolution quality.
To adjust the line thickness, head over to 'Correct Line' Tool and select adjust line width. In the tool property, you can choose 'Thicken' to make the lines thicker, or you can choose 'narrow' to make the lines thinner.
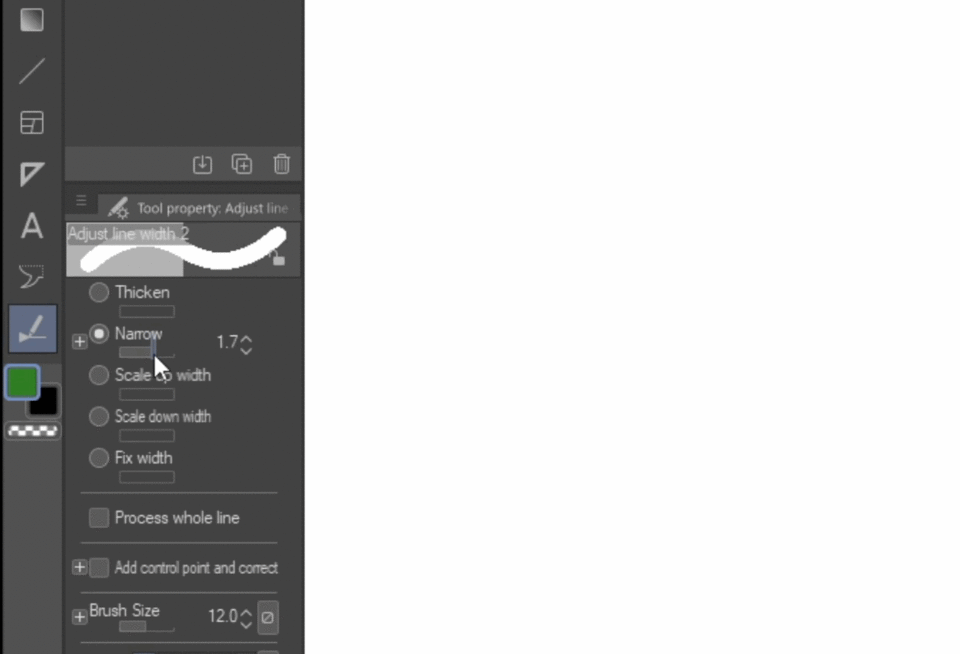
You can adjust the amplitude by hovering the slider or changing the value beside the slider.
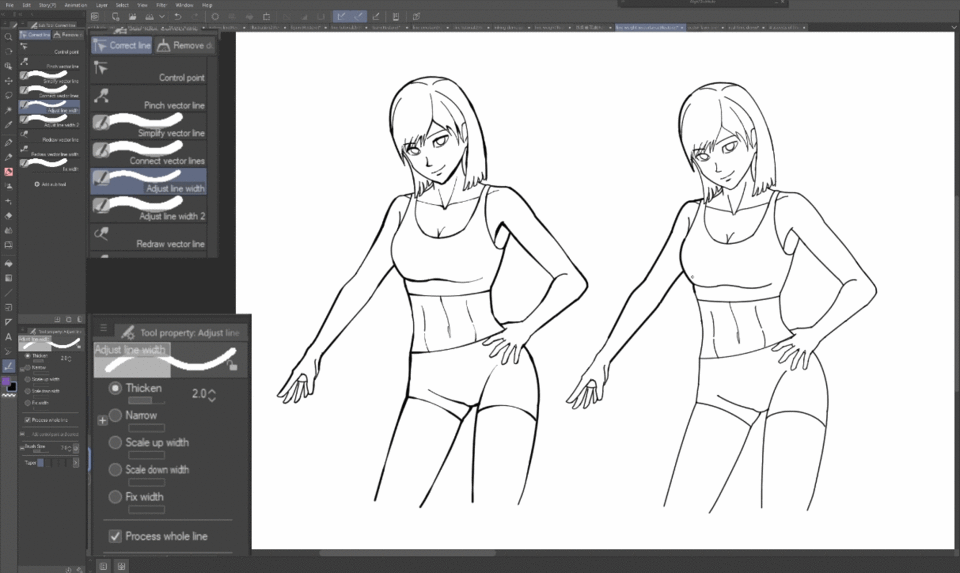
Instead of adjusting only a few control points of a line, you can click 'Process whole line' to adjust the whole path of control points or each stroke at once.

Turn 'Process whole line' off if you want to adjust the line thickness transitioning smoothly, such as from thick line to medium line or medium line to thin line.
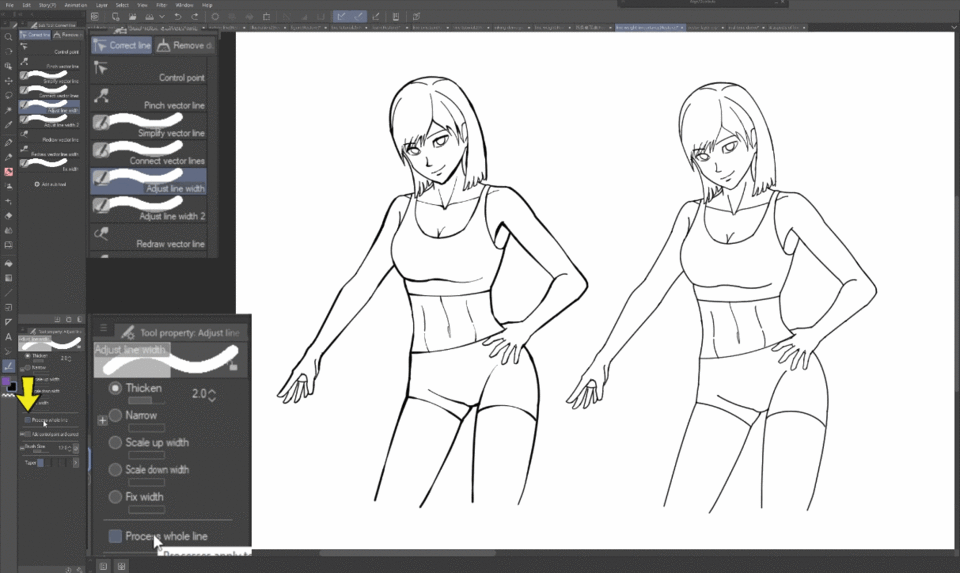
Turn 'Process whole line' on if you want to scale the entire line thickness up or down.
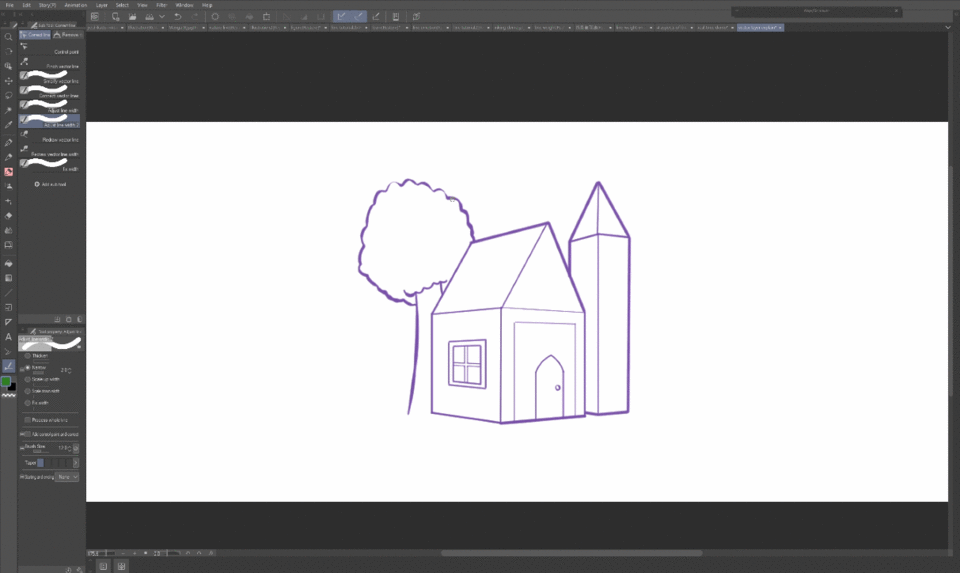
If you want to have more control over the line segmentation, select 'control point' sub tool and choose 'Split line' to segment the part you want. With 'Process whole line' enabled, you can adjust the line segmentation more quickly.

Furthermore, you can also utilize 'redraw vector line width' sub tool to adjust the line width seamlessly. This tool responds to pen pressure, pressing harder thickens the line while pressing softer narrow the line. If you enlarge or reduce your brush size, the overall line thickness will scale up or scale down on average accordingly.
You can set shortcut keys for these tools to conveniently switch between them while you are drawing. Go to ‘File’ > ‘Shortcut Settings’> Category:Tools > ‘Correct line’
5 primary aspects that line weight can be used to convey.
We can categorize line thickness into four types: medium line, thick line, thin line, and broken or non-existent line. These line weights offer versatile options for artistic expression. Generally, there are five primary aspects that line weight can be used to convey.
1. Depth of a Scene
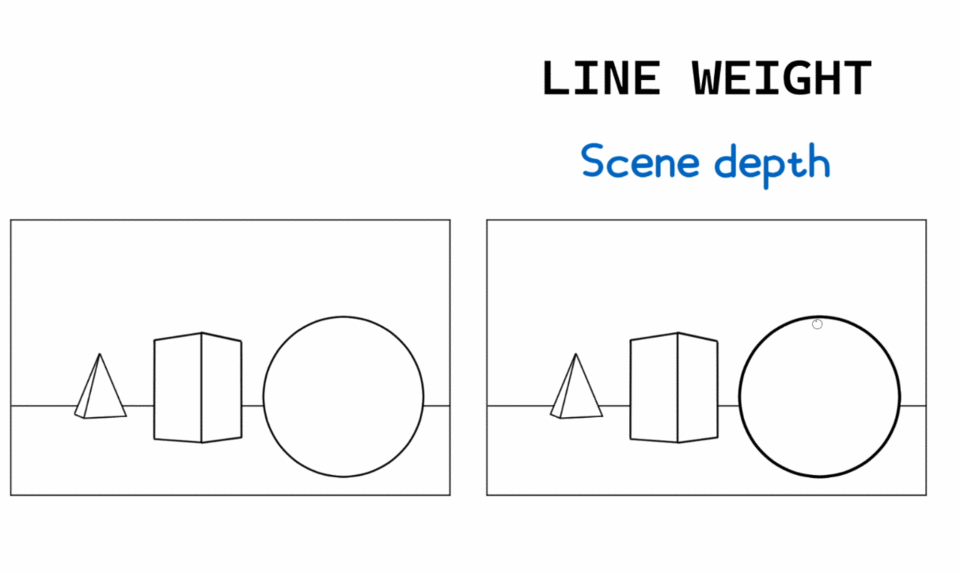
Line weight can be employed to depict the depth of a scene. Essentially, just thicken the lines for elements closer to the viewer and narrow the lines for those farther away to create a sense of spatial depth.
In this scene drawing, i use thick lines for the foreground which is the character, medium lines for the middle ground which is the school and cat and thin lines for the background which is the cloud.
2. Depth/Mass of Object
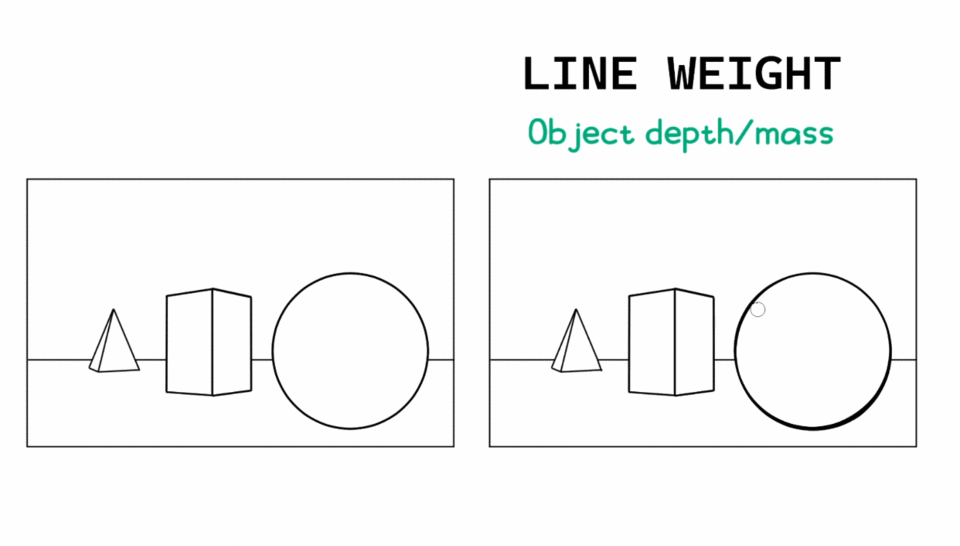
If you want to covey the depth or mass of an object, consider transitioning line thickness from one type to another, such as from thick to thin lines or vice versa.
This technique is commonly seen in comic or manga inking. The transition of line thickness gives a sense of depth or mass to the drawing.
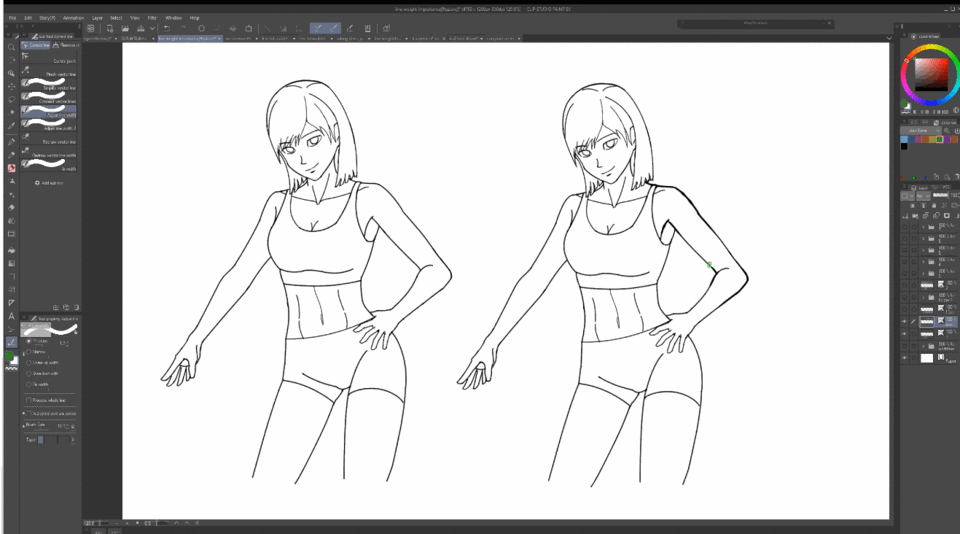
3.Hierachy of importance
You can use line weight to organize the importance of elements within a drawing. Use thick lines to outline the contour line of the most important subject in a scene and use thinner lines for the less important ones. In this same drawing, I can choose to highlight either the character or the cat.
You can also just highlight the character only if this is meant to be a figure drawing or character design.
For this environment scene, I use thick lines to make the cat the most important focal point and thin lines to make the cloud the least important. But for this picture I can shift the focal point to the school and make the character become the least important .
To further emphasize the focal point, you can also break the lines to separate the focal point from the rest. You can organize the importance of elements however you want to guide the viewer's attention.
4. light and Shadow.
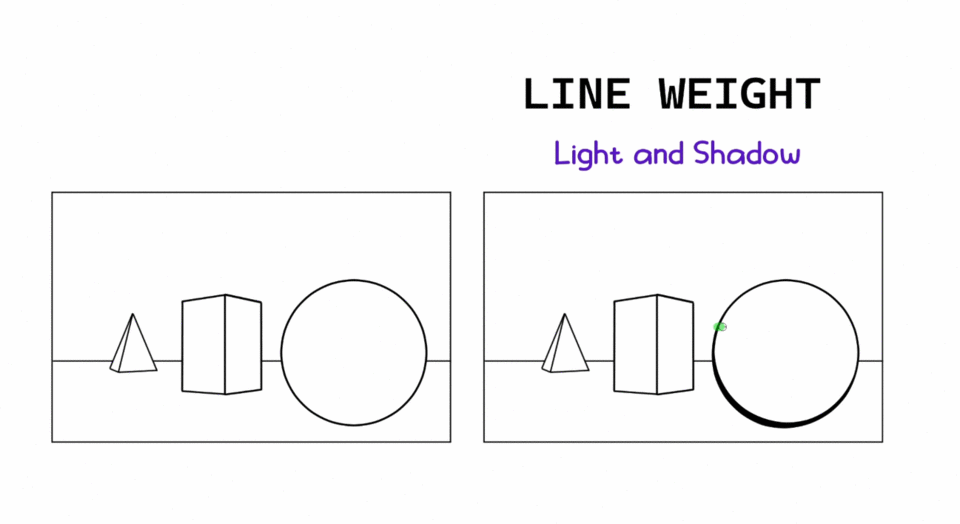
Line weight can be utilized to convey a sense of light and shadow. If the light source comes from the right side, you can smoothly thicken the lines on the left to indicate the shadow. Conversely, you can use thinner lines or even break the line to suggest where the light is hitting.
5.Emotion
You can use lineweight to emphasize the emotion of a drawing. For example in this drawing, if I want to emphasize the horror emotion, I can thicken all the lines together. As for this drawing, if I want to emphasize the peaceful feeling, I can make all the lines thinner.
You can use line weight to express these 5 aspects in the same drawing. As you can see, there are a lot of combination. The choice of which aspect to employ is entirely up to your artistic freedom.
4 Line exercises to improve your line flow and quality
No Zooming
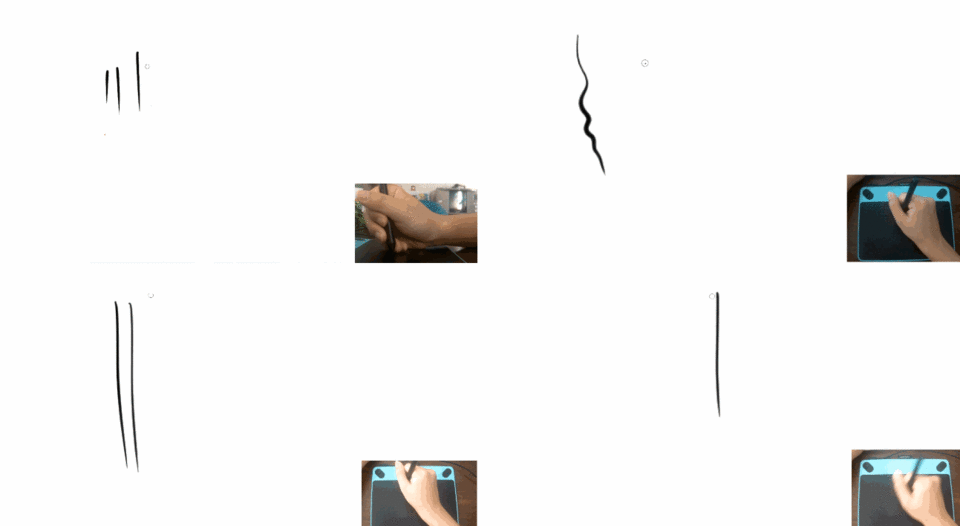
1. Draw longer lines without zooming out the canvas. Learn to use your shoulder and feel the motion as you draw longer lines.
Maintain pen pressure
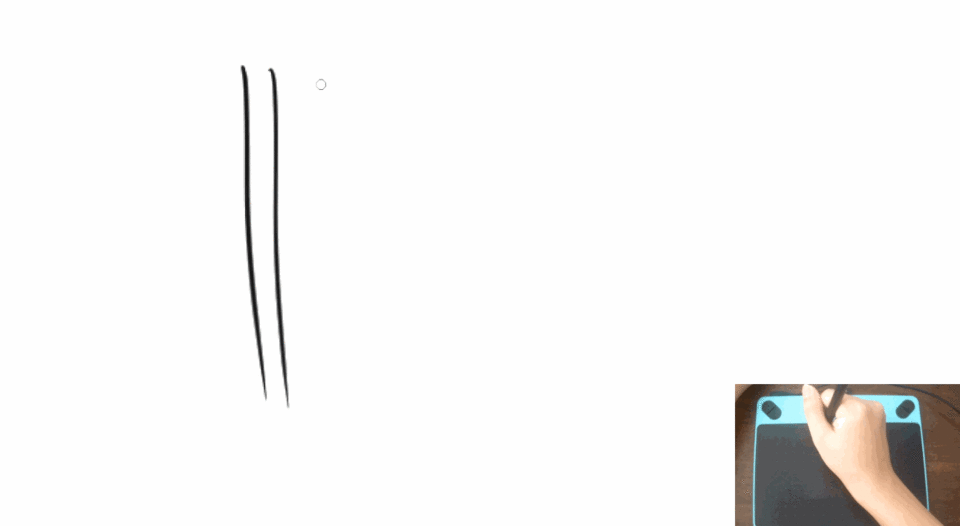
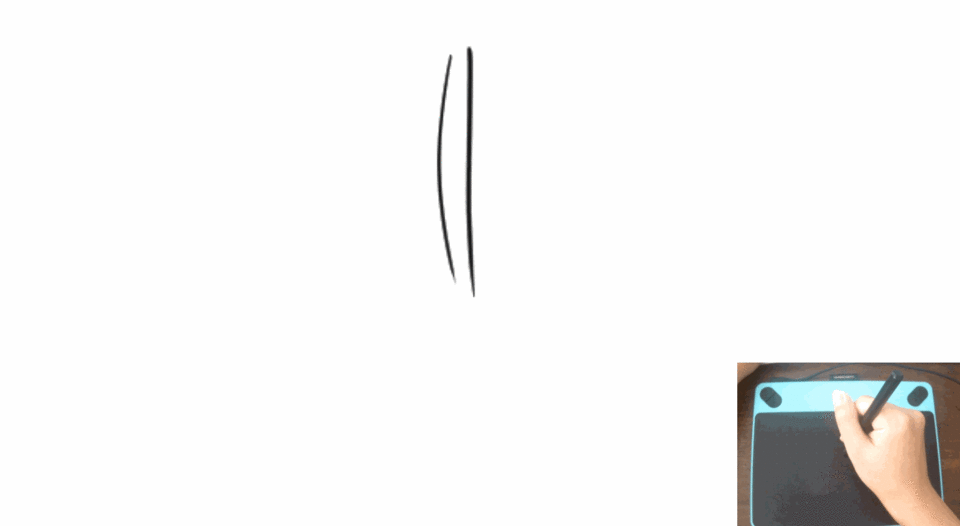
2. Some beginners tend to only draw taper lines all the time because they have a habit of moving their stylus away from the tablet earlier . This exercise is to train your hand not to move your stylus away from the tablet earlier so that you can maintain the line thickness to the end.
Transition of Line thickness
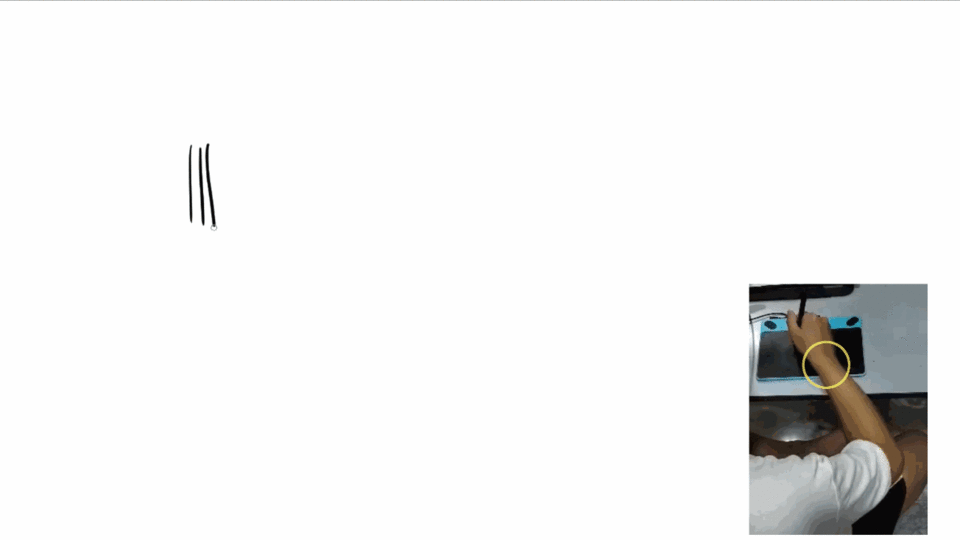
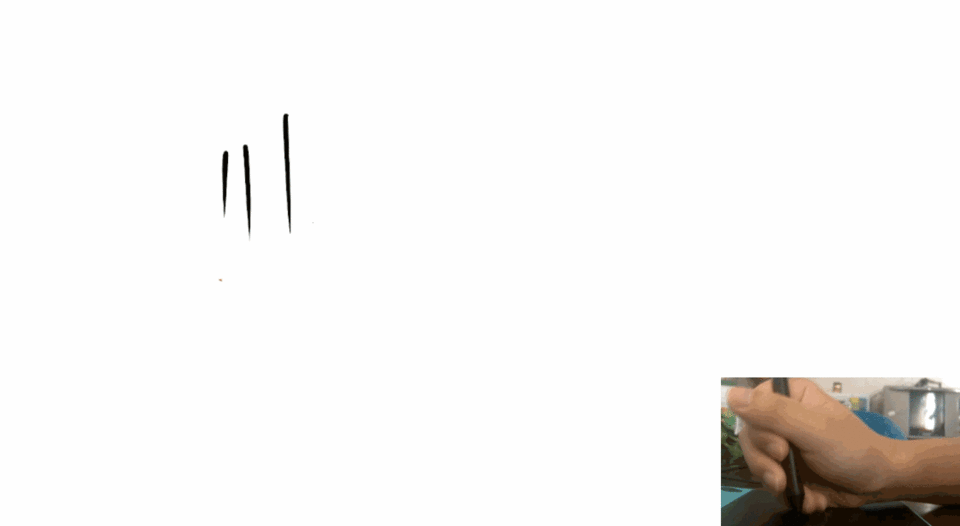
3. Draw Line thickness transitioning between thin , medium, thick line. It can be taper line from medium to thin or the opposite way or it can start from medium to thin and back to medium again then continue to thick and end at thin. There are alot of combinations.
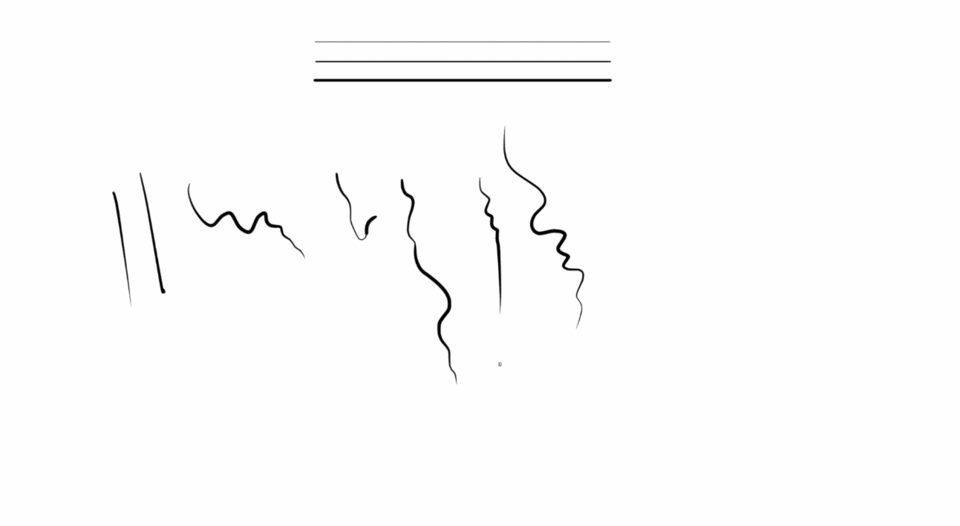
Curves with different degrees
4. Draw curves with different degrees of curvature. This exercise is a good warm up to train your flexibility of hand movement. I personally find this exercise more helpful then repeating drawing circle with the same curvature since it is less practical in actual drawing .
I usually spend about 5 to 10 minutes on these exercises. If you're a beginner, feel free to stretch it out a bit, maybe around 10 to 20 minutes. I don’t recommend practicing for too long as these exercises are meant to be just a warm up for the real drawing.
Alright, that wraps up this tutorial! I genuinely hope the tips I've shared are helpful for your artistic journey.
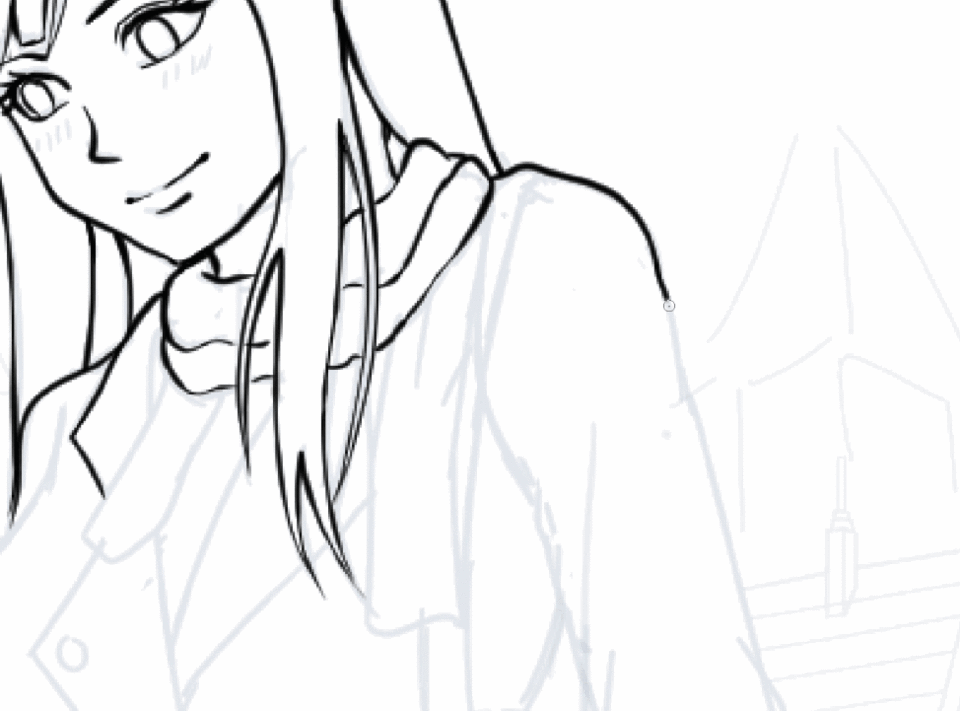
Time-lapse manga character drawing
If you're eager to see how I use line weight in action, feel free to watch my time-lapse manga character drawing , where I demonstrate how I use Clip Studio Paint to bring manga character to life. Time lapse drawing starts at 25:19
Thanks for watching !
Users who liked this post


Comment