
Intro
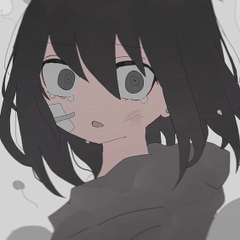
Okay… I know why you’re here, I KNOW you like ’em cute! I don’t judge, me too mate, me too… I’m the type to roll “Pin your interest’s” boards mindlessly for hours trying to figure out how the FRICK they do it! Kawaii POP art, is just… On point!
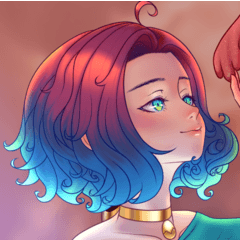
Have you ever played “Myuse and dash” ? (the names are being purposely changed by the way) If not, play it or at least check their art, Like… Dude, their in game sprites are insanely beautiful and cute, the color pallets, details, lineart, halftone work and designs, It’s the perfect balance between POP art and kawaii aesthetic, I dare to admit they are a really good reference for this type of art in the market, and even tho I kinda suck at rhythm games, I still play this one just for the designs and the animations, and I’ve been aspiring to reach their level of cute and quality for a long time, so it’s a big inspiration for me.
And this game art will be my major inspiration to make this tutorial, I’m quite skilled at kawaii colorful illustration as I’ve been “drawing ‘em cute” for my entire life basically and I hope I can pour a little bit of my obsession inside your brain and muscle memory today, if you’re up to go through this journey with me!
So, without further ado, Let’s start!
Concept
Before we start, I bet you’re asking yourself, what the frick is “Moe” “Pop” “kawaii”? Or maybe you already have a brief idea of what is it, but if you fell here randomly with parachutes, lemme explain what are those terms:
Pop art is an art movement that emerged in the 1950s and flourished in the 1960s in America and Britain, drawing inspiration from sources in popular and commercial culture. Different cultures and countries contributed to the movement during the 1960s and 70s (check font references)
Pop artists used the look and style of mass culture to create their art, often incorporating imagery from comic books, Hollywood movies, advertising, product packaging, and pop music. They would cut up, rework, and combine different pop culture references to create bold, simple images of everyday items painted in bright colors. Some common subjects included soup cans, road signs, hamburgers, and celebrities.
As for “Moe/Kawaii” aesthetic, "Moe" (萌え/もえ) is a Japanese term describing the subgenre of anime and manga visuals focused on cuteness and innocence. Leaning heavily into kawaii and feminine visuals, the term is used for characters that create emotions of affection and adoration. The Moe aesthetic places these characters as its main focus.
It’s aesthetic consists basically of:
♥ Soft and rounded design
♥ Kawaii imagery
♥ Chibi or mini ature proportions (ex."kitten-shaped" skulls)
♥ Kemono mimi
♥ Nendoroid/Moe anime figurines
♥ Bishoujos and Bishounens
♥ Aesthetic or edited anime pictures
♥ Cute outfits full of details/Overdesigns
Moe Pop!
By merging these two styles, Moe POP is born, creating a unique and visually appealing aesthetic:
Cute Characters Bold Colors: Retaining the charming character designs of moe but infusing them with the vibrant color palette of pop art. This creates a striking contrast between the cute and the bold.
Dynamic Composition: Pop art's emphasis on composition and graphic elements is applied to moe art, resulting in more dynamic and visually interesting pieces.
Playful and Energetic: The combination of moe's innocence and pop art's energy creates a playful and upbeat atmosphere.
Let's Draw!
Cute designs
“Kawaii/Moe” art style embodies this concept by emphasizing childlike innocence, charm, and feminine world. For some it can be quite hard to achieve this style so the key characteristics to keep in mind when drawing it includes:
Large, expressive eyes:
Small or delicate mouths:
Rounded shapes; Soft, circular forms are used for bodies, heads, and objects:
Chibi/childlike, miniature proportions or exaggerated features (ex. "kitten-shaped" skulls):
Sketch
Keeping this key aspects in mind I’ll sketch my piece, it will be some of my characters in a simple set of a maid cafe, I won’t put too many details, because I’m an enemy of hand draw backgrounds, also my focus here is the character and the decorations after might fill up some blank space.
Lineart rules (or tips)
Always remember, if you’re doing heavily detailed art, always go with a thin and delicate line, as for flat/simple render, try to focus more on thicker lines, thin and wavy inside and solid thicker on the outside, in my opinion, this style of lineart is the best for kawaii pop art, as the piece will be heavily detailed in the end, the thicker lines help separate the elements better.
Don’t be afraid to add random details of surreal elements to your piece, just like we’re trying not to dirty our lineart with uneeded details, we can compensate it adding random objects and decorations around.
Coloring
Color... Theory?
Here we are, the goat of pop art, the colors! It will probably be the most important section of this entire tutorial, so please, pay attention! And it all starts with:
Color wheel
A color circle, based on red, yellow and blue, the Primary colors, Sir Isaac Newton developed the first circular diagram of colors in 1666, and ever since, it’s a traditional very used tool in the field of art.
In traditional color theory (used in paint and pigments), primary colors are the 3 pigment colors that cannot be mixed or formed by any combination of other colors. All other colors are derived from these 3 hues.
Secondary Colors: Green, orange and purple, these are the colors formed by mixing the primary colors.
Tertiary Colors: Yellow-orange, red-orange, red-purple, blue-purple, blue-green & yellow-green, these are the colors formed by mixing a primary and a secondary color. That's why the hue is a two word name, such as blue-green, red-violet, and yellow-orange.
Hue, Value and saturation
Every color consists of three components:
Hue is the specific color that makes it different from other colors on the color wheel.
Value represents a color's relative lightness or darkness in grayscale. Value is essential to establish contrast and depth in visual art.
Saturation, also called chroma or intensity, describes the purity and vividness of a color. Saturation can vary from fully saturated (vibrant) to desaturated (grayed).
Color harmony
But now, how to use it as it’s intended too?
Well, the color theory is not a set “picking colors rule” book for you to follow, it’s just a study to help you understand how colors can work together, and how to approach a more satisfying and harmonious color palette for your piece, avoiding making it look dull or weird, therefore, there’s a lot’s of color picking techniques your can use to make your own color palette, and some of the most used are:
Achromatic
Use of only black, white and halftones in between.
Monochromatic
Combination of different versions of the same color to create an unified and elegant look.
Analogous
An analogous color scheme involves three adjacent colors on the color wheel. This scheme is often seen in nature.
Complementary
Complementary color schemes pair colors that neutralize each other when mixed, typically resulting in white and black contrast when you put it in a grayscale shade.
Triadic
A triadic color scheme consists of three colors spaced evenly around the color wheel, often offering a harmonious yet visually striking contrast. They appear vibrant, even if the individual hues lack vibrancy.
Split-complementary
In split-complementary color schemes, designers blend the principles of complementary and analogous colors. They select the complementary color to their primary and then include the adjacent colors on the color wheel.
Square
The tetradic color scheme includes two complementary color pairs. This scheme can produce vibrant visuals, yet designers find it challenging to achieve balance.
Pop & Moe Paletes
Now, that we are done learning how to choose colors, let’s do it! And also use this opportunity to learn a bit about some palettes in pop and moe culture:
A color palette is a carefully selected group of colors that work well together. It's like a painter's toolbox, providing the essential hues for creating a visually appealing and cohesive design.
Moe utilizes more pastel and light color palettes, pending more to analogous choice of colors, specially pink, blue and purple, while pop art use vibrant and complementary color palettes, like yellow, red and blue, the idea is merging cute colors with high contrast, creating what we call, kawaii pop/ Dark pop palettes:
The difference between the styles when choosing the colors are pretty much the vividness of the color and the contrast (utilizing the harmony technique) Moe pop will aways choose the most high contrast colors in a low saturation value, while pop will do the opposite, choosing the high contrast and darkest saturation value to create a chocking pallete.
As you can see, all of them are pretty much colorful and would grab the viewers attention easily.
Applying colors to your illustration
This is the palette I’m going to use, the method of harmony I did to came up with this was the Square/Complementary one, and it basically consist in pink contrasting directly with neon cyan and bright yellow, while dark blue and purple contrasting with pink and green.
The darker and less bright colors will be in the background as I plan the frame to draw attention to the character, you can do the opposite as well, depending on your concept’s goal.
Remember to distribute your colors evenly, contrasting them besides each other and trying to avoid repeating color patterns of similar tones, once you hit your gray scale effect using a white color layer on top, your illustration is supposed to have high contrast in the maximum amount of areas it can:
My render techniques
Shading
My shade technique consists in a single multiply layer, and using a solid lilac color, I will evenly shade the drawing with “flat” strokes, then add complementary colors edge, deepening the shades details with a smudge tool, I’m not detailing all parts of the piece because it would be an overdesign for what I’m planning, so let’s just add a small complementary color reflex on the side to make it mirror like, and blur.
Following this tutorial might help you achieve a similar result.
Highlight & contrast
Now, the secret technique for the high contrast effect, I bet you’re used to use add or screen for your highlights, and you’re not wrong, they are pretty good for realistic and easy highlights, but we want contrast, we want colors! So now I will ask you gently to set your light layer to “hard light” a common effect used for exaggerated and surreal lightning.
The colors end up being extremely strong in this mode, but still behaving like highlights, and here’s where the things get interesting, you might start feeling the contrast building up around.
Finishing touches & Halftones
Halftones are often used in comics and pop art, it’s everywhere honestly, and in my opinion, because it’s a complex tool to use, I'd rather draw each detail by hand, erase the edges and after rasterizing the layer, locking it on alfa, we color each one with high contrast and complementary colors, adding also some analog tints to the parts you don’t want to drag attention to:
Step 1: Draw the effect by hand using the tone feature inside layer property.
Step 2: Rasterize the tone layer, click on edit, and convert brightness to opacity
Step 3: alfa lock the layer, and paint the tones with the contrasting color, in this case, I will be using cyan, lilac, etc.
And done!
Decorations & Materials
Organizing & decorating
Now we’ve come to organizing the decorations (sketching it) It’s important to keep the size of objects balanced as well, small objects will always be around bigger objects and they’re better be paired in 3 elements, like this:
Using the materials i’ll be adding to the end of this article catalogue, I will prepare the terrain for the main decorations, stars! And put some smaller objects around first, (don’t forget to contrast their colors as well) focusing the placement where you feel it’s lacking details, and there’s a lot of places like this in this piece that i don’t feel like detailing, so take this tip with you.
Now, I’ts time to draw the stars, I’m doing this by hand using a charcoal pencil to add some extra details around, the stars colors are the most contrasting with the ambient, that’s yellow! But if your piece is build differently, keep in mind that your decor might need a different color to high contrast, so find it out utilizing some of the harmony techniques.
It’s going to be the same case with the lettering, yellow and cyan contrast, and after we are done, let’s add a white outline in everything.
Layer after effects
Color adjustments and shading adjustments might be necessary to improve the looks, so copy this to finish up your piece with layer after effects!
Conclusion
This was a hella big tutorial, but if you stayed with me until the end I hope it had been useful for you, but besides that, don’t stop experimenting with new colors and techniques, the white canvas is your playground and you’re yet a bright eye little kid! So keep honing your craft and never give up! After all, being able to create our own universes is just the best!
Bye!
Material Catalogue:
Users who liked this post


Comment