
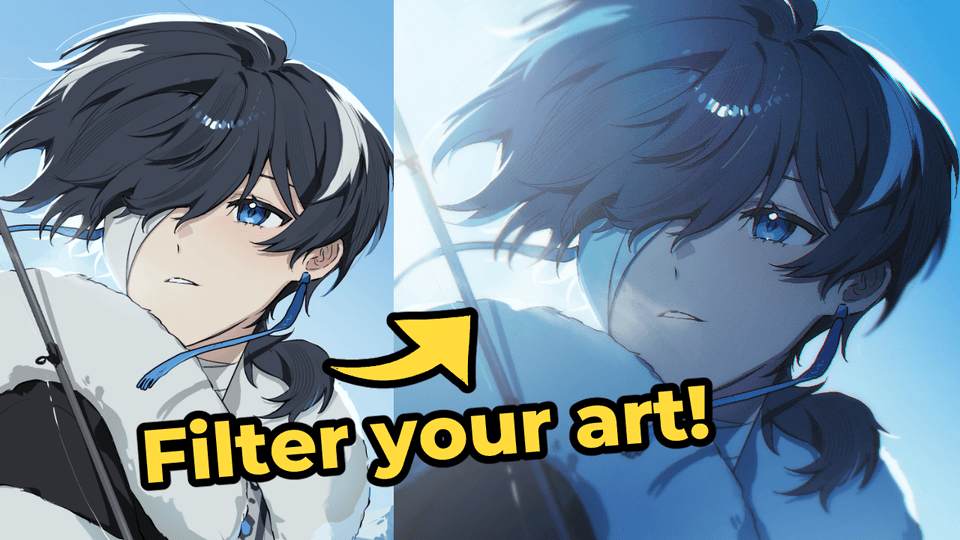
Step 1: Establish Light source
Find where the light is coming from in your image. In this image, the light is coming from behind the character through a window. Its also cascading around her.
Add a new layer and set the lay mode to multiply. Take a cool toned color and start painting in shadows.
Step 2: Soft Lights
Add another layer and set the layer mode to Add (Glow).
Using the soft air brush, air brush a pastel color (I used a champagne color) around the light source and on the image where light hits. This will help the hard lighting look cohesive.
Also airbrush in a line of light around the character to map out where to add sparkles.
Step 3: Hard Light
With the same pastel color, set a layer to Add (Glow) and clip it to your character.
Use a textured, square brush (You can find one in Clip Studio Assets). Start adding sharp lines of light where the light hits the hardest.
TIP: Remember that strands of hair in direct light tend to look very bright, like strands of light.
Step 4: Particles & Sparkles!
Pick a glitter/particle brush (You can find one in Clip Studio Assets) that has softer edges.
On top of the prvious layer, start adding soft cascading particles coming down from the light source. Add brighter, sharper particles following the soft line infront of your character.
Finishing touches!
To make the light more cohesive with the background and character, I like to add a gradient map over to whole image.
You can also add a blur effect to your particle layer if the particles still look too harsh.
Heres the finished painting!
Thank you for reading my tutorial! I hope it was helpful. Good luck!
Twitter - @EpiphanyJournee
Instagram - @Epiphanyjournee
Usuarios a los que les gustó esta publicación


Comentario