
Hello again everyone,
Daniel [@Ado_draw] here, I welcome you to another tutorial with me and on todays tutorial we will be looking at the common step which we can create unique Collage from existing illustration and also using asset materials which are gotten from CLIP STUDIO PAINT [CSP] asset, and we will also be looking at the utilization of the various asset materials in CSP as well.
Now todays tutorial is titled:
Easy Steps to Create collage using assets materials in CSP.
🔸🔸🔸
So before we can even start creating, drawing, adding or design any thing at all, we first of all need to know what we are dealing with here, this tend bring us to this conclusion, we need to first of all,
1. Get knowledgeable on what collage is all about.
Collage as I do believe we may have come to realize that it is a versatile art form that can be used in various artistic disciplines such as painting, sculpture, and mixed media and it demand us artists getting knowledgeable on the effectively design a good collage, so let's get started learning;
I• What is digital collage and what is it usefulness to me [?]
Digital collages are a great way to express creativity and showcase a collection of images (which can be from cutout photo only or uses of assets materials only or even the combination of both), could be ones most relevant work, or new ideas you may have as a visual creator. Also, digital collage is fun to make or create and easy to share online.
🔸🔸🔸
In this digital age, audiences are constantly exposed to new visual content, and collages are both captivating and unique, which makes them the perfect way to attract new audiences that might be interested in your photography and expertise.
Another thing which is very important is before you do anything, you first choose the digital designing studio you want to make use of and get to know how you can effectively use all the digital designing studio aspect (assets, settings and all) to your advantage.
🔸🔸🔸
On that Note, I will like to point out at this time that the digital designing studio am going to be using in today's tutorial will solemnly be CLIP STUDIO PAINT (CSP),
On that Note, I will like to point out at this time that the digital designing studio am going to be using in today's tutorial will solemnly be CLIP STUDIO PAINT (CSP),
And with that said, let's see some of the things (collage materials) we can use to make a suitable digital collage image.
II• What are the various kinds of materials that can be use in creating a unique Collage.
As we do know digital art or design world is different from that of reality but digital art or design reference the thing gotten from reality, so as we know that the collage as design using the various all sorts of items, such as rough paper cut out, photo images, asset materials and textures.
🔸🔸🔸
And most of the above can be located in CLIP STUDIO PAINT CSP SITE and download it onto the canvas.
Which to locate the CLIP STUDIO PAINT CSP SITE, you open the search engine in chrome and type in the following;
assets.clip-studio.com/en-us/
Or you can just click on the below link to go to the CSP asset site.
🔻🔻🔻
Now before we get start creating any collage images, we need to know how and where we can be able to get they various above materials that was mentioned above, hence that will tend lead us the next aspect.
2. How to download and import asset materials.
They are multiple sets of materials (such as assets materials) all over CLIP STUDIO PAINT [CSP] that are provided and available for artists (beginner and old user alike) to use with endless possibilities which we artist can use to our advantage to add to our image to give it a unique and whole new look.
(i) Locating of the decorative sub tool brushes
Way in which we can locate the [decorative sub tool] brushes and asset materials, is by firstly opening the CLIP STUDIO PAINT [CSP], create a new canvas indicated as [1], we can even adjust the size using the width and length bars as indicated [2] , the click on create canvas indicated [3],
🔸🔸🔸
The new canvas created will open, on the right hand side is the [edit bar] with sub tools brushes, click on any one of them,
🔸🔸🔸
we will be taking to the [select sub tool] dashboard indicated as [1 and 4], in the dashboard we will can then locate the the various decorative sub tool,
They various lists of decorative sub tool are as follows;
• Effect (decorative sub tool) as indicated (2)
-
This decorative sub tool as the name implies holds a collections of brushes used for add effects onto images. And the various brushes which can be located here are;
Sparkling - bloodstain - dappled light and so many others which can be seen in the image below indicated (3).
• Background (decorative sub tool) as indicated (5)
-
This decorative sub tool as the name implies holds a collections of brushes used for add details onto images. And the various brushes which can be located here are;
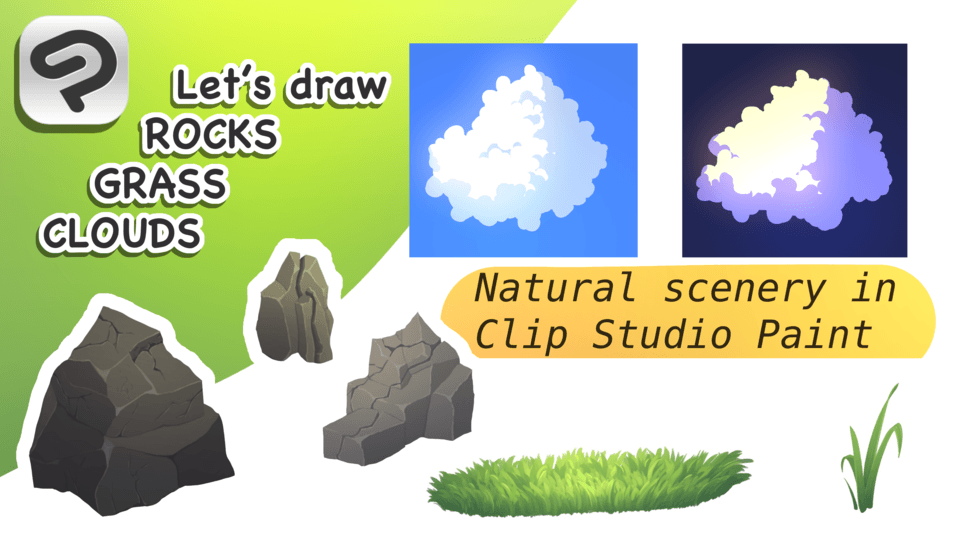
Leaves - Grass - trees and so many others which can be seen in the image below indicated (6).
🔸🔸🔸
• Clothing (decorative sub tool) as indicated (2)
-
This decorative sub tool as the name implies holds a collections of brushes used for add cloth designs onto images. And the various brushes which can be located here are;
Lace - Simple frill - Braid and so many others which can be seen in the image below indicated (3).
• Hatching (decorative sub tool) as indicated (5) -
This decorative sub tool as the name implies holds a collections of brushes used for add hatchs onto images. And the various brushes which can be located here are;
Gauze- Gauze cloud - Cross- hatching ×1 and so many others which can be seen in the image below indicated (6).
🔸🔸🔸
• Ruled line (decorative sub tool) as indicated (2)
-
This decorative sub tool as the name implies holds a collections of brushes used for add all sorts of line designs onto images. And the various brushes which can be located here are;
Waved line - Rough edged - Bumpy and so many others which can be seen in the image below indicated (3).
Onto the next aspect,
(ii) Downloading of Asset material
Asset material can be downloaded by doing the following,
Do Note🔹that there are many ways of accessing the CLIP STUDIO PAINT [CSP] asset store site, but the way I will be showing you is my own way of getting to the asset store.
Firstly, open the canvas, on the palette bar, click on the [Material icon] indicated (1), a mini dashboard will appear indicated (2), then click on the CSP mini icon indicated (3) in the dashboard.
We will the be taken to the asset store indicated (4), where we can locate different sets of materials indicated (6) or we can search for them using the search engine indicated (5).
🔸🔸🔸
While in the search engine, type in the material you want (which for this today is “yarn”) indicated (1), Different sets of yarn materials will then appear but we just need the first one indicated (2), clicking on it a dashboard will appear with the download button and some others, click on the download button, we will be redirected back to the CSP app and the item will start to download.
🔸🔸🔸
Pointer🔹Also if you download any asset, do leave a like and favorite, to help motivate the creator.
3. Step by step process that lead to the creating of a good collage image
At this point, we are now to look at the step we as an artists and designers needs to take to be able to create a good look or proper collage image. Now for starts;
I• Make a Choice of collage composition.
Compositions come in many different forms, and artists utilize them to organize materials in their works of art. From the captivating strokes of a painter's brush to the intricate arrangement of elements in a photograph, compositions play a fundamental role in creating visual harmony and evoking emotions in the minds of viewers.
🔸🔸🔸
The use of points of perspective are implemented to try and capture the fluidity and movement in ones piece. The beauty of working with existing materials is that you already have an infinite number of elements and starting points, so it is very much a process of trial and error to see what works.
When starting a collage, it is best to think of it in terms of composition, or even curation. Try using a variety of compositional techniques, such as the
Rules of third - Letter [L] composition - triangular composition - diagonal composition - Golden ratio and much more.
🔸🔸🔸
Artists uses the various kinds of Composition in a way to show specific feelings, tell a story, or show what something means in a single order, bring different settings of subjects together and then showing the way the interact with each other, take the both image below for example.
🔸🔸🔸
Notice: in image A, how the upper stroke that looks like a scale and the stroke on the left that looks like a less than sign are compliment the stroke in the middle that looks like a mandarin symbol, this set of composition is call a GOLDEN RATIO.
While in the image, we can see that the different subject or elements as in this matter are place different in their arrangement, the dog is place on the left side on the top line and the boy is position by the right side of the same line, while also the cat is position on the right side of the bottom line, hence this set of composition is called the RULES OF THIRD.
This sets of scaling objects and subject in an image is a very useful concept that needs to be firmly understood by every artist before you can even try creating even collages, cause without the proper understanding of composition arranging the various materials will become a problem; like take the image (A and B) below for example, examine them both,
🔸🔸🔸
Notice 🔹how for image A, the 5 characters are balanced properly will the scene, take the 1 characters (which are the characters on foreground) are of the same proportion to that of 2 (the midground character) and 3 characters (the background characters), while that of image B, the two characters for the foreground (1) are different from those on the midground (2) and background (3), with them each showing how further away the object is and the size.
So this is why it is advisable that before you (as a beginners) go about trying to create any illustration image or collage, you need to properly learn how to composite or arrange subject (which are elements) into a scene.
And if you are still having issues understanding the above, I do advice further learning and understanding of composition. And below are some useful articles link which can be of help for you to get started,
🔻🔻🔻
If this isn't enough you can search for more there are enough article on CLIP STUDIO PAINT website that can help you grow and build up your compositing skills.
II• Set or give your collage a theme.
Say we want to design a collage image and we a stuck with different questions [?] Which needs answering like say
• “What am I to design?" ,
• “What material are better suited for design a collage material?”,
• “And How do I know the materials to used?”,
🔸🔸🔸
It is best that before we even start designing our collage, we first of all set a theme that suit what we want to design It can be something as simple and obvious Like take for example, this sets of theme names (Flowers in a vase) and (Mixed media),
🔸🔸🔸
Note that what happened after we may have chosen our theme is that, we are give ideas from the themes name to perusing materials, things that resonate with this particular theme will jump out, helping you to build up a more specific image bank, as we tend to notice in the image below,
We will notice that the various materials which relates to the image piece which we are talking about, Like say (Flowers in a vase) materials that may come to mind are
(Flower - jug - photos)
While for (Mixed media)materials that may come to mind are
(photos - Background image - geometrical shapes - typography).
To list a few,
🔸🔸🔸
This is also a good way to churn out multiple collages focusing your choice of materials to fewer size, or to work in series, as the material you amass might be too much for just one piece of artwork.
III• Use layers to your advantage
Layers is a useful setting that allows us artists draw and render with freedom with multiple Layers, so utilizing that we can render our various elements on different Layers as shown in the below image, so that when we want to add or adjust a particular section of the added rendered, we can do so with easy.
And to locate the Layer settings, we can just do the following;
Click on the [Layer icon indicated as (1)]>[a dashboard with all the create layer will then display as indicated (2)].
🔸🔸🔸
Now while arranging your different sets of materials to form the collage image, do not Hold back from sticking anything down too early, and instead have fun playing around with lots of different arrangements. And remember, even if you do decide to stick it down but aren’t happy with the result, you can always take the material out and start again.
IV• Proper utilization of patterns and textures
Patterns and textures are easy to overlook the less as the obvious elements found in most design works (such as collage and other more). Instead of focusing on figurative imagery, look instead for repeating patterns, say on wallpaper or a carpet, or the voluminous billows of a silk skirt, complete with the interplay of light and shadow, or the fine texture of a feather, or curly hair.
🔸🔸🔸
Zooming in on these elements and using clever crops can transform them into abstract additions that catch the viewer’s eye.
V• Work with Letters (which can also be called typography)
Prominent letter [Typography], if used well can play a defining role in an artwork (especially in collage designing), and be used in creative ways that imbue it with new meaning, such as the 'Q' here, which could also be read as a mountain peak and acting like a background for the subject.
🔸🔸🔸
But be careful though, because sometimes incorporating typography or slogans can make your artwork look like an advertisement.
VI• Experiment with colors
Colour as all artists and designers do know is one of the most important elements in art and design, regardless of the genre. In collage, one way to familiarise yourself with different colour tones can be to set yourself the challenge of creating a piece using just one colour.
Say when we have a female character for example, try giving it a simple colour combination (like for the image below, I made use of four sets of Colours).
🔸🔸🔸
VII• Do not discard your mistake or Wrong turns
Now this may sound weird but whether you are working with real pieces of paper or with digital software, the process of cutting out is still the same. With existing material in particular (say your photo or a paper texture image etc), we can use the selection sub tool to select the portion of the image we want to cutout,
🔸🔸🔸
Different the image into three sections (indicated as 1,2 and 3), and the various Layers we can locate in the Layer by clicking on the [Layer icon].
🔸🔸🔸
Click on the clear entire layers and there we have crop the image leaving the part which we need.
🔸🔸🔸
Many happy accidents can arise through the removal of one image. When you cut something out, turn the (the top part of the head) around to the side and see if the reverse negative is an interesting form.
🔸🔸🔸
Can you still make out what the image was? If you put a contrasting piece of paper behind it, what happens? Play around with the negative, because there is a lot of opportunity here to make an exciting new work with very little effort.
🔸🔸🔸
VIII• Make use of reference
When we design we may even make use of photos, textures, and pattern which may sometime have be downloaded, maybe because the image we tend to be inspired by and believe.
Note: things we need avoid is when we make use of reference do not I repeat do not take the download reference image and add it to your collage work if it way no legally purchase to avoid Copyright.
IX• Use of geometry shapes,
The benefit of using geometric shape patterns is that they fit almost in any design, as long as you choose the right colors and the right theme. Combining shapes, flowers, and vibrant colors can result in a fascinating design that's sure to draw attention.
🔸🔸🔸
Now onto the Next aspect of today's tutorial.
4. CSP Tools and features I use for creating Collage,
They are allot of tools and features which can be use to create a suitable collage images which CLIP STUDIO PAINT [CSP] has made available for artists to make use of, I will just be mentioning some of the various tools and features that I use for the creation of the various collage images in this tutorial article. Now, they various features I found useful and I was able to use them to my advantage are as following;
• Assets materials
This are useful items which are available in the CLIP STUDIO PAINT [CSP] ASSET STORE, they are made available for use by officials and users like us.
The process to get the asset materials was mentioned in the above section.
Now, some of the assets I will be working with today are know as decorations sub tools and they are as followed;
- Background image
- Sea Shells
- Newspaper
- Beach ball
- Life saver
- Palm trees
- Patterns and Textures
🔸🔸🔸
Also I be using a one captured photo,
🔸🔸🔸
But do Note that you can use multiple sets of photos but be careful not to overcrowd the scene or background with some many photos that there is no space for other items to fit in.
Here below are some links of the assets material I will be using in today's tutorial.
🔻🔻🔻
• Selection tools
While in the canvas, the first thing we need to do before anything is to add the background of the collage which for today's tutorial is [Beach side image].
🔸🔸🔸
Doly Note🔸as this aspect of creating collage tend to be very important cause without a suitable background image that meets you choosing theme will through your work out of balance.
While in the canvas, we can locate the selection sub tool in the [select sub area]. Clicking on any sub tool on the [edit bar] as indicated (2) by the right hand side, click on any of the sub tool as indicated (1).
🔸🔸🔸
We will then be taken to the [select sub area] dashboard will then locate the [selection sub tool icon] indicated as (1), we will the locate the [selection area] indicated as (2), where the [selection sub tool] is located and we can then select that of the [Lasso sub tool] indicated as (3).
🔸🔸🔸
Using the [selection sub tool] indicated (1), we are able to select the entire portion of the subject, then click on the [invert selected area] as indicated (2) it will change point of selection (from the subject to the background), we can now click on either the clear layer as indicated (3) or crop icon as indicated (4) to eraser the background of the photo.
🔸🔸🔸
Don't see this as a set rule - You can take it as far as you want, for when we want to cut our subject or object, we can try cutting the border round the different sections of the subject, giving it a unique form or shape, So as for it to add it's own expression to the design,
Also it’s really fun to play with. Sometimes I try to match my subjects curves to the environment, and sometimes it happens very intuitively.
🔸🔸🔸
For further learning about the above, This links below will help.
🔻🔻🔻
• Transformation tools
Now, also after we use the selection tools to select any asset materials, an enclosed added color areas, images and among many, click on the [Transformation tool] icon below on the command bar, a box will cover our selected object and with that we can then moving them to anywhere we want them.
🔸🔸🔸
Note🔸we can locate the [Shortcut icon] on the [Palette bar] indicated (1), a dashboard will appear, click on the [set 2] indicated as (2), then we will see the three sets of transformation tools as listed;
• Scale/rotate.
• Free transport.
• Mesh transformation.
As indicated (3), using the pointers on the edges of the image, we can adjust the image to what we want to fit into the scene of or image as indicated (4).
Lastly, using the selection tools, we can select materials we want to alter the form materials to suit the scene, using the [transformation tool] by clicking on it.
We can just use the anchor points (the box at each point of the transformation box), adjusting them will easily change the form of the selected object.
🔸🔸🔸
Which is the next aspect we will be looking at, but if you are not ok with the above explanation, you can learn more about the above in the links below.
🔻🔻🔻
• Border effects
This one is a little more subtle and depends on visual sensitivities, but I like to work with pre-existing materials, shapes or photos (for example, take the below photo which was giving a border effect), and because of the border effect added to various materials pasted onto the image, we tend to help viewers notice the subject in the photo with ease.
🔸🔸🔸
Note🔸we can locate the [Layer property] on the [Palette bar] indicated (1), a dashboard will appear, click on the [Border effect] indicated as (2) to enable it, then set it to [Edge] indicated (3) while setting the [thickness of edges] to 10% indicated as (5) and the [Edge color] to White indicated as (4) in order to get a border line around the edges of the subject.
Now, looking closely at the both image (A and B) below, examining the both of them, even we as artist can see that that of the image on the right with border effect stand out the most more than that of the left.
🔸🔸🔸
With the above process done, we can now move and add they various materials which we want to be added to the image and adding border effect to them, we have already listed the sets of materials we want to use, so all we do now is just to add them all,
🔸🔸🔸
• Before Collage image,
• After collage image,
And all the material should be place on separate layer for maximum efficiency.
For more if you are not ok with the above explanation on adding of border effect, you can further learning about it by using the links below.
🔻🔻🔻
• Alignment tool
Adding of materials on to a scene without proper arrangements is most times not a good habit, cause for example say we add multiple typography (be it letters or numbers) onto a scene as shown below for the two options,
For the left side image, the letters and numbers are added randomly, meanwhile that of the right side image have the letters and numbers arranged properly using one of CSP features called alignment.
🔸🔸🔸
We can further learn more about the above mentioned feature using the links below.
🔻🔻🔻
5. The Step by step collage process.
At this point, before today tutorial is conclude, I would like to just run us through the stepwise or step by step arrangement process of the collage,
We start by doing the following;
Below is the Step by step rendering process;
🔸🔸🔸
Here is the finish image of the themed collage [Summer time at the beach].
🔸🔸🔸
Now this set of collage is the mixed collage below, tend to look much but the materials all compliment each other and have repeated or complimentary colour.
Below is the Step by step rendering process;
🔸🔸🔸
Finish Collage piece.
🔸🔸🔸
The collage is themed [Garden of green and blues], so that is mostly why I made so many of the material Blue and green.
Conclusion
Thanks everyone,
For going through, I hope it has you enlighten one or more persons on easy ways to turn their illustration or photos to collages, and last thanks also to CLIP STUDIO PAINT [CSP] for get us artist the opportunity to express and show the world what we have learned over time in the world of art and design.
Now, with no further Ado,
I bid everyone byeee.
Usuarios a los que les gustó esta publicación


Comentario