Animated perspective! (Background movement)

Animating Backgrounds in perspective is one of the hardest things you can do in Animation, and there are great examples of this in Studio Ghibli animation movies, for example the fly through the canal in Porco Rosso, another great example of animated backgrounds is Richard Wiliams movies like the mesmerizing checkered floor in, The Thief And The Cobbler.
The production of these animated perspectives was a time consuming and technical marvel in the times before computers, but now with software like Clip Studio, this can be achieved with ease. In this tutorial, I want to explain a technique that involves the use of File object, to import pre-generates animations and transform its shape to achieve animated backgrounds that almost look 3D.

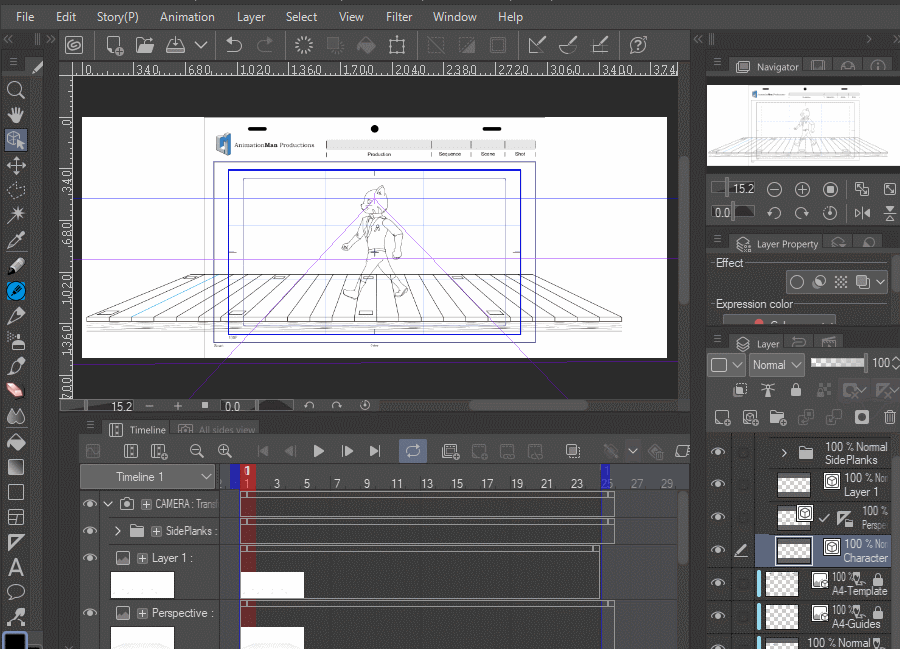
For the example of the beginning, I created this 24 frames animated loop, and the image below shows the environment in which it will walk. I painted a bridge, using one-point perspective, and this will be my reference for the complete loop.
I create three different tutorial explaining how to animate this kind of cycle, so if you need more information about this visit any of the next three links.
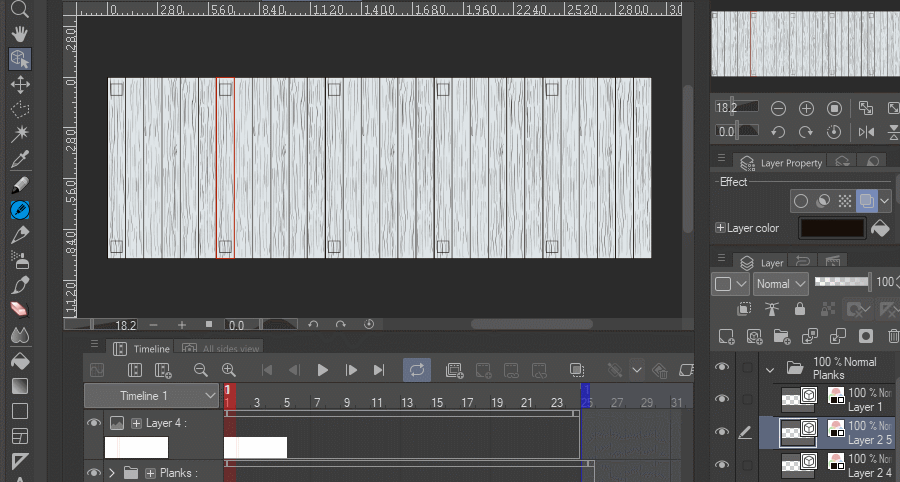
From the reference I can see that the minimum amount of movement required for the loop is the distance the character moves in the walk cycle, so at least six wood planks, this is because the cycle needs two steps to repeat itself. So knowing this I can paint the bridge from the top view with a minimal module that has six boards. In the image there are some squares that represent the point of the handrail posts, and they are the same length as the minimal module. You can see that there are four modules already visible, so to make the bridge loop, I need to animate an extra module.

After painting the 6 modules for the bridge, in a separated file, I animate the loop using the Enable Keyframe feature of Clip, so for the perfect loop I copy one of the rectangles outside of the folder that contains the six wood modules, this will be static and is in the perfect position for the end of the cycle. After enabling Keyframes is activated, I move the folder trying to match the red reference, you can drag or use the arrows to move the drawings. I paint a color texture for these piece but it is too complex and is better if it is not visible for the next part of this technique.

In the main file you need to impot the wood planks in File/Import/Create File Object, and you need to adjust the perspective of this file using the free transform tool, you can find it in Edit/Transform/Free Transform, or you can use Shift+Ctrl+T, and adjust the perspective trying to math the one in the reference. If you play the animation, the imported File object will show the animation previously created but it will conserve the transformation, so in this way, will create the effect of animated perspective.
I created a more detailed Tutorial on Youtube so please visit my video if you are interested in watching the entire process.
Thank you, If you have any questions please ask, I will try to answer them all.


Commentaire