How to make easy animated hot steam/smoke with dual brush
Hello everyone, Do you already try the brand new dual brush feature of Clip Studio? It’s very useful for making effect to the artwork!
I find that the combined mode for one brush is very helpful in my animation too, it helps me reduce the complication of layer usage.
This tutorial will show you the very easy way to create hot steam/smoke animation with a dual brush and vector layer. I’m keeping with the frame-by-frame style here, but instead of drawing everything, I use the dual brush feature to save my time. This may give some idea for your creation with it too!! Let’s have a try!

If you do not see the dual brush feature on your Clip studio yet, make sure you update it to the newest version!
Video Tutorial
Understanding the Dual brush
Here is a quick demonstration of the dual brush feature.
Basically, it’s the combination of 2 brushes together.
So you can create some easy interesting brush by just combine 2 brushes together
Here is 3 steps in conclusion for creating the dual brush !!
[[ Step 1: Register! ]]
To apply the secondary brush, you must add the second brush you want into the preset first.
Select the brush and [Show detail subtool] on the tool property panel
On sub tool detail popup panel, click on the [Add to presets] button
[[ Step 2: Apply! ]]
Apply the brush to the primary brush
(Just select the brush, the subtool detail popup will change to any tool we select)
On the 2-Brush shape, check the [Dual brush] check box to activate the dual brush.
Then select on the registered brush and [Apply brush shape]
Set the mode to normal, you will get the shape of both brushes overlapped together.
[[ Step 3: Config! ]]
The second brush also has brush dynamic customizations like the main brush.
You can adjust the brush tip, spraying effect, stroke method, and texture separately from the main brush.
The [Combine mode] is for setting how the second brush will take effect with the main brush.
With RGB value check, it will also show the color effect on the brush
The RGB Value is also useful for the [Decoration] sub tool, you can simply put it together like using overlapped layers.
Note: the mode of the brush will take effect only on the brush, not the layer where you paint it.
There is also some extra additional dual brush that Clip studio added to the standard brush set.
You can also study how the dual brush works by configuring its subtool details.
For more information about the configuration of dual brush, checking the tutorial from Official Clipstudio :
Create hot steam / Smoke Effect with dual brush feature
The hot steam effect is easy, we only need the center of the brush to become more transparent than the edge.
but to make it with a single brush is quite hard to design the brush tip,
let's make it with dual brushes!!
Use the G-pen brush as the primary brush, click on the [subtool detail icon] to edit the brush
Enable the dual brush, and select the pencil tool.
The pencil tool will give the soft edge look, but not as soft as the airbrush.
Then set the mode to [Substract] you will get a brush with transparency in the middle.
When increasing brush size, will not affect the 2-brush.
To fix this, increasing the size of the 2-brush
When satisfying with its look, enable the [Link to main brush size]
Now the 2-brush will relate to the main brush size
If you want more transparency. You can config the brush density of the second brush adding it to 100
When finish the configuration, click on the [Duplicate subtool] icon to save the brush.
The new brush is ready to use!!
Don’t forget to reset the original brush by clicking on the reset icon on the [Tool property] panel.
Create a new layer and paint it on your art
Clean up the unwanted area with the eraser tool
Use the soft eraser to erase at the top of steam to make it fades away.
For a more enchanting look, I set the layer color to [Add(glow)]
Animating hot steam: Preparing
Let’s make animation for the hot stream!
I will put the animation in this drawing
I recommend creating a new canvas and import the file as a file object instead of working directly on the original file, this will avoid accidentally touching on original layers.
Create a new canvas and import image, go to [File> Import >Create file object]
Import the file and it will show as one object
(you can edit the original file and save it. The change will show here automatically)
Create a new vector layer,
And draw the smoke with the smoke brush we create using gray color
If you point on the ink line with the [Control point] tool, you will see there is a lot of control points, we must simplify this for easier move in animation processes.
Use the [Simplify vector line] tool with [Process whole line] checked to simplify the ink.
Use the control point tool to edit the control points on the vector line.
Use the [Add control point] mode will allow you to add a new node on free space on the line and move the node
([+] symbol is showed on the pointer when able to add a control point there)
Adjust the size of the steam, use the [Adjust line weight] tool in [Scale up width] mode.
Make sure the [Process whole line] is unchecked
It will allow you to adjust the size of the vector line separately on each control point.
Use the Control point tool to adjust the steam to the cup and you’re ready for the animation process!
Animating hot steam: Animating
Before you make the animating hot steam, Let’s take a quick look at the easy hot steam movement in a loop animation.
Basically, we can see the hot steam as a wave, float up from the cup, like this:
To create a movement for the wave, specify the centerline and the wave shape, then set the moving point on the top of each curve.
Moving the node back and forth will create loop animation for the wave
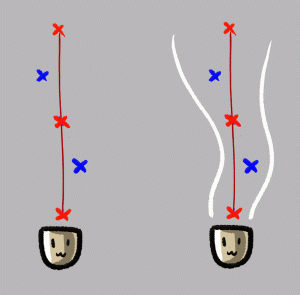
We will use this movement as the reference to moving the hot steam
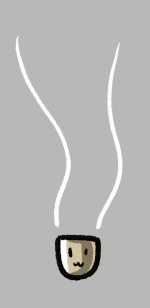
On the Timeline panel, click on the [Create new timeline] icon
(If you don’t have this panel, go to [Window > Timeline])
Create a new timeline with frame rate 8 and playback time 24,
this will be the loop animation for the hot steam.
(This is also compatible with Clipstudio Pro version)
We will make frame-by-frame animation for the hot steam.
Create a new animation folder
Double click on the smoke layer and rename the layer to ‘01’ and drag it to the animation folder
(When you create a new frame on the timeline, it will make a running number by order)
Right-click on the timeline and select the frame to make it appear on the canvas at the time point.
Duplicate the smoke layer, then rename it to the frame number where it will be shown
Assign the keyframe to the timeline
The 13th frame will be the final movement point of the steam animation before it moves back to the start frame again.
This will create the animation loop for the hot steam
Use the [Control point] tool to adjust the shape of the steam
Set the last keyframe to the first frame to use as the reference, this will be removed later.
Now create the in-between keyframes,
copy layer ‘13’, rename it to ‘19’, and assign it on the timeline.
Enable the onion skin, then you can adjust the shape to the middle of the previous and next frame.
Note: In the previous part, I recommend using gray instead of white for the steam, because if we use white, the onion skin will not able to apply the color tint to the object, it will look confusing when editing.
Repeat the step of making in-between keyframes by separating and move on the middle frame
Separate it halfways always make it easy to adjust
The more in-between keyframe, the more smooth the movement it is.
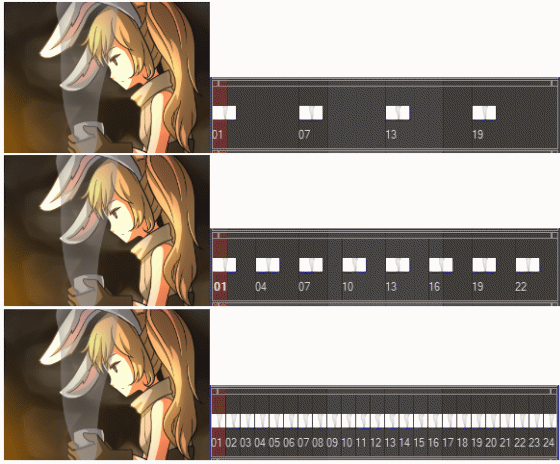
For the last part of the timeline, if you’re using Clip studio paint Pro version and have the frame limitation, here is the way to create keyframe 22-24
1. Create keyframe ‘22’ and adjust it normally with the referent of keyframe ‘19’ and keyframe ‘01’
(we need to set keyframe ‘01’ to the last frame to make loop animation)
2. Shift keyframe ‘22’ to frame 21, and repeat the step of creating in-between keyframes.
3. When finish, drag each keyframe back 1 frame
Then create the rest in-between keyframes
Note: For the Clip studio Ex version, you can put the frame 1 reference on frame 25 and delete it after use.
Result :
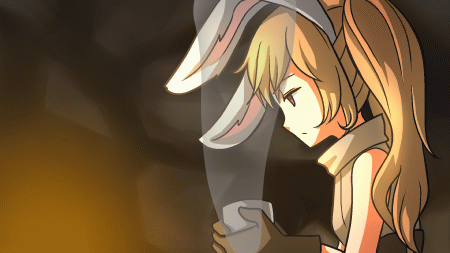
Animating hot steam: Final touch
When the animation is ready, it still not look like hot steam from the cup and not fit the image
Select the animation folder, and set the layer mode to [Add (Glow)]
(the gray color is always good with [Add (Glow)] mode, have a try on it ^ ^)
You can create more detail for the steam by copy the animation folder, and press [Ctrl+T] to create a free transform.
(or menu [Edit > Transform> Free transform])
Flip it with the [Flip] icon in the [Tool property] panel, it will make the direction of animation inverse too
Scale down the width of the steam and adjust the size until you’re happy with it
[Optional] you may enable the layer keyframe to edit the position and rotation of the steam
Create keyframes at the start and end of the timeline, drag the end keyframe to the edge to remove a little stop between loop.
Then select the frame you want and use the object tool to rotate/move the steam
It will auto-create a keyframe on the timeline.
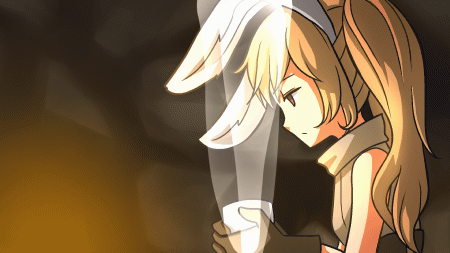
In the next step, we gonna set the effect to not overlap with the image with the layer mask
Group the animation folders together by [Shift]+click to select multiple folders and drag them to the [New Folder] icon
The layer mode of animation folders will be lost from the canvas
Set the layer mode of the grouping folder to [Through] to fix it
Then create the masking area, instead of drawing selection for it, go to the original file of the image
Right-click on the layer, [File object> Open file of file object]
On the character folder, make a selection by right-clicking on the layer,
[Selection from Layer > Create selection]
Create a new layer and fill it with white color then deselect [Ctrl+D]
Press [Ctrl+X] to cut the layer, or go to [Edit>Cut]
Then go back to the main file and paste it [Ctrl+V] or [Edit>Paste]
If your new canvas is the same size as the original image, it will overlap at the actual point of character
Erase the area where the steam is not overlap
Paint the upper area with the airbrush to create fading area
Then create a new selection from the layer, and hide/delete the layer
Then select the layer folder for effect, and right-click, [Layer Mask > Mask Selection]
And there you are, the smoke animation by using dual brush feature with the vector layer!!

[Optional] I add more light effect as if she’s sitting by the campfire, learn more about light vary on the scene in my tutorial: (final chapter)
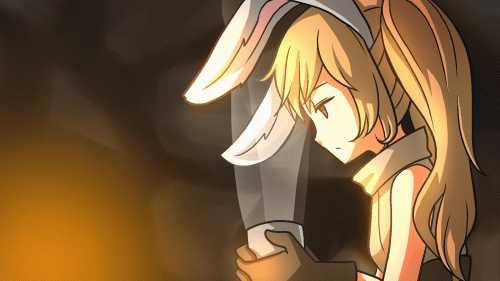
I hope you have got some idea about adapting the dual brush feature with your creation. The dual brush works well with the vector layer and you can edit it freely with the Object tool. It’s very useful when you want to create effects on your art!
Please stay healthy and safe!!
Have fun animating.


Commentaire