
Introduction
Hey-hey! ^-^ Welcome to my guide on the work optimization for artists of Clip Studio Paint. In this article, I will share several different hints that may optimize your workflow and, as a result, save a lot of time!
This will be a collection of several completely different hints that will come in handy for many tasks.
Interface Optimization
Time required upon remembering the hint: 15-30 minutes (once);
Potential time saved thanks to the hint: hundreds of hours (in sum, thanks to the optimized workspace);
Before we proceed to something more in-depth, I would like to focus on what might seem obvious, but still important. The interface. Unfortunately, not all smartphones support the wonderful Companion feature that allows you to perform many actions on your phone (like canvas rotating, brush switching, or colour picking) while leaving your main device’s interface clean and spacious. And the comfortable interface is one of the key elements to making your workflow optimized and operative. That is why I’d like to give advice on how you can alternate the workspace yourselves.
N|B: If you are not a self–interface-making person, which is totally fine, scroll directly to Special Stage where I teach how to apply prepared custom interfaces and how to save your current workspace if you need to return to it.
Stage 1 | Key Binding
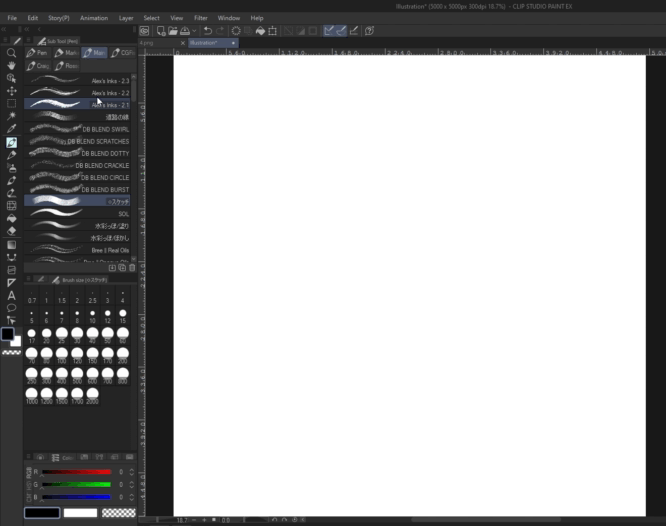
Before dragging and hiding all the windows and pallets, you need to understand what features you use most, and which of them could be removed from the interface in favour of binding them to your tablet or monitor’s keys. Usually, they are eyedropper, favorite brushes, or zoom. But you are free to bind any feature Clip Studio lets you.
To bind a feature, go to File → Shortcut settings… — there you can find the full list of hotkeys most of Clip Studio Paint’s features are assigned to (if some are not assigned, simply double click on its name and enter a desired combination).
What you are to do is to find what hotkeys your favorite features are set after. Then simply go to your tablet’s driver and set the very same keys after your tablet’s buttons in the preferences (the example screenshot demonstrates my Huion Kamvas GT-221’s driver window). That is how you assign a feature to a button.
Stage 2 | Interface Alternation
Once we have prepared for the changes, it is time to find out how to actually perform them. You might have gotten used to the default interface (and I myself switch to it from time to time, as well as to several other interfaces I made on my own). But there is always a better option. The team of Celsys did a great job with the default interface — they provided a compromise decision between space and showcasing the main windows of the program. But with time, every artist grows a desire for something more personal, something that would satisfy ALL of their needs. And that is where we face the Window and partially the View menu. These are your main friends in alternating the interface. The View menu can basically be divided into 3 sections (as on the screenshot below), and here are their definitions:
1. Canvas features. These settings mainly let you interact with the canvas - rotate or flip it, for example. Some of the features have been duplicated into the Navigator (canvas overview) window for convenience. Do not mistake them for similar options in Edit → Transform for these features in View can only flip the “camera”, but they don’t mirror all the work and layers;
2. Interface features. These elements turn on and off some constant interface elements and windows — those are your main points of interest in altering the interface. The “On-screen area” settings are only available when you work on a webtoon canvas (can be chosen while creating a new canvas);
3. Actions. A set of different options that allow you to perform different actions.
Section two is what you need to operate with the interface. It controls the displaying of several bars, as well as allows to turn on/off the grid and the ruler, and a couple of other actions.
The Window menu is where most of the magic is hosted. Basically, 95% of the buttons you see there are toggles that remove and summon different windows you see in front of you. The names of the windows clearly hint at what each button does — you can go ahead and click, for example, the Layer button. This will remove the list of your layers from the screen. Don’t worry, you can get this window back by clicking the same button.
Most of the buttons are obvious, and their brief descriptions are indicated in the screenshot below.
However, there are several parts that require additional explanation:
- Canvas sub-menu: basic operations with canvas or fitting all open canvases into a cascade position/fit into the workspace;
- Workspace: operations with your current or registered workspace(s) — detailed explanation is in the Special Stage;
- Palette dock: control over windows’ properties (lock windows’ width/height so you cannot adjust them, make certain windows as pop-ups (letting them disappear once clicked somewhere behind their border), etc.).
Use all these functions to leave only the windows you will need. “Pallete dock” is especially interesting: if you need a certain window to be present, but don’t want it to take the space, use one of the toggles with the “pop-up” word in it - in this way the chosen windows will disappear once you click anywhere beyond its borders. Here is how it works in an example of the brushes palette:
In this GIF the Sub Tool tab (brushes) operates as a regular tab — it won’t go away once you start drawing on a canvas. But after it was hidden and switched to the pop-up mode, it will always be disappearing after you click somewhere aside from it — that saves a lot of space.
And of course, there is regular window moving: simply hold any window’s name bar and move it anywhere you like. You can also manually adjust its width and height.
Special Stage
As indicated at the beginning of this hint, in this stage I will teach you how to get comfortable interfaces without spending time and deciding on how to make your own. Getting comfy presets without creating them is actually another way to wisely optimize your time and energy spending if you know you are not able to do this yourself for any reason.
First, I would like to teach you how to save your current interface before you apply a different one. Even if your workspace is close to the default one, you might had applied some small changes you forgot about, so we will save your present one for your convenience.
Open the Window menu and go to Workspace. Then click on “Register Workspace…”, give a name to it, and press OK. From now on its name will be displayed in the Workspace menu — clicking on it alternates the interface according to the saved preset.
Now let’s find a custom one. Open Clip Studio Assets.
At the end of the search bar, click on the Detail button and choose Workspace among the filters.
Choose the desired interface and download it (be attentive for not all of them are free). If you are not sure and just want to experiment, you may get one of mine I made myself:
Now go back to Clip Studio Paint. Open the Download folder in the program, where all your downloads from the Assets are displayed. At the very top, there will be the downloaded interface. Simply drag it to the canvas area and apply it. Now you have a new comfy interface for faster and better work ^-^ And both your saved initial workspace and the downloaded one are stored in the Workspace menu — you can switch between them in an instant~
Removing the white background accurately
Time required upon remembering the hint: 5-7 minutes;
Potential time saved thanks to the hint: up to hours of manual work (per each try);
From the interface advice, we are moving to something more specific. There are times when you need a specific element for your design or matte painting process, or for any other reason, but you are not able to find it with a transparent background. Although my next hint is not as universal and is basically meant to help with removing the white background, it still might come in handy in many situations.
N|B: This hint was created as a solution to the white background that needs to be removed scenario. However, if the body of the image also has white elements, they will be removed as well and you will need to restore them manually.
For this example, I took my artwork with my character Kurotsu (I’m still training drawing hands properly ^-^). This piece has a pure white background and harsh edges around the character with complex structure and semi-transparent elements — a perfect candidate for demonstration.
The best thing about my method of making the background transparent is that you don’t even need to touch the canvas* — all you need is already in Clip Studio Paint’s features.
First, duplicate the image layer and apply Clip to Layer Below to the copy. In this way, we save the colour information for our updated image.
Now switch to the original image below and go to Edit → Convert brightness to opacity. The feature works in the following way: the brighter the shades, the more transparent they become.
So pure white pixels are now removed completely (the colours are still visible thanks to the copy we’ve made).
Now create a new layer, move it below the rest and fill it in with white colour. You may have noticed how much brighter the image looks now — that’s due to the desaturated original layer we altered with the “Convert brightness to opacity” feature.
Correcting this effect is easy: duplicate the original layer (that now has transparency) and combine the copies. Then do it again. And again. You should do it approximately 5-7 times or until the saturation of the image becomes identical to the original.
Now if you compare it with the initial image, you will see there is actually no difference between the two, but the updated version is now separated from the background.
Now I turn the separate background layer off and you might notice some imperfections. I am specifically talking about the disappeared white strokes in Kurotsu’s hair. But I took this sketch for this example on purpose, to demonstrate you the limitations of this method and how they can also be corrected. It would be impossible to get rid of the background in this image manually without spending hours of hard work and keeping the semi-transparent elements intact. So cleaning up after some flaws of my method would be much easier and faster.
*The optional stage when you actually need to touch the canvas (if the body of your image also had some white elements): To return the white elements, simply create another layer and place it under the desaturated body of the image. Then you have two options: to either fill the missing areas with white colour with any brush or manually cut the same areas from the original picture and paste it into this lower layer without changing their position. Either way, you will replicate everything missing successfully and fast.
The last stage is to combine the three image body layers you have: the colour info layer, the transparent body, and the white elements replica — upon combining them you finally have a complete piece separated from the background! ^-^
How to use convenient brushes in Colour Mixing without switching them
Time required upon remembering the hint: 30-60 seconds (once);
Potential time saved thanks to the hint: several seconds for switching a brush (per each action);
Colour Mixing is a relatively new feature in Clip Studio Paint. It is a small window with a separate “canvas” that allows you to mix different colours there and pick the mixed shades fast. Basically, a palette that traditional artists use. If you turned it off for some reason, you can get it back in Window → Colour Mixing, the menu that we have already reviewed briefly today.
Normally, there are four main tools:
Use same sub tool as canvas — lets you draw in Colour Mixing with the picked brush - requires manual brush switch;
Brush — regular round brush with standard mixing values;
Blend;
Eyedropper.
Yes, you can use basically any brush you desire here with the first tool, but you have to constantly go and switch brushes if you want to draw with one brush and colour mix with a different one. But there is a way to constantly bind a specific custom brush to Colour Mixing. First, choose the brush in your collection you would like to save in the Colour Mixing palette. Then press the three-line icon in the window’s top left corner and find the “Register current sub tool” section.
You will now have to choose which of the basic tools to be replaced: the brush, the blend, or the eyedropper. The latter is the essential part of the feature, so I’d recommend keeping it. And since you don’t need the default brush here, replace it with yours.
Now if you try drawing in Colour Mixing’s canvas, you will see that the brush was switched to the custom one.
Determining center with rulers
Time required upon remembering the hint: 30-60 seconds;
Potential time saved thanks to the hint: depends on the need — up to dozens of minutes of elements positioning (per each action);
Although I believe we are yet to see an automatic centering and positioning advice mode in Clip Studio Paint, there are still ways to precisely place an object in your canvas without it. I use rulers for this.
What you need in the first place is the side rulers as seen in the screenshot (if you have them disabled, turn them on in View → Ruler Bar).
Now you need to literally drag the canvas rulers out of the Ruler bars — two of them, a horizontal and a vertical one. Follow the actions you can see below. The rulers are depicted as violet lines by default.
Switch to the Operation mode and click on any of the rulers you’ve created.
Now in the Tool Property menu of the Operation mode, you should be able to see the coordinates bars (as seen below). If you have clicked on the vertical ruler, enter the value that is half of your canvas’ height. And half of your canvas’ weight for the horizontal ruler.
So if your canvas is 6000 x 3000, you must enter numbers 3000 and 1500 accordingly. The perfect center of your canvas is where the rulers cross.
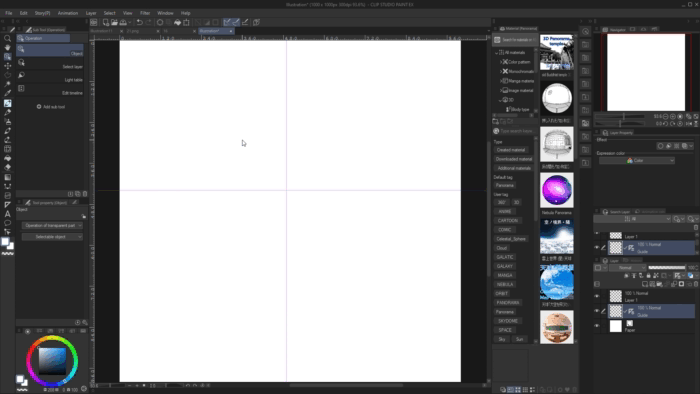
How does this help? Import any image or element you like — you will see there is a small cross on it as well when you are in the transformation mode (when dragging, zooming, and rotating are available). You need to place the image in the way its center cross lies perfectly in the rulers’ crossing. In this way, you place it perfectly in the center of your canvas.
Use rulers and coordinates to create more precise structures! ^-^
Conclusion
These are the main hints I use while drawing or working on design elements. Considering how much time we artists can spend working on a piece we are passionate about, I do hope these hints, tips, and advice will be of use to my fellow artists! Thank you for your time! ^-^
この投稿を「いいね!」したユーザー


コメント