Making backgrounds & accessories with 3D Primitives

-
 MVP ◆This user has contributed greatly to the management of the community, by posting many great responses to the questions asked. Once every three months, MVPs are determined based on the points earned during that period and will be recognized accordingly.
 -
 New Valuable Player (NVP) ◆These are the next-best contributors to the community after MVPs. This is awarded to users who have not yet won an MVP award, based on the number of points they have earned.
 -
 Official Expert ◆Chosen out of all MVP awardees, who are already proof of excellence, this is a testimony of outstanding correspondence in the community. After careful screening, they are appointed by CELSYS and assume their position.Note: Formally called “Evangelists”
 -
 CELSYS official moderators ◆Moderators are official CELSYS staff members who are fluent in Japanese as well as various other languages. As moderators are not experts on software or creative work, they will not be able to directly answer your questions. However, moderators will provide communication and language support to ensure that everyone can smoothly communicate with each other.
 -
 CELSYS officialThis is the official administrator account.
This article will introduce new 3D features and ways to use 3D primitives added after ver. 1.11.6.
For more about Panoramas, see the following article.
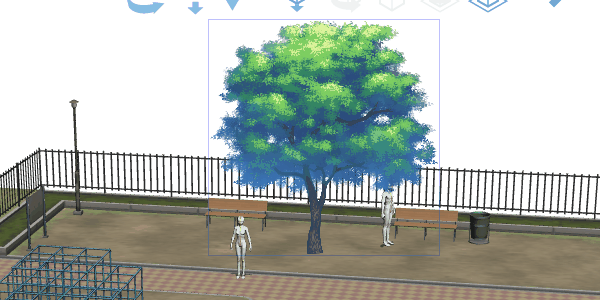
(1) Create backgrounds by combining 3D primitives
You can adjust the number of corners, the length, width, height, and depth of the six basic 3D shapes: Cube, Sphere, Prism, Pyramid, Plane, and Polygon using the manipulator on the canvas or the controls in Tool Property palette. This allows you to freely combine 3D shapes like blocks on a 3D layer to create a background layout without 3D software or technical knowledge.
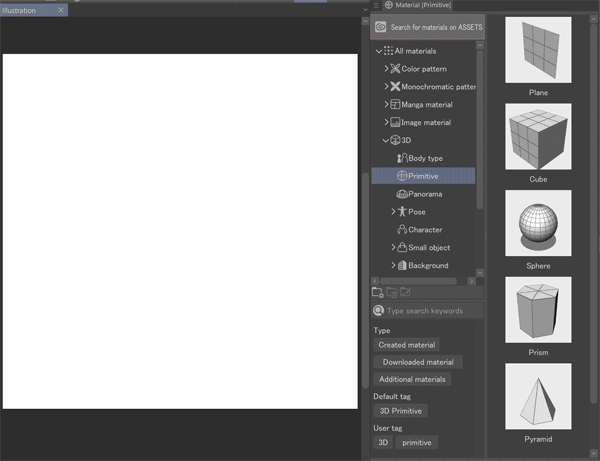
3D primitives are stored in the Material palette > 3D > Primitives.
You can drag and drop them onto the canvas.
For example, after creating a set of rooms using multiple 3D primitives, you can freely choose the angles to use as templates for your work.
It is also possible to set a 2D image to a 3D planar texture and display it as if it were 3D.
The basic operation of 3D primitives is the same as 3D object materials. For more information on how to use 3D materials, please see here.
(2) New 3D Features
After Ver. 1.11.6 the following features that are useful when using 3D materials together with 3D primitives were added.
●Snapping
Snapping allows you to snap 3D materials to the positions, rotations, and sizes of other objects when moved with a pen or mouse. When snapping, you'll see a bounding box and other snapping effects."Snap and move" is not supported.
You can snap even when multiple 3D objects are selected.
●Rotation
Rotation allows you to snap a rotatable 3D material at angle of 5 degrees. The snapping angle can be changed from the Mode setting in the Sub Tool Detail palette.
Multiple selected objects cannot be snapped.
If you don't want to snap to the 3D model, you can turn snapping off from the “Snap to 3D models” icon on the right side of the Movement manipulator above the 3D material.
●Aligned copy
This can be used when you want to arrange several materials at the same interval, such as when you want to arrange many desks and chairs the same direction.
1. Select the object you want to copy, and then copy and paste it.
2. Move the duplicated object.
3. If you paste it again without copying it, it will be pasted with the same spacing it was moved in step 2.
(3) Unique Features of 3D Primitives
3D primitives can be manipulated in the following ways:
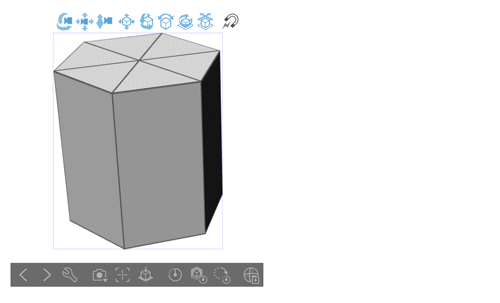
3-1 Height, width, and depth can be changed.
3-2 Show/hide the number of divisions and faces
3-3 Color, texture, and opacity can be changed
3-4 Add unevenness to texture using a normal map (Ver.3.1 or later)
3-5 Rotate and follow camera
3-1 Height, width, and depth can be changed.
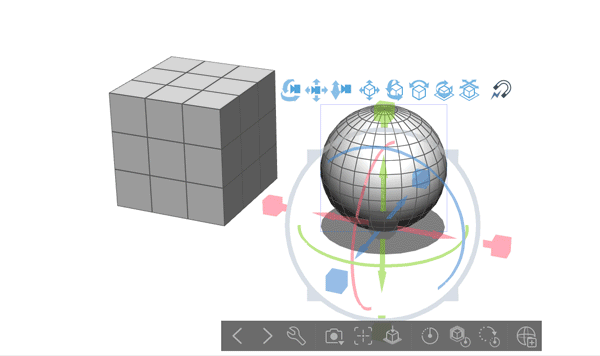
Select a 3D primitive with the Object sub tool to display the manipulator. Unlike manipulators for 3D object materials, each of the XYZ axes can be adjusted independently.
If you want to change the length, width, or depth, adjust the corresponding axes X (red: length), Y (green: width), and Z (blue: depth), respectively.
If you want to change the overall size of the image, manipulate the outer gray ring.
Note: The z-direction cannot be changed for Plane or Polygon. If you need the object to have depth, use the Cube or Prism.
If you want to set the size precisely, enter values in the X, Y, and Z sliders of Object scale in the Tool Property palette. The Slider supports file export in centimeters. 100 = 100 cm
3-2 Show/hide the number of divisions and faces
Spheres, Prisms, and Pyramids correspond to the Sub-divisions in the Tool Property palette, so their shapes will change as you increase or decrease the number of sub-divisions.
Prisms and Pyramids change with X. Spheres change their shape with X and Y.
For squares, and the tops and bottoms of Planes and Prisms, the number of wireframe lines shown on the surface changes according to the number of Sub-divisions.
Wireframes can be used as a guide for drawing or as a pattern, but if they are not needed, you can hide them by unchecking Show wireframe.
3-3 Color, texture, and opacity can be changed
3D Primitives are light gray by default, but you can adjust the base color in the Tool Property palette, set your own textures, or use an image from Image Material in the Material palette, or on your device.
(1) Color
Tap the color icon to display the Color Settings dialog and select a color of your choice.
(2) Files, Materials, Reload, and Delete
You can set or remove textures applied to 3D primitives.
Tap File to select any image on your device (clip/lip/psd/psb/tga/tif/bmp/png/jpg) and apply it as a texture.
Tap Material to apply an Image Material from the Material palette as a texture.
Tap Reload to reload the image from the file path set to the primitive.
Tap Delete to remove an applied texture.
(3) Map
Tap Export to export a UV map. You can add and edit drawings by referring to the exported UV map.
(4) Alpha
Adjusts the display when a color or texture is being set. The does not affect the wireframe.
Opacity: Displays the drawn portion of the texture as opaque, regardless of its transparency. Fully transparent areas of the texture will show the ground color of the 3D primitive.
Remove with threshold: Specifies the Alpha Threshold. If the value is greater than the threshold, it will be opaque; if it is less, it will be completely transparent.
Semi-transparent: Allows you to change the base color of the 3D primitive, or the opacity of the texture if you have one set.
(5) Texture settings
If the texture you have set is not in your ideal position or size, then you can go to [Tool Property] palette > [Texture settings] and try configuring the [Tiling], [Scale ratio], and [Position].
Note: Drag and drop the Image Material from the Material palette onto the 3D primitive to set it as a texture. Also, dragging and dropping onto a 3D layer other than a 3D primitive will automatically paste it to the planar primitive and display it on the canvas.
3-4 Add unevenness to texture using a normal map (Ver.3.1 or later)
A Normal map is a type of texture that simulates unevenness on polygons, rather than creating this unevenness with additional polygons. You can express unevenness by loading an image converted to a normal map onto a 3D primitive as a texture.
■ Creating a normal map texture
Open the image file you want to use as a texture in Clip Studio Paint.
You can convert the drawing content on the selected layer to Normal map by selecting the [Filter] menu > [Effect] > [Normal map].
Save the file after the conversion.
■ Importing Texture onto 3D Primitives
Select the 3D primitive you want to load the texture onto and open the [Sub Tool Detail] palette. Import the normal map texture from the [File] option under [Primitive normal map].
The normal map texture is then applied to the 3D primitive.
The texture's [Scale ratio] and [Position] can be set in the [Texture settings] just like regular textures.
By changing the Primitive Color you can change the feel of the normal map.
3-5 Rotate and follow camera
When using the 3D primitives Plane and Polygon you can set the camera to follow only horizontally or normally by going to [Tool Property] palette > [General primitive] > [Follow camera] > [On] or [Only horizontal]. When set on, the plane will always face the direction of the camera.
Setting the texture will change the scale of the Plane primitive to match the aspect ratio of the texture.
The [Billboard] in the [Primitives] section of the [Material] palette already has a texture and is set to rotate and follow the camera.
When follow the camera is set on and goes diagonally and then the camera gets set to [Only horizontal] the object will go horizontally while tilted diagonally.
If you want to set it back to the original angle, tap [Reset model rotation].
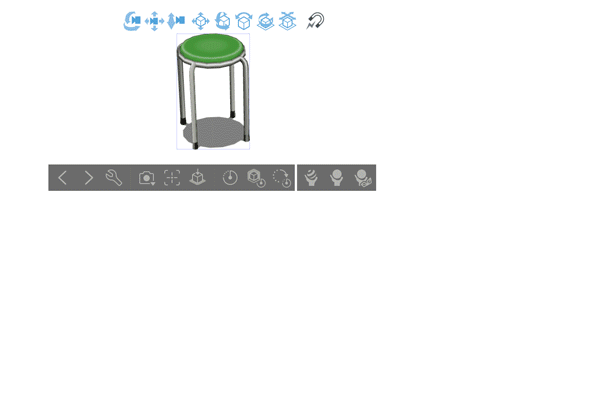
(4) Registering 3D primitives as materials
●Registering a single 3D primitive
By tapping [Register 3D primitive to material palette] on the right end of the object launcher when a 3D primitive is selected, the [Material property] dialog will be displayed. Enter the material name and save location to register.
■ Registering a 3D layer containing multiple 3D primitives
A 3D layer containing multiple 3D primitives can be registered in the [Material] palette as a 3D image material. You can register a 3D layer on the canvas by dragging and dropping it into the [Material] palette, or by selecting the [Edit] menu > [Register Material] > [Image].
In versions 3.1 or later, you can import registered 3D image materials into existing 3D layers. For more information on how to import the materials, please read the next part on: "(5) Importing 3D Image materials".
●Publishing materials to Clip Studio Assets
A single 3D primitive or a layer containing multiple 3D primitives can be published to Assets as a material. Materials that can be published on Assets are limited to those for which the posting user holds the copyright and other intellectual property rights. Please make sure you fully understand intellectual property rights before posting.
Note: Points to note when publishing 3D layers
If a 3D layer contains a ruler, it cannot be used in Clip Studio Paint Debut. To make the material available in Debut, please delete the ruler before publishing.
3D image materials that can be published to Clip Studio Assets include 3D drawing figures, 3D Primitives, and 3D head models that are included with Clip Studio Paint, as well as your own 3D models.
If you publish a 3D layer containing 3D materials or 3D models created by someone else to Assets, it will be subject to deletion. Please avoid including these in your materials.
For more information, please refer to the Guidelines About Posting and Behavioral Guidelines and Best Practices for Posting on CLIP STUDIO ASSETS
Please take a look at this article regarding how to use 3D materials.
(5) Importing 3D Image materials
From the July 2024 release (Ver.3.1) onwards, you will be able to load 3D image materials (3D images) containing multiple 3D models into existing 3D layers.
Select the 3D layer you want to load the material into. Select the 3D image material with the registered layout from the [Material] palette and tap [Paste].
The 3D image material will be pasted onto the selected 3D layer.
Users who liked this post


Comment