How To Master REFERENCE LAYERS
Hello Hello! I’m Jay,
I’m a professional illustrator that’s been using Clip Studio Paint for over 4 years.
And today I’m going to teach you how to MASTER Clip Studio Paint’s Reference Layers so you can utilize them in your workflow!
I've also made a video walk-through of this tutorial if you prefer learning that way!
What Can I Do With Reference Layers?
You'll be surprised to know that reference layers are used for many cool features in Clip Studio Paint!
Some examples include
The Freeform Gradient tool

Paint bucket settings for clean up work, so your shading and effects stay within the lines

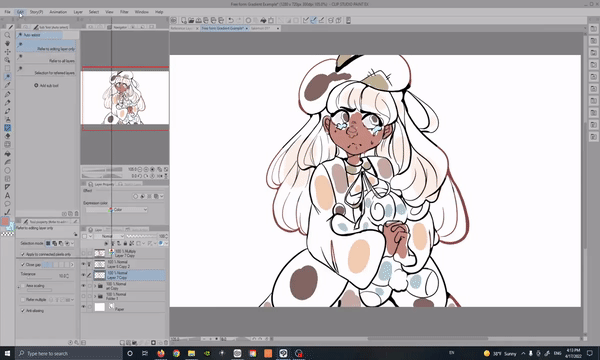
For you painters out there you'll definitely have some fun with the "Colorize" feature in Clip studio paint
Annnd for our comic artists
Get excited because we'll also go over how to use reference layers and a 3d model to create CUSTOM LOGOS that can be adjusted in 3d space!!

There's a little bit for everyone packed into this tutorial so stick around!! And let's get started!!
Setting Up Reference Layers
So what ARE Reference layers?
Reference layers are a layer setting option that allows you to fill and draw on other layers while referring to a specific set of layers or a singular layer.
Reference layers are a super handy tool to add to your digital toolbox so before we jump into using them, let's talk about how to set them up first!!
There are a few ways to set up Reference Layers
With the layer you want to set as a Reference selected, Hover over the top menu and go to "Layer"
Then go to "Layer Settings" and click on "Set as Reference Layer"
You can also
Right click directly on the layer you want to set and
go to "Layer Settings" like before and click on the "Set to Reference" option again.
You've probably never noticed the three lines next to the layer tab. If you click on it it'll also bring up the menus previously shown.
Fun fact! The "Three Lines Icon" is commonly called the "Hamburger Menu" and it's a space saving mechanism that's used across many different applications and websites!! Think of it as an extra options button.
Now that I've pointed it out, take a look across your workspace! They're everywhere isn't that neat?!
I'd like to introduce you to one final way that will be much faster and more practical to use in your workflow.
You might be antiquated with these icons in your layers panel, If you mouse over any of them you'll get some text that reads what each one does.
From left to right we have;
"Clip to the layer below"
"Set as Reference Layer"
"Set as Draft Layer"
"Lock Layer"
and "Lock Transparency"
Today we'll only be focusing on the Reference layer button
Free Form Gradient Tool
Before we use the Freeform Gradient tool let's set our line art layers as reference layers
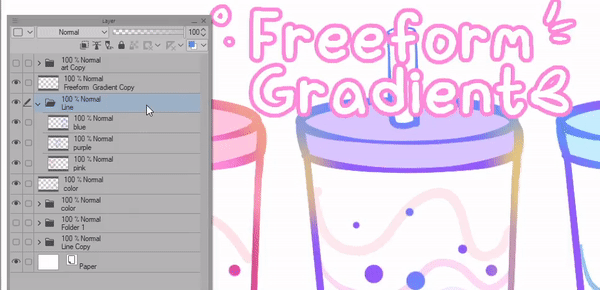
You can either set the whole line art folder as a reference OR set multiple layers as a reference by holding down the control key.
It's important to note that you need to hold down control and select your layers all at once otherwise when you set one layer then move to the next it won't set them both as reference layers but rather switch between to the most recent layer you set as a reference.
You can set any kind of layer as a reference layer! Think Vector, 3D, Tone and more except for correction layers so watch out for that!
Don't worry if you can't find this tool right away
Click on the gradient tool and in the sub tool menu you'll find it there!
We'll be using the Normal Paint tool in this example.
In the tool property menu look at the section that says "Refer Multiple" and click on the Reference layer icon
Now you can use a brush and put down the colors you want to use.
I'm using the G-pen but set the anti-aliasing at the lowest. The Freeform gradient tool doesn't work well with brushes that have a fading effect like this

Now that I've placed the colors I want to use I can click and drag and create my Gradients!
I encourage you to try out all kinds of shapes and patterns in your work, I'm sure you'll absolutely love playing with this tool.

However, the default settings the tool doesn't quite give the results I'm looking for
Depending on the artwork you're working with you'll have to tinker with the tool's settings.
I personally turn off the Close Gap and turn the Tolerance settings all the way up so the fill doesn't leave any pixel fragments.
There are so many ways you can tool and I hope this gives you some inspiration for your next project!!

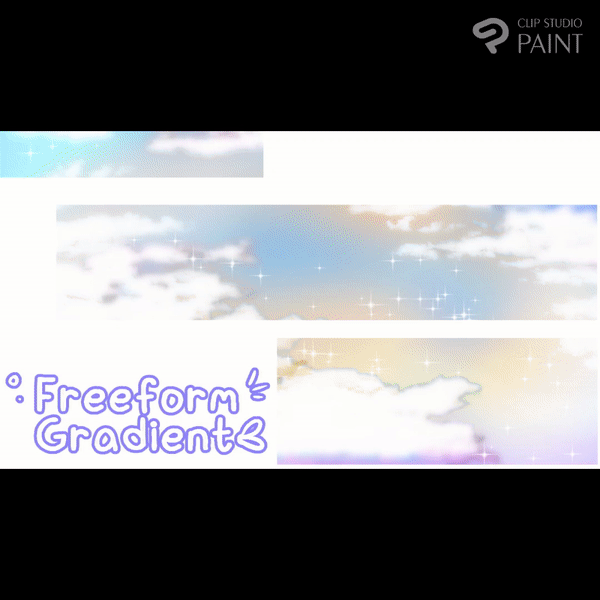
This is a super quick and easy sky that I also made using the Freeform gradient to give you even more ideas for how you can utilize this fantastic tool!
Refer to Reference Layer Paint Bucket Settings
Let's say you want to add an airbrush effect to your artwork but don't want the colors to escape your linework.
There's a few ways you can approach this,
#1 you could use a clipping layer on top of your flats layer.
and another way is to use some handy settings on your paint bucket tool! Yes that's right, you can use your paint bucket as a giant eraser.
With your lineart set as a reference,
Select the "Refer to Other Layers" Paint bucket, then select the transparent square underneath your colors
Next in the tool property settings go to "Refer Multiple" click the "Refer to other layers" icon
and then click the plus icon.
This will show some extra settings you can add to your paint bucket tool
from there click on the icon that says "Exclude Editing Layer"
Now you can do your shading and effects and simply click and the paint bucket will erase all the overflown areas!
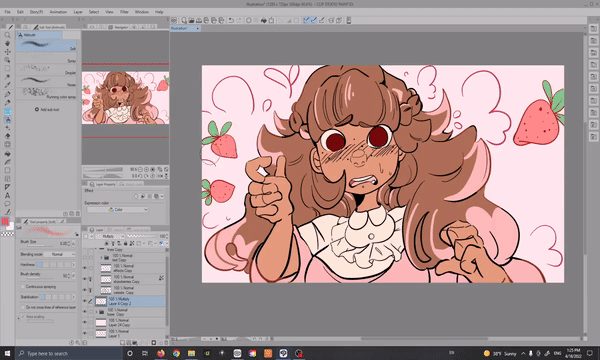
You can also set a line less layer as a reference and use this tool to create shading and other lighting effects.
I would suggest turning off the area scaling if you find the paint bucket taking away too much of your color but this really depends on the effect you're going for and the drawing that you are using.

If you want to save these settings for later without having to worry about changing your settings over and over again for different purposes,
Right click on your paint bucket tool and hit "Duplicate sub tool" so now you'll always have a copy!! You can also change the name by clicking on "Sub tool settings"
After setting a new tool with these settings I recommend resetting the original paint bucket to default so you can use it normally like before.
This clock icon will reset all of your settings to default so if you ever worry that you've messed up settings on any tool or brush you can click on this button in the tool properties panel to fix it!
The Colorize (Technology Preview) Feature
For those who love to paint but are a little intimidated by the blank canvas,
Clip Studio Paint offers another fantastic tool that automatically fills your lines.
Set your Line art to a reference layer, then in a layer underneath place the colors you want
go to "Edit" then "Colorize (Technology Preview)"
and click "Use hint image and colorize"

This tool has a phenomenal understanding of lights and shadows and while it might not look like much at first, these colors are a perfect under painting to work with
But what if you don't have any colors in mind?
Check this out, you can colorize your work without any color hints!!
This time select your line layer and hit the option "Colorize All"
This is the result I got and I was so inspired by this color palette I decided to render the drawing so you can fully see the creative potential this tool can provide
Automatically the layer created by the colorize tool will have a white fill but if you use the paint bucket settings from earlier you can get rid of it with no hassle.

Using 3D Models and Reference Layers To Create Logos
So far we've talked a lot about using reference layers in a way that helps artwork that's already been made. To shake things up in this next section lets talk about making art directly using reference layers!
I'll be using a 3d model in my example but this trick works with any kind of image material. You could use stock photos or your own to create these cool silhouette images.
Place the 3d model you want to use onto your canvas and position it to your liking.
I recommend using a larger canvas to create a good quality image.
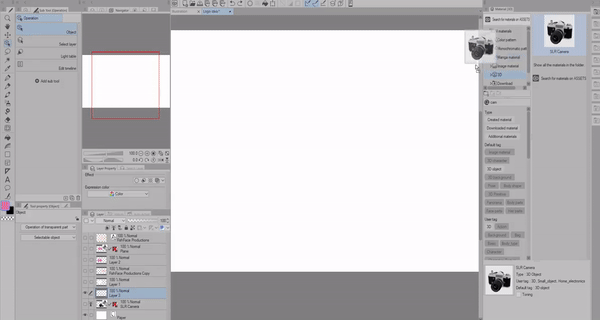
Next set your 3d model layer as a reference layer and create a new layer above. This new layer will be the one we'll use to create the silhouette effect
We'll be using the default "Refer to other layers" paint bucket tool
All you have to do is change the "Refer multiple" setting to "Reference layer"
Now you can color in the model freely like this.

Once you have an image you're satisfied with, go ahead and place any text or extra details you want to include in the logo.
Then fill the image with a solid color because in the next step we'll be saving this image as a PNG

I use an edited version of the "Enclose and Fill" lasso tool here's how to set yours the same way
#1 set the close gap to a higher setting, sometimes it will need to be higher or lower depending on your fill needs.
#2 set the target color to "all enclosed areas including transparency"
#3 set the area scaling to -0.10
and you're done!!
Using the Logo In 3d Space
Now save your logo as a PNG in a folder you can easily find
In the Latest Update, Clip Studio Paint has added Primitive 3d models.
So if you can't see the "Primitive" tab in the 3d section of the materials panel, make sure to update.
We'll be using the Plane model so go ahead and place it into your workspace
You'll notice a gray bar underneath the 3d model. Click on the wrench icon.
This brings up the settings for the 3d model. Go to the "Primitive" section and turn off "Show Wireframe"
Next in the "Map" section click the option that says "Open"
Now you can select your logo and move it in 3d space!!
You'll notice that the logo has a tint over it. This is because we still have shadows turned on from the original 3d model.
All you have to do is turn off the "Apply Light source" and "Cast shadows on the ground" to fix this.

And we're done!! Now you can adjust the logo as much as you want!!
Using Reference Layers for Flat Colors
You can set your line art as a reference layer to easily fill your lines with other elements behind it
If you set the "Refer to other layers" paint bucket tool to reference you'll notice that the paint bucket will ignore the extra lines across the page
and here's what it would look like with those settings turned off
This method is great for artwork that doesn't have any gaps. However I find that my lineart is too complex for this method to be helpful for me.
Another thing to keep in mind if you're someone who is bothered by fills that have pixel fragments. This method tends to leave a lot of them, even with higher tolerance settings.
These can be super annoying if you're making color selections for shading and other effects.
I much prefer the Lasso fill tool for this purpose
Now keep in mind the lasso fill tool isn't perfect either and it tends to avoid the very edges of the canvas which you will have to fix yourself. However in comparison I find the lasso fill tool much more efficient and leaves a lot less clean up work in general.
I still use all the paint bucket tools and talk much more in depth about them in this tutorial. So I would check it out if you're looking to cleanly color in your artwork.
Selection Tool Settings With Reference Layers
If you're looking to add a pattern or texture in your artwork you should use the "Selection for Referred layers" magic wand tool. it's so simple to use and is perfect for any outfit you want to fill in with a material texture
I have my line art set as my reference and all I have to do is drag my material into the workspace and it will stay within my selection!

You can also use this tool with line art that's made on a vector layer.
all you have to do is check this box and that's it! You can now use vector layers as a reference to make selections!
You can also set the "Refer to all layers" magic wand to function the same way by clicking the reference layer icon in the tool property menu.
Though I enjoy using this wand because I don't have to keep turning on and off those settings.
Do not exceed line of reference layer Brush Settings
The last setting that we'll be talking about today is the "Do not cross over reference layer" tool setting.
Click on the wrench icon in the tool property menu.
This will bring up the brush settings.
Then go to the section that says "Anti Overflow"
From here you'll find all the settings you need for this feature.
Including "Fill up to vector path"
"Tolerance Settings"
and "Area Scaling"
You should also click on the far left checkbox as this will add these options into your tool property menu where you can turn them on and off as needed.

Keep in mind that if the general center of the brush goes outside your reference layer it will bleed outside the lines.
I find that this setting also doesn't react well to gaps in the line art as shown above using the same sized brush. Now you could lower the brush size however it would be no different than carefully coloring in your lines with a normal brush.
I truly believe the lasso and other paint bucket tools are better suited for flat coloring in general as it's faster and much cleaner to use.
However this setting is perfect for adding clothing details using decoration brushes like the rose pattern.
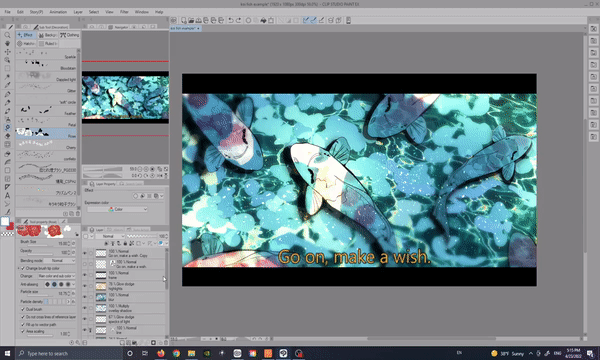
Another thing to keep in mind,
if you don't turn on the area scaling option, this brush setting will leave really ugly pixel fragments that would be difficult to fix by hand.
In order to get the best results you'll have to turn area scaling on.
I found that hard brushes like the G-pen didn't have this issue along with the airbrush.
I did find that the brushes you need to watch out for are decoration brushes like the example above,
and any kind of textured or opacity effected paint brush such as the watercolors and oil paints.
As always, it depends on the artwork you're using but if you ever get these pixel fragments using any of your tools with this setting this is what you have to do to fix it!
Closing Thoughts
I hope you've learned a few new tricks to use in your workflow! Thank you so much for joining me
Make sure to like and favorite this tutorial to save it for later. It also let's me know to make more tutorials in the future!
If you want to see more of my artwork you can find it here on my Linktree where you can find my Insta, Tiktok, and Youtube where I post even more content like this!
and with that I'll see you next time buh bye!


留言