ASSETS I use for work (Blur, Texturing brushes and more)
Introduction
Hey-hey and welcome to my Clip Studio TIPS of the Month special guide! ^-^ Among the three introduced themes I chose “Your favorite brush ASSETS”, and so, today I will show you some of my favorite brushes, how I use them and how YOU can use them. You are free to watch the video guide (with subtitles I added for your convenience) with the examples “in action” for better understanding or read the article to keep your own pace. Either way, let us start the TIP!
Brush hair // blur version by Tofu-Tofu
And I would like to start with the brush I use most among the assets on this article – “Brush hair // blur version” made by Tofu-Tofu (1748249). As this brush’s name indicates, it was made to help you to achieve a certain effect while drawing hair.
| Preferences |
This blur brush is quite simple which can be confirmed if you open its Sub Tool Detail palette. The key element is the texture that the author added to its tip – it reminds of blades of grass or some fast simple brush strokes. However, this simplicity is what makes this brush “for hair” such a great tool.
| The brush on canvas |
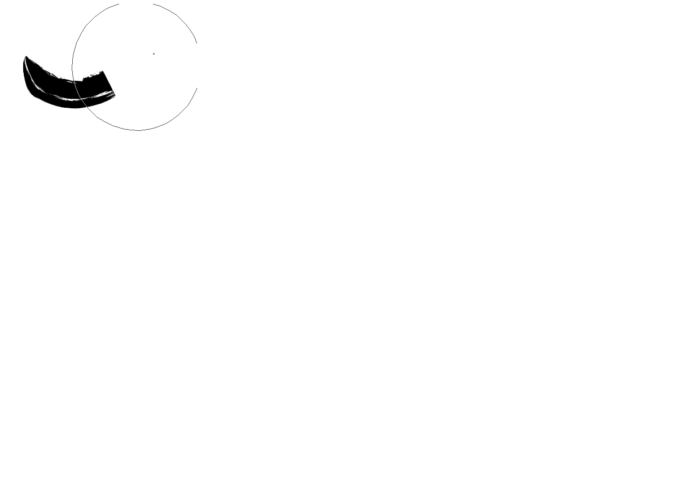
But despite the way the stroke looks on the previous screenshot, it actually goes smoothly only if you move the pen along one straight vector, while such actions like tapping or moving the tip of your pen around a certain point clearly show that the brush actually places its texture separately.
However, I would say this is more a positive property rather than negative one. As you can see on the screenshot above, such a diversity allows you to create more than just a hair texture. You can make it look like grass, fur (on animals or clothes) etc.
| Examples of using in my works |
Of course, the main way I use this brush is to create hair. Basically, this is the main brush I use to create such an effect, and here is the result:
But of course, as I mentioned before, this is not the only way you can use it. Even within the same arts, I used this brush with many elements to achieve different results and effects. For example, I used it to blur the gloss on the character's clothes or to create textured shadows.
You see, the greatness of this instrument is in its simplicity – it is not locked within a certain field of use. But sure, it is still a great brush for hair drawing ^-^
Ink pen (墨筆) by ぱーらめんと
The following asset (1564809) consists of four brushes that imitate ink brushes’ strokes. This set is relatively narrow-focused, but I believe there are plenty of people who love inking, monochrome and Japanese traditional art like I do.
| Preferences |
These brushes have a great and very natural texture – probably one of the best among free materials. The tool has a very simple build that just adds its texture to canvas.
| The asset on canvas |
However, the uploaded textures are not infinite, so if you create a too long stroke it will just end and start drawing a new but identical stroke (though I cannot say the full texture is short – there are not that many situations when you run short of it). Despite that, the textures do not just abrupt themselves, so you draw with a whole endless line which just repeats its elements.

| Examples of using in my works |
It is interesting how these inking brushes can be used for both sketching (while they are narrowed enough, for example) and full and complete arts. They can also be combined with different styles like graffiti in my art below and multiple effects like chromatic aberration in the sketch with my character Kurotsu:
Texture blur brush Set (質感ぼかしブラシセット) by といつ
More of blur brushes are coming. This set (1770104) consists of six different and quite detailed textured blur brushes that imitate different effects for different purposes. It is not free like the previous assets, but it is totally worth its fair price.
| Preferences |
Speaking of the number of brushes in the asset – yes, practically, there are six of them. However, there are only three textures to all six tools.
The thing is that three of those brushes have Color Mixing preference turned on but with all sliders set to 0, while the other three have some more custom preferences as can be seen on the screenshots below:
The brushes with the preferences like on the second screenshot not just blur, but also add a bit of the shade of your main chosen color.
| The asset on canvas |
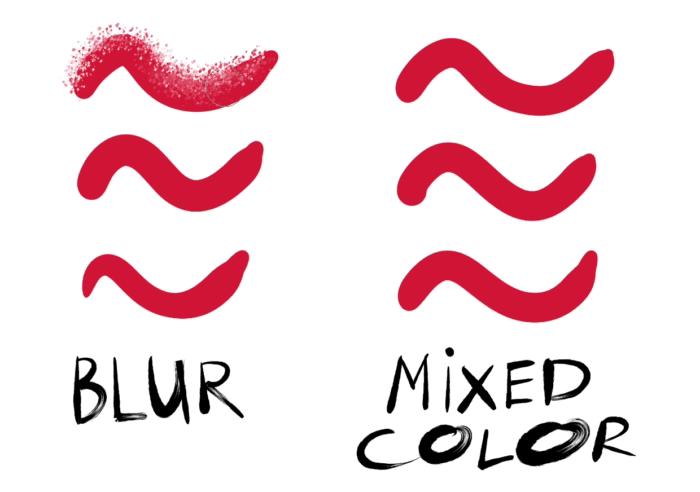
Here is a brief presentation of the difference between the two types:

I chose black as the main color and now you can see there are some grayish shades in the Mixed Color column. I was looking for such good brushes with complex textures for a long time, and now, after some practice with them, I can totally recommend you to download them and try them out yourself, there are numerous of ways you can use them – whether to imitate a realistic painting texture or just to add some unique decorative elements to your work or add a slight texture.
| Examples of using in my works |
My artist credo is “Art is Chaos” – it means that for me the true art and beauty lies in seemingly chaotic composition which, despite how contradictory that might sound, is fully controlled and deliberately made by an author. That is why my movements and my style are light, free and sometimes quite unpredictable even for me, and those brushes help me to achieve my goals a lot. Here is an example of one of my sketches of my OC Kurotsu made with this asset:
Natural Brush Set: Vol. (自然界ブラシセット:弐) by ぽっぽぽぽぽ
Now this is an asset that already had its “cameos” and appearances in some of my previous guides (1732795). It is a huge set of multiple brushes for drawing nature objects and plants.
| Preferences |
With total of seventeen brushes, this asset is a reliable assistant when you are drawing a landscape for example. Some of the brushes are simple while others – complex and detailed, like the following brush for stylized mountains which has a dozen of texture materials uploaded to its Brush Tip:
The set also has several brushes for grass and leaves, so you can use only one set to create a beautiful composition.
| The asset on canvas |
The brushes use randomization to create a more natural effect on your canvas. Despite the difference in their textures and preferences, you can use them in various combinations to achieve different results.
Some of the brushes are more sharp and draw with precise forms while others can be mixed with elements on canvas and with themselves. So everybody will find something useful here (on top of that, you can still customize the brushes).
| Examples of using in my works |
Despite most of the brushes here are meant to be used for drawing trees, grass and such basic nature elements, you can still find more creative ways of exploiting them (even in their default forms). For example, you can take a look at the landscape I made with this set:
If you take a closer look at the stem, you will see that the brush for mountains (山脈ブラシ) actually forms the basement of the tree’s texture (as well as some other brushes from the asset). I also used 木陰ブラシ to emphasize the moss, and the leaves are a combination of several brushes. Basically, EVERYTHING in this art is made ONLY with this set and some matte painting (well, besides the kitty and the butterflies, of course ^-^).
And the same goes for the following concept art of mine:
Conclusion
So, I showed you my favorite brushes from Clip Studio ASSETS that I use in my works. I would like to thank the Celsys team for giving us a convenient way to share and use each other’s materials. And I also want to thank everyone who read this article! I hope you found it interesting and useful ^-^
And if you would like my Clip Studio Paint guides and my artworks, you can buy the license to the program or the subscription via my referral link:
Thank you for your time and I wish you a great inspiration!


Kommentar