Simple drawing: two types of winter snow scenes
"Simple Drawing: Two Types of Winter Snow Scenes"
The theme this time is "Winter Scene".
Although it does not snow everywhere in the world, when it comes to "winter", the most representative thing is "snow".
In this article, I carefully selected a few snow-related things that are common in winter scenes and easy for beginners to master, and are very suitable for character illustrations! The following introduction will contain more than one method of drawing this object. Please use them freely to design your own winter snow scene!
The main demonstration picture below is "Sunny after snow" (left picture).
"Snowy Day" (picture on the right) uses an example image display as a reference.
You can make good use of the catalog function and select one of the paintings according to your own needs!
start!
First, as always, we start with a simple color block as the base color!
The upper layer depicts the blue sky; the lower layer depicts the snow.
🔧 How to do
Select the ① Rectangular Selection Tool → Left-click to select a location on the screen → Select the ② Fill Tool → Click with the left mouse button (shortcut key: Alt+Delete).
【Sky】
✧ Clear sky
Here, I would recommend painting a darker blue as the sky color.
In addition to the attractive color contrast between dark blue and white snow, the color of the sky actually becomes darker at higher latitudes. At the same time, it is easier to snow in high latitudes than in low latitudes, so for snow scenes, dark skies are more convincing!
The sky is cloudless on a clear day, very simple and easy to draw! We only need to add two gradients and it's already beautiful.
Of course, you can also paint the sky stained by the sun at sunrise or sunset. But personally, I really like the color combination of dark blue and white, give it a try!
🔧 How to do
Select the Gradient Tool → (Upper Sky) and draw a line from top to bottom on the top → (Lower Sky) pull a line from bottom to top on the bottom.
Note that these two color layers need to be placed under "snow". When actually painting, you can paint directly on the "sky" without adding a new layer, but if you separate the layers, it will be easier to adjust the gradient position, so my personal suggestion is to separate them first, adjust the color to your satisfaction, and then merge the images. layer.
🎨 Color Choice
Upper Sky: A darker, more purple hue than the base color.
Lower Sky: A lighter, greener hue than the base color.
✧ The sky when it snows
Note that if you want to paint a scene with falling snow, the sky will not be blue because of the presence of clouds.
At this point, I will use a lower chroma, closer to gray color as the base color.
In addition, in order to express the heavy sky, I did not choose to draw the clouds clearly, but painted them gray.
🔧 How to do
Select "Yanbian Watercolor" → paint directly on the "Sky" layer.
🎨 Color Choice
Choose several grays with different brightness (different shades), or slight changes in hue (within 10 to 20 degrees).
✍ ️Brushstroke
Start with a large brush size first, and then gradually reduce the brush size. The color is dark → light → dark → light, etc. used repeatedly.
Draw horizontally to express the clouds. If you want the picture to be more compressed, you can also draw it into a U-shaped arc to create the effect of a wide-angle lens deforming the scenery.
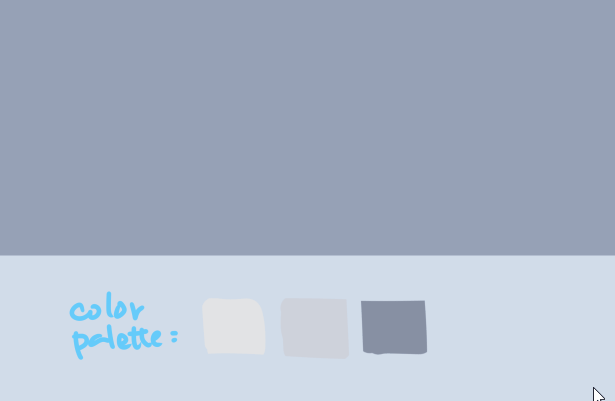
You can further add a color-added layer above to deepen the color of the edges:
📝 Remarks
"Yibian Watercolor" is one of the default initial brushes of CSP. If you can't find it in your device, you can re-download it at the following location (it is the seventh brush of the watercolor category in the official screenshot):
For how to install brushes, please refer to the following official help:
【Snow with texture】
Although there is a snow patch with smooth edges on the screen, the actual snow is not that smooth. In the demonstration picture, I will first redraw a boundary line that implies the slope, then draw the snow texture, and finally add a large range of light and shadow, reflected light, etc.
🔧 Drawing snow shapes - How to do
Select "G Pen" (or other brush with a hard edge) → draw the edge on the "Snow" layer → fill it with color.
You can also use an eraser to erase the excess.
📝 TIPS
Because the snow is naturally stacked by falling snowflakes, using the straight line tool will be unnatural.
Try to be careful not to draw sharp corners, because even if there are bumps, there won't be any snow on them. Only smooth places can allow large amounts of snow to accumulate.
✧ Add snow texture
🔧 How to do
Select the ① "Point Pen" brush → lock the "Snow" layer to the transparent primitive → draw the texture.
You can use the ② "fingertip" tool to reduce and organize texture according to personal preference.
🎨 Color Choice
Since the default brush setting includes color changes, it can be the same as the background color.
You can also use the tone compensation tool to adjust the color after you have finished painting.
✍ ️Brushstroke
First use a large brush size to paint the nearby snow, and then gradually narrow the brush size to paint the distant snow.
Use the "fingertip" tool to create hidden slopes on the snow.
Whether it is the "point pen" brush or the "fingertip" tool, when drawing close to the upper edge of the snow, please draw according to the upper shape of the edge.
Demonstration of "clicking pen":
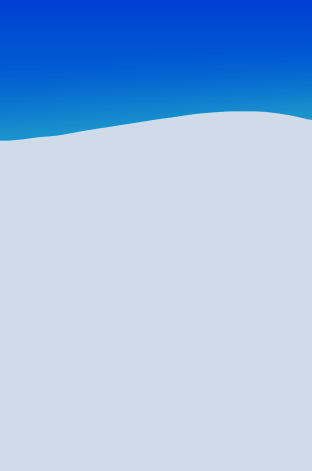
"Fingertip" tool demonstration:
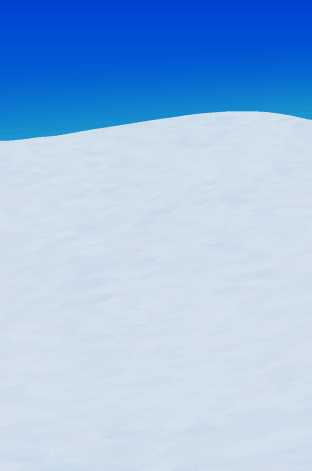
In addition, you can also use the Skew tool to adjust texture position and direction:
(In order to see it more clearly, the contrast of the snow is slightly increased here)
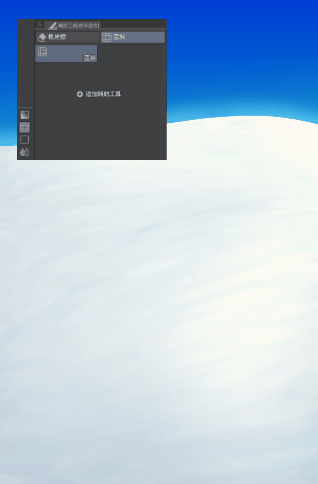
📝 Remarks
"Stippling" is one of the default initial brushes of CSP. If you can't find it on your device, you can re-download it at the following location (it's the seventh brush in the impasto category in the official screenshot):
✧ Add a wide range of light and shadow
🔧 How to do
Add a new layer above the "Snow" layer → Set the layer blending mode to "Add (Glow)" → Click the "Clip with next layer" icon → Use the "Airbrush (Soft)" brush → Paint on the layer.
🎨 Color Choice
Since I wanted the color of the light to have some variation in hue from the background color of the snow, I chose a very dark and yellowish brown (HEX number reference: 3D3220).
✍ ️Brushstroke
Since you are lighting a large area, use a larger brush to paint and lightly add color where needed.
The glowing part is mainly concentrated above the snow.
📝 Remarks
If it is snowing (cloudy) and there is a lack of direct sunlight, please lower the brightness of the light.
✧ Add snowflake reflection light①
🔧 Painting - Practice
Add a new layer above the previous layer → Set the layer blending mode to "Add (Glow)" → Click "Cut with next layer" → Use the "じゅわっと空気Sense 1" brush → Paint on the layer.
✍ ️Brushstroke
There are more light spots in bright places and fewer in dark places.
📝 Remarks
The brushes can be downloaded here:
✧ Add snowflake reflection light②
🔧 Adjust the sense of distance - how to do it
Use the "Free Transform" (shortcut key: Ctrl+T) function → adjust the sense of distance.
While pressing the [Ctrl] key + the left mouse button, you can freely move the corners of the deformation frame.
📝 Remarks
If you want to adjust the perspective according to individual slopes, you can also use the lasso tool to select local snowflake reflections and repeat the above steps.
If you feel that the reflected light is too eye-catching, you can lower the opacity of the layer, or you can simply not draw this part.
If it is snowing (cloudy), the reflected particles should not be too bright in the absence of direct sunlight. Please lower its brightness or simply not draw this part.
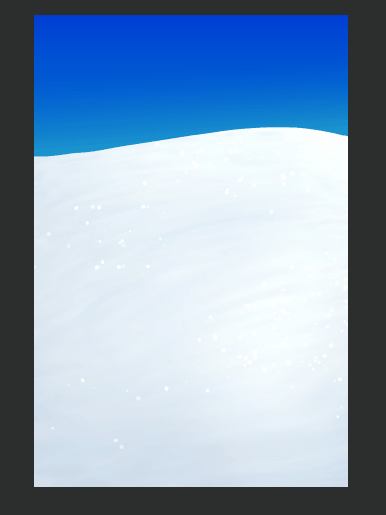
✧ Add snow edge halo
🔧 How to do
Add a new layer below the "Snow" layer → Set the layer blending mode to "Add (Glow)" → Use an airbrush to paint along the edges.
📝 Remarks
- If it is snowing (cloudy), you can also add this step. Although the steps are the same, this will change from "a halo caused by strong sunlight" to "distant snowflakes caused by snow and strong winds."
Complete the snow! (Attached below are demonstration pictures of sunny and snowy weather)
[Footprints on the snow]
When drawing footprints in the snow, the focus is on conveying its thickness.
🔧 How to do
Add a "footprint" layer above the "snow" layer → select the "smooth watercolor" brush → paint directly.
Beginners can first add a draft layer and determine the approximate location of the footprints before officially painting.
🎨 Color Choice
In terms of color, I chose four colors to complete the footprints. In addition to variations in shade, they also differ in hue. You can also choose different color combinations to try different effects.
✍ ️Draft
First decide the approximate path → draw the approximate location of the footprints.
In general walking, the footprints are positioned forward, one on the left and one on the right.
In order to create a sense of distance, the closer footprints will be larger and the distance between the footprints will be farther. vice versa.
✍ ️Painting Steps
1. Use gray to draw the footprint shape.
2. Lock the transparent primitives of the footprint layer.
3. Use mid-tones to create thickness.
Please note that if the direction of the footprints is different, the shape and direction of the thickness of the footprints will change accordingly.
You can think of it as a box without a lid. If it is placed in a different direction, the visible bottom position will also change.
In the demonstration picture, only the bottom footprint is facing the other side, please use this as an example.
4. Use a lighter color to draw the highlights of the footprints.
5. Use a more purple color to further refine the bottom shape and enhance the tonal change.
6. Add a new layer with the blending mode of "Color Leaking" above the "Footprints" layer, and clip it with the next layer.
7. Use a dark gray-blue spray gun to paint from the top to make the footprints in the distance lighter.
8. If necessary, you can use the free deformation function to make the footprints more distant.
(The method is the same as "Add Snowflake Reflected Light ②")
After deformation, the footprints near the edge of the frame may need to be filled in for missing positions.
9. Add a new layer above and use a white "thin ink blend" brush to draw the surface snowflakes at the edge of the footprints.
Since the light source of this illustration is set from the right side of the screen to the left, the white position will be thicker on the left and thinner on the right. When painting, please cover the edges of the current footprints that are too flat with the white part.
10. If the bottom of the footprint occupies a larger part (such as the bottom footprint in the demonstration picture), or the footprint is closer to the camera, you can draw snowflakes at the bottom of the footprint to add more details.
11. According to personal preference, you can use the "じゅわっと空気Sense 1" brush to add a little reflective snowflakes to increase details and information.
12. Check the overall snow field. Adjust the texture, light and darkness (i.e. repeat the steps of the [Snow] part), footprint position, etc. as needed.
For example, in the picture below, in addition to slightly modifying the light and shadow of the snow texture, the direction of the footprints below is also corrected. But as long as you follow the steps mentioned above, it is very simple to modify the edge snow position and so on.
📝 Remarks
"Smooth watercolor" and "thin ink smudge" are the default initial brushes of CSP. If you can't find it in your device, you can download it from the official material collection of "Dip Pen・Brush_Ver.1.10.9" mentioned above (it is the fourth brush in the watercolor category in the official screenshots/ The sixth brush in the Ink category).
However, the brush selection has little impact in this part. You can also use your favorite brush to draw!
Complete footprints!
【Trees in the snow】
✧ Painting silhouettes of trees
Add a new layer and use the "G pen" to draw the silhouette of the trees:
🎨 Color Selection: The closer the camera is to the trees, the darker the color and vice versa.
Branch thickness: The closer to the center trunk, the thicker the trunk.
Different tree species will have different crown shapes. If there is a tree species you particularly want to paint, please search for relevant reference materials.
You can also search for some ready-made tree silhouettes for use in the Material Library. You can enter words such as "tree" and "silhouette" to narrow the range.
If it is a tree species with soft branches, such as pine (Christmas tree), you need to consider whether the branches will be weighed down by the snow and fall.
✧ Add details of trees
If it's a nearby tree, you can follow these steps to add detail.
(If it is a tree in the distance, only the silhouette will work)
🔧 Painting the texture of tree trunks - how to do it
Lock the transparent primitive of the "tree silhouette" layer → use the "point pen" brush → brush settings → adjust the "thickness" in "Brush Front" to 10 → paint in the direction of the branches.
🔧 Enhance the front and back three-dimensionality of branches - how to do it
Add a new layer → Set the layer blending mode to "Screen" → Cut with the "Tree Silhouette" layer → Use a dark blue "G Pen" or "Smooth Watercolor" to draw the branches at the back.
✧ Add snow on trees
Just add a new layer and paint directly. In the demonstration image, I used the "Yuta Pencil・Normal・x2" brush to draw.
Here are some things to note:
The amount of snow depends on how you set up the scene. In the following demonstration, there is no problem even if you only draw the first step** (there is very little snow).
Snow is more likely to accumulate in the "Y"-shaped ya forks of branches, followed by tree trunks with a more horizontal direction.
If there is a lot of snow, you can add shadows to express its thickness. (Figure 2)
Snowflakes will also accumulate in a triangular shape at the tree roots. (Figure 4)
If the previous snow was too heavy or it just snowed not long ago, the vertical tree trunks will also be stained with snowflakes due to the snow being blown by the wind. (Figure 5)
If you are painting a scene where it is snowing, it is recommended to draw at least the amount of snow in Figure 2.
📝 Remarks
The pencil brushes used in this part can be downloaded at:
✧ Add snow reflections to trees
Finally, since the snow will strongly reflect sunlight, adding reflections at the bottom of the tree will make it more realistic!
📝 Remarks
If it is a forest situation and the sunlight cannot directly shine on the snow, the reflection will not be very strong.
If it is snowing, it will be blocked by splashing snow, etc. Although this part is drawn using the same method, the content will change from "reflective" to "snow".
Complete the trees!
[Dead grass and branches on the snow]
If you want to further enrich the picture, painting dead grass on the snow or dead branches that fell to the ground due to breakage is also an easy and quick option!
1. Since the snow in the demonstration picture contains a slope, I deliberately followed the direction of the slope (blue line) when painting the dead branches. If you are painting on flat ground, you do not need to draw the dead branches diagonally, but just follow the horizontal direction.
2. The closer the dead branches are to the camera, the darker the color will be, and vice versa.
3. After deciding the location of the dead branches, you can add snowflakes. The location of the snowflakes added in the picture below is:
A. Some snow left on the tip (small amount).
B. Splashing snow on stems close to the ground.
C. Snow slightly raised by plants on the snow.
Complete the dead branches!
【Shadows on the Snow】
✧ Shadows on a sunny day
I really like the mottled shadows projected on the silvery snow! In addition to direct drawing, we can also use different functions to obtain shadows. For objects with complex shapes, this can save a lot of painting time!
✍ ️Steps
1. Duplicate the tree silhouette layer. (You can drag the layer with the left mouse button to the icon below)
2. Use the free deformation function (shortcut key Ctrl+T) and the up and down inversion function (as shown in the figure below).
3. Follow the method of "Adjusting the sense of distance" above to adjust to the appropriate position.
4. Fill color (I chose lavender in the picture below).
5. Set the blending mode of the tree shadow layer to "Color Boost".
6. Use a lighter blue color to spray color on the edges with an airbrush.
7. Use the automatic action "Sticker Outline" to add a light blue outline to the layer, and set the blending mode of the newly added layer to "Color Boost" and reduce the opacity. (*See the remarks section for the download location of automatic action materials)
8. Merge the outline and tree shadow layers (shortcut Ctrl+E).
9. Unlock the opaque primitives of the tree shadow layer.
10. Select the "Select Pen" tool.
11. In the tool settings, adjust "Hardness" to the lowest and "Brush Density" to 50.
12. Select the edge of the tree shadow on the screen, reduce the brush size and paint several times on the edge.
13. Select Lens → Blur → Gaussian Blur, adjust to the appropriate level and press OK.
14. Erase the excess.
15. The final adjustment of the shadow depth depends on the intensity of the sunlight in the scene setting.
📝 Remarks
The automatic motion material of the outer frame can be downloaded at the following location:
After downloading the material, please refer to the official help for how to install automatic actions:
✧ Shadows on snowy days
Compared with the clear shadow on a sunny day, the shape of the shadow will be blurred on a snowy day (cloudy day) because there is no obvious sunlight. Therefore, it is enough to draw the approximate location when painting, and there is no need to explicitly draw the shape of the branches.
✍ ️Painting Steps
Add a new layer → Set the layer blending mode to "Color Enhancement" → Reduce the layer opacity if necessary → Draw with pencil to suggest the material of the snow.
🎨 Color Choice
Like the other parts, I used colors with a hue gradient (purple to blue).
Finished the shadow!
【Falling Snow】
The steps for painting falling snow are very simple. After downloading and installing the brush, swipe it over the illustration and you’re done!
If you want more control over the position of the clouds, just paint directly with an airbrush.
Here are some things to note:
When drawing, be careful to draw snowflakes of different sizes to emphasize the sense of space near and far.
Without wind, the snow will be nearly circular. In strong winds, the snow will turn into an oblique oval shape.
Brush download location:
Finally, I added characters as embellishments to both illustrations. Finish!
Conclusion
Thank you for reading this far!
In addition, you can also use the elements introduced above to combine your own winter snow scene composition. Please be sure to try it and have fun painting!
What do you think of this teaching?
Feel free to leave a message and let me know! Hope this tutorial is helpful to you.


Comment