
◆ClipStudioPaint can create special effects depending on your ingenuity
You can create hand-drawn animations to recreate the special effects used in movies.
Clipstudio doesn't allow you to edit difficult footage, but you can create your own homemade movies by layering cuts (scenes).
There is a more detailed demonstration video on YouTube.
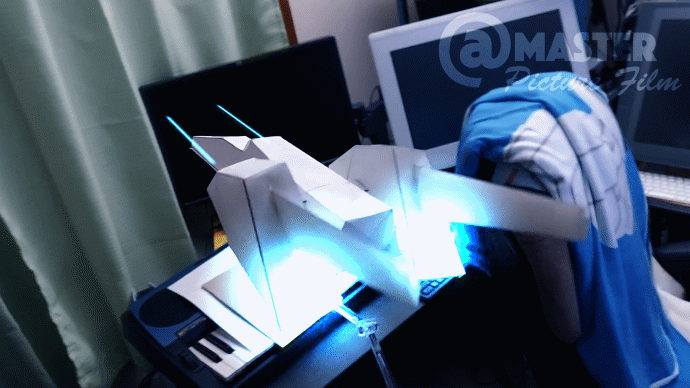
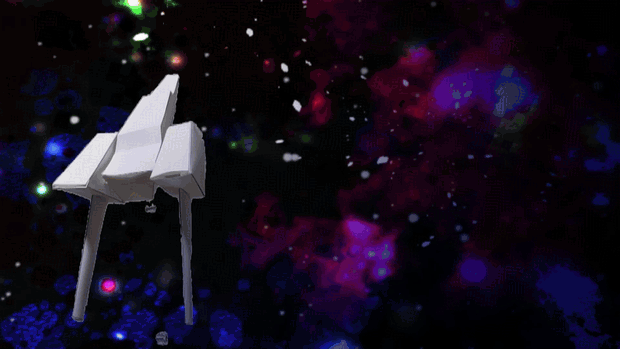
◆ Build a spaceship
Well, that's a pretty impressive headline, but it's made with just two sheets of copy paper.
The rough sketch was completed by repeatedly drawing with ClipStudioPaint's straight line tool. (See rough sketch)
Straight lines and precision are essential for mechas.
First, I came up with a rough idea for the spaceship, and based on that, I made a rough blueprint.
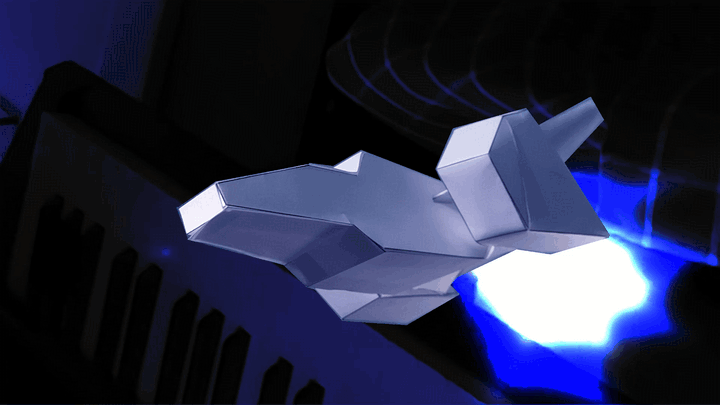
Despite the trouble of the printer running out of ink,
I used the usual props, a cutter and glue to glue it together, and assembled it to finish.
It's a little different from the rough idea, but I decided that it was impossible to reproduce the details with this flimsy copy paper! Please forgive me.
But, I like this one because it's kind of cool.
I also prepared a blueprint for Unit 2 as a backup, but it was cold at night after making Unit 1, and I ran out of spirit, so I didn't make a second one. (Room temperature 7℃)
※The author is making this quite casually, so please take that into consideration.
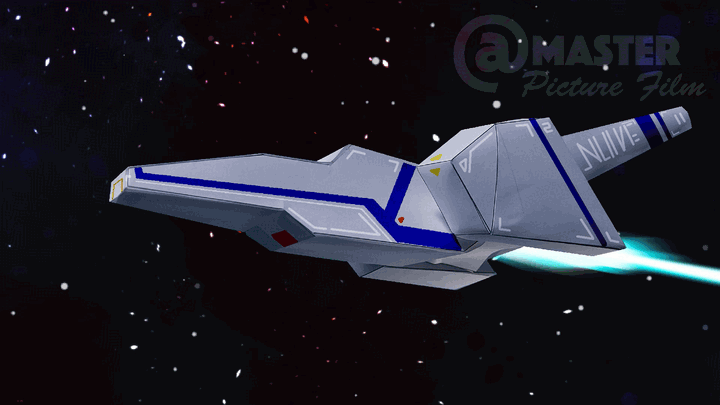
The hyper-dimensional private space military battleship "Atoma Star Unit 01" is now completed!
Normally, storyboards (conceptual drawings) of scene cuts are needed for filming,
but that's only when you're shooting a long movie.
This time, I already had an idea in my head of what kind of scene I wanted to create (really?),
so I just started filming the video.
◆Draw and create special effects
[Point] Once you've finished filming, think about where you'll use special effects while watching the footage.
◆Drawing a Laser
《Explanation》
A laser is a type of light or electromagnetic wave that is specialized in the directionality and convergence of wavelengths.
It is widely known in a certain industry that "it can be equipped with the fourth power capsule."
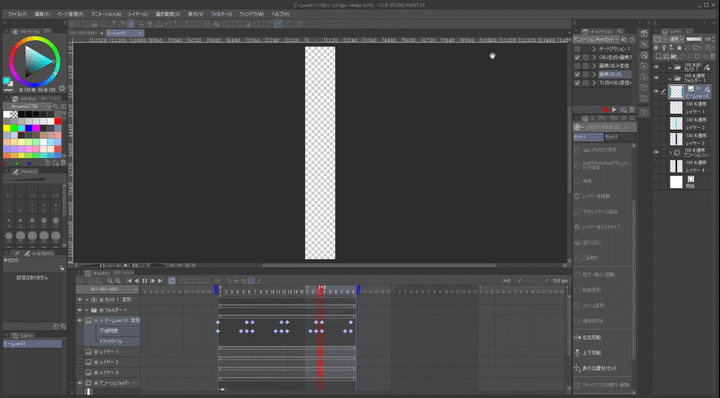
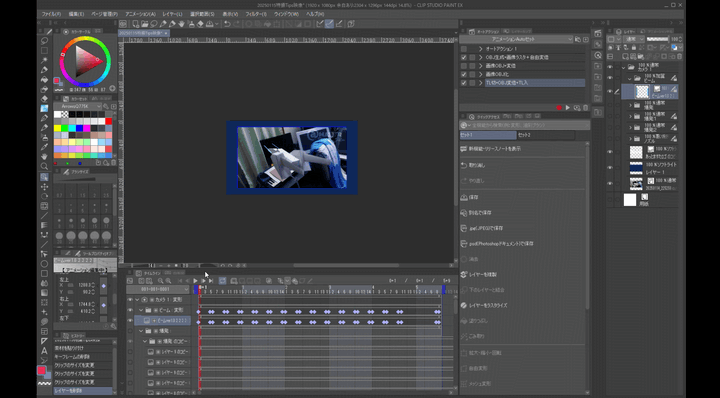
Create a animation document in portrait orientation.
12216px height, 1728px width, 144dpi resolution, 10 frames per second (frame per second)
Create a keyframe animation in which the laser moves up and disappears repeatedly four times.
While creating each layer separately, draw a white line with the straight line tool,
then paint the expanded "white" selection with light blue,
then paint the expanded light blue selection with dark blue,
and blur the light blue and dark blue with a Gaussian filter.
Once you've created one, duplicate the other and merge all the layers into one to finish.
We will make this laser material into a key animation, but to "freely transform" this frame,
1) Turn off the timeline
2) Convert the layer to "image material layer"
3) Select Transform > "Free Transform" (if it has no effect, transform it once and return to the original)
4) Turn on the timeline
5) Convert the layer to "image material layer"
This will create a keyframe that can be "freely scaled" later, rather than the usual "scaling".
Once your keyframe animation is complete
(see video above),
Edit>Register Material>Save as Animation Material.
Press the "Video Thumbnail Button" on the left side of the screen to play the movie,
and after checking that it works, select the "Destination to save materials" on the right.
In my case, I've created a "USER Material Folder" in my "Image Materials Folder"
for the sake of organizing, so I'll save it there.
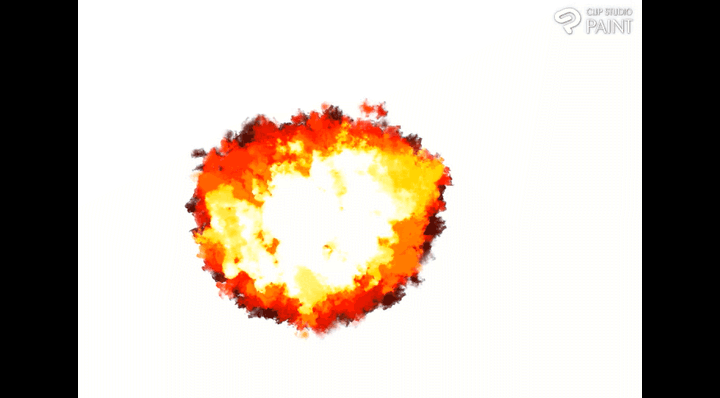
◆ Draw an explosion
《Explanation》
An explosion refers to a destructive action caused by sudden pressure.
Until recently, it also meant a brilliant work of art.
Create a new illustration document. The example is A4 size, 144 dpi. Chanting something like "O jet black covered in light, o explosion of flames wrapped in night..." will make the image more realistic.
Draw simple, beautiful "clouds".
Note: You don't have to draw the blue sky. It's just for looks.
I used the "cloud brush" to draw these.
From here, Merge the clouds only layer and open Edit > Color Correction > Gradient Map.
The blue sky is art.
Art is an explosion!
Clicking on a gradient set on the Gradient Map screen will apply the gradient.
*I have already set an "explosion gradient", so if you don't have one, try creating a "gradient" using similar colors to the sample using the screen as a reference.
Once applied, the clouds will instantly change to the explosion color.
Then, you can add a dark brown to the bottom layer to make it look like an explosion, and adjust the "brightness/contrast" and "hue/saturation/value" from the color correction controls, and then it's complete.
《Tip》
If you can't get it right the first time, try repeating the gradient map several times or multiplying the layers and adjusting them.
※) I myself have also had to try again because I couldn't get it to work as I had imagined.
◆Drawing Vernier light
《Explanation》
This refers to an auxiliary engine for attitude control of spacecraft, etc. Originally, it was an auxiliary part for reading widths with a vernier caliper (a measuring instrument). In the world of anime, it refers to the jet nozzles of space mechas.
For the verniers, use the "Spray Tool" to draw on separate layers using the actual image as a guide.
"Light Blue" and "White" are in the standard position of the palette.
It's also a good idea to use a filter like the "Gaussian Blur" filter.
Whatever method you use, as long as it turns out the way you imagined it, it's OK.
◆Finally creating the special effects video
To put it simply, it processes animation for all keyframes.
《Animation Document》
Height 1080px Width 1920px Resolution 144dpi
15 frame rate Playback time 5 seconds 9 frames (seconds/frame)
The captured video data is transferred to the working PC environment using a network, cloud, or small storage media.
From the main menu, select File > Import > Movie. (See image below)
In my case, it is MP4 format.
Supported video data formats are Clipstudio format, AVI format, MP4 format,
(QuickTime movie) Mov format. (As of January 2025)
◆How to create special effects animation of laser cannon firing
From the image materials, drop the "Laser material" created in the "Draw laser" item.
It should be isolated outside the document, so find it carefully and
put the imported material layer in a folder or something.
When you play the timeline, you'll see that it will animate for the number of seconds you saved, so
you'll be able to see that the long, thin position is the animation range.
◆ Reduce the animation range of the "Laser Material" layer and deform it to match the perspective of the subject as shown in the image below. Make the laser disappear off-screen. ◆ Extend the short timeline frame of the laser material until the end of the recording. ◆ Leave only the first animation part and delete the remaining keyframes. (See the image below) If you're going to delete them, surely you could have just created one keyframe from the beginning? Some people may think that, but if there's only one, it's hard to find, and it's to get a sense of the range and to recognize it. It's better to have one than nothing.
We'll continue to add more and more "Laser Material" layers while modifying keyframes at 5-frame intervals to match the video. The result will be something like the reference video (see video below).
Set the blending mode of the "Laser material" layer to "Normal"
and the blending mode of the "Laser material" folder to "Add".
*The effects of the blending mode must be applied at the same layer level as the video material.
◆How to create an explosion scene
The explosion parts are combined into one layer and placed in a folder.
In the video, the subject was moving sideways while shooting, so it was an inevitable interpretation of the camerawork
that there would be no explosion in the direction that was not being shot, and I thought it would be more realistic if the explosion was off-screen, so that's what I did.
《Explosion Explanation》Explosion ① Layer
◆Starting from the second frame, the layer is reduced to 0% size and 100% transparent.
◆100% transparent in the fifth frame, a big explosion in the seventh frame
◆0% transparent in the eighth frame, and returns to the first frame in the ninth frame (same as the first frame)
Keyframe.
◆Based on the explosion ① layer, the explosion ② layer is also exploded at the back as an auxiliary.
From now on, this will be duplicated and placed, but explosions can be boring if they are not rhythmic, so the trick is to make all the explosions different, without making them too uniform and monotonous, and to mix in some duplicates that rotate while exploding.
There is a limit to the movement (reproducibility) of keyframes, so that is the difficult part.
So in this example, the explosions are reproduced by exploding two layers.
◆Vernier light: How to create special effects animation
Put the four layers of both verniers into a folder, and move the keyframes by specifying the folder.
Set the folder's "Compositing mode" to "Dodge (glow)".
In one second, place four key points around the subject nozzle until the end of the video. (See image below)
I wanted to make the nozzle light look fluffy as it moves, so I delayed the initial movement and intentionally shifted the key point from its fixed position.
Do you think it looks fluffy?
◆ Underexpose the imported video footage
On the left is the "blue" color mounted on the image. On the right is the image as it is, "without any work".
As you can see by comparing, special effects stand out more in dark scenes
so making the image one level darker makes it look more effective.
In outer space, the darker it is, the more realistic it feels!! But I've never seen the real thing.
(Location/my room)
《Blue RGB value》R13 G39 B89 Blending mode "Soft light"
◆ Try chromakey photography with things you have at home
If you have colored curtains with a solid pattern, you can do chromakey photography.
Explanation
Chromakey compositing is a technique for compositing part of the background color of a shot to create a different background.
Compositing images often done by "weather forecasters" on TV programs.
This technique makes it difficult to tell if the same color shows through.
A DIY chromakey shoot using curtains from the house.
By combining it with video editing software, you can create digital images that look more like movies.
The video above was created by combining footage created with video editing software and then using Clip Studio Paint text and moving keyframe animation to create a video of the staff's end credits.
◆Add sound effects and background music to video
From the menu, select File > Import > Audio to add audio.
Select the animation playback setting as "Real-time playback".
It is useful to add "Timeline Labels" to coincide with the timing of sound effects.
Additional Note: The "Audio Scrub" function was added in ClipstudioPaint ver. 3.0, which allows you to check the audio output frame by frame by using the timeline cursor, greatly improving visibility.
Official How to Animation Voice
◆You can also create animations with ClipstudioPaint Pro!
◆Create an ECM launch scene
This cut was actually made with ClipstudioPaintPro.
The Pro version has a limit of 24 total frames for animation, so you can choose between 1 second x 24 frames, 2 seconds x 12 frames, or 3 seconds x 8 frames.
For action cuts, a scene cut every 2 seconds is appropriate,
so the example will be made as a 2 seconds x 12 frames animation document.
《Animation Document》
Height 1080px Width 1920px Resolution 144dpi
Frame rate / 12 Playback time / 2 seconds (seconds / frame)
"Check" for production frame
"Check" for drawing size Width / height 4.00 magnification
[1] Load an image and create a mask.
Once you have cut out the shape with the mask, make it an "image material layer."
[2] Draw the bullet barrage.
You can draw it well by using the "Blur" filter and different types of "Brush".
Once you're done, convert it into a "Free Transform"
keyframe, just like when you "Draw Lasers".
Create a folder to store the image material layers.
Create a masking area for the bullet barrage.
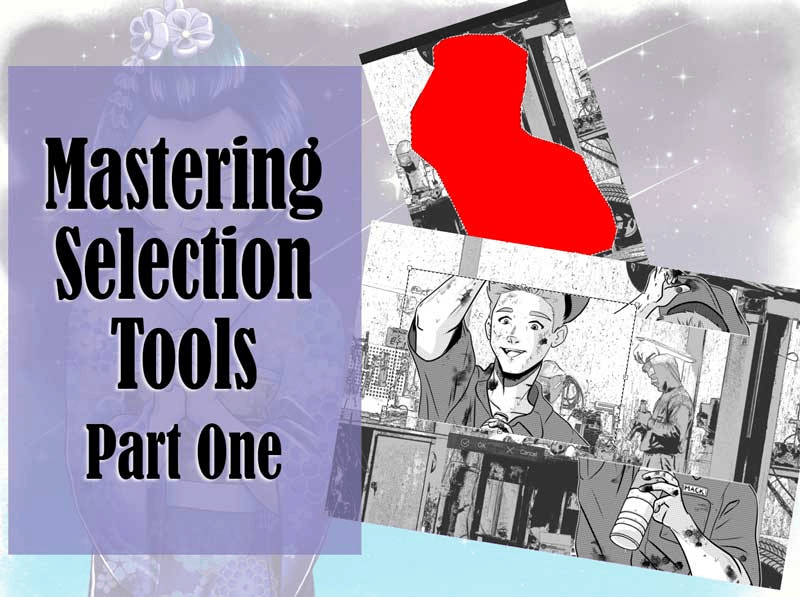
I use the "Lasso Selection" tool.
I wanted to imagine the bullets being fired from behind the subject, so I roughly determined the area.
Let's create keyframes.
This depicts the bullets flying to the edge of the screen from 1 second to 5 seconds into the video.
It depicts the bullet barrage getting bigger and stretching out gradually until the end of the video.
Once you've created one, duplicate it and edit it as you go, then make 6 of them.
【3】Draw the jet animation
Make one of these and follow the trajectory of the bullet barrage frame by frame to determine the position. Make six of these as well.
[5] Draw the vernier light
Every four frames, change the size to large and small, and add repeated movement
while adding keyframes until the end of the video.
(See example image timeline)
【6】Load background video
It's 2 seconds long, so decide which scene in the footage you want to use it in.
Mount the footage you shot with a blue paint and make it "underexposed."
【7】Camera work
This is actually the most important step. Camera work should be the last step.
If you do it first, you won't understand the keyframe work.
The idea is to move the camera in, then pull it back,
and slowly pull it back while firing.
There's a little trick to making it.
For camera angles in this kind of scene,
I start by putting in the keyframes from the last cut.
The timeline is numbered in that order.
It's much easier to visualize it if you make it in the order ① End ② Start ③ Middle.
It's important to have an image of what kind of camera work you want to achieve.
Official How to Animation Camerawork
By linking together these two-second cuts,
you can create action scenes with good tempo.
Created by: Clipstudiopaint PRO ver3.0.4
Afterword
Filming requires patience, skill, and luck.
You can easily create short movies that combine live action and animation with ClipstudioPaint.
It may be difficult at first because there are many things you don't know, but if you have the time and interest, why not try making your own videos instead of just watching?
I wish you all the best in your creative life.
ClipStudioPaint PRO/EX Ver.3.0.4 2025.0115 Akiben
◆Thank you to everyone who liked!
Official How to Animation
Users who liked this post


Comment