(2) Animating with two images
Compatible with Clip Studio Paint Ver. 1.9.14
Let’s create an animation using Clip Studio Paint’s animation feature!
This animation practice tutorial is aimed at first time animators.
The first lesson
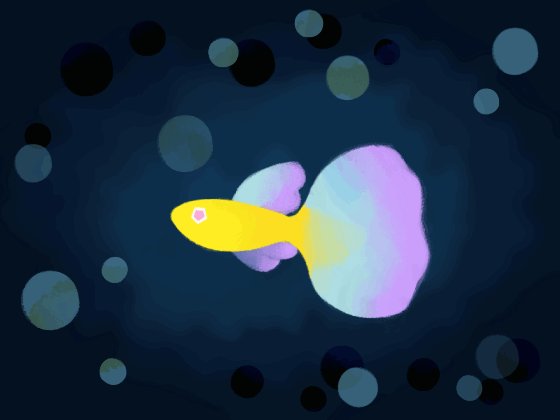
In this second practice lesson, we are going to make an animation that switches between two different illustrations.

Features you will learn: Animation folders & the [Timeline] palette
Note: For smartphone Users
Clip Studio Paint for smartphones requires palette bar customization to create animations.
Use the following procedure to add the [Timeline] palette.
Making a new Canvas from the New dialog box
(1) Select the [File] menu > [New] to show the [New] dialog.
(2) Under the [New] dialog, select [Animation] from [Use of work].
(3) Adjust the settings as follows:
・[Reference size] : The actual image size of your animation when exported. This time, we will use the default [720x540 (144dpi) with blank space] settings.
・[Timeline] : Set the [Frame rate] and [Playback time].
You can select a common frame rate from the drop-down to the right of the [Frame rate] input field.
Set the [Frame rate] and [Playback time] to “8.”
By setting the same value, you can create an animation that is exactly 1 second long.
Note: "Frame rate and playback time" is explained in detail in "Required knowledge for using the Animation function".
Note: If you are using Clip Studio Paint Debut, you will not be able to select [Animation] under [Use of work].
[Use of work]: After selecting [Illustration], check the box next to [Create moving illustration], select the [Number of cels] to “8”, and [Frame rate] to [8 fps].
(4) Click [OK] to create a canvas for the animation.
An animation folder will be created under the [Layer] palette, and layer “1” will be stored there.
Layer “1” will be specified under the [Timeline] palette.
Drawing the first illustration
Draw the first illustration on layer “1”.
(You can also import or open illustrations that you’ve previously made)
Note: How to draw illustrations using separate layers
In normal digital illustration creation, layers are divided into line drawings and color fills. However, with animation folders, you cannot draw in layers that are not specified as cels in the timeline.
If you want to split colors and line art into separate folders, please check the following “Use multiple layers as a single cel”.
Note: Using illustrations that you have already drawn
(1) Store cel “1” into the layer folder using the steps in the following “Use multiple layers as a single cel” tutorial.
(2) Open the illustration you want to use, and select [Edit] menu > [Copy].
(3) Open the canvas for the animation, and under layer folder “1”, select [Edit] menu > [Paste] to paste the illustration into cel “1”.
The first illustration is complete.
This image will be cel “1”.
Note:
By drawing on a layer outside of the animation folder, the layer will become a still picture that will be shown throughout the animation.
Store character layers that you want to move as cels inside Animation folders, and store background layers that you do not want to move outside.
Adding cels
(1) Select the middle area in the [Timeline] palette. I chose the frame 5th out of the 8 frames.
(2) Under the [Timeline] palette, click on [New animation cel].
Cel “2” has now been created as a new animation cel, and has been specified to the 5th frame in the timeline.
If cel “1” was a layer folder, cel “2” will also be created in the same structure.
Drawing the second illustration
The cel that is selected under the [Layer] palette will be shown on the canvas for drawing.
(1) Draw another illustration in cel “2”.
The second illustration is now complete.
Done!
Click [Play/Stop] on the [Timeline] palette to play your moving animation.
An animation that switches between “1” and “2” is complete!

Note: This has been exported to GIF format.
From the [File] menu, click [Export animation], then [Animated GIF] to export the animation in GIF format.
This is the end of the second practice tutorial.
Part Three
Part Four
To learn more about animation features:
If you want to learn more about Clip Studio Paint’s animation features, please look at the tutorials below.


Comment