Keyframes for Illustration
Introduction
Hello and welcome to a new tip of Clip Studio Paint, dedicated to our creations and today I will explain about the use of keyframes and camera movement for illustration
In this month's theme, we will prepare an animation ''cut-out'' from an illustration to learn the functions of Clip Studio Paint and get more benefits for our work of illustration and animation
YouTube Video Tutorial
I want to show the videotutorial that I prepared for better experience
1. The Basics
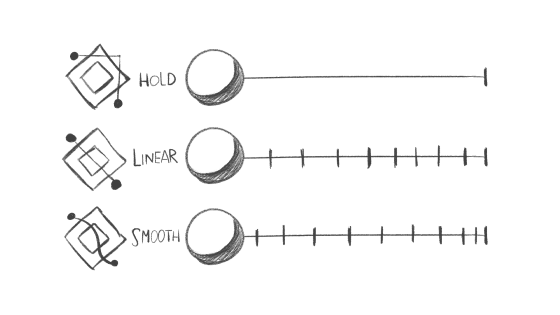
Keyframes for animation are the key points that have a beginning and an end. In the movements, you can choose between soft, hold and linear.
Look out the example of the ball in three different movement of keyframes

For the demonstration, we prepared a painting of a sky with separate layers, they are necessary to move the layers and create the movement with keyframes
For layers, create the next layers for the paint: the background gradient, the refined clouds and the fog

Now this is the steps for generate animation of the clouds
1. In Clip Studio Paint, create the timeline with 24 FPS and duration of 240 seconds
2. Enable the keys for the layers and insert the keyframes
3. Transform the layer in other position for generate the movement

2. Cut Out
Cut out animation using flat characters, background and objects in layers to create animation, with the fuction of keyframes, we can prepare the animation of the parts of body of the girl and the horse
Now this is the steps for cut the parts of the character illustration:
1. Cut out the parts to divide them into different layers
2. Rename the layers and make groups
3. Repaint the parts of illustration to refill
4. Add keyframes each layer
EXTRA TIP
5. Add the keyframe for the group folder to move the body
3. Camera Work
The steps of use of camera work for our final animation:
1. Add the camera 2D layer for the group of illustration
2. Add the Keyframe and create the camera movement
EXTRA TIP
3. Create a new camera 2D layer, put into them, and create keyframe with effect of camera shake
Conclusion

This is the final result of the illustration animated with keyframes of Clip Studio Paint. This realization opens many possibilities to create movements in traditional and digital illustrations, also know more about the software and in the future see improvements in the technique of keyframes
Thanks for getting here and I'm glad you read the tutorial and I hope it was useful and practical.


Comment