
Tutorial Overview
Hey guys, welcome back to yet another night study with your friendly neighbourhood shadow lurker professor Crimsy!
In today’s class I will teach you how you draw Chibis, the most popular and adorable form your anime characters can turn into! More specifically, In the first part of the video we will start by covering the basics of drawing Chibis from choosing their proportions to drawing specific features like the face, eyes and hair and in the second part we’ll put our newly acquired knowledge in execution by drawing a Chibi from start to finish!
So without further ado, let’s begin the ritual!
Introduction to Chibis
Chibis are essentially very stylized and simplified shrunk down versions of anime characters. They’re typically very expressive and colorful and their huge head can take up to more than half their total size!
And this is the key to drawing Chibis really. While your options for stylizing their face and overall aesthetic may vary alot from one artist to the next, their size and proportions are really what defines Chibis the most.
For instance, using a human head as a measurement, regular human characters are usually around 7-8 heads tall in height as represented here, but Chibis, on the other hand, are typically 2-4 heads tall at their biggest. This is all proportionally speaking of course seeing as the head measurement works in correlation with the initial size of the character’s head.
Chibis also showcase very simplified features compared to their ‘’standard’’ counterpart, but not all features receive the same type of stylized treatment.
Beauty features generally get enhanced while secondary features get shrunk down the most or are entirely removed from the character. For example, the head, eyes and hair become much bigger, but the nose, ears, shoulders, hands and feet become smaller and less detailed in most cases.
Meanwhile, the overall body goes on the thicker side, kind of like if the character got squished vertically into a little chubby child like version of itself.
If the character had more clothes and accessories, they would probably also appear bigger proportionally speaking, kind of like how you fashion clothes and accessories for dolls in a way.
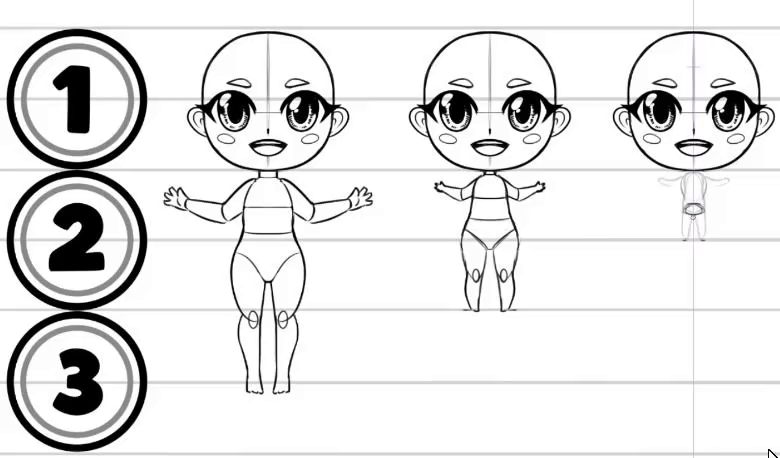
How to: Chibi Proportions
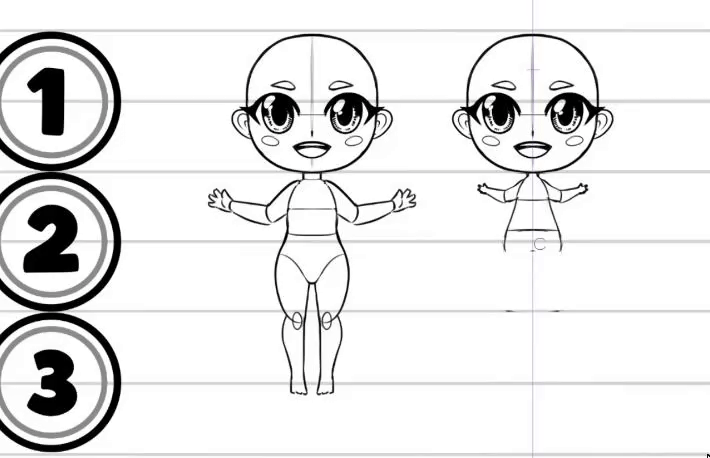
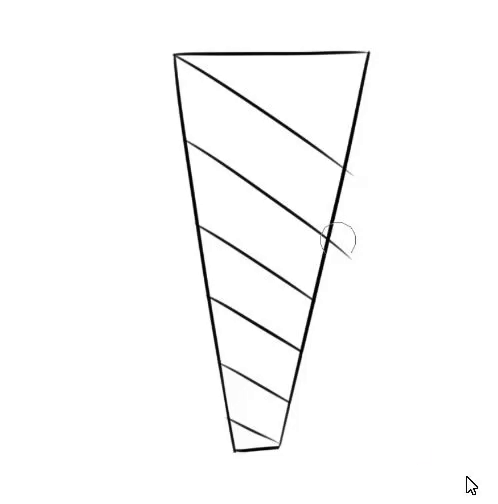
Now, when it comes to the proportions of your Chibi, it is very important to know that a 2 heads tall Chibi will look vastly different than a 4 heads tall Chibi and this is all because the body proportions of a Chibi follow a certain set of rules, which is all dictated by its final size.
To understand this concept better, here is a few examples of a 2.5, 2 and 1.5 heads tall Chibi. As you can see, the head of our character takes up the entirety of the first head measurement. This part never changes, no matter how tall your Chibi is, so what really determines the appearance of your character is its body and the amount of heads tall it will measure.
Now, in order to quickly explain how I constructed the bodies, I used the symmetry tool, which you can grab in the ruler menu. (See my ruler tutorial for more information on how to use the tools in this menu!) I then sketched a head rather quickly, it’s not perfect, but we will go over the head and face in more details a bit later so it doesn’t matter too much here.
Then I created a little tube for the neck and drew two spheres to represent the torso and hips of the character. After that all you need to do is connect the spheres together to form the stomach area. Note that I’m always refining the body as I draw, I never fully limit myself to the initial spheres I drew and use them rather more as guides, than final shapes.
The arms and legs are also essentially small tubes which end up in tiny stubby hands and feet.
TIP: A good tip you should keep in mind is that the legs will usually occupy more or less half the total height of the body while the arms will be around the same length as the upper body. It’s not a super strict rule, but it can really help you in estimating the body proportions of your Chibi.
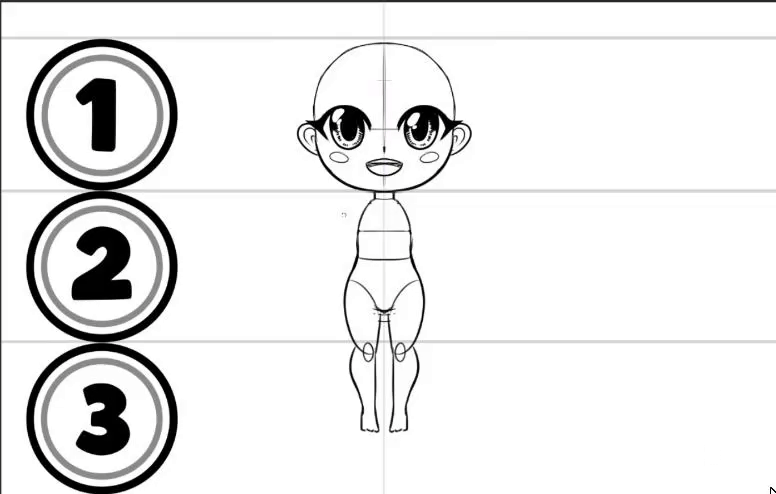
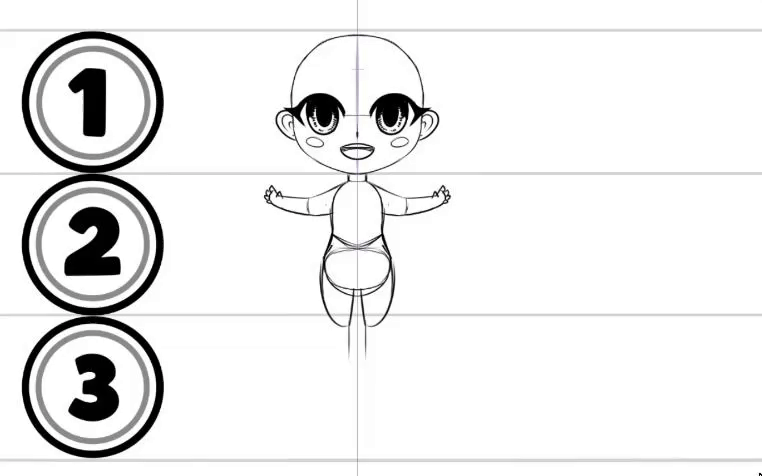
As for the hands and feet, you can simplify them as much as you want, some artists will not even draw toes for the feet and sometimes draw hands with only 4 fingers instead of 5.
And that’s it, there’s really not much more to it really!
Now we can use this process on different sizes of chibi and it will be roughly always the same except every time you shrink you Chibi a little more, you have to simplify its anatomy a little more as well.
For instance, This is what a 2 heads tall Chibi would look like in comparison to our previous 2.5 heads tall character. They only differ from half a head, but you can see how quickly character features change at such a small scale. These two sizes may be the most popular, but feel free to experiment with any size from 1.5 heads tall to 4 heads tall and you will surely find a size that’s most fitting for your art style!
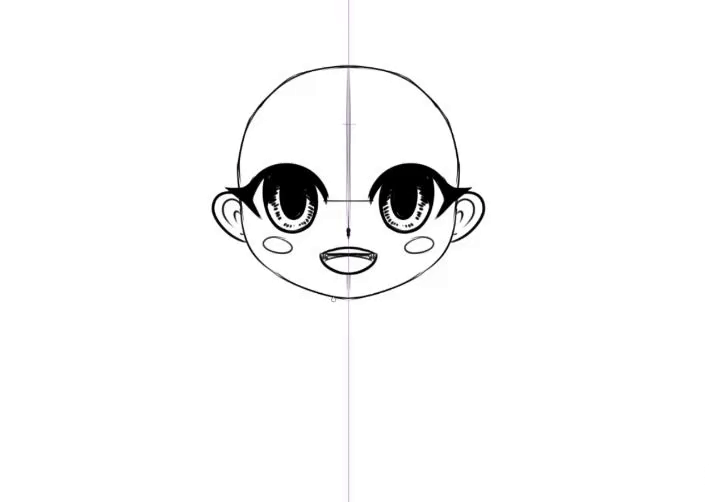
How To: Head and Facial Features
- The Head -
Next up, let’s move on to constructing the most important part of our Chibi characters: the head.
First, draw a circle. This circle doesn’t have to be perfectly round, then simply draw the jaw line and connect it to the chin.
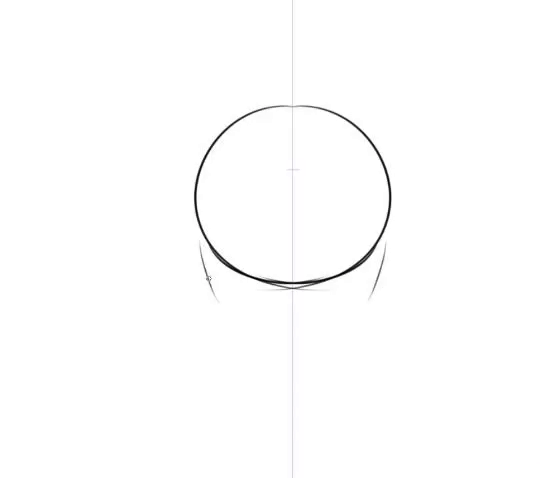
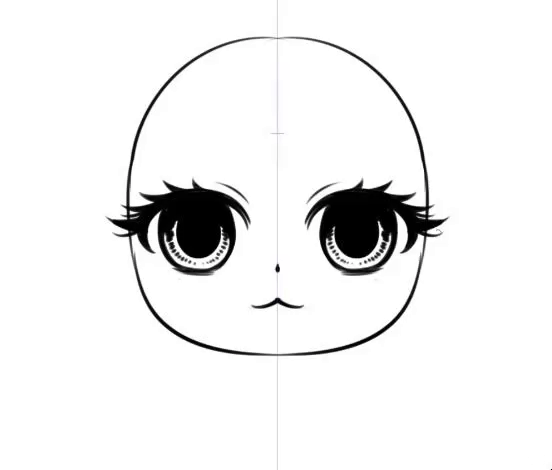
-The Eyes -
1. Draw a horizontal line in the middle of the head and slightly above that line we will draw the top arc of our eyes.
2. At the end of the arc, draw a second arcing line for the main eyelash and again another one lower than the central line to situate the end of the top eyelid.
3. Next draw the eyeball, which is kind of an oval shape, then another rounded almond shape to serve as the pupil. I use the draw/erase technique alot when it comes to creating curvy lines, meaning that I create the whole shape and then erase the extra parts I don’t want to keep afterwards.
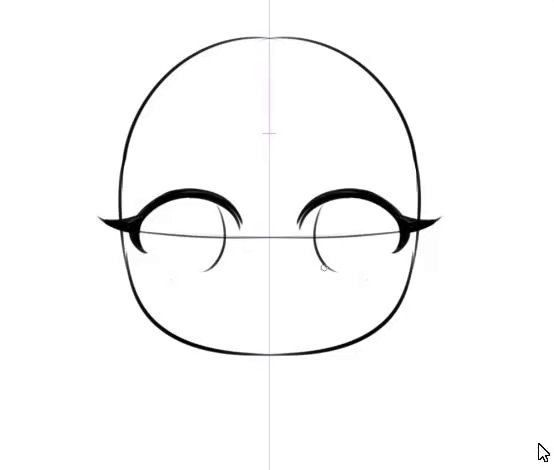
4. To draw the nose, simply make a diamond shape dot at the center of the character’s face and the mouth in this instance is a simple upside down curvy V shape, almost like a cat’s mouth.
5. Something I like to do that is optional is to create two more arcs in the eye and fill them with black. Then simply add this little dot pattern that make the eye pop some more.
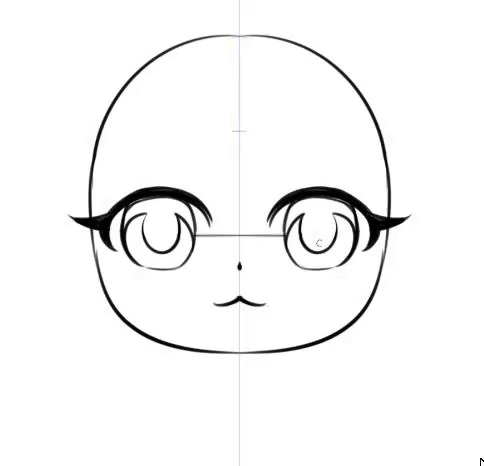
6. After that, feel free to add a few more eyelashes and a line for the upper eyelid. Notice that eyelashes decrease in size and length the closer they get to the center of the eye.
7. Finally, you can make a few extra touches to the face, like a few lines to suggest blush and finish with adding some highlights to the eyes in the form of a large oval shape followed by a much smaller dot of a similar shape.
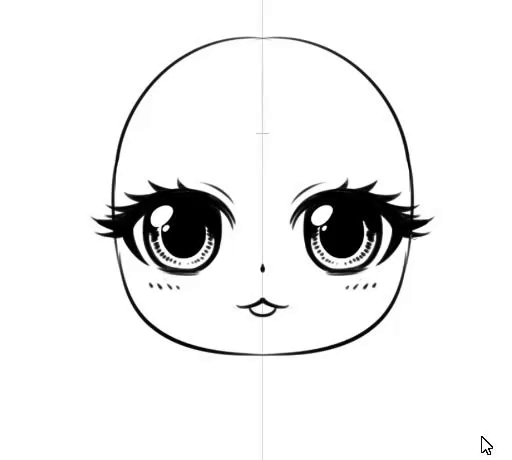
- The Ears -
To draw the ears all you need to do is draw a C shaped like the half of a heart that is rounded at the bottom instead of pointy and for the inside of the ear, you only need to draw two smaller curves following that same initial shape.
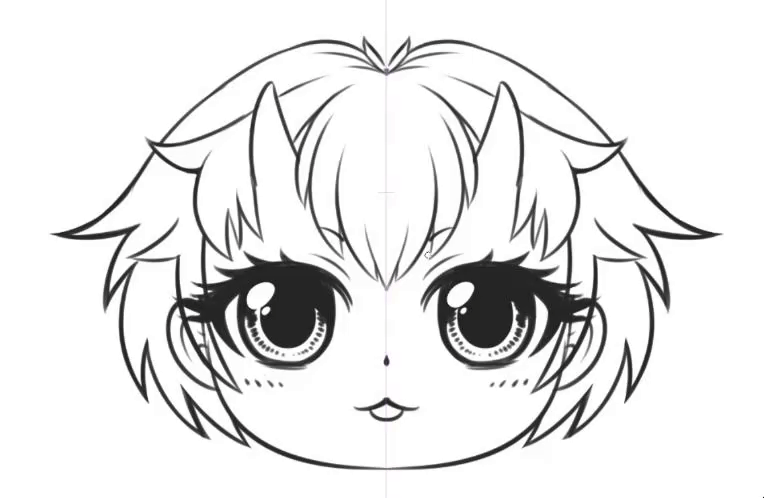
- The Hair -
Drawing hair is as easy as creating two connecting curves that point either up or down. I would advise you to start off by drawing the bangs of the character and then using the draw and erase technique, build the hair closest to the face and outward from there.
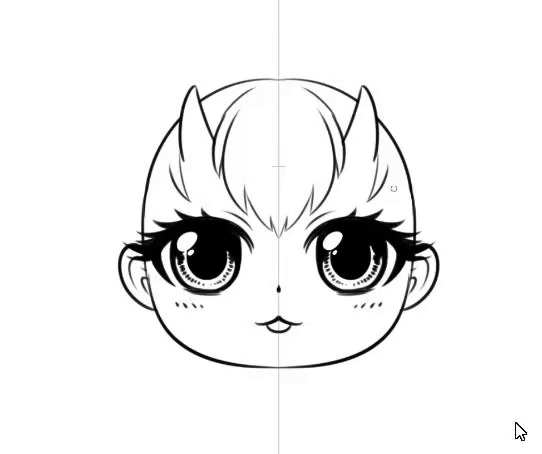
Another good tip for hair is to vary you hair locks angles. So let’s say you have the top hair here curving down and then pointing up a bit, the next hair lock will instead curve and point down. Of course, this comes with trial and error and varies alot depending on the type of hair and hairstyle you want to give your character, but it’s a good thing to keep in mind in general.
Finally, a quick little tip for drawing Chibi eyebrows is to start with an oval shape and then connect two lines from the middle of the top and bottom of the oval and erase the part of the circle inside that we don’t need anymore. It’s as simple as that and it gives you really cute eyebrows in less than 30 seconds!
Drawing a Chibi from start to finish!
Alright, now that we’ve learned the basics of drawing Chibi bodies and faces, let’s put that knowledge in execution and speedrun the entire steps of drawing a fully colored Chibi from beginning to end!
Sketching your Chibi!
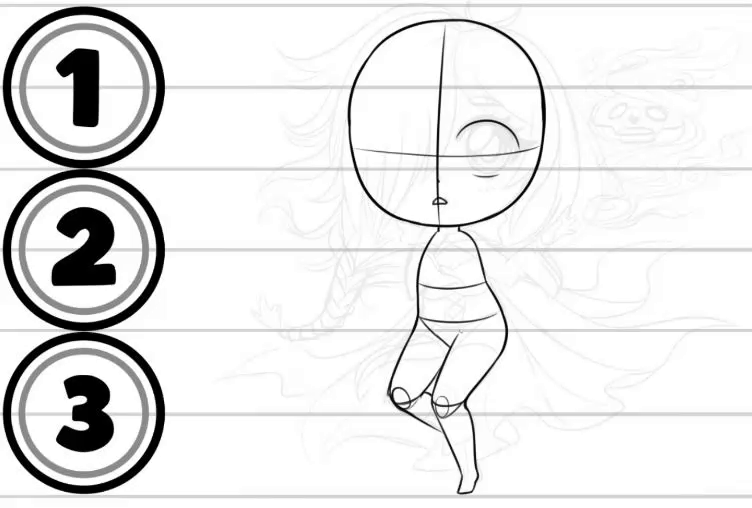
First, of course, we begin with the sketch.
1. We draw a circle for the head, then quickly doodle the jaw line and add in the eyes, nose and mouth.
2. Then we make two circles for the torso and hips and connect the two together.
3. Next we draw the cylinders for the legs, which are approximately half the total size of the body and the arms, which should be similar in length to the torso.
4. Once that’s done let’s move on to drawing the hair. My character Gabby has a specific hairstyle, so I simply reproduced it in a much simpler way by making the braid thicker and giving more volume to everything.
5. Finally I made a quick draft of the cape, which drives alot of the silhouette of our character and an even rougher draft of the clothes.
TIP: I mentioned this before, but a good tip for drawing Chibi clothes is to imagine the character is some kind of doll and the clothes made for it are miniature version of the real thing. This means the folds in the clothes are fewer, but also bolder in size and movement. Basically, important accessories and details should become bigger and bolder and the rest should be removed. For example, a pearl necklace with have bigger and fewer pearls, a bowtie or a hair piece will become three times its real size, but stitches or tiny motifs on clothing should disappear.
TIP: Drawing braids is not very hard, simply create a rectangle that tapers at the bottom, draw some oblique lines forming an X on both sides of the rectangle, erase the lines overlapping on one side and create the curves of your braid from there.
Inking you Chibi!
Now that our sketch is done it’s time to move on to the lineart!
I am not going to dive deep into the technicalities of line art and how to perfect it because it would take a long time and besides, I have already made a video full of tips and tricks on the subject, so definitely go check it out after this tutorial if that’s something you would like to improve, but the gist of it is:
1. I usually draw a clean base for the body of my character above my sketch first
2. Then from that point, I start inking the final version of everything that goes on top of it. So I started by inking the face using very similar techniques to what I’ve shown earlier.
Once the face is done, we can now move to inking the clothes, starting with the body, which is where our clean base becomes very useful. What I always do is I lower its opacity and start inking the final version of the clothes on top of it, using it as a guide.
Next, we can start inking the cape and maybe change up some of the folds and add some holes into it. When it comes to making folds, I usually make a bunch of wavy lines to simulate wind in the cloth and then I draw a line from the extremities of those waves up to the top where it gets lost behind the character a bit. I really only go with what I think looks right to be honest, so I usually experiment with my folds alot until I like the final result.
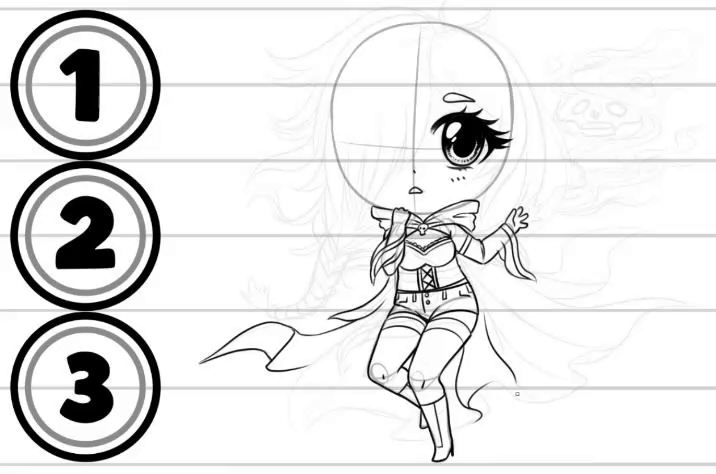
Lastly, we get to inking the hair and poof, done!
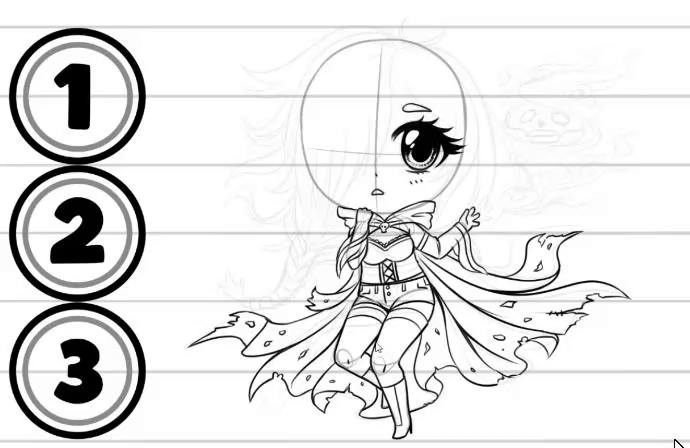
Coloring and Shading your Chibi!
here we go, our lineart is complete, time to get into the coloring stage of our Chibi character!
Now, let’s magically edit in those flat colors because ain’t nobody got time for that and besides, if you want some really neat coloring tips in Clip Studio Paint, I’d rather send you to this other video I made just last month on the topic because it covers everything we’ll be breezing through in this step.
So as you can see, every different material has its own flat color layer, otherwise called a color block layer. Once all base colors are blocked, I added in the color accents in a new clipped layer so it’s easy to tweak them if I want to and from there we can start shading our character.
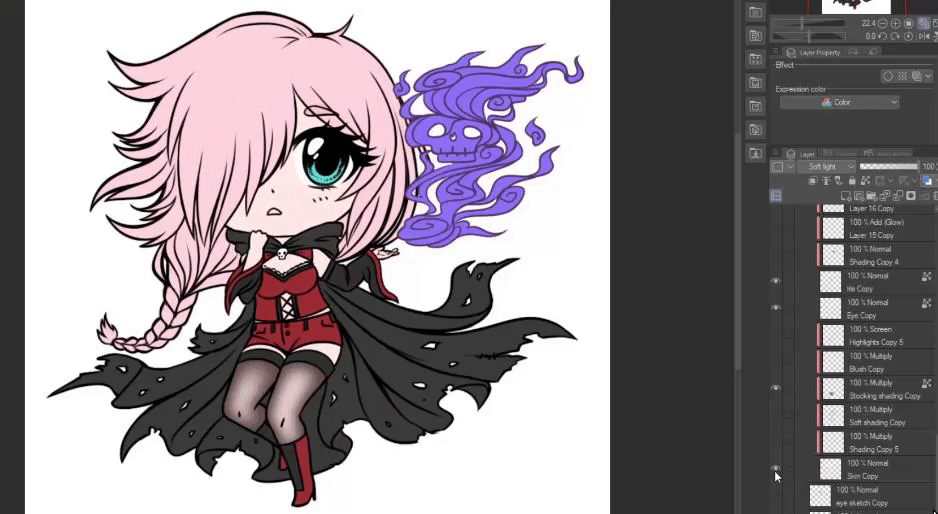
So one thing people tend to do is start with the skin and the face first, then draw the clothes and finally the hair, but no matter where I’d start, the shading layers will always remain the same. I’ll have one base layer, one shading layer on multiply, one soft shading layer also on multiply and one highlight layer on screen. You can add more and make your Chibi fancier, but that’s all you need to get great cell shading results really.

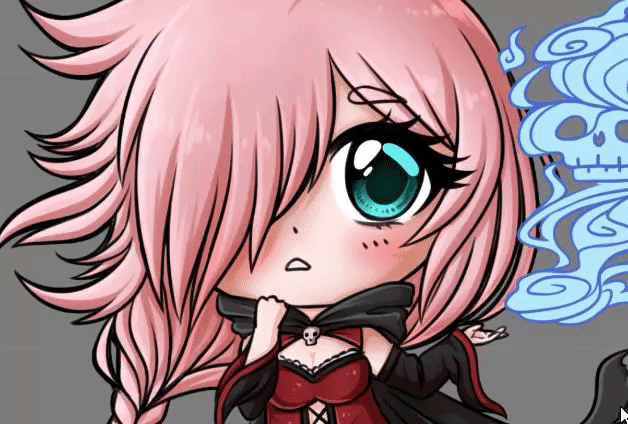
Another thing you can do is add some extra reflections and highlights in the eyes of your character. To do this, preserve the opacity on your eye layer, choose a soft brush, draw a big blob and erase some lines into it, then blend everything back together using the smooth watercolor brush and the airbrush and voilà.
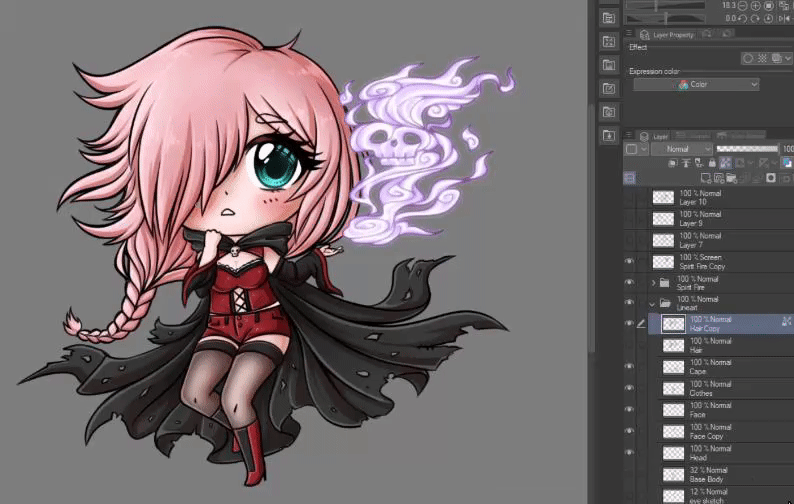
As for the spirit fireball, the way I colored it was to pick a base color, draw some white streaks into it and create a glow effect using a duplicate of its folder that I merged, gaussian blurred then put on the blending mode screen. I tweeked the colors a bit with a hue and saturation correction layer and that’s it!

Lastly, this part is optional, but changing your lineart color is something that can really make your character more cohesive and cute. To do this, you only need to:
1. lock the opacity of your lineart layers
2. Use edit --> fill or draw over your lineart with a bigger brush.
TIP: When coloring your lineart, make sure you’re using a color that is similar yet darker than the darkest shadows on your character or it will probably not look as good. In the same vein of thought, avoid coloring your lineart if your lines will be next to darker colors. For example, here I kept the lineart of Gabby’s legs black because the paler skin line would look strange next to the darker colors of the cape.
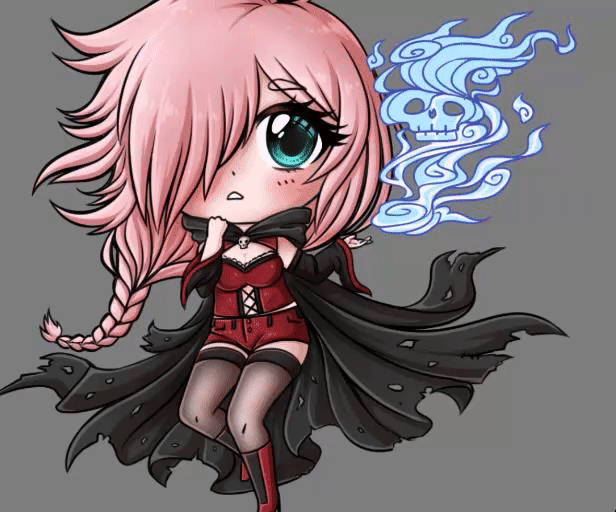
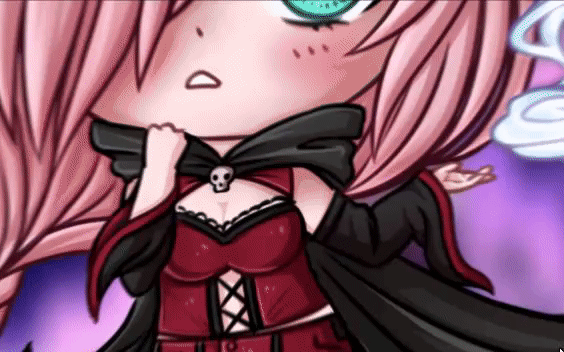
Final Results!
And this is our final result! See? It wasn’t too bad right?
Final Words
I really hope this video was helpful to you in some way, it can be hard for me sometimes to deconstruct things I’m so used to drawing over the years, so definitely let me know what you think of the video in the comments and feel free to join our community while you’re at it!
But for now, that will be it for me, time to cozy up in my crypt, until next time everybody, aurevoir~
-Crimsy
Users who liked this post


Comment