
This tutorial will show you how to draw clean and neat paintings with Bezier curves, from basic usage to practical application (with an explanation of the painting process). Although it is not very detailed, it has a similar animation style effect. Mainly use graphics tools, line correction, and filling.
Preparation before entering the computer drawing program
Before entering the computer operating program, you must prepare a draft, don't need to be too detailed, just describe it yourself. It is recommended to scan the draft beforehand, and take the sketch directly, which is easy to be distorted due to perspective, and it is more troublesome to edit the picture on the computer. It doesn’t matter if you don’t have a printer to scan. I don’t have one. I use the mobile phone’s scanning application ─ ─ Adobe Scan, which can correct skew caused by perspective.
Precautions when shooting
Although Adobe Scan has the function of correcting the distortion, the shooting angle is too tilted, and the distortion will still occur after the correction. When shooting, the lens should be as parallel to the paper as possible.
Equipment to be prepared
You don't need to use the electric drawing board, you only need to prepare the keyboard and mouse, but you must memorize some shortcut keys to use it smoothly.
(I used the mouse to draw this orc character illustration all the way.)
Drawing basic shortcuts
Mouse wheel: screen zoom
Space key: drag the screen
[: Brush zoom
]: The brush becomes smaller
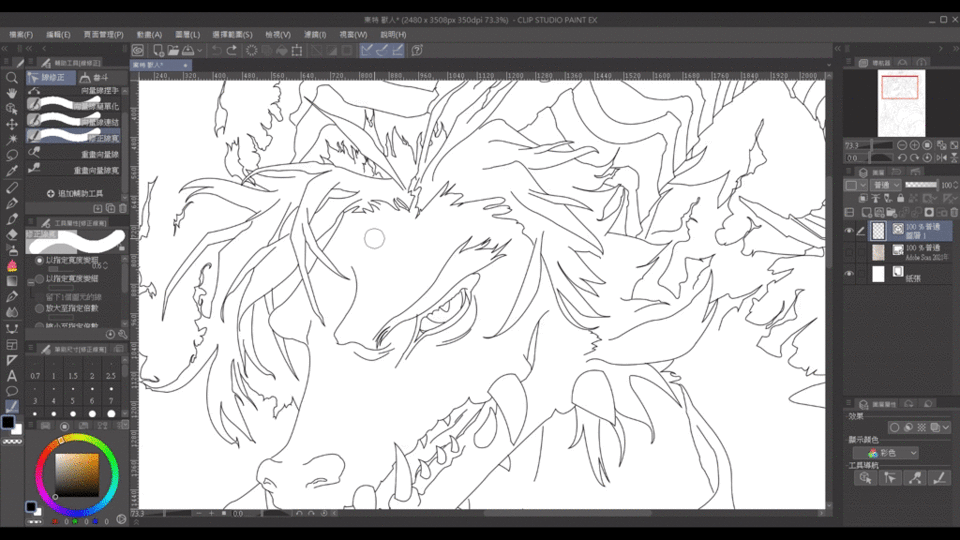
Graphic tool: how to use Bezier curve
Abstract: The second-order Bezier curve is too smooth, so choose the third-order Bezier curve here.
(1) Each time you click, an anchor point (hollow dot) will appear, and the two anchor points will become a line. Click the anchor point and drag it to create an arc. When you click the next anchor point, it will extend the last arc. Press Enter to complete a line.

(2) When drawing the next arc, click on the anchor point (a 90° polyline symbol will appear next to the arrow), and when you drag the next anchor point, you can draw arcs or straight lines of different arcs. Hold down Ctrl to adjust the position of the anchor point, and move the handles (solid points) on both sides of the anchor point to adjust the arc.

(3) Hold down Alt and click on the anchor point, the line connecting the anchor point will become straight, click and drag the anchor point to draw the arc again. While holding down Alt, you can move the handle on one side to adjust the curvature of the line.

(4) When the line is connected to the first anchor point (origin), it will form a closed shape. Sometimes the anchor point and the anchor point are too close, and the screen must be enlarged to avoid the point to the wrong position. Use the above methods to practice drawing! It takes time to practice to be proficient. You can draw from simple shapes at the beginning, and it will naturally become faster after a long time. (「・Ω・)「
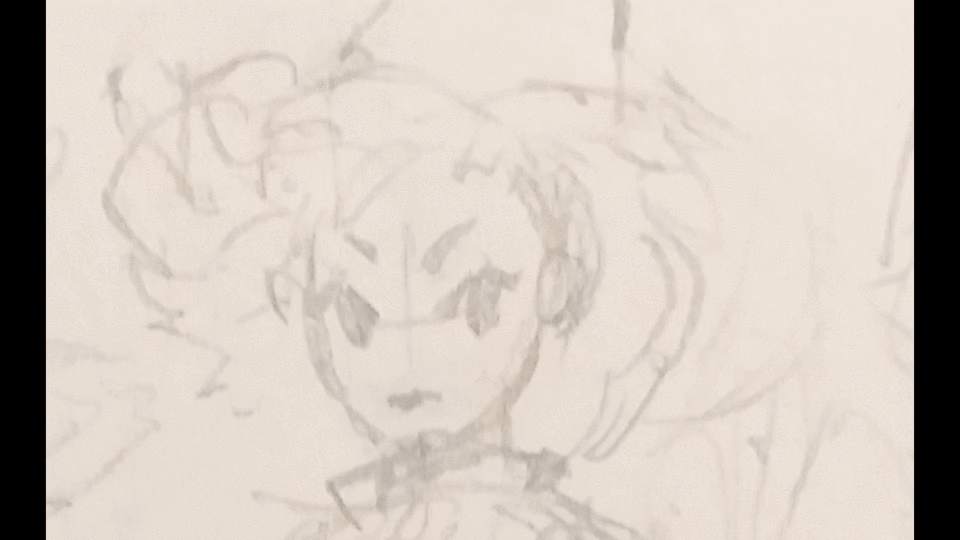
Prepare a manuscript
Scan the draft and confirm that it is not deformed. If there is any deformation, use the deformation tool to adjust [Edit]>[Deformation].
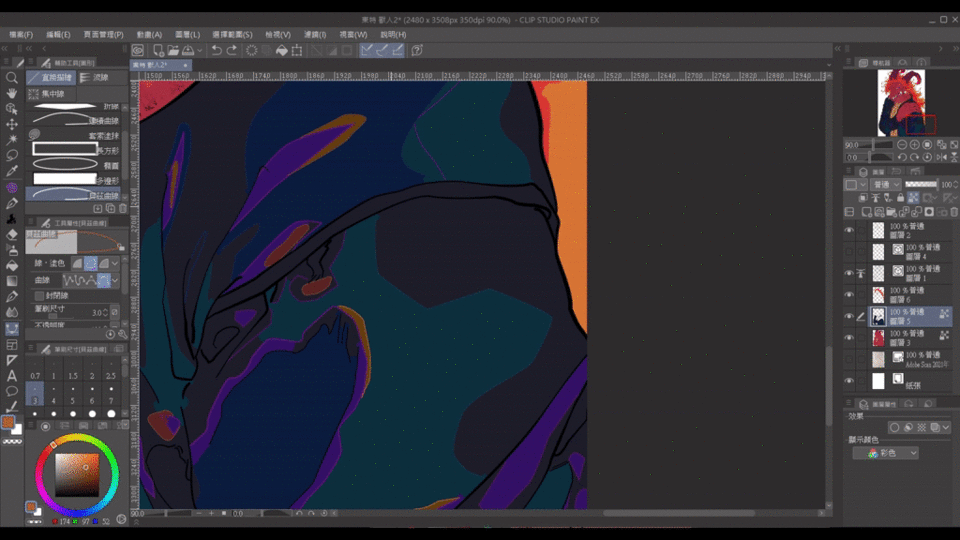
Use the Bezier curve 3 times to draw lines on the *vector layer (easy to adjust). If you want a better visual effect, you have to spend time tracing the lines and portraying the details.
The tracing part took me a lot of time. (┐「﹃゚。)
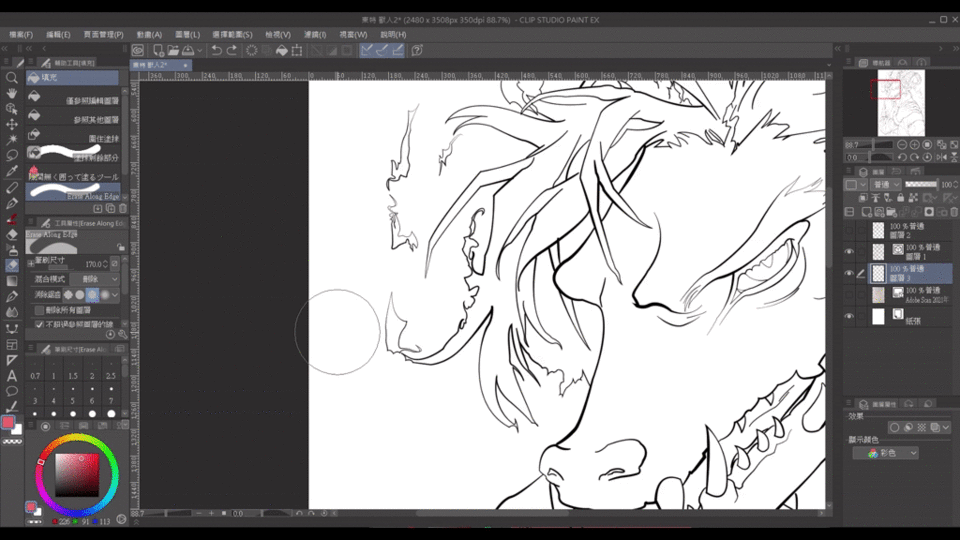
Adjustment draft
At present, it seems that the thickness of the line is the same, which is a bit dull. Use [Line Correction]>[Modify Line Width] to change the line. The thickness of the line will affect the weight and front and back positions of the objects in the screen. EX: I made the head and tail of the thread have a finishing (thinning) effect, and thickened the interlaced parts of the hair to make the hair strands have a back-to-back relationship.
Adjusted result
[Line width correction] Make the line draft look like it was drawn with an electric drawing board (it draws cleaner than I usually do).
Awesome dragon scale brush
Coloring stage
There is only one object in the picture. For the convenience of coloring, fill the entire picture with a single color, and then erase the areas other than the coloring. First set the line draft as a reference layer, and then use this eraser tool and lasso filling tool Can work.
The following tools are recommended here to save time in the process.
Easy to wipe the edges
Super easy to use lasso tool
Color details
The irregular highlights are made by random doodles filled with lasso (the effect is unexpectedly good).
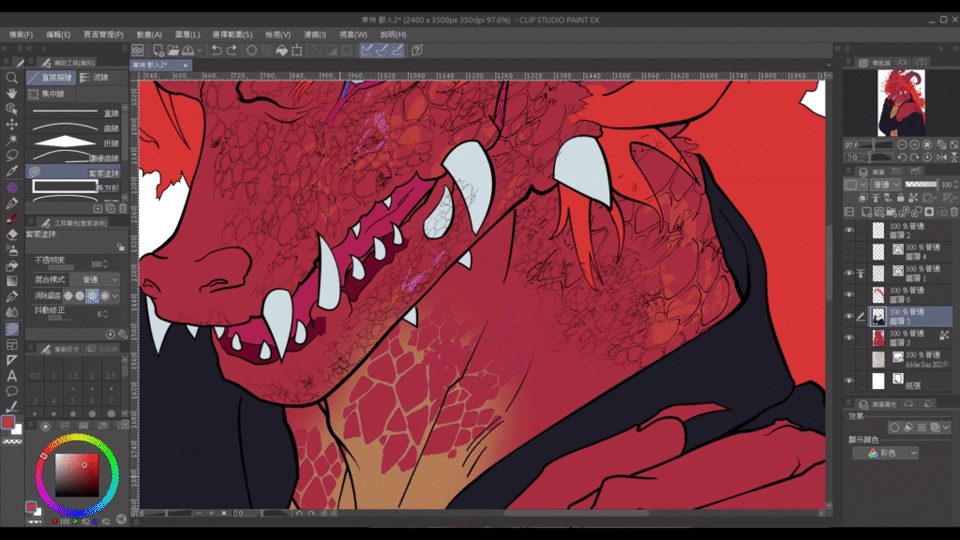
The overall coloring is done by drawing a closed coloring area with Bezier curves (unclosed shapes will cause color to bleed) and using coloring tools. It is recommended that the [closed gap] function be turned on to the strongest.
Finish the coloring.
Flame effect brush used for flame hair
Light and shadow changes and levels
Predict the direction of the light source, draw a closed shadow area (red line) with a Bezier curve, and animate the steps of shadowing.
Use the fill tool to fill in the color, the shadow color should not be too heavy, it will look too dull.
Change the shadow layer mode to [Color Value] and overlay it on the character's inherent color layer.
The effect is as shown below
Increase the level, and finally retouch
To make the shadow with the color of the environment, the single color looks a bit monotonous, set the shadow layer to [Lock transparent element layer], and then use a soft spray gun to paint within the layer range.
In order to highlight the brightness of the flame, the background is dark.
In addition, a layer with the layer mode of [Highlight Color (Glow)] is added to make the color of the fire more vivid and bright.
finished!
Brush, material collection
Hope this teaching is helpful to you (͡° ͜ʖ ͡°)
Users who liked this post


Comment