How to draw your own character using CSP 3D model feature!
Hello everyone, my name is Lalaluta. I’m an illustrator and also a webtoon creator. I hope you all are doing well these days. So today, I am here to help you guys with how to draw poses and also to give you a clear view of the perspective behind these. I truly hope that you guys will find this tutorial helpful 😊. I will try my best to point out each and every tip that I have discovered till now and will explain them as clearly as I can.
So, without any further ado let’s get into this :)
Introduction:
I can understand how hard it becomes to draw the perfect poses that actually fit well with your imagination. Sometimes the hands do not look right, sometimes the shoulder is a bit weird, or maybe the position of the legs is not sitting well with the upper body, I can go on and on~
Now suppose you are making a webtoon, it gets very hard to draw various kinds of poses from different perspective repeatedly and takes a lot of time! And yet after all that hard work, you may not even like it.
Trust me I know how it feels like TwT
So most creators choose to use 3D drawing figures for reference (including me) :)
As a webtoon artist I have been using the 3D drawing figures for quite a while as a helping hand and I am going to share some cool tips with you which I have figured out from my experience, in this tutorial.
So here is a tutorial specially on how to draw different types of poses by using the CSP 3D drawing figures to make cool and significantly accurate poses that you want!
Import CSP 3D drawing figure:
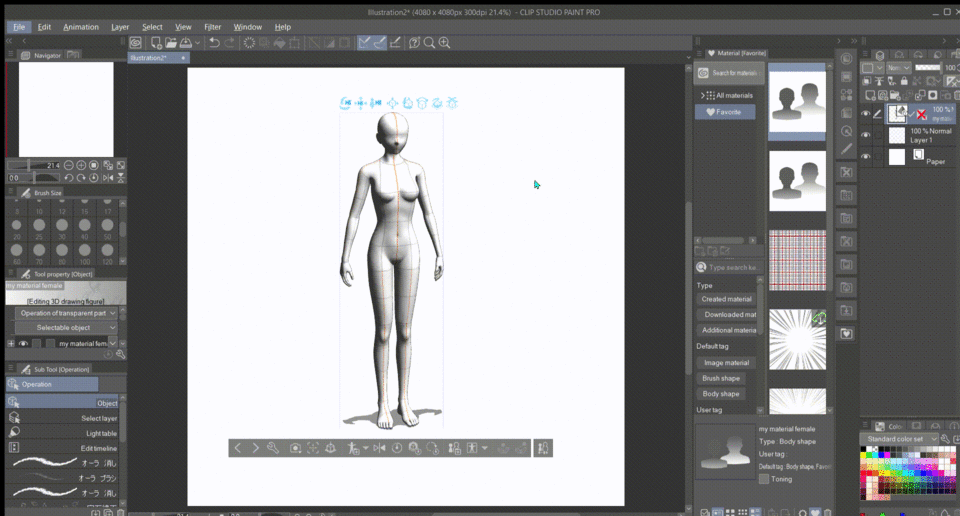
The things that we all know about CSP 3D drawing figure, is we can set 3D figures or characters from the Materials window by dragging and dropping the 3D figure. By the way, there we’ll see two different types of figures, [1] Female and [2] male figure, so we can choose it accordingly to our requirements.
As soon as we drag the 3D model onto our canvas, we’ll see the figure in the basic standing posture and two different rows of specified toolboxes (which are very important by the way!).
Now I’m going to explain the important tools here.
On the upper side of the 3D figure, we’d find-
On the lower side of the figure -
I use these two mostly, there is also the register pose but I am very lazy so~~
Okay, now we know how the toolbox works, let’s move forward.
Placing and posing the 3D figure: Step by step
Now that we have an overall idea of the toolboxes, it’s time to pose our 3D model.
Remember the toolbox under the 3D model that we discussed before?
Yeah! Exactly, That one.
As we drag and place our model onto the canvas, we need to pose it according to our scripted image that we have on our mind.
We need to go to the 2nd tool box and select the last tool from there.
You just need to experiment a bit to find out your perfect ideal figure for your characters. I personalized my favoured figures for both Male and Female body types, which I set as default. This way I saved a lot of time while making webtoon panels.
You all can use it, if needed. But I say to play around a little bit and find your own body type or shape, have fun:)
Okay, let’s move onto the next step.
Now we are going to find the 4th tool from the toolbox.
This is the tool I use the most.
CSP has its own library of default poses. But for me, instead of searching the closest poses from the default library, selecting the certain camera angle from the pre-set is much more time efficient.
We just need to select the desired angle for our character from the chart.
And trust me, here you'll find almost every possible camera angle that would be needed to pose your character!
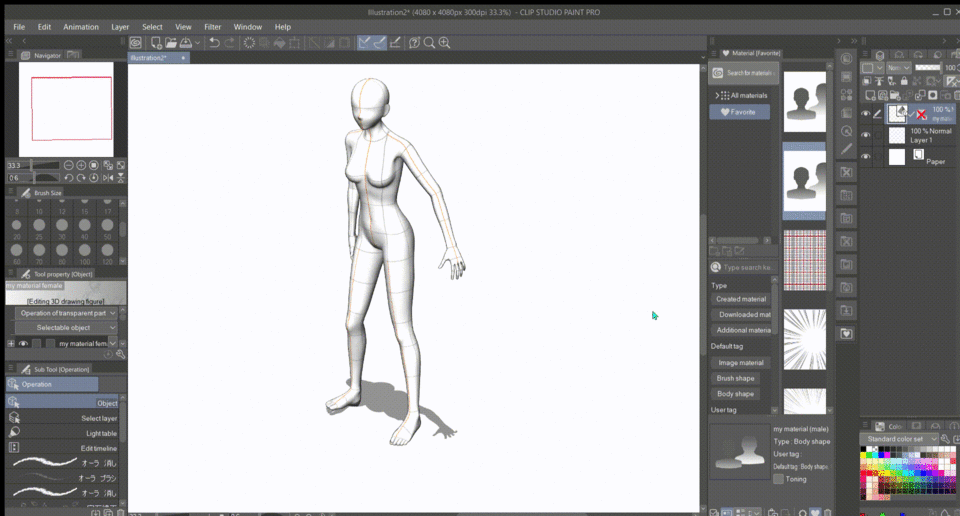
Now that we are done with the character’s body shape and portrait the basic angle for the character, it’s time to improvise the character in depth by sharpen the Perspective using the 1st tool box.
[I have already explained before in details about how the 1st tool box worked]
To match the theme for our illustration or to be completely in sync with the background we have on our head, these tools from the 1st tool box is very helpful!
Tool box no, 1, remember?
Improvise and tune the 3D model:
After posing the 3D model accordingly, there’s still some small adjustments left it to become complete and perfect!
So, it’s time for some fine-tuning for the 3D figure:)

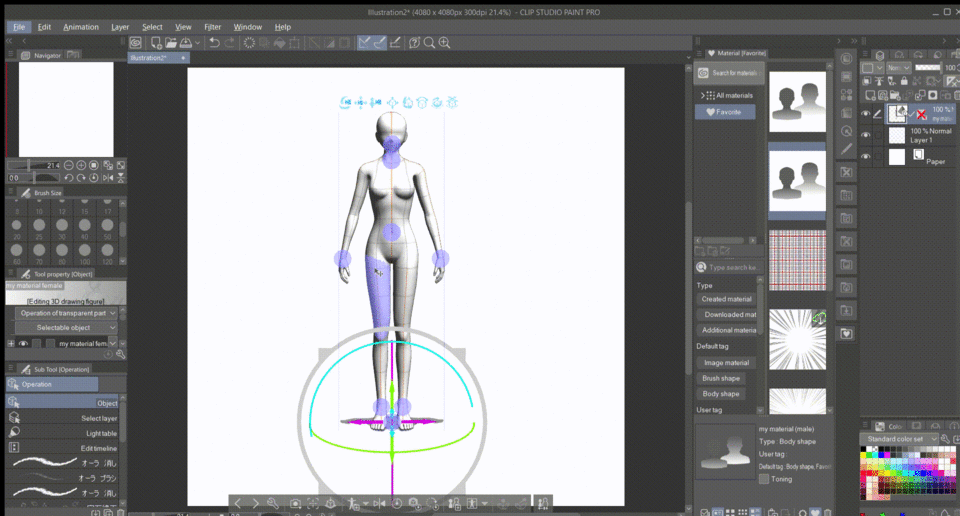
Here we all can see the blue circled points, which controls the respective joints of the figure.

See? By this we can control all the body parts precisely and even go for very small details to match the theme!
Now that let’s talk about the hands and hand gestures!
In this graph, we’ll find all the basic hand setups. Just choose suitably!
The only thing left is to setup the remaining details for the fingers. Let’s break it down with an example.
I’m going to do the details for the hand, where my character is going to shoot an energy ball!
(By the way, I've already posed my model according to the theme)

See! It's really easy. Isn't it?
And it turned out great too!
Let's build our own character by this Method: Step by Step
This method might look difficult right now, but trust the process. It's all worth it in the end:)
Let's draw an illustration of one of my characters from my webtoon. Let’s wake her up from her sleep and make her run towards the garden. There she sees something which infuriates her.
Let's go!
Open a new canvas.
Select the 3D model from Materials window and drag it onto the canvas.
(By the way, here I am using my personalized material , which I set as default 3D figure)
In accordance with our theme here, let's select the perfect camera angle from the Tool box no. 2.
Now let's do some work with the perspective a bit using the Tool box no. 1 .
And here is it!
Now some adjustments!
Almost!
Some tuning on the hand and it's done!
*Now let's proceed to the next step, which is Sketching.
Create a new vector layer above the existing material layer.
Now we are ready to do some sketching.
An important tip: always think of the outline of the material as the skin of your character's.
This way the hair, cloths and the accessories will look good!
Now the sketching is done, let's procced with the Line Art.
Here is the link of the pen which I use for my line arts, in case you want to check it out!
*Base colour
*Some shading !
Draw an appropriate background, which matches our theme well.
And some more details.
Tadaa!
Our illustration is done:)
I hope you learned something from this tutorial.
If you have any question , do leave them in the comments.
Till then~


Comment