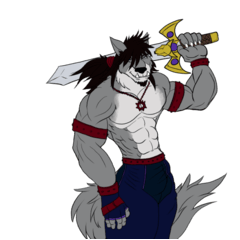
3.Inking
After your draft is finished, draw the main lines using the [Pen] tool. This process is called "inking". The main lines of the character are drawn on a different layer from the draft.
What is a Layer?
Layers are used when drawing illustrations and manga with digital painting tools such as CLIP STUDIO PAINT. A layer is something similar to a transparent piece of film. All elements, such as lines and color, are drawn on these transparent layers. The canvas shows the result of all of the layers stacked together.
Drawing elements such as lines, color, characters and background on different layers allows you to edit each element separately. Separating elements into layers allows various operations for efficient editing, such as hiding the draft once it is no longer needed, keeping the lines while refilling the color and changing the position of the character relative to the background.
The [Layer] palette shows the layers in order from the top downward. When "Normal" is set as the blending mode, lower layers cannot be seen through the content on the layers above.
<Tips: How to display the layer palette on a tablet>
On tablets, tap the icon on the [Layer] palette to display the palette.
Creating a Layer
Create a layer for a line drawing. Drawing this on a separate layer from the draft is convenient as it allows you to change the data so that only the line drawing shows, simply by hiding the draft layer.
1 On the [Layer] palette, double click the layer name of the layer containing the draft ("Layer 1") and change the name to "Draft".
2 Move the [Opacity] slider on the [Layer] palette down to "50" to lighten the color of the draft.
Lowering the opacity of the draft makes it easier to see the inking lines.
3 Click [New Raster Layer] on the [Layer] palette to create a new layer.
The currently selected layer is indicated by changing the color of the layer name to blue.
4 Double click the layer name and enter "Line drawing".
Preparing the Pen Tool
Inking is done with the [Pen] tool. Adjust the [Pen] tool before starting.
1 Select the [Pen] tool from the [Tool] palette and select [Mapping pen] from the [Sub tool] palette.
2 Adjust the brush size of the [Pen] tool.
Adjust this on the [Tool Property] palette or select a size from [Brush Size].
3 Click black in the [Color Set] palette to select it as a color.
Inking the Drawing
Draw the lines, using the draft as a guide. First, draw the outline of the character and the outlines of each part.
Because you created the "Line drawing" layer on top of the "Draft" layer, the blue lines of the draft are covered by the black inked lines.
You can add variance for decorative lines such as wrinkles in the character's clothing by drawing with a lighter pen pressure to create finer lines.
Correcting the Lines
To correct lines, use the [Eraser] tool.
1 On the [Tool] palette, select the [Eraser] tool. On the [Sub tool] palette, select [Hard].
2 Adjust the size of the [Eraser] tool.
Adjust the brush size of the [Eraser] tool either by moving the [Brush Size] slider on the [Tool Property] palette or by selecting a size on the [Brush size] palette.
3 Move the eraser along the line to be erased.
Erasing the main lines will not erase the blue lines in the draft, as the draft is on a different layer.
Ink the drawing using the [Pen] tool and the [Eraser] tool.
Drawing the Fine Details
Once the overall outline is complete, create a new layer for the lines of the patterns on the clothes and wings.
1 Click [New Raster Layer] on the [Layer] palette to create a new layer.
Double click the layer name of the layer you have created and enter "Fine line".
2 Adjust the brush size of the [Pen] tool using the [Brush Size] slider or the [Brush Size] palette on the [Layer Property] palette.
Make the brush size slightly finer than the size used to draw the outline.
3 Draw the patterns on the clothing and wings.
Drawing these areas on a separate layer from the outline makes it easier to correct areas where the lines of the pattern overlap with those of the outline.
Finish Inking the Drawing
Once inking is complete, hide the "Draft" layer so that only the main lines can be seen.
1 Click [Show/hide layer] to the left of the "Draft" layer on the [Layer] palette to hide the layer.
2 The draft layer is hidden and only the main lines are displayed. Inking is now complete.
Unlike when drawing on paper, the draft lines do not need to be erased as the use of separate layers allows this to be done automatically by hiding the draft layer.


Comment