
Today's tutorial is about how you can earn money by documenting your drawing progress - so-called WIPs (Work in Process) - and which software, utensils and websites you can use for this.
Why you should document your intermediate steps
It is not uncommon for an artist to get significantly more feedback on a WIP picture than on the finished picture.
Intermediate steps are exciting, they arouse curiosity about the finished picture, but also make the art of an artist "tangible".
Often you don't see the finished picture, how much work has gone into it, which techniques were used, etc.
It is also exciting to see the development of an image and other artists can learn from it.
WIPs as an incentive for crowdfunding
Crowdfunding is becoming increasingly popular among artists. There are now numerous sites, such as Patreon, Ko-Fi, Tipee, Steady etc., where you can take out a subscription and support an artist with an amount of your choice.
Depending on how much money you give the artist per month, the more you get from him as a thank you or reward.
WIPs often serve as low-threshold entry and exclusive content for crowdfunding, so with many artists you can see exclusive WIPs, videos, etc. from the creation process for as little as 1-5 $. Videos are particularly interesting.
The time-laps function of Clip Studio is particularly suitable for this, as the videos do not have to be reworked and they are created "on the side" while drawing.
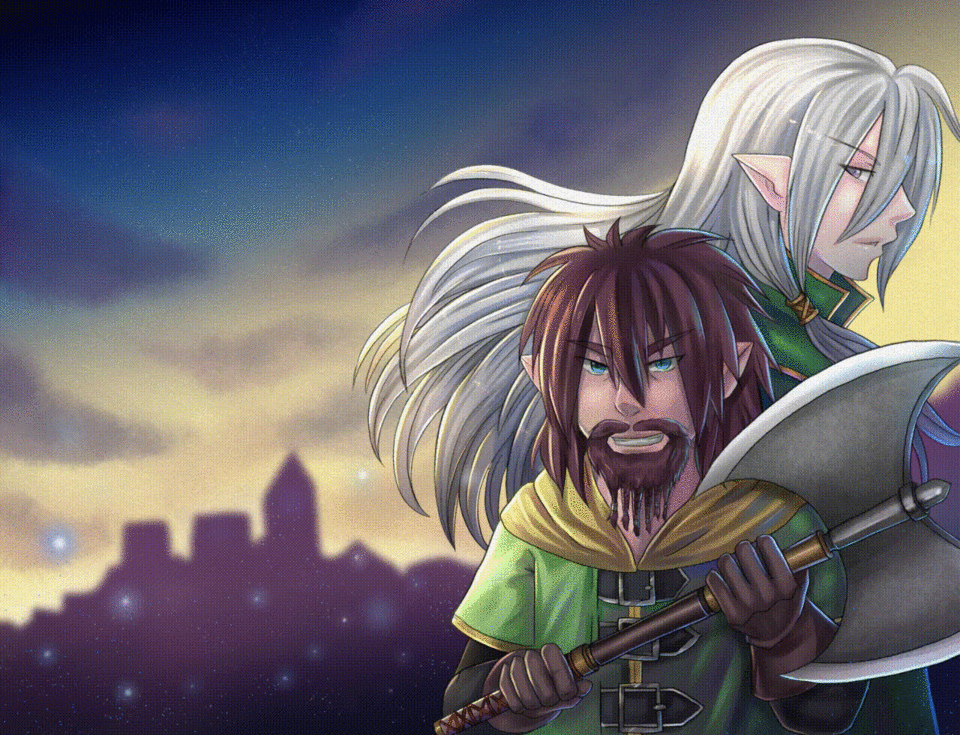
Here is an example of 2 different payment levels in crowdfunding.
WIPs for tutorial videos
You can make money with tutorials not only on Clip Studio Tips. Many artists use photos and video recordings of their intermediate steps to create tutorials.
You then post them on video platforms such as Youtube, or tutorial platforms such as Skillshare, Domestika, Udemy and co.
It should be noted that although you can post any type of video (tutorials, time lapse, speed paint) etc. on YouTube, you must first meet certain criteria in order to be able to monetize them. Since the guidelines for this keep changing, I recommend doing your own research.
For tutorial platforms, the tutorial character must be fulfilled. In addition, each platform has its own criteria for how these videos should be designed.
Streaming
Live streams are becoming increasingly popular. You can watch the artist in real time as he / she draws his / her picture, comment, ask questions and interact with it.
Popular platforms for this are e.g. Youtube, Twitch, Picarto etc.
On many of these platforms there is also the possibility to earn money by streaming your art through subscriptions or donation buttons.
It is recommended - as in the example - to announce the corresponding stream with a WIP (e.g. the sketch). This can make your followers curious about the finished picture and its creation process.
WIPs as a Marketing Tool
WIPs are a great marketing tool. Finished pictures take a lot of time, with WIPs you can post something regularly on your social media channels and thus keep them "active".
They are also well suited to Patreon, Ko-Fi and co. to apply.
Tutorials can also be applied well with it.
Tools for WIPs
Screenshot
A screenshot is the easiest way to share a WIP. With a screenshot, your device takes a photo of the entire screen.
The key combinations for this are quite different depending on the device, but can be easily found out using search engines.
Screenshots have the advantage that they are very easy to take. However, the "hand-drawn" feeling is somewhat lost with them, which is why some artists prefer photos.
Cell phone photo or video
Cell phone photos and videos are very popular as WIPs.
In contrast to simple screenshots, they offer the advantage of the "handmade" impression: You can see that there is a person behind the drawing and that the picture is hand-drawn. It is not created "as if by magic" using software.
Short video clips can also be easily shared on social media platforms such as TikTok, Instagram and co. edited and published.
The disadvantage is that you don't always get a good angle and it can be exhausting to take photos or film yourself while drawing.
Tripods or document cameras can be a solution to this problem.
Time-lapse videos
Under File -> Time Lapse Clip Studio offers the function of recording the creation process of an image as a video. This can be conveniently exported at any time using the time-lapse function and divided in different lengths.
The advantage is that you don't have to edit the videos. They can be easily shared almost anywhere thanks to their short length and small file size.
The disadvantage is that these videos are basically a series of screenshots that document every change process in the image. Layers and tools are hidden.
This means that the creation process is well documented, but it is difficult for others to understand which brushes the artist used, for example, or which effects etc. were used.
This function is therefore only partially suitable for tutorials.
Screen recording
In addition to the time-lapse function, there is also the option of recording your screen directly. A wide variety of programs such as Quick Time, OBS, or a function of the device intended for this purpose can be used for this. For example, the iPad has a screen recording function.
The advantage is that you can really see everything. Every setting, every procedure is documented in real time. The disadvantage is that these videos require a lot of memory and become very long.
Using video editing software, they can be accelerated, cut and adapted, but this is associated with some effort.
In addition, these are only limited on social media platforms such as Twitter, Instagram and co. uploadable, as they only allow very short videos.
Videoschnittsoftware
You need a suitable program to edit video recordings.
Most operating systems have a video editing program preinstalled for this, or there are plenty of free programs for this on the Internet.
Social media apps such as Instagram and TikTok can also be used for short WIP videos.
Streaming Software
To stream your art, you need external software that makes your recording available live on a website. A very popular and free software for this is OBS.
This allows videos to be posted on Youtube, Facebook, Twitch and co. put live.
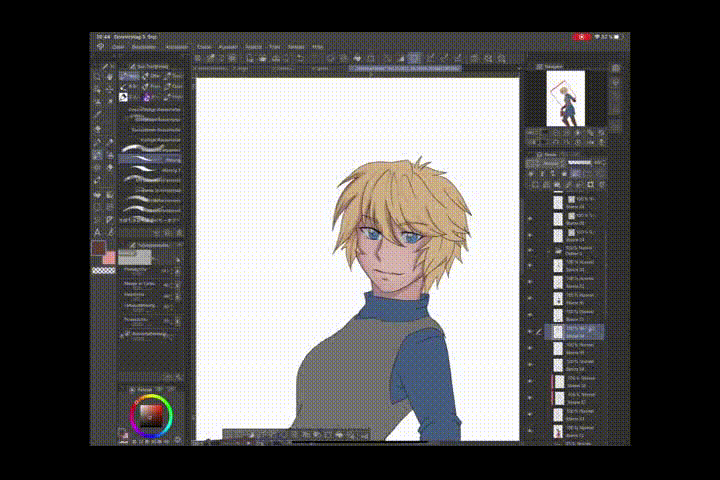
Unfortunately, OBS is not available as an app. If you're streaming from an app-based device, you'll need to connect it to your computer. You can then select your device as the source under Devices (see 1 and 2).
Instructions on how to connect the OBS to the respective social media platforms can be found on most platforms themselves. As a rule, a so-called "key" is required for this. OBS saves it so that you only have to enter it once. You can enter the key under Settings (3)
Note for MacOS users: If you want to synchronize your iPad with the OBS for the first time, you may have to open the Quicktime program so that OBS can find your iPad. Once the setup has been saved, you no longer need to activate Quicktime.
Some mental health tips
Social media likes and clicks say nothing about the success of an artist.
Many artists quickly feel pressured to post something every day.
If a WIP should get more likes than the finished picture, that doesn't mean that the finished picture is not beautiful. In addition, many already "know" the picture from the WIPs.
It is important that you feel comfortable and healthy. If you don't feel like posting your intermediate steps, then don't. If you find yourself feeling pressured, step back from social media.
In many countries there are free hotlines that you can turn to if you have the feeling that the pressure is getting too great and they have really good tips on how to cope with it.
Users who liked this post


Comment