Covering the basics of LAYERS
Introduction
Hello everyone, this is shironeco.In this tip, I will simply explain the basic use of layers in Clip Studio Paint, with some real-life examples.Understanding the basic functions of layers will help you work more efficiently.
*These tips are written by me, a native Japanese speaker in a Japanese environment of CSP for PC, using my limited English skills and a translation engine. Please understand that there may be some parts that are difficult to understand.
The concept of layers
Layers are an essential feature in digital illustration, and are like transparent films.
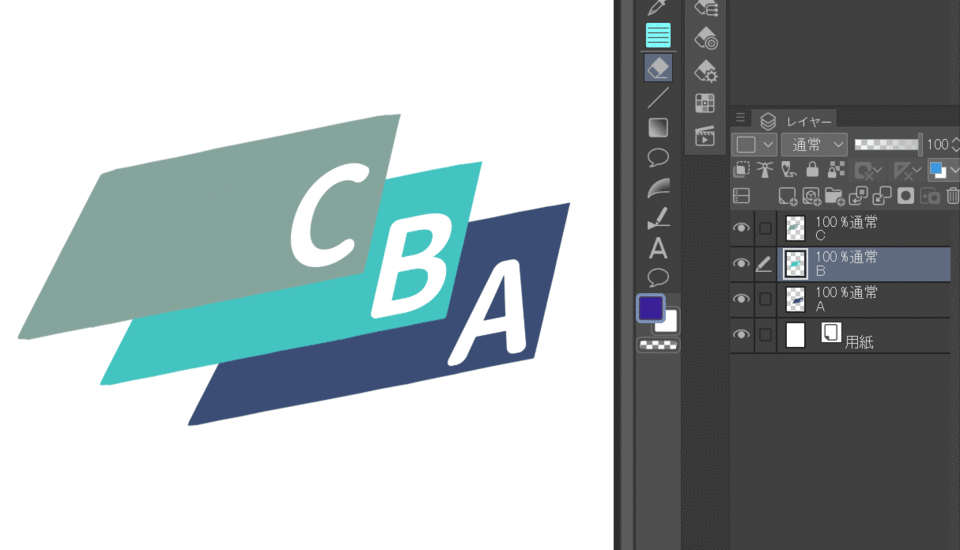
Look at the figure below.
The red frame on the right is the layer, and the corresponding layer is shown in the figure.
The upper the layer, the closer it is to the front, and the lower the layer, the closer it is to the back.
Look at the gif below, drag layer B to the top and it will appear in front of you. Also, erasing the B layer with the eraser does not affect the A and C layers.
*There is also an eraser that can erase through the layers.
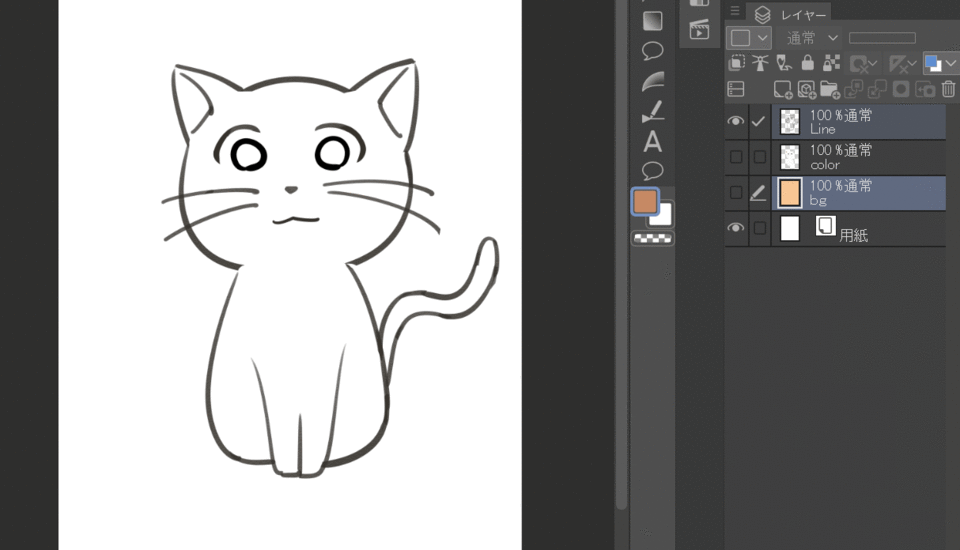
By separating layers for each part, you can work with fewer revisions.In the following example, by separating the character and background layers, the shadow does not extend over the character and can be quickly painted.
Basic operations of layers
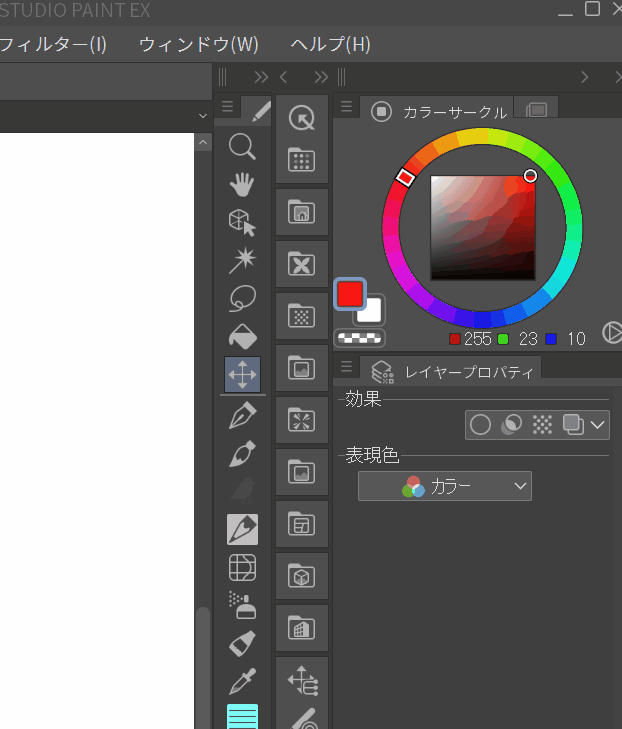
1.Display the Layers palette
Now let's take a look at the basic operations of layers. First, make sure that the layers palette is visible, and if not, show the layers palette from the menu bar window.
2. Basic operation
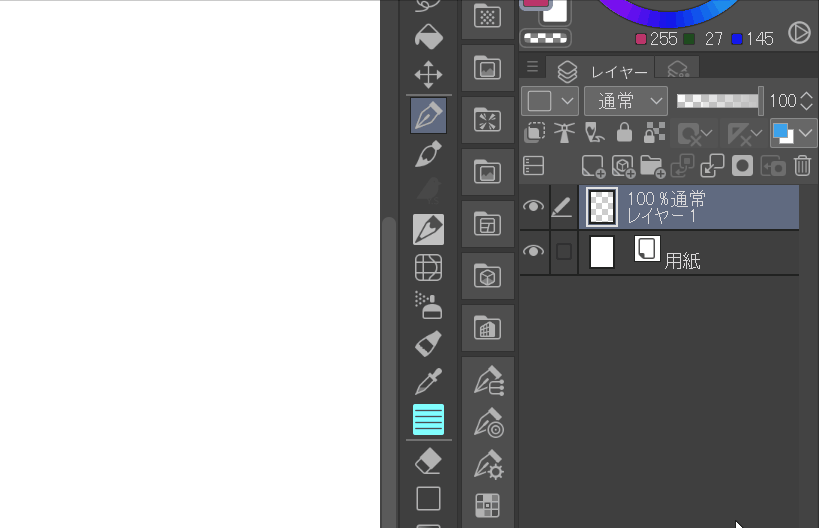
See the gif below for a summary of the basic operations.
What you do is create a layer, rename it by double-clicking, move it by dragging, show/hide it by using the pupil symbol, delete it, and create a folder. One useful feature is to select a layer and drag it to the Create Folder icon to create a new folder with the selected layer.
Layers palette
Let's take a closer look at the layers palette.
1.Paper Layer
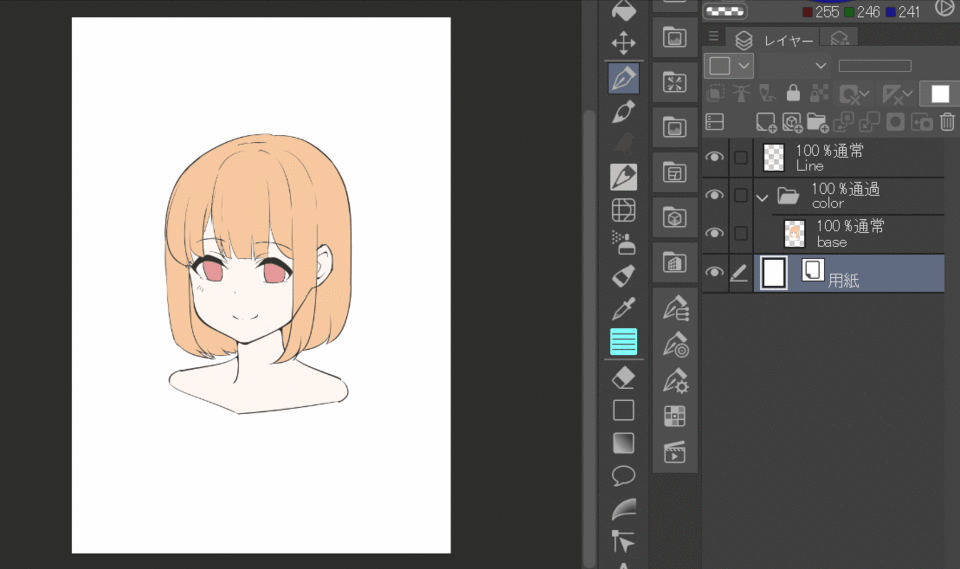
When creating a new image, you may have noticed that there is a paper layer under the normal layer. The properties of the paper layer are as follows: it is not transparent, so it is used as a base layer.
Only one paper layer can be created on a canvas.
It is not possible to write on the paper layer or delete its contents.
The paper layer will always be placed at the bottom of the layer.
In the following example, when the paper is hidden, you can see that the area outside the drawing area of the general layer is transparent. You can also double-click on the paper to change its color to a prominent color and use it to check for paint leaks.
2.Change palette color
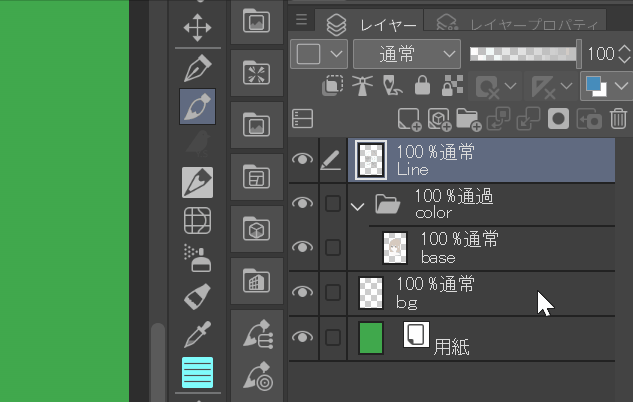
Palette Color is a feature that allows you to color-code a selected layer. This is useful for managing a large number of layers. For example, it can be used to colorize line drawings, colors, backgrounds, etc.
3.Show layers in 2 panes
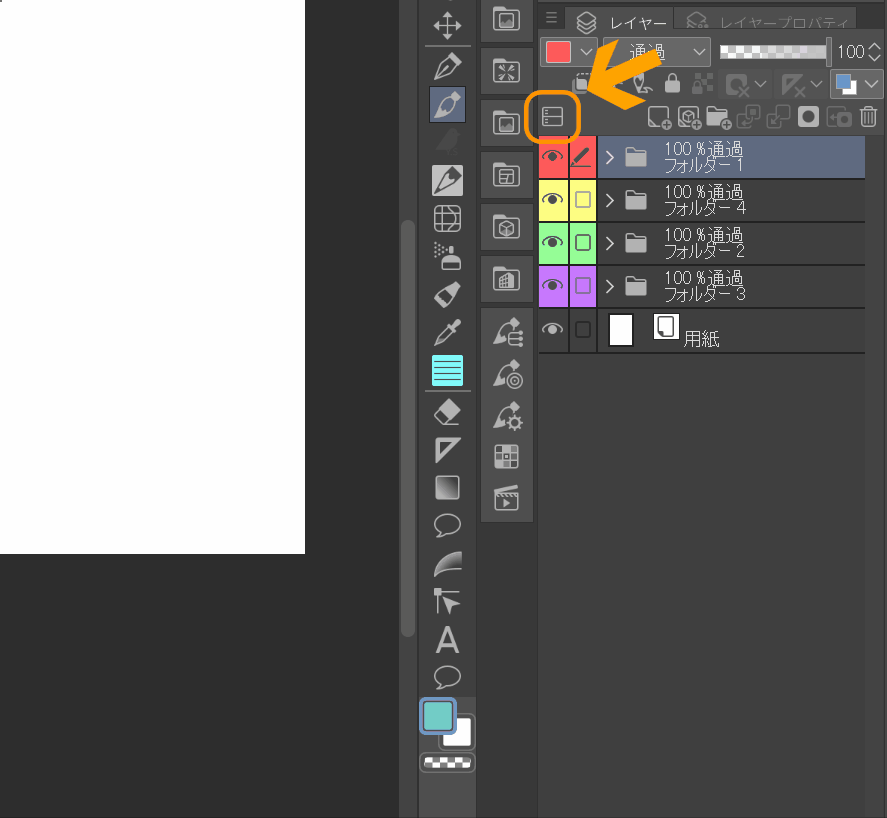
You can split the layer palette in two. This is useful when you have a lot of layers.
4.Set as reference layer
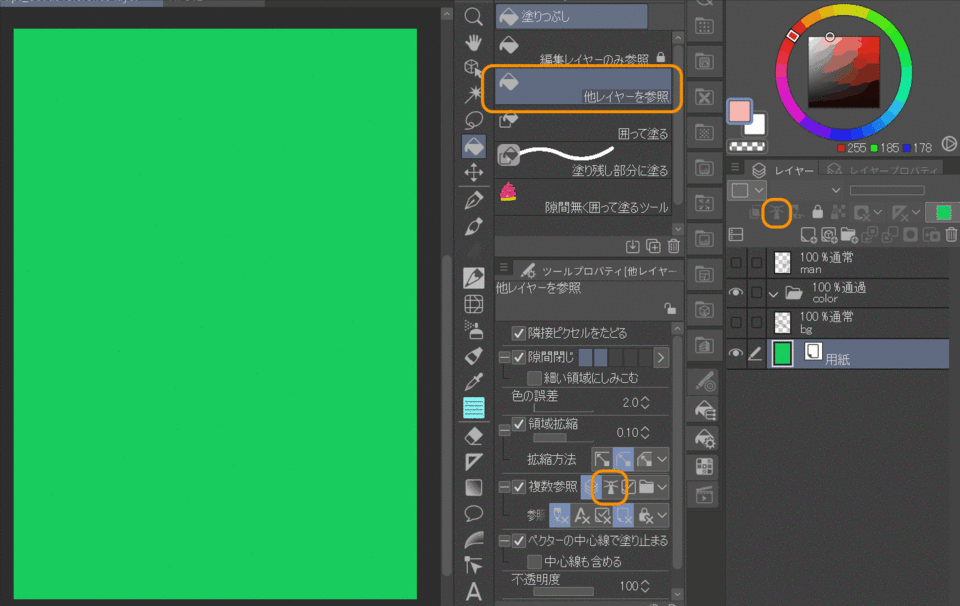
Use this option to reference only the layer specified by the Fill tool. To use it, first set up a reference layer, select "Reference other layer" in the Fill tool, and set multiple references to the reference layer. By doing this, you can ignore the line drawings on other layers.
In the following example, when filling in a character, the background line drawing does not fill in. This can be avoided by setting a reference layer to the character's line drawing and then filling it in.
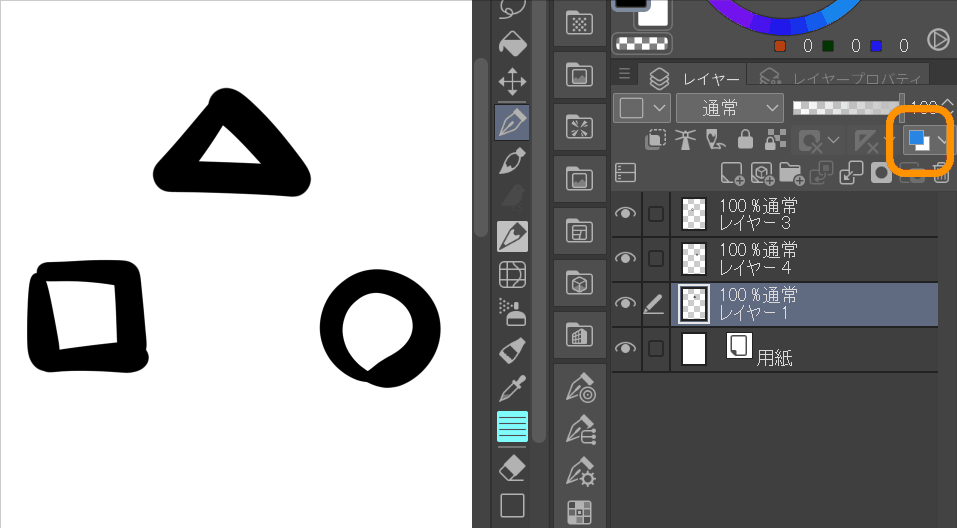
5.Change layer color
You can change the drawing contents to the set color. The color can be changed using the layer properties described below. You can use this function to distinguish between a colored drawing and a draft.
6.Opacity
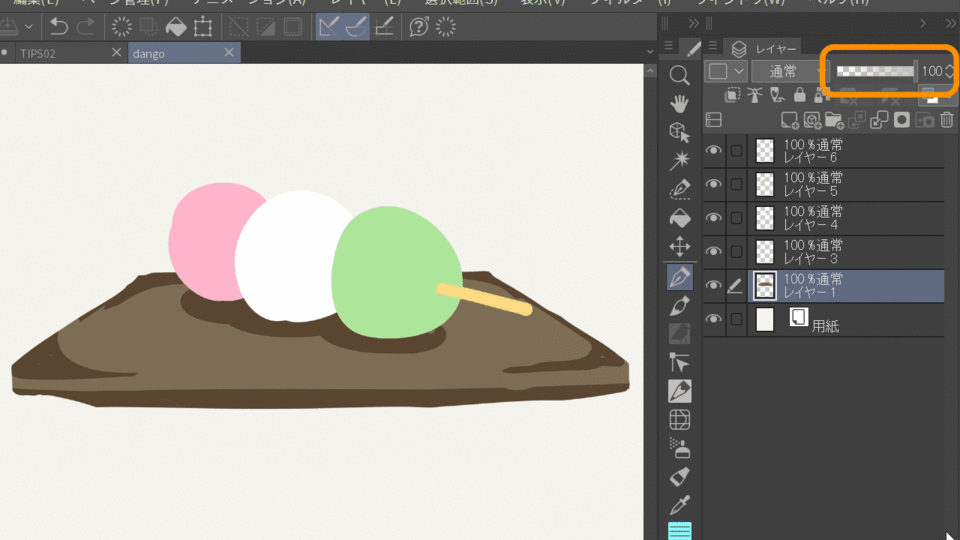
Opacity changes the transparency of the selected layer, becoming more transparent as it approaches 0%. It is used to adjust the strength of shadows, highlights, and layer effects.
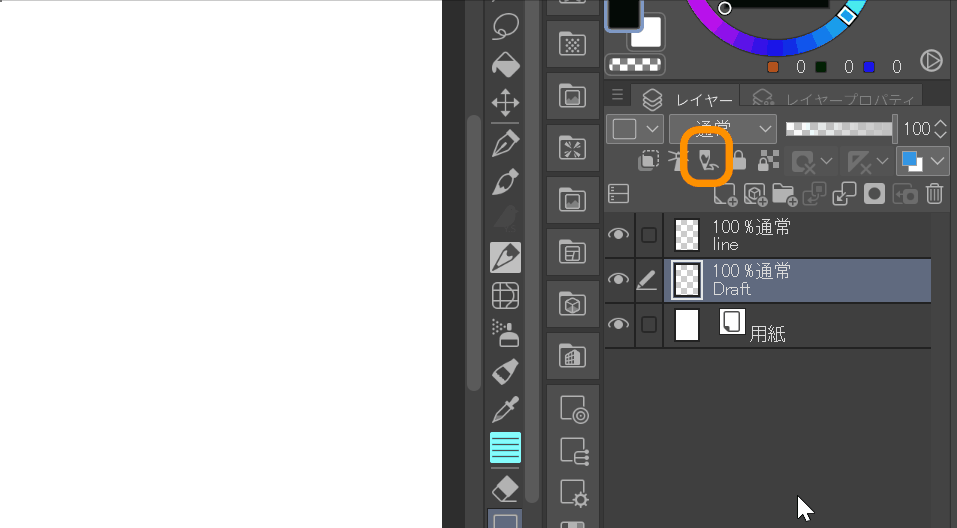
7.Set as Draft Layer
As the name suggests, it is used as a draft. As a property, it is ignored when filling. Drafts can also be set to be ignored during output. When creating line drawings, drafts can be distinguished from line drawings by combining them with layer colors.
In the example below, you can see that the line drawing is ignored in the draft.
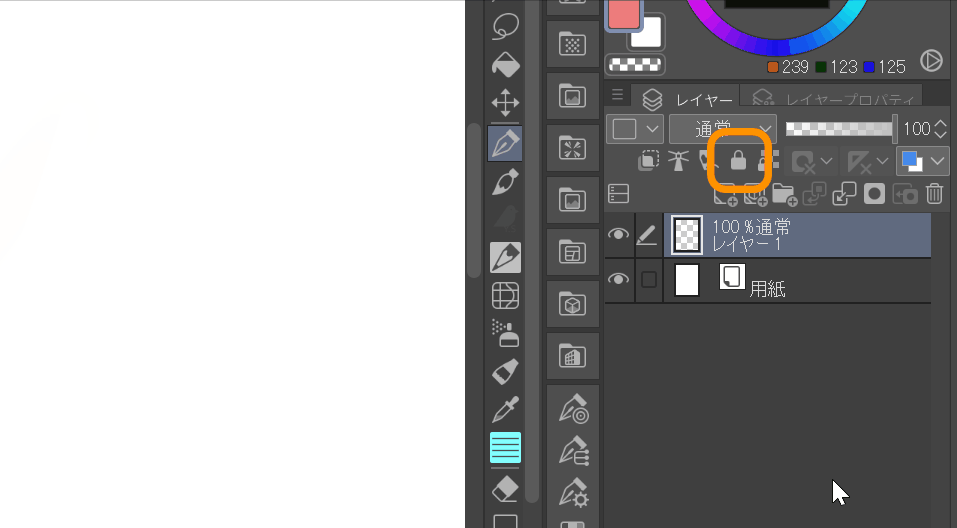
8.Lock layer
As the name implies, it locks the layer and prevents you from editing it. This is used to prevent accidental editing.
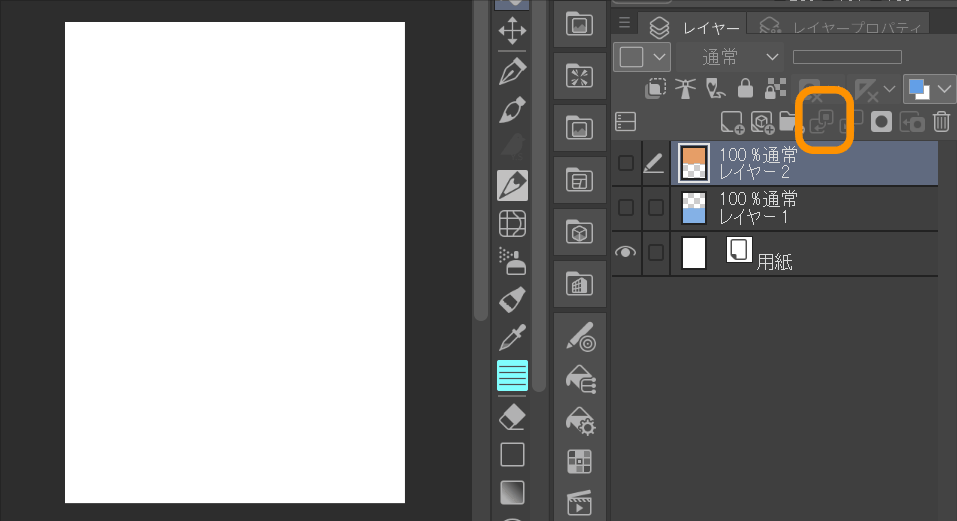
9.Transfer To Lower Layer
Move the contents of the upper layer to the lower layer.
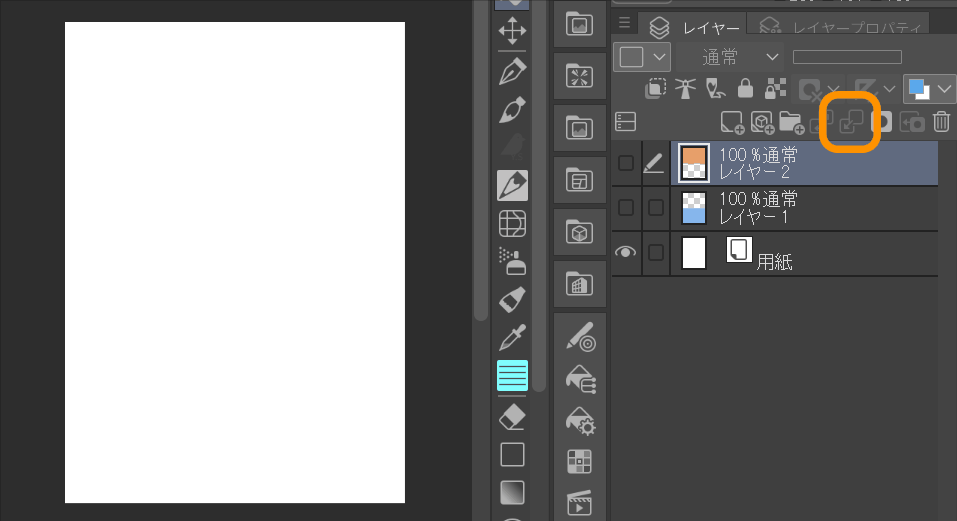
10.Combine to layer below
Merge the upper layer with the lower layer to create a single layer.
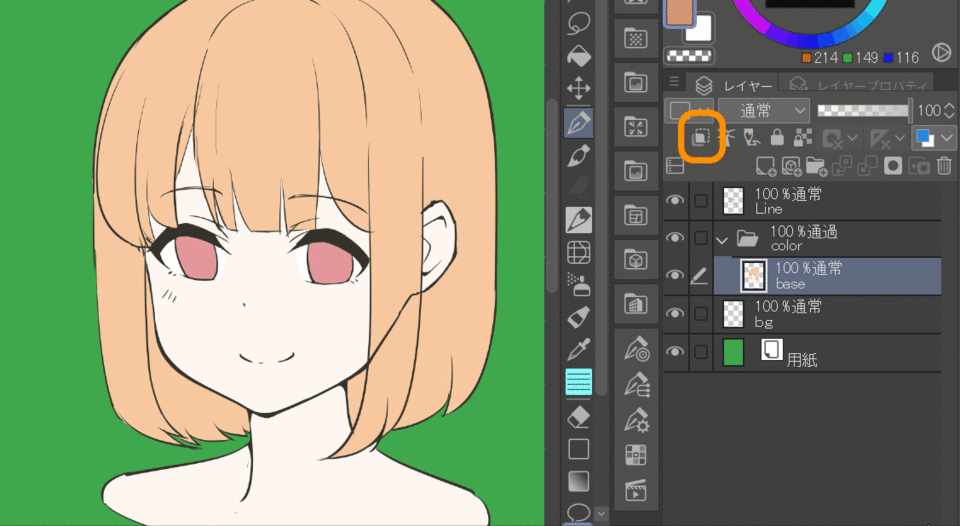
11.Clip to layer below
The clipped layer will only be drawn in the foreground of the layer below it. This can be used to paint shadows on the base color, as shown in the example below.
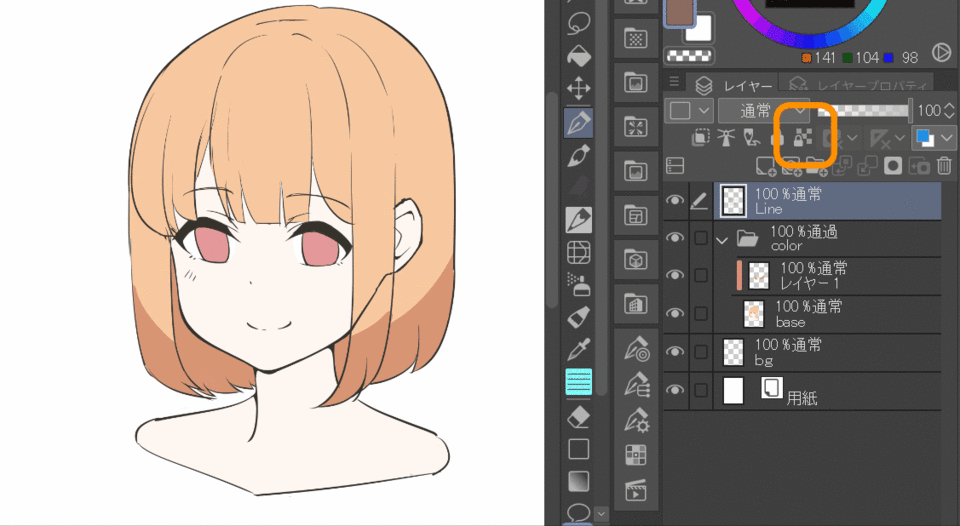
12.Lock transparent pixels
You will not be able to draw on the transparent part of the specified layer. It can be used for color tracing or for coloring without worrying about overflow. In the example below, a line drawing is colored with color tress.
*Color tress is a technique used to draw a line drawing with natural colors.
13.Create layer mask
This function allows you to create a mask based on the selected area and hide it while maintaining the drawing content. It is often used in the same way as clipping, since it prevents overflowing and coloring. Functions related to layer masks include the following
Apply Mask to Layer:Apply the result when mask is enabled to the layer and remove the mask.
Enable mask:Enable/Disable mask switching
Show Mask Area:Display of mask application area. Useful for mask correction.
In the example below, I selected the hair with the gamut selection, created a layer mask on a new layer, and painted the shadow. When you remove the layer mask, you can see that the hidden area is now visible.
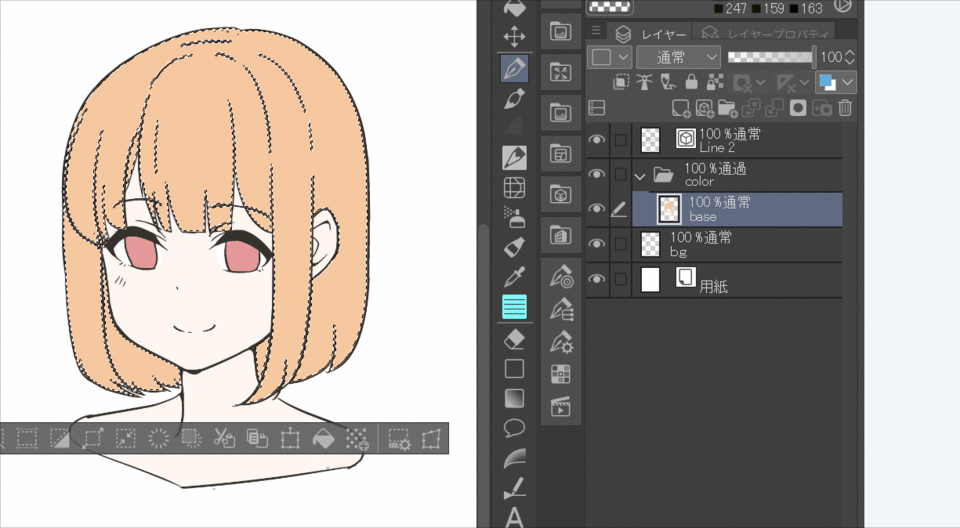
[technique]Unclipping while maintaining the clipping result
There are times when you have been painting with clipping, but want to make a single image. In this case, you can use a layer mask to select all of the clipping source and mask the clipped layer to remove the clipping while maintaining the current state.
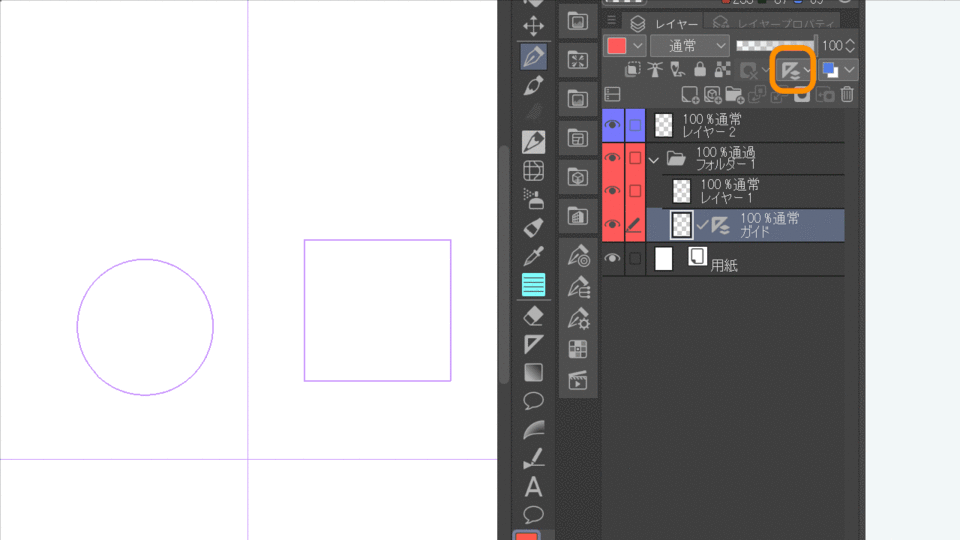
14.Set showing area of ruler
The display range of the ruler can be set.
Show in All Layers:Show in all layers
Show in Same Folder:Display on the same layer as the guide
Show Only When Editing Target:Show only on the layer with the ruler
Link guide to ruler:Enable/disable moving guides and rulers when moving.
Raster&Vector
1.Raster&Vector
Let's discuss raster images and vector images.
A raster image is an image that is drawn with the smallest possible number of dots, like a typical illustration or photograph. It can be used universally for line drawing and coloring, but it deteriorates when enlarged or reduced. It depends on the coloring method, but in CSP, it is mainly used for coloring.
A vector image is an image that is drawn using control points. Vector images are not drawn with dots, so the image does not deteriorate when scaled up or down. Vector images are widely used in logo design for business cards, brochures, etc. In CSP, they are mainly used for line drawings, and there are various functions to modify line drawings.
2.Raster Layer
The raster layer, as mentioned above, is a general-purpose layer that can be used for finishing. If in doubt, just use this one.
3.Vector Layer
It has many functions for modifying lines, and is mainly used for line drawings. It is also capable of SVG output and can be linked to external vector software.
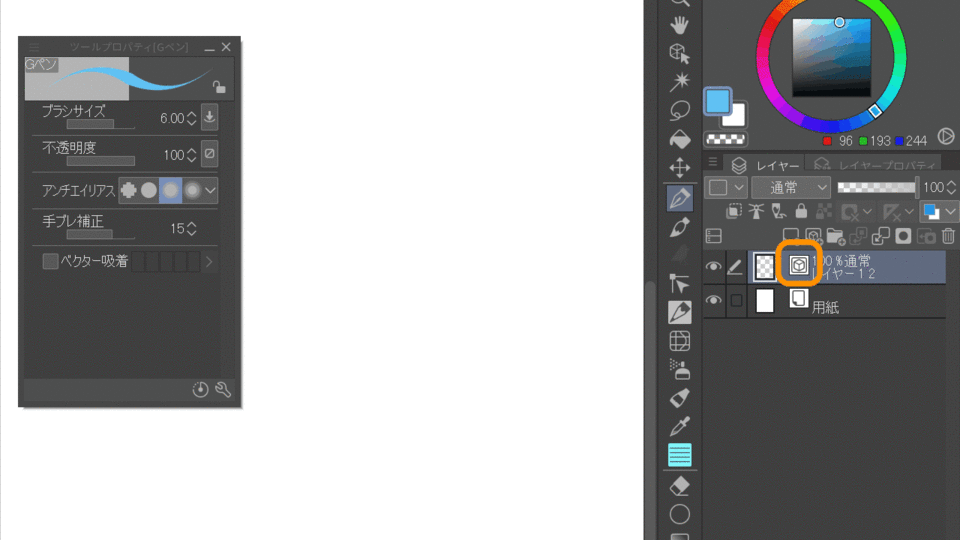
3-1.control points
The contents of a vector layer can be manipulated with control points. You can add, delete, and move control points.
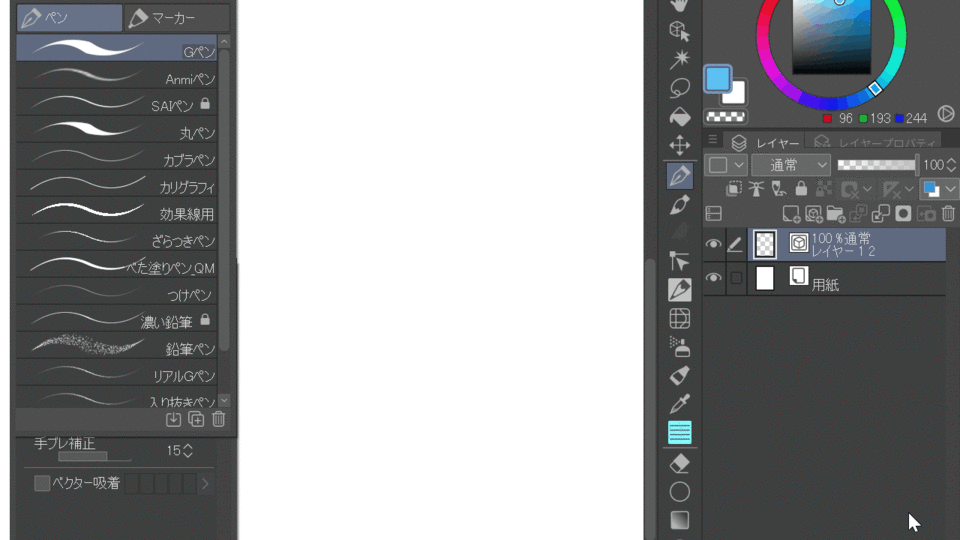
3-2.Adjust line width
This is also possible with raster images, but the lines can be scaled up or down to a specified size.
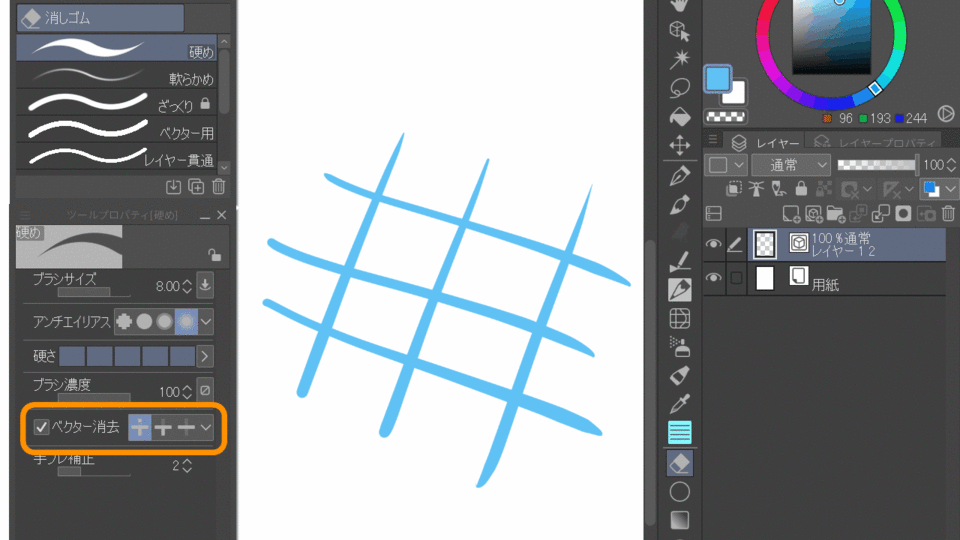
3-3.Erasing when a vector
Vector lines can be deleted as smoothly as raster images. You can also delete lines that protrude to the point of intersection or erase the entire line. This is useful for processing the tips of hair.
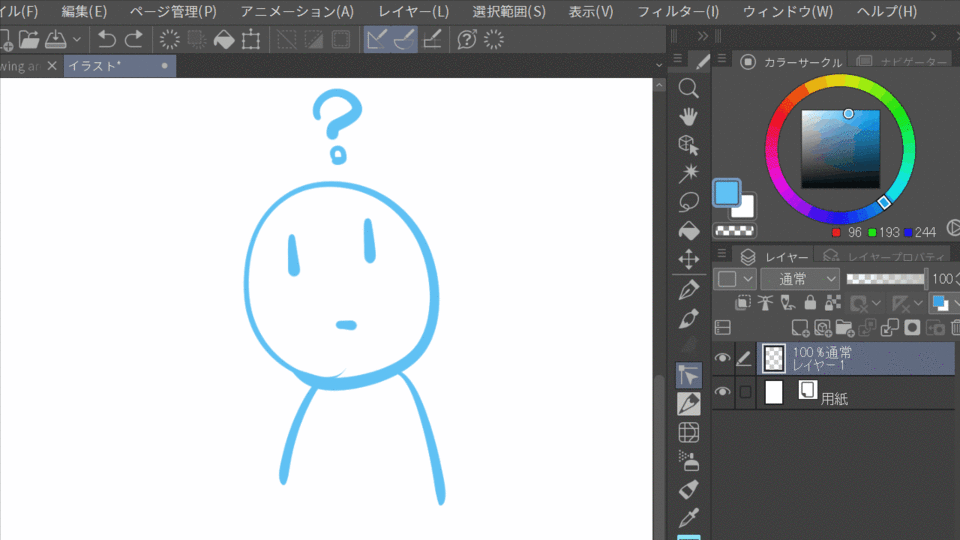
4.Convert layer
Raster layers and vector layers can be converted to each other. You can choose the type of layer you want to convert from the menu bar Layers to Layer Conversion. Vector to raster conversion is clean, but raster to vector conversion is not perfect. However, it is useful when you want to convert a raster layer drawing into a vector layer.
Blending Mode
This function allows you to add various effects to the layer below. There are many types, but here we will briefly introduce the most commonly used ones.
1.Normal
Normally, you just lay it on top of the lower layer without adding any effect to it.
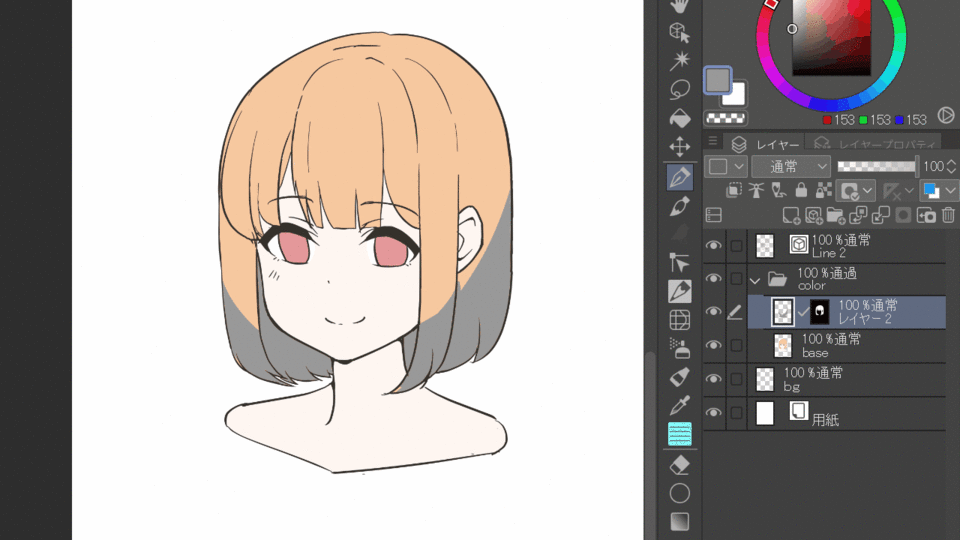
2.Multiply
Multiply darkens the layer by multiplying it by the underlying color. This is useful for drawing simple shadows. In the example below, gray is applied to the hair, and then multiplied to reduce the opacity to create a shadow. However, if you apply it in this way on your skin, it will become dull and your skin should be applied normally.
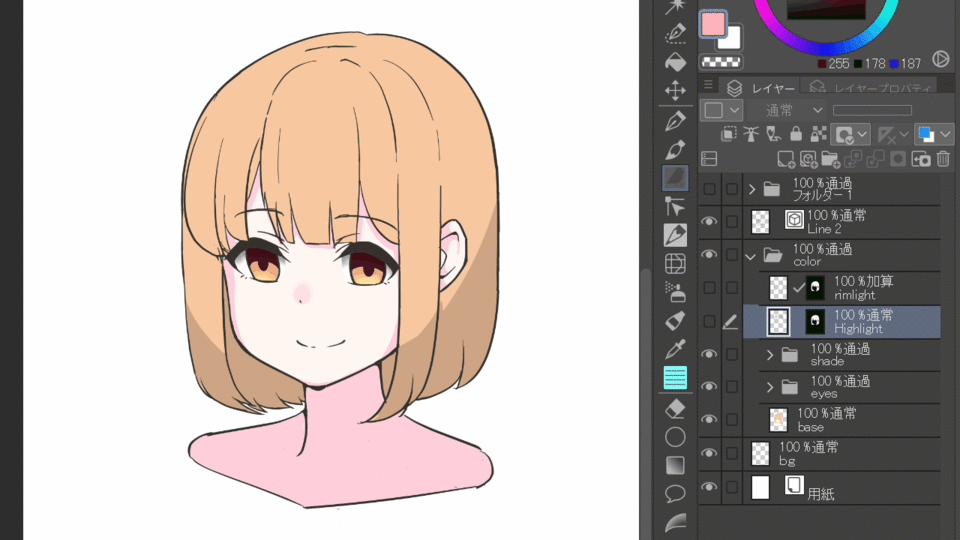
3.Screen
It produces the opposite effect of multiplication. It is used for highlighting and air perspective. In the example below, it is used to highlight hair.
4.Add&Add (Glow)
Add the colors of the layer below and glow with less saturation.Add (Glow) emits a stronger light than Add.
5.Overlay
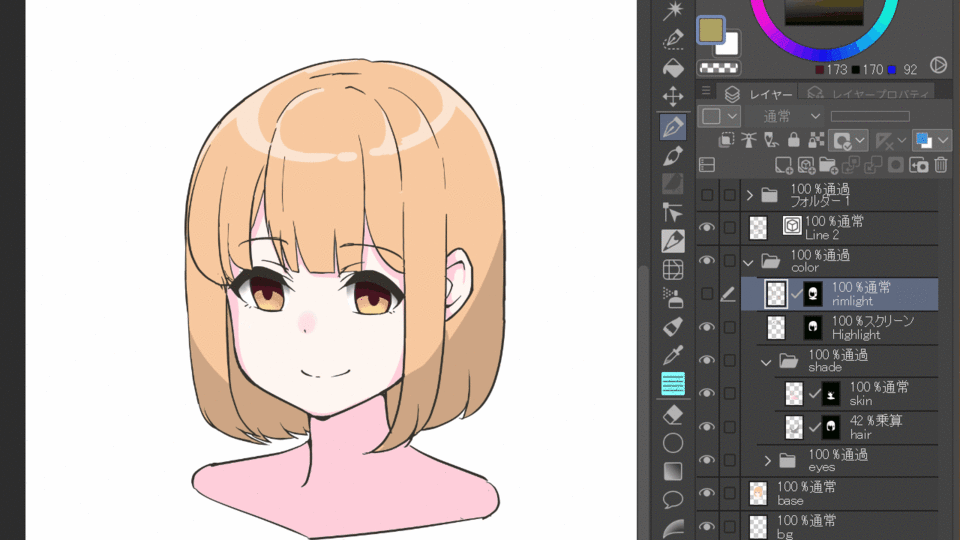
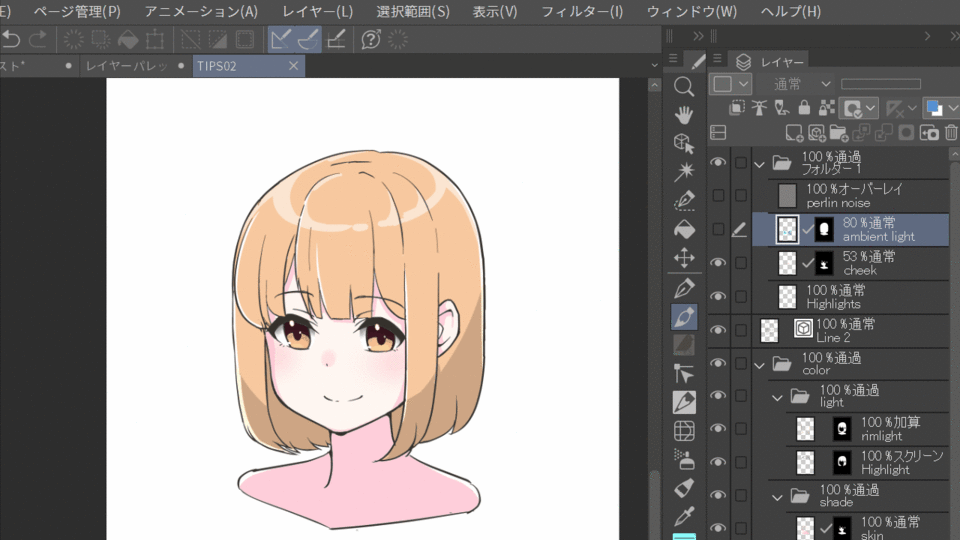
The overlay brightens bright areas and darkens dark areas. Because of this property, it can be used to adjust contrast and change color. It is also used in texture synthesis to express texture. In the example below, the blue ambient light hitting the hair is expressed.
Correction Layer
A correction layer is a layer that applies a specified effect to the layer below it.Unlike color correction in editing, no changes are made to the original layer, and the effect can be re-edited.If you want to color correct multiple layers, the Color Correction Layer is useful.Here is a brief description of the most commonly used ones.
1.Hue/Saturation/Luminosity
You can change the color of the target, change the saturation, and change the overall brightness. This can be used to easily change the mood or color of a work. In the example below, the color correction layer is placed at the top of the character folder, so the effect is applied to the layer below it in the folder.
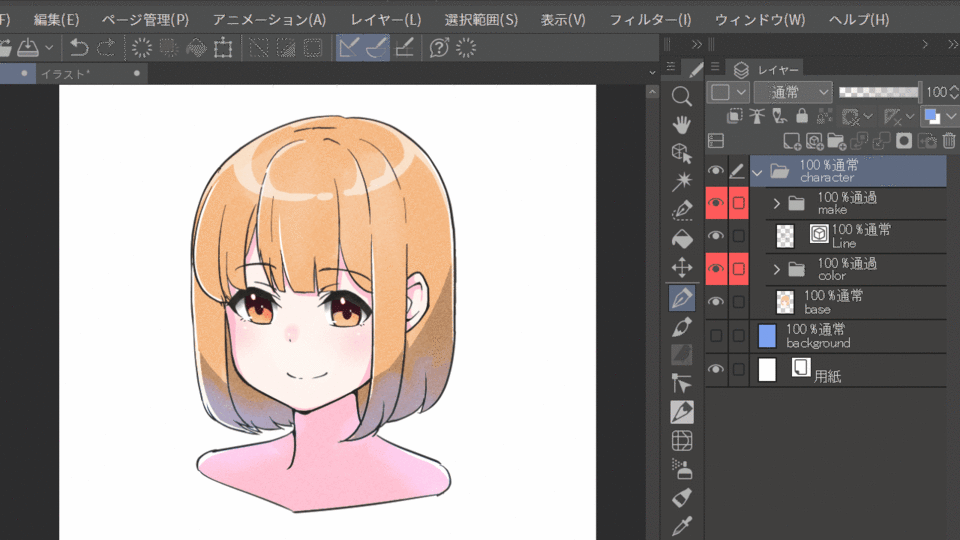
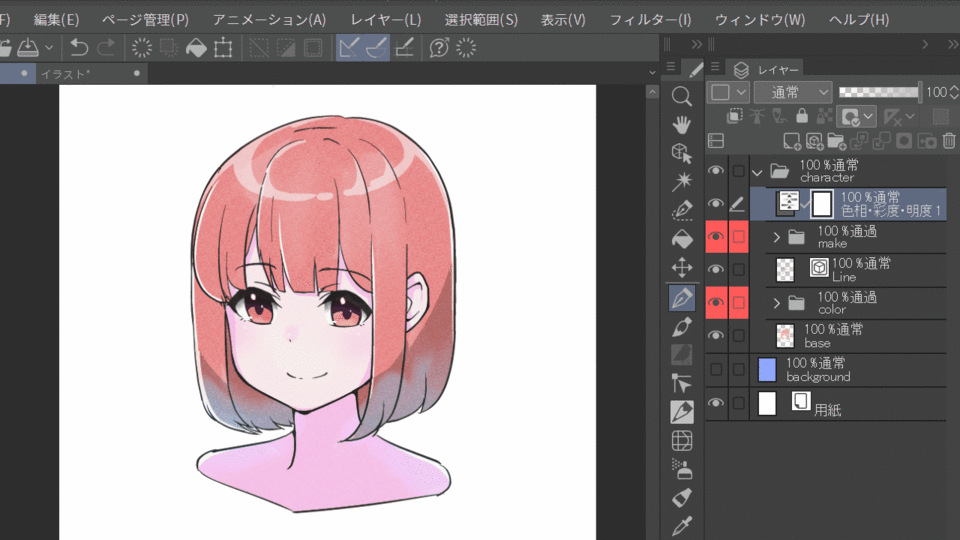
In the example above, the entire character is corrected and the skin is reddish. If you want to correct the color of a specific part of the image, you can create a mask to achieve good results. In the example below, we select the hair and eyes in the color gamut selection, expand the selection a bit, and then apply the mask to the color correction layer to correct the colors except for the skin.
2.Tone curve
You can freely change the brightness and color of a specific area you want to change. It is used to add specific color to an image or to adjust contrast.
The histogram in the tone curve represents the amount of light and dark pixels. The right side of the curve represents the bright areas, and the left side represents the dark areas. In the example below, the right side, which has more bright pixels, is slightly lowered to increase the contrast.
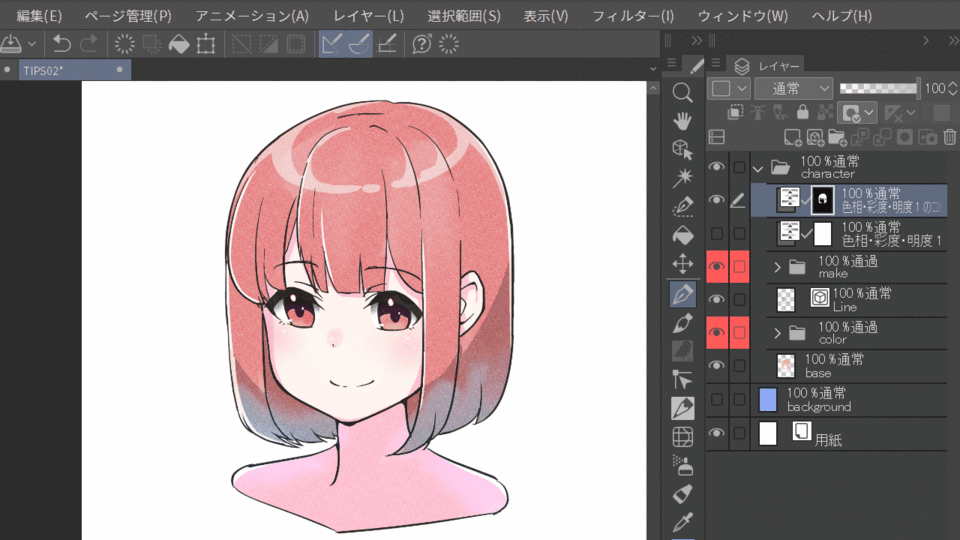
Normal and Through folders
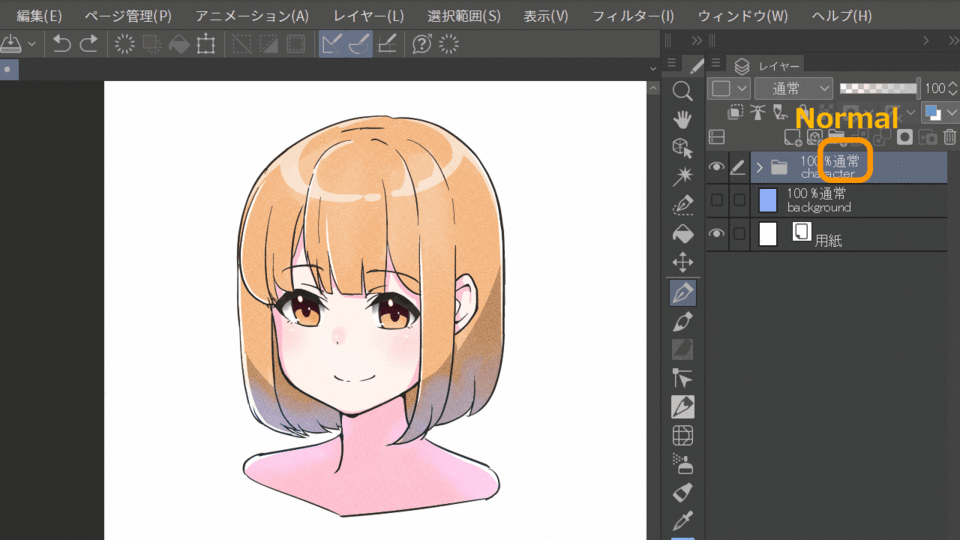
Folders can also be used in compositing mode, but there is a compositing mode called "Through" that is not available in normal layers. The difference between this
mode and the normal mode is as follows.
Nomal:Layer effects in a folder will be reflected only in the folder.
Through:Layer effects in a folder will be reflected in the layers underneath. Passing folders cannot be clipped.
In the example below, when the character folder is set to "Normal", the color correction is only applied to the character folder, but when it is set to "Pass Through", it is also applied to the background underneath.
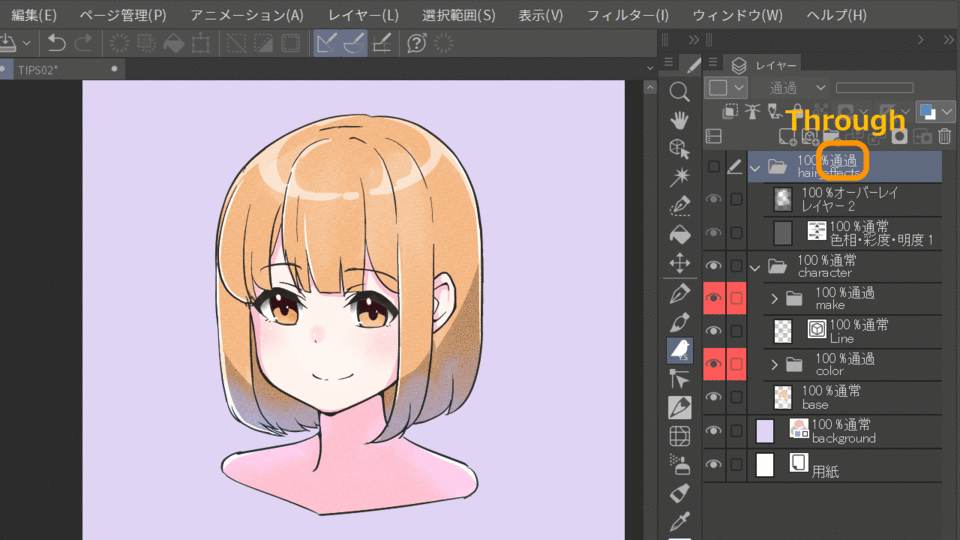
Another way to use a pass-through folder is to group effect layers together and layer-mask them. In the example below, a mask is created in the through folder for hair and other effects, and the effect is applied to any part of the image.
Layer Properties
Layer properties can be used for illustration work, but they are especially useful for creating comics.
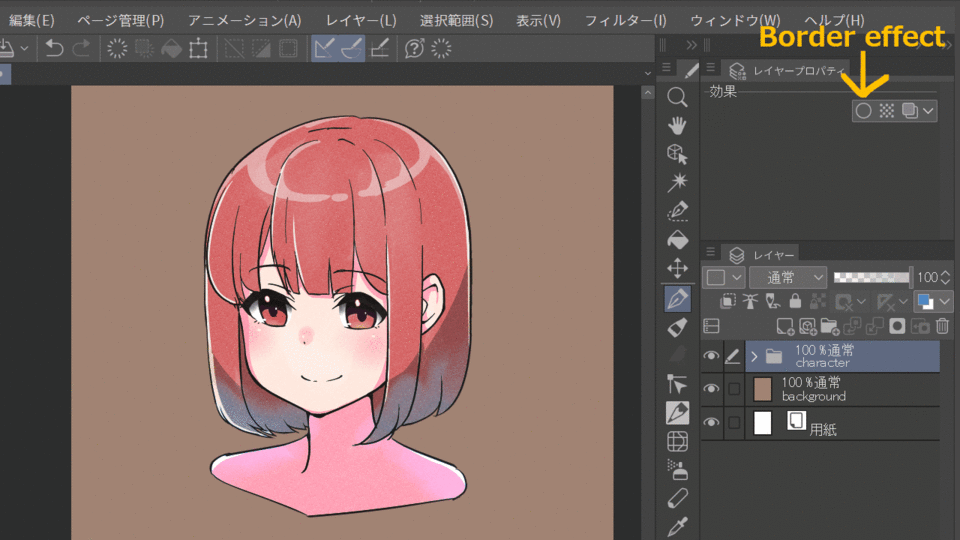
1.Border effect
You can apply a border to the drawing area of a layer. The size and color of the border can be changed freely. This can be used to make a character stand out, or used for text.
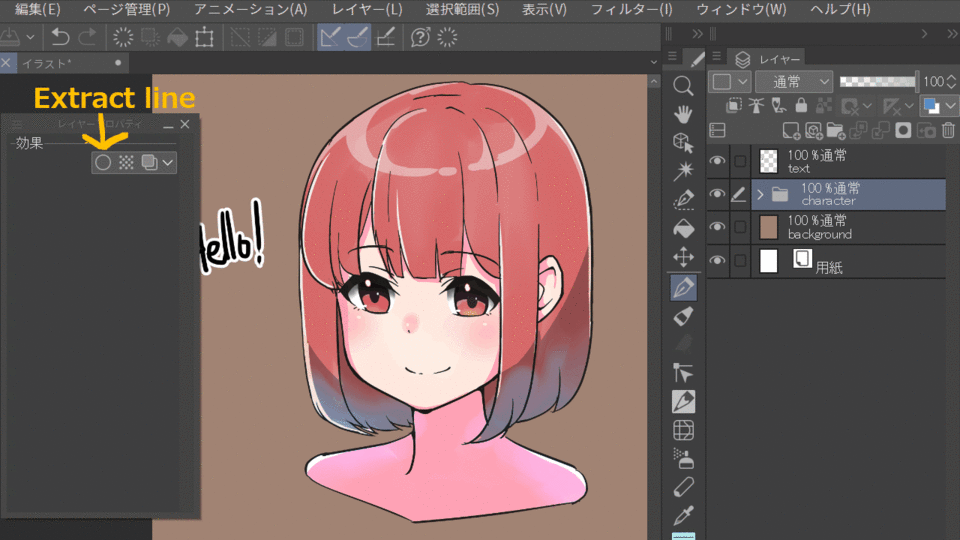
2.Extract line
You can extract lines from images. It is possible to extract lines for backgrounds from photos as well as characters.
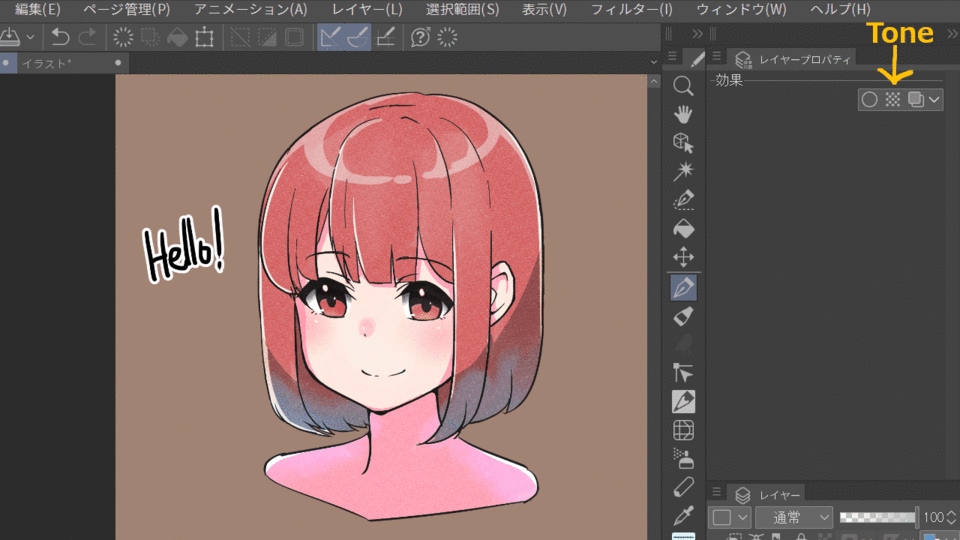
3.Tone
Tone performs the tone processing. You can set the fineness and pattern of the tones.
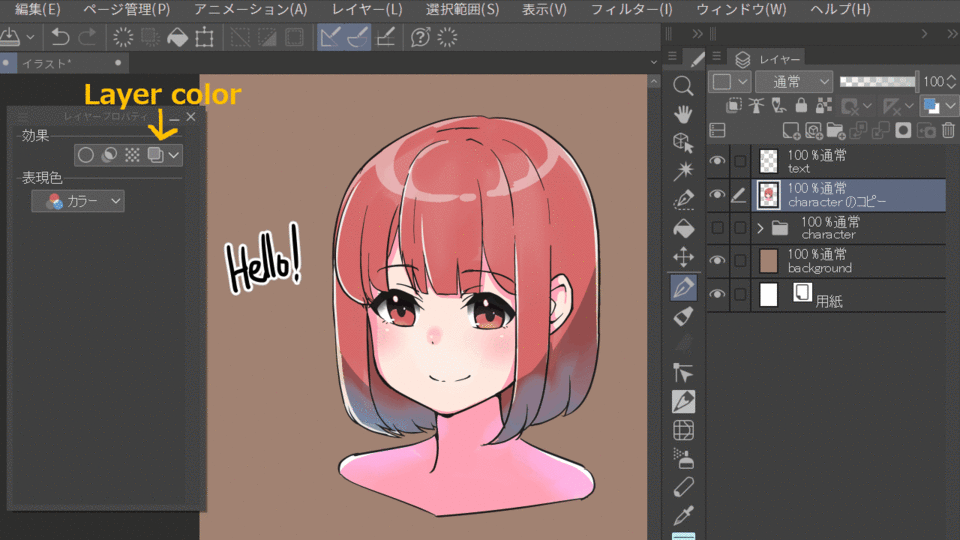
4.Layer color
From the layer palette, which is also introduced in the layer palette, you can set the color in the drawing. The default color is blue, which can be changed at will. This can be used to change the color of a specific part of the image, or to colorize a draft layer.
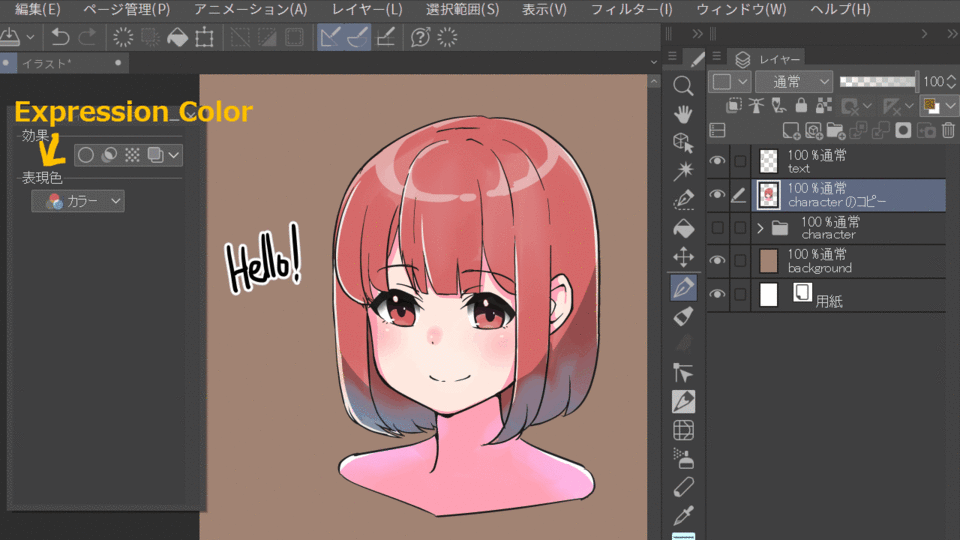
5.Expression Color
You can specify the foreground color that can be used in the expression color, and you can choose color, gray, or monochrome.
Conclusion
Thank you for reading this far!
What did you think?Even though it's a layer, I had to explain other functions as well, and it became quite a large volume!
I hope this TIPS helps you out! If you have any questions, please leave them in the comments section below.
see you around!




Comment