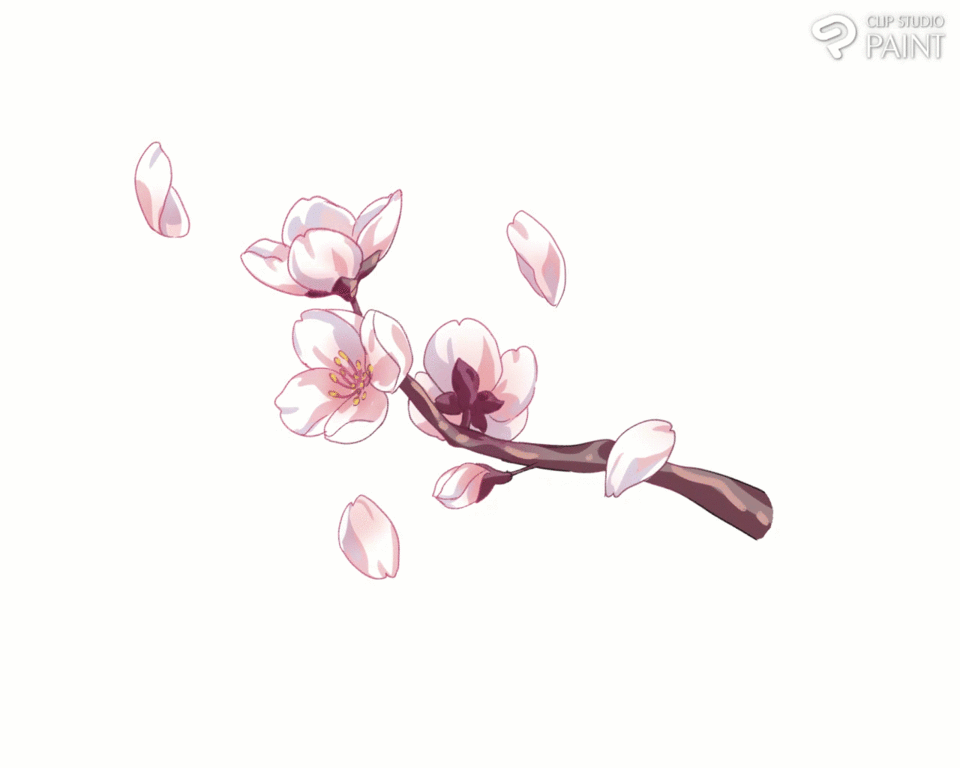
Learn to draw flowers 3 different techniques!
Hello and welcome to this tutorial for beginners in which I will show you how I draw flowers in 3 different techniques! and stay until the end as there will be a bonus on how to integrate flowers into your scene drawings.
Before moving on to the techniques let's understand the structure of what we will draw.
Flower Structure!
to. how to draw petals
As I see it, a petal has 3 parts: the base, the tip, and the middle.
The base is what will be connected to the center of the flower, this is usually the narrowest part of the petal, the tip faces outwards, this is usually wider than the base and its shape is usually rounded or pointed depending on which flower we are drawing, the middle part is usually the part where the petal is wider than the rest, this can vary but in general it is what I usually follow when drawing petals.
The main attribute of the petals is that they are curved not straight, there is always inward or outward curvature.
The petals are not usually perfect shapes, they tend to have indentations and slight bends.
b. Basic perspectives for drawing petals
Front: this is the simplest we simply draw the petal without much complexity, taking into account the center of the flower and the direction of the petal, usually the petals are not, as I said before, straight or stiff, they have curves.
From the side, in this case the petal is made up of two main lines, a straighter part and a more curved part, when we have the base we can begin to give it slight undulations to make it look more organic, we can also play with the position of the petal to to see the inside.
We can Imagine as if it were a sheet of paper to better visualize
from above, in this case it is also made up of two lines, both are curved although one is straighter than the other, the first can vary greatly depending on the point of the petal of the flower we are drawing, the second curve usually has the same way, it only varies if it is in or out.
c. How to draw flower buds
The structure of the flower buds is very simple, there are 4 parts:
the bud, the stem, the leaves and the receptacle.
The cocoon that is oval in shape, like an egg, the stem is just a line with a smooth curve, there are also the leaves that wrap around the bottom of the petals, which is very similar in shape to the petals, only these are usually shorter and with pointed tips unlike the petals that are rounded, and finally between the stem and the leaves, there is a small lump which is called a receptacle, it has a shape between oval and cylindrical.
To draw a bud is very simple because what the petals and leaves do is follow the oval shape, yes, no straight lines, just smooth curves, all very compressed and overlapping each other, the leaves on the other hand do not overlap but they wrap the petals then we just make the receptacle and the stem, and that's it, to draw it in different perspectives we just follow our structure.
Several things to take into consideration:
1- The shape of the oval can vary from flower to flower, but these are usually the ones I draw most often:
2- It does not necessarily have the bud that is super compressed, you can play with this and draw buds starting to open, in this case, moving the petals a little away from each other and leaving an empty space in the middle, which does not have to be very exaggerated , it will do the effect.
d. how to draw flowers
We start with the structure, which varies from flower to flower, but I will show you the one that I usually use more often:
1- we draw a large circle and inside a smaller one, the small one
representing the center of the flower and the large one where its petals reach, then with guide lines we can decide what shape the petals will have and how they will be interacting with each other, once again we avoid rigid or totally straight lines, then we draw our flower, I usually start by drawing the center and then continue with the petals.
Depending on the type of flower that I am drawing, I am changing the size of the circle that represents the center of the flower, since in case of drawing a flower like a sunflower, it will have a different scale than a lotus flower.
interaction of the petals with each other:
The petals tend to overlap each other, the more petals a flower has the greater the possibility of this happening, I have noticed that adding this will make the drawing look more organic.
Another interesting interaction that occurs between the petals is the way they are positioned with respect to the center of the flower, since if there are many petals, there are usually several “layers of petals” so to speak, I call the petals that are closest to each other. near the center of the flower "inner layers" and those that are further away "outer layers", these layers go in a different order from each other, that is, if the inner layers have a specific position, it means that the outer ones will be drawn in these leftover spaces.
The other structure that I use a lot is the following, it is really very similar to the previous one but it has an oval shape in the middle, you can play with its proportion, and it is to mark more obviously that there are several “layers of petals” and the general logic is the same as the previous structure.
To give this structure perspective, we draw the circles from different angles and we can play with the position of the circle inside
If you want to draw a specific flower that doesn't fit the previous structures you can do the following:
1-look for references of PHOTOS of the flower from different perspectives
2- identify the main forms that make up the flower,
3- From there you can extract the structure.
Technique I
I like this technique a lot and it consists of drawing just like it sounds, using mainly lines, both for the shape and the shading,
We will take into account several things:
1-The line value, this will be different depending on what we are drawing, for example for the base drawing line, you can use a brush size greater than the one used to give details to the petals (axis on screen, base drawing 7px and the details 5 px)
2- the shape of the line when shading, for this technique we are not going to color as if you were using colored pencils, we are going to draw orderly lines that have a sense of being, the lines will be our tool to give volume to the flowers, and highlight folds or indentations in the petals, so the lines follow the shape of the petal:
3- contrast, finally to make our drawing read better we add contrast between areas that are not seen so clearly, for example when one petal overlaps another create a small shadow to better define what is happening, also darken the part more of the leaves and the stem so that the flower stands out more works very well, they are small details that will add legibility to the drawing.EJ
with this in mind we start our drawing
we make our sketch, then the base lineaart, without forgetting the indentations of the petals,
now we begin to place the details (following the volume of the petals) and remembering to use a different line value, to finish we add contrast details
With this in mind we begin our drawing, we start with the sketch, then the base lineart, without forgetting the indentations of the petals, we begin to place the details (following the volume of the petals) and remembering to use a different line value, to finish we add contrast details

Technique II
Step by step of this second technique:
1 - Sketch, we make our structure to draw the flower.
2- Lineart, we will try to make it as clean as possible, unlike the previous one we will not draw the fold details of the petals with the lineart.
3 - Base colors, In each of the areas of the drawing we place the color that we want it to have, once this part is ready with the spray brush we can add gradients to the petals to make them look more interesting.
4- Shading, we choose a color darker than the base color of the petal and putting the layer in multiply mode, we begin to shade it and highlight details, this is a shading that I would define as "dry" or "hard", since it lacks of intermediate nuances between base color and shading, just as we do shading in the previous technique, the shadows must follow the volume of what we are drawing.
If you want, you can do the shading individually for each part, that is, one layer for the petals, another for the stem, etc. However, I have the habit of using only one for several parts or even for the entire drawing.

5- Finally put light details, you can use a layer in a luminosity fusion mode, I usually use “overlay”, and using a lighter color than the petals, I usually choose a whole leaning towards yellow, I put light details here and there, you can also spray larger areas of light and adjust it with the help of opacity.
More examples:

Technique III
This technique, unlike the previous one, the shading system is to mix colors together and get new tones, it is the opposite of "dry" shading.
To better adapt your brush to this technique you can use the brush settings, remember that you can alter attributes such as: opacity, brush density, etc, this will be very helpful as it will allow you to configure the way the colors mix with your brush. brush and thus adapt it to the way you feel most comfortable when drawing.

Step by step of the technique:
1-We start as always with the sketch,
2-We will jump to the base colors.
here they can use the technique in two different ways.
Way 1: starting with the base colors, start shading using a layer in multiply to put basic shadows, then compile everything in a single layer and start giving details, everything being in one layer will allow you to better mix the strokes and get new ones tones with those that were already inside the drawing,
the shading follows the same logic as before, following the shape of the volumes of the flower, and continue detailing until you feel comfortable.

Way 2: After placing the base color, we darken all the tones, we identify our light source, then where the most light is going to hit, we put the very soft base color with the spray, not at all its opacity, and we begin to put color with a more solid brush highlighting the volumes of the flower, this will help the volumes of the flower begin to be seen.
when this is ready we are going to better define the part of the shadows with another tone and as we advance little by little we are drawing on the sketch to the point that it is no longer visible, do not forget to add light details and it will be ready!

For this technique I like to use textured brushes, some of the brushes I used were these:
Ultimate Bonus! how to integrate flowers in your scenarios
When I add flowers to my scenes, I honestly don't put much detail into them, it should be clarified that it depends on the interaction the flowers have with the composition of the drawing,
for example: the flowers "a" have a lot of detail since they are in the focus point of the drawing, the character in this case, but the flowers in the background I am satisfied with just making them the basic shapes so that they are understandable.
What I usually do is that with a solid brush I draw the shape of the flower, its silhouette, and then seeing if I need detail, I add the center of the flower or shadow. I draw the maximum simplification of its shape, this of course varies from flower to flower, it is a matter of doing an observation exercise and identifying which shapes work best
In the following example to make the flowers I just made the silhouette, added the center and airbrushed a soft shadow on the flowers closest to the edges of the drawing.
And that's what integrating the flowers into your drawings is about, at least the way I do it, it's about identifying how much detail the flowers really need within the drawing to make it understandable, if the flowers are near or interacting with the focus point of the drawing, they will have a certain level of detail, but simply making the silhouettes will suffice.
In this example we can perfectly exemplify this, the flowers in the front (a) have more detail and I put more shadow on them, all conscientiously and meanwhile those that are further back (b) are simply forms that allude to the silhouette from the flowers.
Another example:

Farewell and thanks
And ready! That has been all for this tutorial, thanks for watching and/or reading it, I hope it has helped you, remember that practicing is the key, see you in the next tutorial! bye!


Comment