3. Coloring the Character - 1: Eyes

-
 MVP ◆This user has contributed greatly to the management of the community, by posting many great responses to the questions asked. Once every three months, MVPs are determined based on the points earned during that period and will be recognized accordingly.
 -
 New Valuable Player (NVP) ◆These are the next-best contributors to the community after MVPs. This is awarded to users who have not yet won an MVP award, based on the number of points they have earned.
 -
 Official Expert ◆Chosen out of all MVP awardees, who are already proof of excellence, this is a testimony of outstanding correspondence in the community. After careful screening, they are appointed by CELSYS and assume their position.Note: Formally called “Evangelists”
 -
 CELSYS official moderators ◆Moderators are official CELSYS staff members who are fluent in Japanese as well as various other languages. As moderators are not experts on software or creative work, they will not be able to directly answer your questions. However, moderators will provide communication and language support to ensure that everyone can smoothly communicate with each other.
 -
 CELSYS officialThis is the official administrator account.
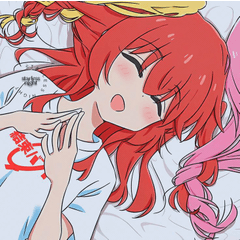
Painting eyes
① A new layer is made above the base color layer, and a pupil is drawn in the center of the eye.
② Contrast is added by applying the [Layer Property]’s [Edge] effect to the layer with the pupil.
③ Making a new layer below the pupil and using the [Soft] brush, shadows are added with a color that is a little darker than the base color(A).
Shadows are added with the same color as the line art of the eye(B), and a color that is lighter than the base color is added to the bottom of the eye(C).
④ A new layer is made above the line art layer, and highlights are added with the [G-pen]. In the “Eye” folder layer, a new layer with its blend mode set to [Add (Glow)] is made, and highlights are added to the inside of the eye with [Opaque watercolor].
⑤ The shadow borders painted in ③-B are blurred with the [Brush] tool →[India ink]→[Lighter ink], and detailed highlights are added to make the eyes sparkle. I used my custom brush [Droplet 2] for the highlights.
The highlight layer’s blending mode is changed to [Glow dodge]. The image will feel flat if all colors are similar, so colors other than the eye color like green and blue are added as highlights.
⑥ To add volume, reflected lights are added to the darker parts of the shadows, and a pale blur is added to the top of the eyes.
⑦ The line art of the eye is adjusted. A new layer is made and clipped to the line art of the eye.
With [Soft], saturated pinks are added to the tips of the eyelashes.
Saturated pinks are also added to the inside of the eyelashes on a new layer.
⑧ Finally, the layers are blended by adjusting their transparency.
Users who liked this post


Comment