
Introduction
Hello everyone! My name is staro, and I´m a 15-year-old hobby artist. In this tutorial I will explain how I draw legs and feet. I will go through simple anatomy and perspective; I will also talk about dynamics and at the end show the illustration process form start to finish.
So, if you struggle with drawing legs and feet hopefully this tutorial will help you. And if you understand a little of the basics it is a lot of fun to draw legs and feet! You will learn how to go from this to ====> This!!
Of course, to draw the perfect legs will take time, because practice is key to anything but, I hope after reading this tutorial you have an idea of what to draw.
Enjoy!
Structure of the foot
In general (not only the foot but the leg as well), you can start form drawing the skeleton to the muscels and add skin at the end. This is indeed a good practice to understand how the human body is built. But it is no secret that this is difficult and takes a lot of time, so to make it simple, I usually break everything down into shapes and add more detail latter.
Now let me give you a brief overview of the anatomy of a foot. As said before I start with breaking the object down into simple shapes. Starting on the back, you have the heel (red), here with a triangle like shape going a bit outside. It takes of around 1/4 of the size of the foot. Make sure the heel isn’t in line with the lower leg and has a curve going outside!
The yellow ball here replaces the ankle. Cause it is a joint I drew it in a round shape to show the flexible movements it can make. The ankle is also responsible for the little hill on the outer side of the foot.
The green middle part is going down form the ankle to the beginning of the toes. This is the largest part of the foot, taking around 1/2 of the space. Here you must keep in mind that the instep doesn’t reach the ground, it is a little bit above. It is best seen viewed from below.
And lastly in violet the toes, here I just imagen a smaller version of the middle part (around 1/4 of the foot), with the DIFFERENCE all of toes are touching the ground. In the next picture I will elaborate a bit more on the toes, so I stop at this point.
Now putting all these shapes together, you have a foot! Congratulations!!
As for the toes, I know they can be a bit difficult to draw but don’t worry. If you want to draw a side-front-view just imagen the toes as stairs going up. Only the big toe has a unique shape which means you can try drawing it like some flat stairs and really round them out. Try to imagen it in 3D boxes so that you can apply this to any perspective.
Form a view belove, you can see that it has a U like shape with either the big toe or the second toe being the longest. On a side note, here you can also see how the instep doesn’t reach’s the ground.
A general tip to make your feet look naturel is to add some Asymmetrical into its structure because nothing in real life is perfect. You could do that by raising the inside step line (blue), which is placed under the end of the lower leg bone. The direction it is heading in depends on the position the foot is in, but a general tip is that it raises on the inside of the foot and goes down on the outside.
This is a part where you can play a little bit around and maybe exaggerated it, you just need to see if it suits your taste in shape language. In my opinion a 1:1 similar looking foot will just look wrong for the brain.
Structure of the leg
Moving on to the leg, it cover up half of the body. To draw a full leg, I break it down in 3 shapes: the thigh, the knee, and the lower leg (and of course the feet). To start I would draw a straight line and make a mark in the middle (for the knee), because we have a 1:1 ration between the thigh and the lower leg.
After drawing the straight line, I would add 2 cylinders for the tight and the lower leg and a ball for the knee (and the ankle). The great thing about such simple shapes is that you could easily imagen them in any perspective (but latter more). Now you can try making your first leg pose!!
Looking frontal at the leg: On the outside we have two curves, one going out form the thigh and the other from the lower leg. On the inside the upper thigh, the knee and a little bit of the lower leg sticks out. From a side view you have a curve going out form the thigh and on the back of the thigh it is a straight line, except the butt. On the lower leg it is the exact opposite.
To understand the curves better let’s take a look at the muscle drawing I made:
- GREEN the Vastus medial: on the upper inner thigh. it bounds out until it almost reaches the kneecap.
- YELLOW the vastus medialis; it attaches along the femur and down to the inner border of the kneecap.
- PINK the vatus intermedius and the rectus femoris: the look like one muscle being attached to the kneecap in the middle of the leg.
- other YELLOW the semimembranosus; it extends the thigh and flexes the knee. It is not always visible.
-BLUE the Soleus: this muscle exitance from the back of the knee to the heel. It´s important for standing and walking.
- RED the gastrocnemius; connect from the knee to the foot. It is placed in front of the leg.
If you can keep the direction, they are heading in in mind, it will be easier to draw the line art latter.
The hip has the pelvic Bone (A) creating the upper curve and the tight bone there to make a second curve(B). You can either draw them round or sharp as seen in the two examples. The second hill that is created is so called hip dips.
Moving on to the last part of the leg. The knees consist out of the thigh bone, the 2 lower leg bones ant the kneecap on top. The wrinkles here are because everyone kneecap looks different and is not an even upper. Again, try to not make it Asymmetrical.
The kneecap works like a tilted scare. The upper side point inside and the lower side outside. So, you can tell the difference and say from which side the leg is. (Mirrored on each side)
Putting it in Perspective
Now to draw legs in perspective, remember the cylinders and the balls from the structure part. Those simple shapes are easy to imagen in every perspective. You can start practice with the shapes and add the details latter.
To perspective rules are important for drawing legs in perspective:
1. Know where your vanishing point is paced. This is the point were all the red lines are heading in. And from that point about are al the shapes defined. I practiced that here with the cylinders because a ball will look in each perspective the same.
2. The rule of overlapping is the next important factor to keep in mind. It is quite simple, ever thing that is near to the viewer covers the other thing behind it, if it is in the same eye line as the other.
Speaking of eyelines those have a huge impact on the perspective as well. In the example you can see one, and how the boxes will be viewed from this line’s perspective. To create this, I used the perspective ruler that has CSP pre-installed.
You click on the icon and then can make tow lines on the canvas, to set your vanishing point. Now you can draw everything in the right perspective.
fter having the practice now, I applied my knowledge to the 3 characters above. Each of them is in a different perspective the fist, from a bird view, which makes her look small a maybe a little shy. The second is in a frontal perspective, makes her look normal or neutral and without a valuation. And the last one from a frog view looks tall and power full.
Really cool what perspective can do to a character’s appearance!!!
Lastly let’s apply it to the legs. I stared drawing the box on the left side and made marks on it. Those marks you can now apply to the leg as seen on the right leg. A squatting positing is maybe a bit challenging but with those lies it will be at least a bit more logical.
Now please enjoy drawing your legs in any perspective you like!!
Creating flow using dynamic lines
On this point of the tutorial, you know how legs work and you know how to put them in perspective, but now I will talk about dynamics. Dynamic is best understood by looking at
an example the first poses are made of blocks figures and look stiff. What is missing are dynamic lines! I have added them on both other sides.
I start with drawing a curved middle line. The lines can close at the ends or also spread. There is not a rule fore that. Normally you can use them to make simple poses look more interesting (as in exp. 1) but they also work well for complicated poses (as in exp. 2)
You can also put in some strait lines as well to create a contrast. Also, strait lines are good to plan out a pose, as see down below in the foot example. Here we have a great composition of strait and curved lines, creating a great dynamic for the viewer (but i will elaborate on that topic latter on).
Legs and Feet in Motion and Force
Let’s combine our knowledge about the muscles and dynamics and create some strong poses. For a motion keep that rule in mind: When one muscle expands the other contract. This is seen quit well in sitting poses. But if you have a pose where the muscles are tightened, you can easily show the force wit making some veins stick out or adding lines for the muscles (better you add them out when rendering and replace it with shadows).
The yellow part in the picture show which muscles are tightened. Especially in the Cross-legged seat it is seen clear.
But muscles are not the only rule for making a dynamic pose. You can also follow the rule of a triangle and place the legs in that shape. Because the triangle is a sharp shape and contains an odd number it is interesting to look at.
Also, the shape language of rounder stylized legs can bring a lot of motion to the picture. Over gesturing is also nice and it offers itself with the triangle rule.
Now let’s come to the line language of legs. As seen below we have tree times drawn the same legs. But each time different! The first only with straight lines and the last with curved ones. But What makes the middle one (just my opinion) better looking, is the combination of curved and straight lines.
If you want to show force on the feet, I recommend following the flow line and make it squeeze there where it is hitting the ground. The green parts show where there is tension in the foot.
Illustration form start to finish
To end this tutorial, I will show you my illustration process In CSP from start to finish.
Side notes:
All the video clips are seeded up because I’m a slow drawer and I didn’t want to bother you with 10 min videos. Also, almost throughout the entire process I used the dark pencil, to draw.
But now let’s start!!
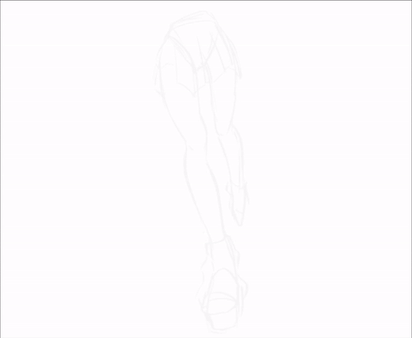
1. sketchout the pose with rough shapes
Most of the time I start with, drawing simple shapes to plan out the pose. But as you can see, I have already drawn to pose. So, I just drew over it again for you.
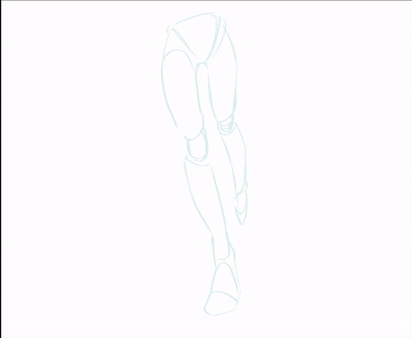
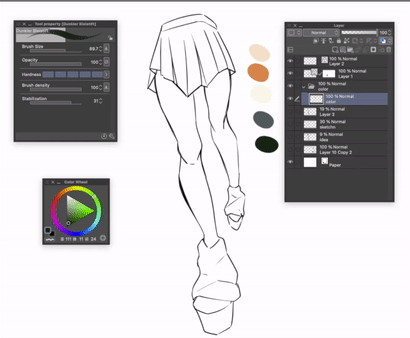
2.Now do the sketch including the clothes
The first thing I do is to put the sketch layer underneath and reduce the opacity to 30.
Make a new layer and then I follow the steps to draw the legs as explained in this tutorial. Here I’m also adding some clothes to the legs.
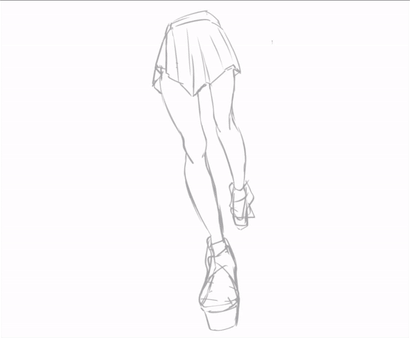
3. Doing line art with a thin brush
Now starting off with reducing the brush size of my pencil, to make thin and clean lines. The next big step I do is creating a Vector layer (as see in the second pic). These vector layers are really useful for line art because they allow you to correct you lines afterwards.
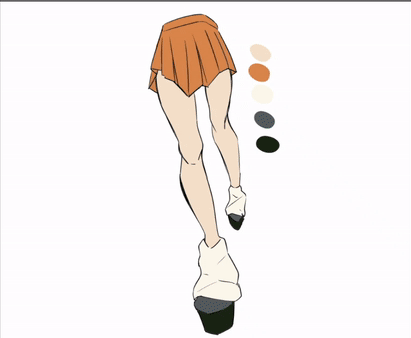
4. Filling in the base colors
Here I use the lasso tool to select the places where I want color to be. To use this tool, it is important that every line on the line art is closed otherwise you whole canvas will be orange.
Now you select each part you want color in and do so, but of curse on separate layers!
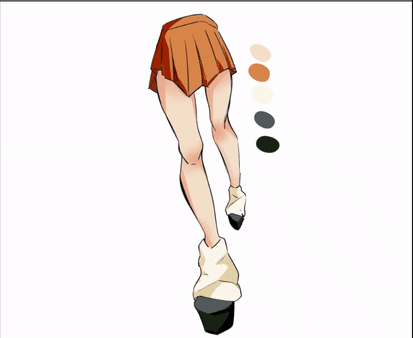
5. Adding light shading
This one is a simple step. For a moment we stay on the base-color-layer of the skin and ad with an airbrush some light shading to it (best would be a reddish tone). This will give you skin a little hue.
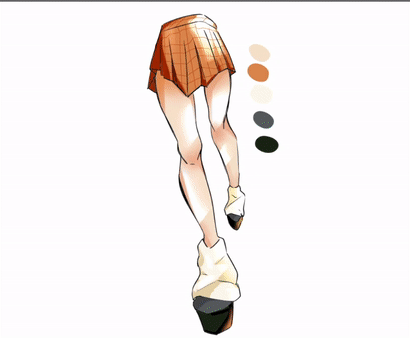
6. Adding dark shadows
For shading I normally begin with sharp edge shadows and smoothen them out latter. I added some on the Legs especially under the skirt and some on the cloths as well. To not paint outside of the lines, I selected the double layer icon in the layer menu. This allows you to only draw on the layer underneath. We will also use that for the light.

7. Adding light
Now I again added light with an airbrush and erased everything out I didn’t want in there. This step also includes adding the pattern to the skirt. Adding the light to the legs was a little bit harder because I needed to find the right tone.
8. Final touches
The main thing I was doing here was changing the color of the line art. I also added some more shadows and at the end I did some color correctios.
and done!!
Thank you!
yeaahhh, you made it until the end of this tutorial! (づ ̄ ³ ̄)づ
This was my very first in depth tutorial in CSP. For me anatomy was also a little bit hard to get, but hopefully my rather simple explanation helped you to get a better understand about how legs and feet work. Legs are and will always be one of my most favorite things to draw!
If you want, you can check out my artwork on Instagram under @staro
Hope you have a great day!
bye ☆ ミ(o*・ω・)ノ
Users who liked this post


Comment