How to animate Magic Effects in Clip Studio PAINT
Hello! My name is Kevin (@kevinfm_art)
In this article I will show you how to animate Magic Effects in Clip Studio PAINT, in a simple way to achieve a really great result that will surprise you.
Whether you are a Clip Studio PAINT PRO or EX user, you will be able to achieve this Animation since we will only need 24 frames.
The Animation that we will make:
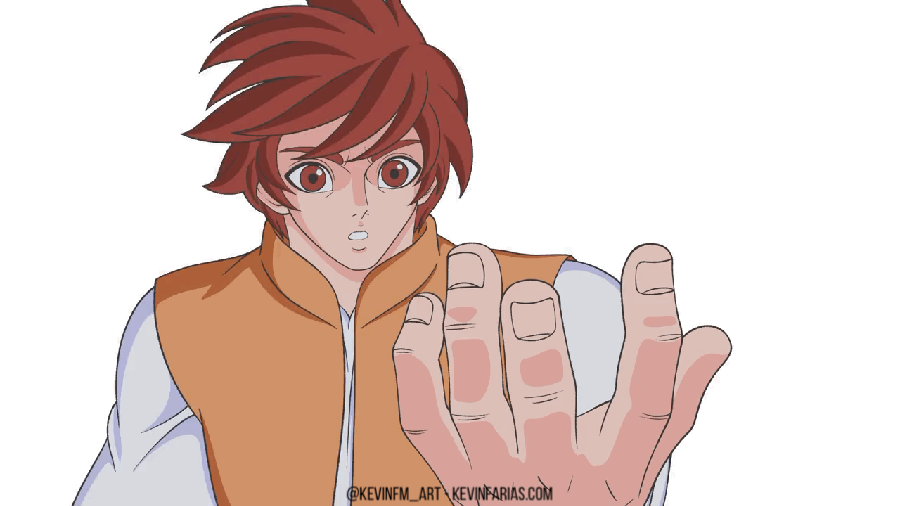
We will start with this Animation:
To finish with this Animation:
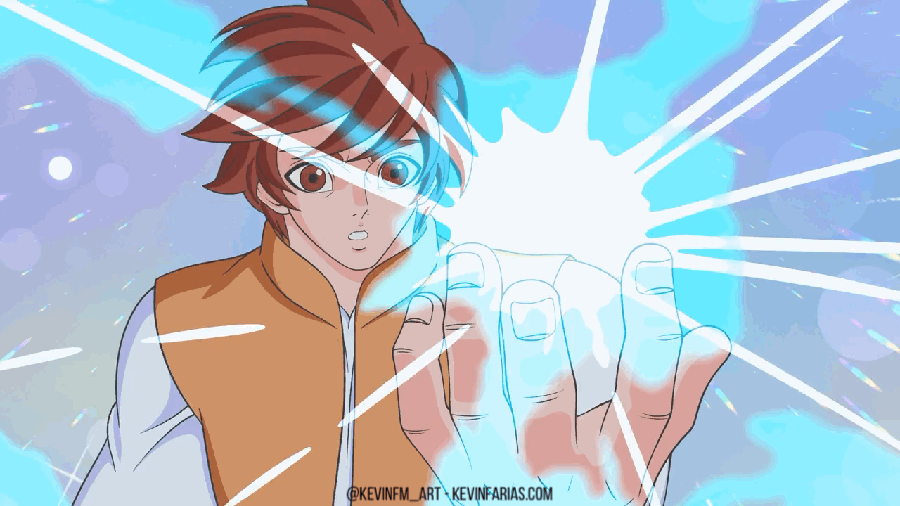
This time I used my iPad Pro for the first time to do this tutorial, so you will see the interface in English but my voice will be in Spanish. But this will not prevent you from following all the steps in the tutorial and making your own magical effects.
And if you speak English, this article will come in handy! Because you will also find the tutorial in English a little further down.
VIDEO TUTORIAL: How to animate Magic Effects in Clip Studio PAINT (Subtitles in several languages)
Remember to activate the subtitles in your language, you will surely find yours.
What do you think about the video? It was 10 minutes where I explained specifically how to animate magical effects, from sketch animation, cleaning animation, color and how to apply combination modes for great post-production.
VIDEO TUTORIAL in ENGLISH
I have created a YouTube channel in English for all those who speak this language and can learn with me.
Step by step of the Tutorial
Now I invite you to see the process through images so that you understand it even better.
1. Original Animation
To this animation we will add the animated magic effect in his hand.

2. Magic Effect Animation Folder
We go to the timeline and activate: Create new Animation folder, named: Magic (or whatever you want)
Then in the layers panel inside the Animation folder called Magic we create a: New layers folder.
It automatically acquires the name 1.
Then we will create the following raster layers: Sketch, Base, Light. And finally a vector layer called: Line.
Now we go to the timeline and activate: Specify cels
In the window that appears we select frame 1 and click on: Accept.
And to start animating the magical effect we are going to choose the Sketch layer to draw.
And we're ready to start animating the magic effect, but first we're going to do the following:
We select the layers of the character and activate: Change layer color.
It leaves our character in blue to be able to draw magical power comfortably.
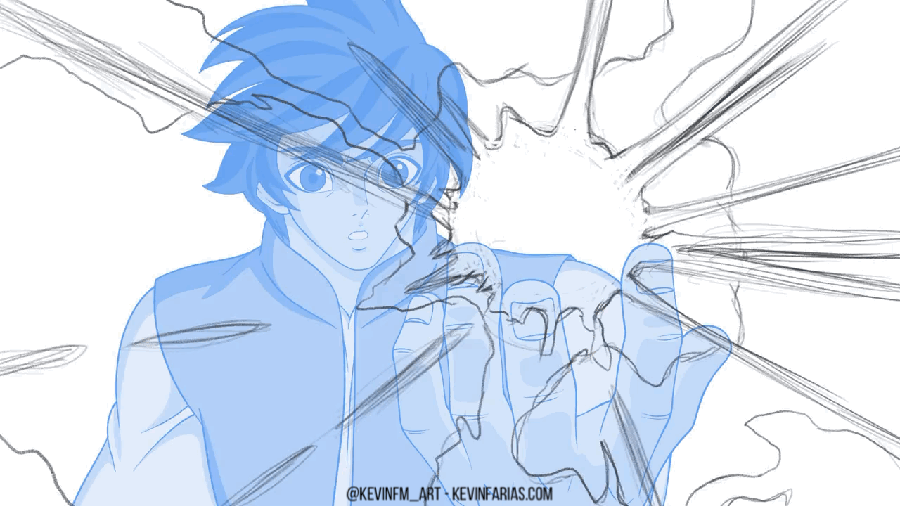
3. Sketch of Magic Effect Animation
Now it's time to start drawing and animating, for this we select the Sketch layer.
And we make the first drawing of the Animation in frame 1 of the timeline. The form of the magical power will have 2 zones, a central zone of white color and the zone that surrounds the core of the power will be the altar of the magical power, which we will make in light blue.
Now we go to frame 13 to create a new frame with the option: New Animation cel
And as you can see, the new frame is also a folder like drawing 1, respecting each of its layers and their names.
Also, don't forget to rename the new drawing to the position on the timeline, in this case number 13.
And we activate the onion skin to see the previous drawing and have a guide to draw.
In addition, we always select the Sketch layer to draw.
Achieving the following result, these are the 2 key drawings of our animation.
Now we are going to create the Breakdowns, we go to frame 6 in the timeline and activate: New animation cel.
We change the name to 6 in the layers panel and select the Sketch layer. And finally we activate the onion skin to see both the previous drawing and the later drawing.
Getting the following drawing.
Now we go to frame 20 and activate: New animation cel.
We change the name in the layers panel to number 20, select the sketch layer and activate the onion skin.
And we make the following drawing.
We already have the main drawings of our animation, both the key drawings and the breakdowns, now we must add the inbetweens. For this we will create new animation cels in the frames: 4 - 6 - 9 - 11 - 16 - 18 - 23
To achieve the following animation:
4. Cleaning up the Magic Effect Animation
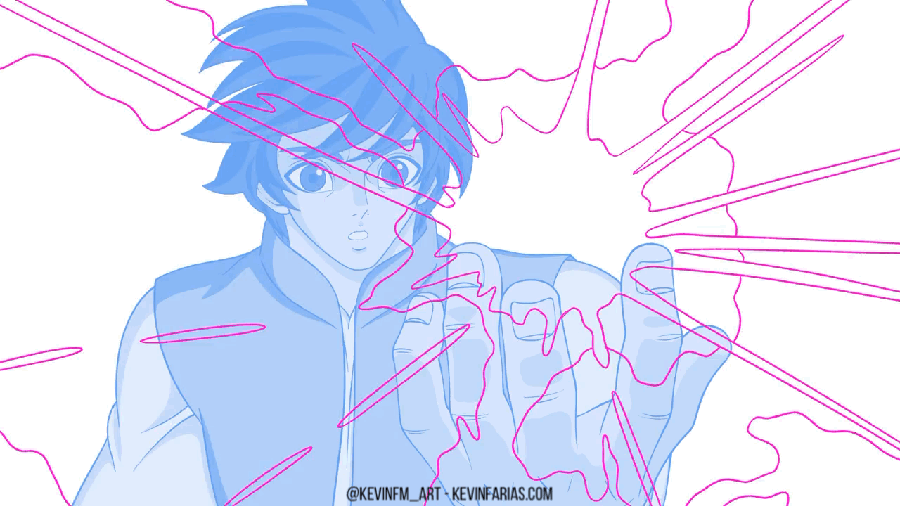
Before cleaning up our animation we are going to do the following in each of the animation drawings. The first thing is to select the sketch layer and activate the option: Change layer color.
And if you want you can lower the opacity to 50%
Then we change the color to draw, in this case I will choose a Magenta color, you can choose the color you want since it will only be a reference color to be able to paint, in the end we are going to hide it.
And to do the cleaning we are going to choose the Pen tool, in Sub Tool we choose Textured Pen.
You can also help yourself with stabilization, so your strokes will be perfect.
And we make the line in each of the drawings of the animation and when you finish, don't forget to hide the sketch layer so that only the clean line of magic power is visible.
5. Magic Effect Animation Color
Now to paint more comfortably we double click on the Paper layer that comes by default and change it to a darker color, so when we paint the central area of the magical power white we will make sure that we have painted all the areas.
Don't forget to hide the character layers.
Now we will go inside each of the drawings, select the Base layer and paint with the Fill tool.
Activating in Subtool: Refer to other layers.
And we paint the core of magic power on the layer called Base.
Now we change to a light blue or light blue color and select the layer called Light, to paint the aura of magical power.
And we do the same for all the pictures in the Magic Power Animation to achieve the following result.
(If you want you can also make the character visible again)
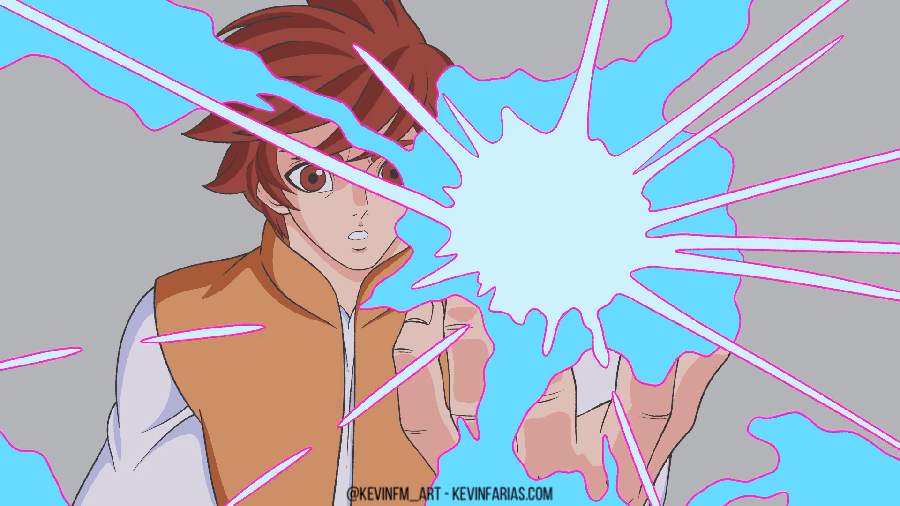
Lastly, turn off all the line layers of the magical power animation that we did earlier.
To get the following result:
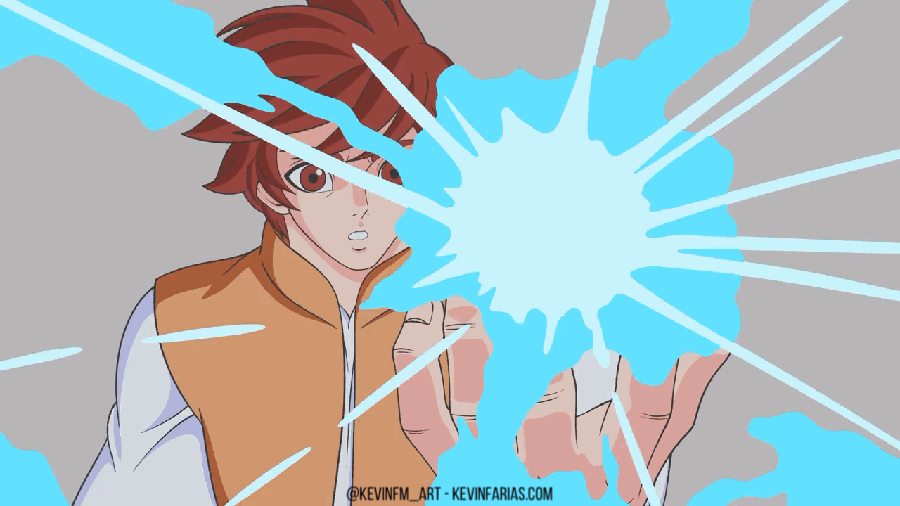
6. Post-Production of the Magic Effect Animation
I downloaded a background from Clip Studio Paint Assets to integrate it into my Animation.
Next we select in the layers panel the animation folder called: Magic.
And we go to the combination modes and activate: Overlay.
Making it look like this.
But we can make it even better. To do this, we enter each of the drawings of the animation of magical power, select the Light layer and activate: Duplicate Layer.
We hide the original layer leaving only the duplicate layer to work on. And we activate the tool: Blend.
In Subtool we activate: Blur.
Blurred the edge of the magical power aura.
And we repeat the process with all the drawings of the animation of magical power.
Finally, in the layers panel we select the animation folder called Magic and activate: Duplicate layer.
Making the magical power even brighter.
Obtaining the following result. It looks great right?

7. Texture for Magic Effect Animation
I activate a texture that I have downloaded from Clip Studio PAINT Assets.
And the Animation looks like this. I love it!

8. 90s Anime Style Animation
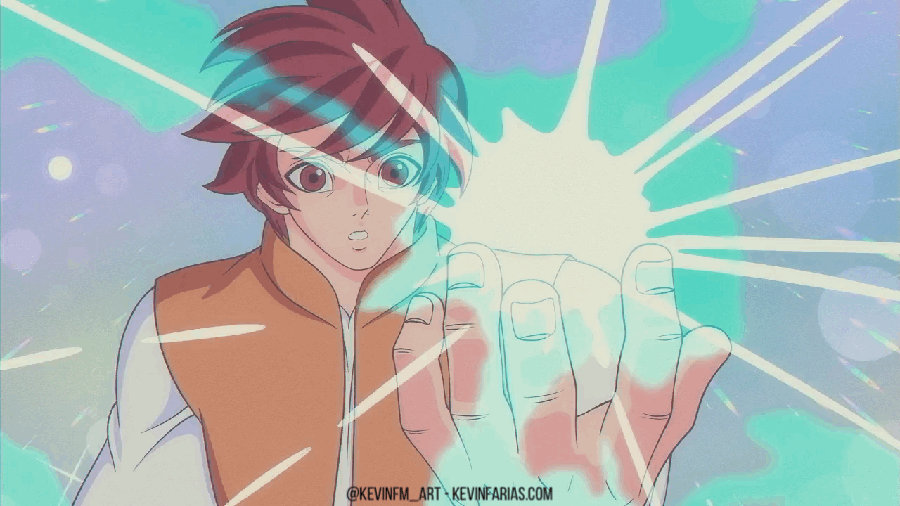
If you want to learn how to apply this retro filter from the 90s, I invite you to my article where I teach it, in this case you will have to apply it to each of the animation drawings.
9. My social networks
You can follow me on Instagram:
10. Farewell
I hope this article has been useful to you and encourages you to create your own animated magical effects, it's easier than it seems.


Comment