How to Paint 90s Anime Style ☆ in Clip Studio PAINT
Hello! In this article I will teach you how to PAINT 90s ANIME style in Clip Studio PAINT, using an optimized color palette and an automatic Filter. Achieving a really cool result.
I will give you some color recommendations to apply in your drawings.
We will also see different techniques to paint in Clip Studio Paint, such as: Refer to other layers or Paint in unfilled area. (In addition to Lock Transparent Pixels and Adjust to Bottom Layer)
This is the Illustration that we are going to transform into 90s Anime.
90s Anime style illustration that we will make
From Manga to Anime of the 90s
I invite you to watch the super tutorial where I show you the whole process step by step:
VIDEO: How to PAINT 90s ANIME style in Clip Studio PAINT
The video is in Spanish but you can activate the subtitles in your language, I'm sure you'll find it.
VIDEO in English: PAINT 90s ANIME style in Clip Studio PAINT
I have created a new Youtube channel in English to teach all my Clip Studio PAINT TIPS, I invite you to watch the video if you speak English:
Process summary
Now I invite you to watch all the steps again using images and Gifs.
1. Color Base
We deactivate all layers except the Illustration Border Line.
And under the line layer we create a New Raster Layer
Name: Base Color.
2. 90s Anime Style Retro Color Palette
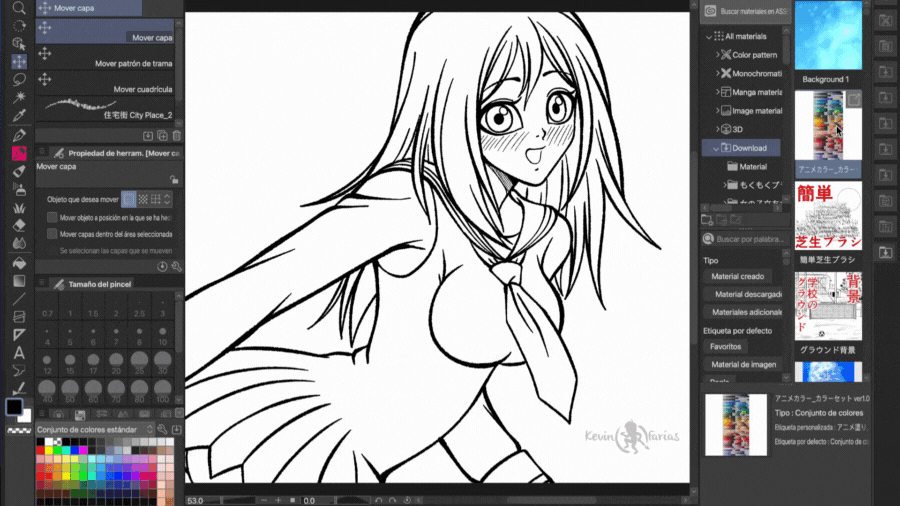
We go to the color area and choose the second option.
And we open the Material folder and take the downloaded Color Palette.
This is the color palette we will use:
We take it and drag it to the color area.
3. Fill Tool
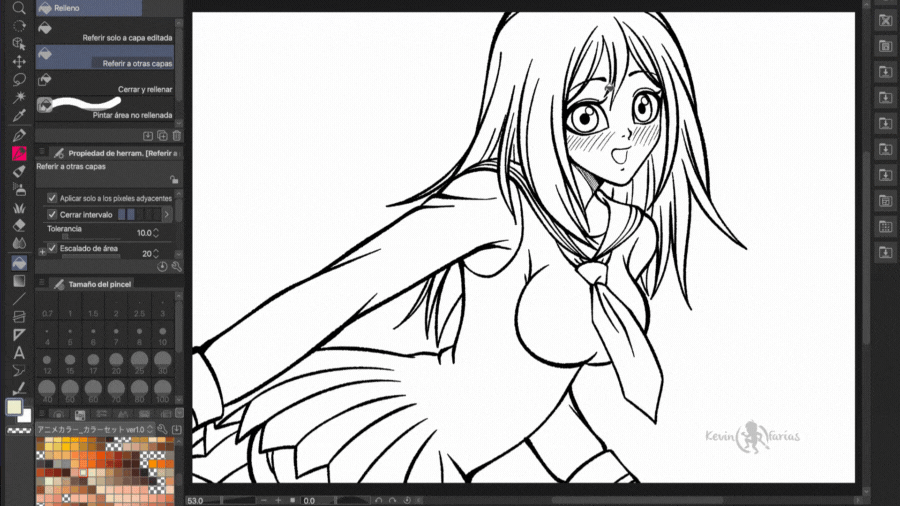
Once we have the color palette available, we select the tool: Fill. In Subtool we activate: Refer to other layers.
In the Base Color layer, we will use clicks to paint the color of the illustration.
4. Paint unfilled area
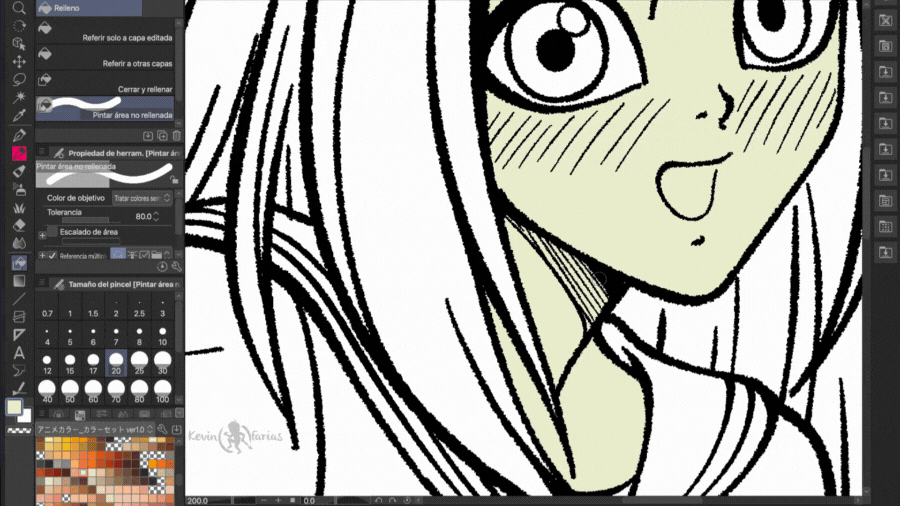
In some areas it will be very difficult to paint, for this we will activate: Paint unfilled area.
And so we can go on painting the empty areas.
5. Block Transparent Pixels
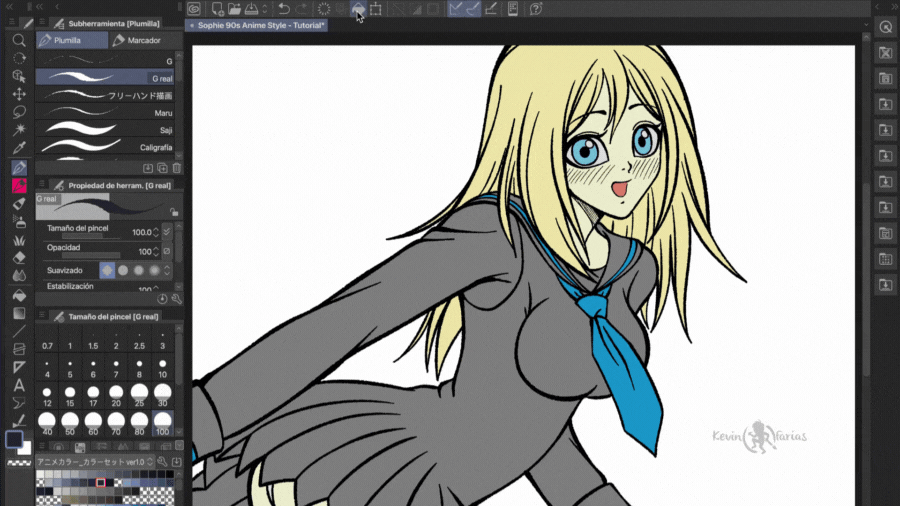
Once we have the base color we can change the colors, as I show you below with the uniform.
We select and make visible the base color layer of the uniform.
And we activate: Block transparent pixels.
And we paint with the fill tool found at the top:
6. Adjust the Bottom Cover
Now on the Base Color layer we will create a New Raster Layer named: Shadows.
And we activate: Adjust to Bottom Layer.
And we paint with the Pen tool or with the tool that you use to paint.
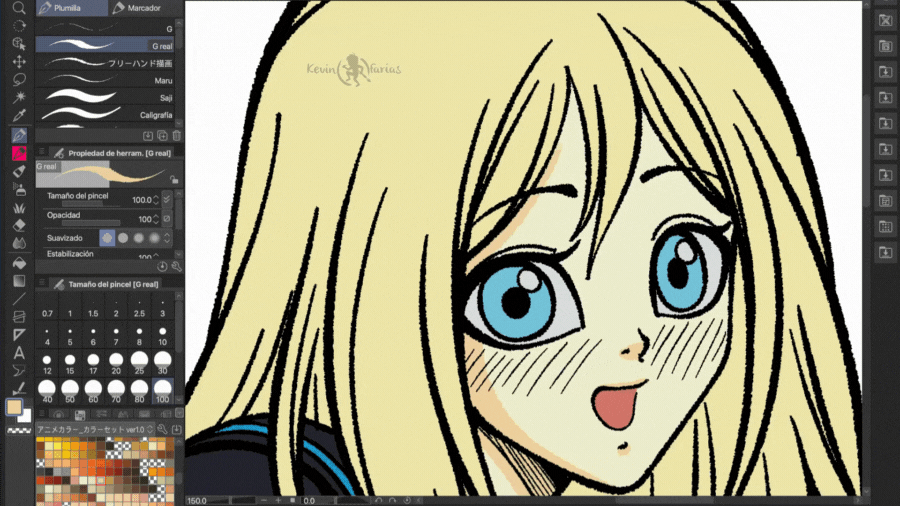
And we have achieved the following result for the moment:
7.How to paint the color of the border line?
I'll show you one of the many ways that exist, but this is definitely my favorite.
First we must create a New Raster Layer above the Line layer.
Select the new layer called Color Line and activate: Adjust to Bottom Layer.
And we choose a color from the palette and paint with the fill tool that is at the top.
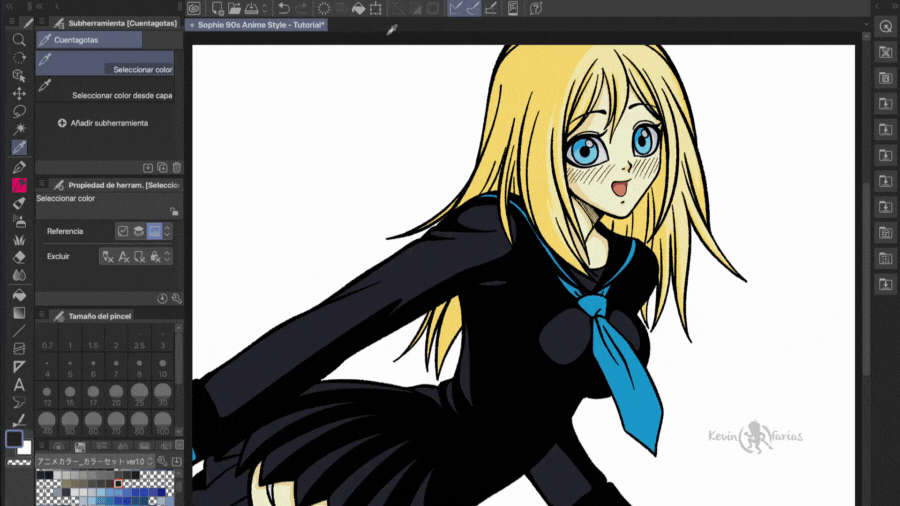
With the same color we can paint the shadow of the uniform, blocking the transparent pixels of that layer. This is something that is very used in the Anime of the 90s, that is, that the color of the line is the same as the dark shadows.
8. Paint with the Airbrush Tool
We create a new raster layer above the others with the name: Cheeks (or whatever you want)
We select the Airbrush tool, in Soft Subtool.
And we paint the cheek area, first we will use the same base color as the skin, to hide the cheek lines.
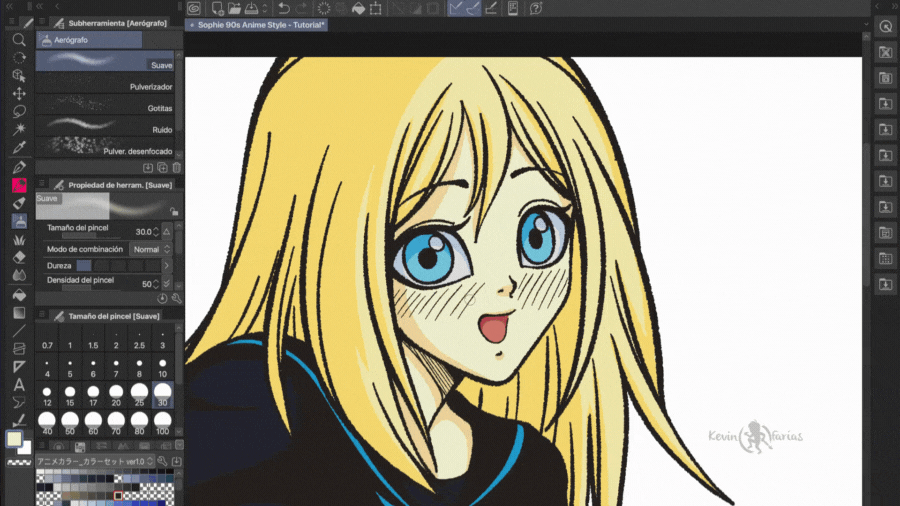
Then we chose a different color to make the classic 90s anime cheeks. Believe me, they used a real Airbrush to paint the blushing cheeks.
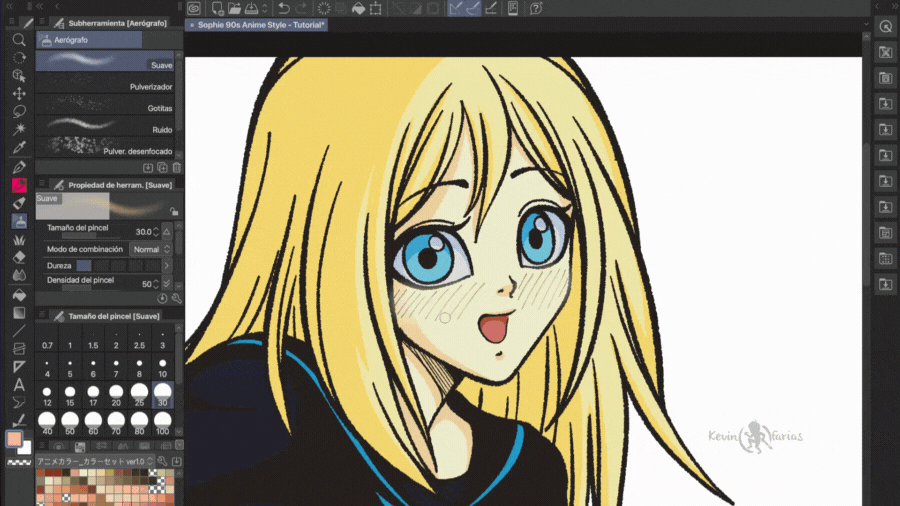
And we get the following result:
9. Illustration Background
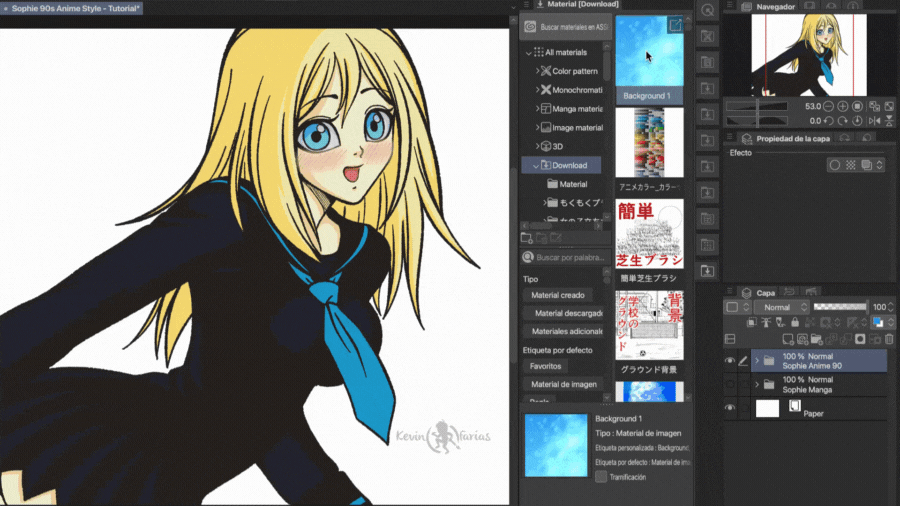
You can download the material we will use below:
Once we have downloaded it, from the material window we take the Background and place it under the illustration folder of our drawing.
And with the Operation tool we scale the Background image.
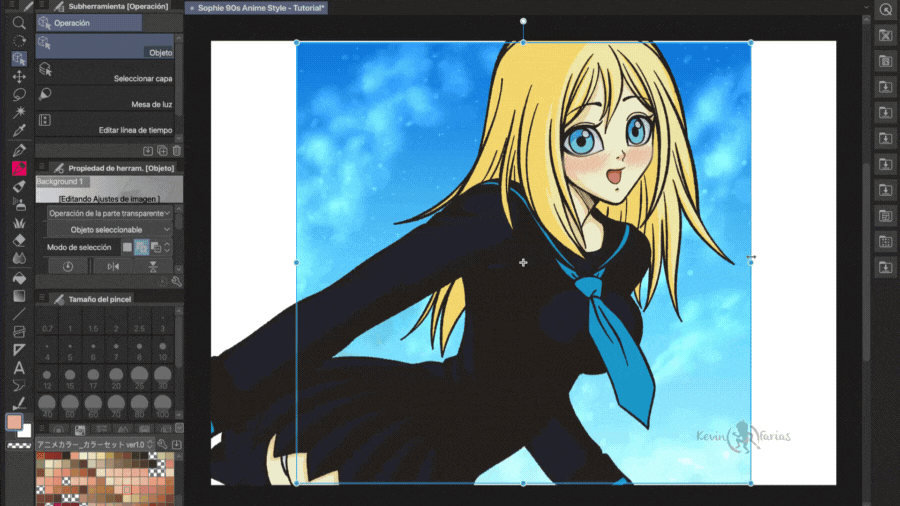
Making it look this way, for the moment I don't like it very much, so below we will make some very simple changes.
10. Effect of the Fund
We create a new raster layer above the background layer and below the girl layer, in the Blending modes we will activate: Lighten.
We choose a color and paint with the fill tool on the top.
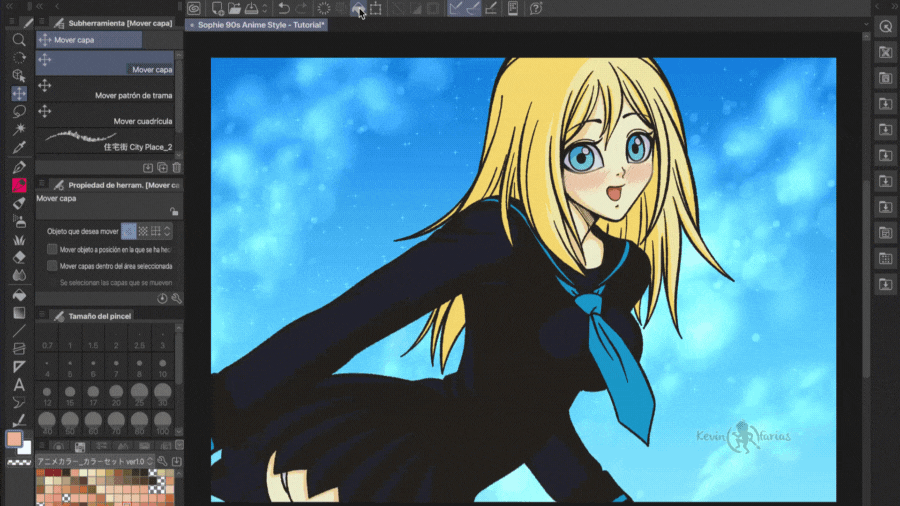
11. Combine Covers
We select the girl's folder, the background and the effect with Shift, right click: Duplicate layer.
We take them to the top and again with the right button: Merge selected layers.
We have all the illustration on the same layer (I recommend hiding the original layers)
12. Retro Anime 90s Effect
We duplicate the Illustration layer and add the name: Effects. This is where we are going to apply the retro filters.
We activate the panel: Automatic Action.
And we select in the Material folder the Filter that we will use called: Retro Filters.
You can download it below:
Once downloaded and installed, we take it and drag it to the Automatic Action panel.
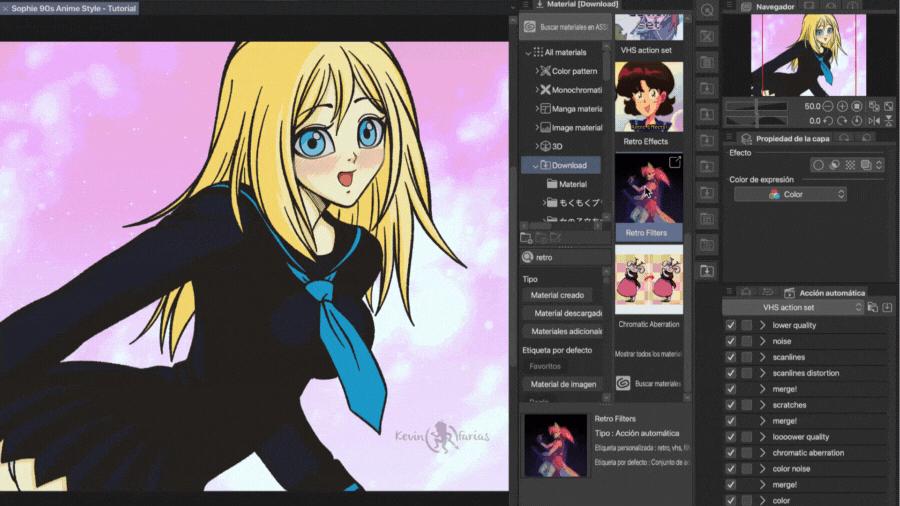
With Shift we select all the actions and activate: Start playing auto action.
Each of the applied effects will appear where you only have to click on: Accept.
Below you can see how Gaussian Blur works on our illustration.
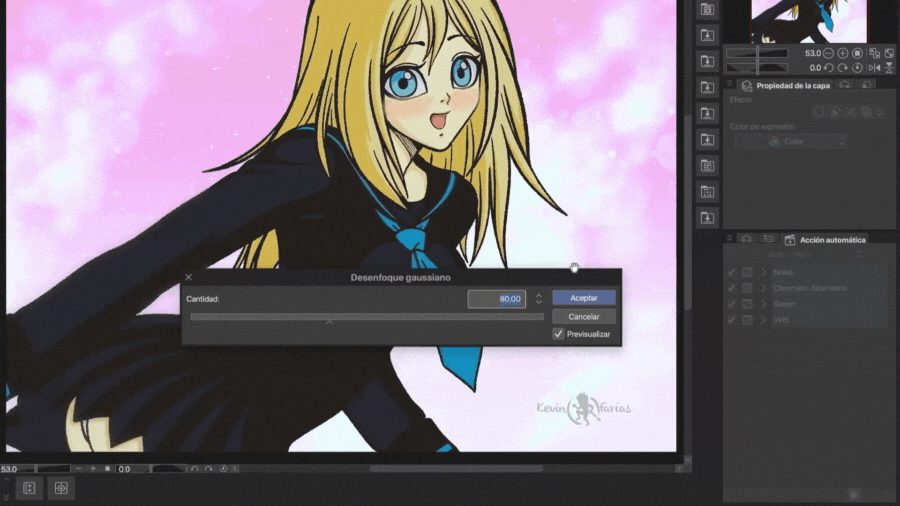
We can also play with the different actions, making them even more visible.
The default Perlin Noise is 1, I changed it to 2, but you can set the value you want.
And we get the following result, it is certainly BEAUTIFUL!
13. Export your 90s Anime Style Illustration.
Let's go to: File - Export (one layer) - .png (PNG)
We choose the folder where we want to save our image.
In PNG Export Settings you keep it like this:
Finally we see the window: Export preview.
14. Final Illustration 90s Anime Style
I'm really surprised by all the things we can do in Clip Studio PAINT and this article is proof of that.
I hope all this information has been useful to you and that you are encouraged to create your own retro illustrations from the 90s.
See you in the next TIP!


Comment