
Introduction
draw hands
The hands, those strange and challenging creations that not even Artificial Intelligences can deal with, are a mystery. Often, we focus on hiding, embellishing or disguising them in our drawings, but...
Is a hand so challenging? No! I refuse to believe that we can't draw simple hands.
Common Challenges When Drawing Hands
Among the most frequent are:
Achieve the proper size and proportion in relation to the rest of the body.
Adopt poses and gestures.
The Structure.
The Perspective.
The Fingers (Yes, the fingers).
2_Anatomy of the hands
Structure overview
This is just a reference image (Anatomically not entirely correct)
Main parts of the hands
The bones:
The hand has 27 bones in total, divided into three main groups:
carpal bones ; there are 8 small bones
metacarpal bones; There are 5 long bones that connect the carpus with the fingers.
The bones of the fingers; Each finger has 3 phalanges, except the thumb, which only has two.
The Palm
The palm is the inner surface of the hand, it is fleshy and concave, it provides a wide area to grasp objects and perform various activities.
The back of the hand
The back of the hand is the part opposite the palm. It generally has less meat than the palm and contains bones, tendons, and ligaments that are critical to the movement and stability of the hand.
The fingers
Hands have five fingers (Usually), these are essential for precise manipulation of objects and fine tasks such as writing, holding tools and performing gestures.
- The Thumb: it is the shortest and widest finger of the hand. It is unique due to its ability to oppose the other fingers, allowing us to grasp objects with precision.
As the Phrase says; "without this we do not live"
The Index Finger: Located next to the thumb. It is slightly longer than the other fingers and is used for pointing, aiming, and grasping small objects.
The Middle Finger: Located between the index finger and the ring finger. It is one of the longest fingers and plays an important role in grasping and manipulating objects.
The Ring Finger: Located between the middle finger and the little finger. It is called an "annular" because it is traditionally used to wear wedding rings.
Fun fact #1;
This tradition goes back to the belief that a vein called "vena amoris" (vein of love) directly connects the ring finger of the left hand to the heart, thus symbolizing love and commitment in a relationship.
- The Little Finger: Located next to the ring finger. It is the smallest finger and is usually the last to touch objects when we close our hand.
The doll
The wrist is made up of two main bones that connect to the hand:
the radius on the thumb side (identified in blue) and the ulna on the little finger side (identified in green).
The bone that we usually see in our wrist, is due to the process that has the tip of the ulna, although technically speaking, the radius also has a process, although it is not as noticeable. This is how these bones form the structure of our wrist and contribute to its mobility and functionality. Below is a small animation that I perform.

the ulna will look more pronounced or less pronounced depending on the rotation of the wrist.
When the wrist is turned inward, the ulna protrudes
The wrist is composed of several joints, which allow a wide range of movements. These are detailed more in "Articulations"
The Joints
- The carpo-metacarpal joints (CMC): There are five joints that connect the carpal bones with the metacarpal bones (the five long bones that form the base of the fingers). These joints allow limited sliding and rotational movements at the base of the fingers.
- Metacarpophalangeal joints (MCF): They are the joints that connect the metacarpal bones with the bases of the fingers. These joints allow flexion and extension movements of the fingers, allowing us to bend and straighten the fingers.
- Interphalangeal joints (IF): They are the joints that connect the phalanges (bones of the fingers) to each other. Each finger has two interphalangeal joints: one between the proximal phalanx and the middle phalanx, and one between the middle phalanx and the distal phalanx. These joints allow flexion and extension movements in the fingers.
but context
- Carpal and metacarpal bones:
The carpal bones provide stability to the wrist and act as a base for the metacarpal bones. The metacarpal bones are five long bones that connect the wrist to the fingers.
- Fingers and thumb:
The fingers are an essential part of the hand and are connected to the metacarpals by the metacarpophalangeal joints. The fingers are made up of three phalanges (proximal, middle and distal), except for the thumb, which only has two phalanges.
- Ligaments and tendons:
Ligaments are connective tissues that hold bones together, providing joint stability and limiting excessive movement.
Tendons are fibrous tissues that connect muscles to bones and transmit the force generated by the muscles to allow movement of the hand.
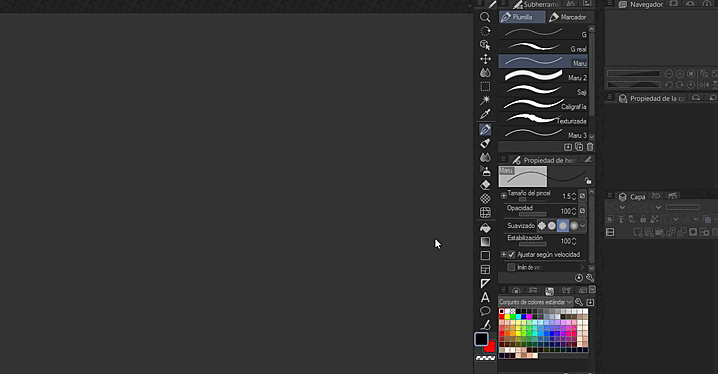
3_Preparation of Materials
my brush
Tell you how to create it.

1) Open the Clip Studio icon >
2) start the program >
3) Locate the Pen Sub Tool( Maru) tab > Right Click Duplicate Sub Tool >
4) the new Tool should be at the end of the nibs > check the "adjust according to speed" box >
5) left click on the key > the "sub tool detail" will open in a new window >
6) right click on the square divided diagonally, uncheck all the boxes >
7) Check the "minimum 1 pixel" box >
8) we will close the window >
9) in brush size we will choose 1.5
I almost forgot those boxes have to be like this
skin colors
4_Basic techniques
There are various techniques for drawing hands, I will mention some common examples.
Anime Technique;
In this style, the characters stand out for their personality and expressions, while the hands are represented in a simpler and more stylized way.
Realistic drawing technique ;
he seeks to depict the hands with a high degree of precision and detail, capturing every fold, shadow, and texture of the skin. It is a challenging technique, but one that offers very impressive results.
Caricature Technique;
In this technique, the hands are usually represented with 4 fingers, in an exaggerated and stylized way, focusing on distinctive elements and striking features.
Structure technique;
This technique focuses on building the hand step by step, using geometric shapes to establish the basic structure and then progressively adding details.
Gestural drawing technique;
This technique focuses on capturing the essence and movement of the hands through fast and fluid strokes. (Basically it's attaching the structure technique to transform it into something).
heating section
Now that we know more about hand structure and technique, it should be easier. But first we will do some exercises.
Fun fact #2;
Saying "I can do it" has been scientifically proven to be an affirmation that boosts our self-esteem and motivates us to face new challenges with confidence. By saying this phrase, we are feeding our mind with positive thoughts and creating a growth mindset.
Warm-up exercises to improve stroke accuracy
Whether you draw on paper or on a digital tablet, warming up your hand and soul with previous exercises is key to awakening your creativity. These warm-up exercises will help you loosen your hands, develop spatial vision, and improve your artistic dexterity. (These exercises help activate the neural connections related to creativity and artistic expression, which usually work in reasoning mode.)
You are free to skip the exercises, if you think you don't need them.
Next we will carry out the following exercises on our canvas;
- Make circles and spirals with smooth and continuous strokes. Make them bigger and bigger and then smaller. (Approximately 30 seconds)
(This exercise will improve the coordination and precision of your movements).
- Pick a nearby object and draw its (basic) outline with light strokes.
(This exercise will help you observe and capture shapes more accurately.)
- Next try to draw an object without looking at the paper, just focusing on its shape.
(This exercise will develop your spatial perception and precision in drawing).
mmm… (it's a water bottle)
- Practice drawing basic three-dimensional shapes like cubes, spheres, cones, and cylinders.
(This exercise will develop your spatial perception)
- Finally choose several small objects and place them in different overlapping positions. (They can only be cubes, spheres and cones)
(This exercise will improve your spatial perception)
Basic shapes for the structure of the hand
The basic ways to represent the structure of the hand are:
Palm Rectangle: Begin by drawing a rectangle to represent the palm of your hand. This shape will serve as a guide for the size and orientation of the hand.
Knuckle Circles: Along the palm rectangle, add small circles or ellipses to represent the knuckles. These shapes will mark the location of the metacarpophalangeal joints.
Oval for Thumb: Draw an oval connected to the palm rectangle to represent the location of the thumb. The thumb can be visualized as an oval connected to the base of the palm, at least at first it will work...
Finger Rectangles: For the fingers, use rectangles or smaller rectangular shapes connected to the knuckle circles. These shapes will represent the base of the fingers and will help you establish the length and position of each finger.
Curved lines for the phalanges: Along the rectangles of the fingers, add curved lines to represent the phalanges. These lines will indicate the flexion and extension of the fingers.
Below a Gif

5_Draw hands step by step
Next, I will show you Gif to expedite the explanation.
The first hand will have a general explanation for all the gifs.
Personally, I recommend the following:
- If you have a graphics tablet without a screen;
I suggest you draw the reference hand on paper and then use it as a guide when drawing on the digital canvas.
- On the other hand, if you use a graphics tablet with a built-in screen ;
you can draw directly on the digital canvas, taking advantage of the convenience of viewing your strokes while you work.
Hand in relaxed position

Gifs are handy for summarizing the process, (compared to writing lengthy explanations).
With this in mind, here is a general explanation that will help you understand the following gifs.
Let's draw hands!
Step 1 ; We will draw a basic hand with pencil and paper. (This will help us as a reference)
Then, we will move the image to the layer area in Clip Studio. We will change the color of the layer and add a new vector layer, we will use the brush from the "prepare the materials" section.
Next, we will follow these steps:
2. We will draw a square.
3. We will add the wrist and thumb joint.
4. Then we will draw the fingers.
5. We'll change the color of the layer and add a vector layer.
6. We will refine the drawing.
7. We'll repeat step 5 and 6 until it's decent, then we'll add details.
8. The hand will be finished!
Now, we will make another hand on the same canvas, hiding the layers of the first hand we will follow these steps.
1. We will repeat steps 2 to 4 on the other hand.
2/3. Now steps 5 to 6.
4. As you can see, it's quite easy.
5. I will modify the hand by adjusting its size.
6. We will fix the fingers if they are too long, erasing the excess.
7. We will finish the second hand.
8. We will paint both hands with the colors from the materials section.
9.in a new raster tab with the fill(g) we will paint with color 1 and in another raster layer we will paint with color 2.

10_ We will use the eraser and the brush to perfect the areas of light or darkness.
Ready! Now you will have two beautiful hands ready.
Hand in Open position

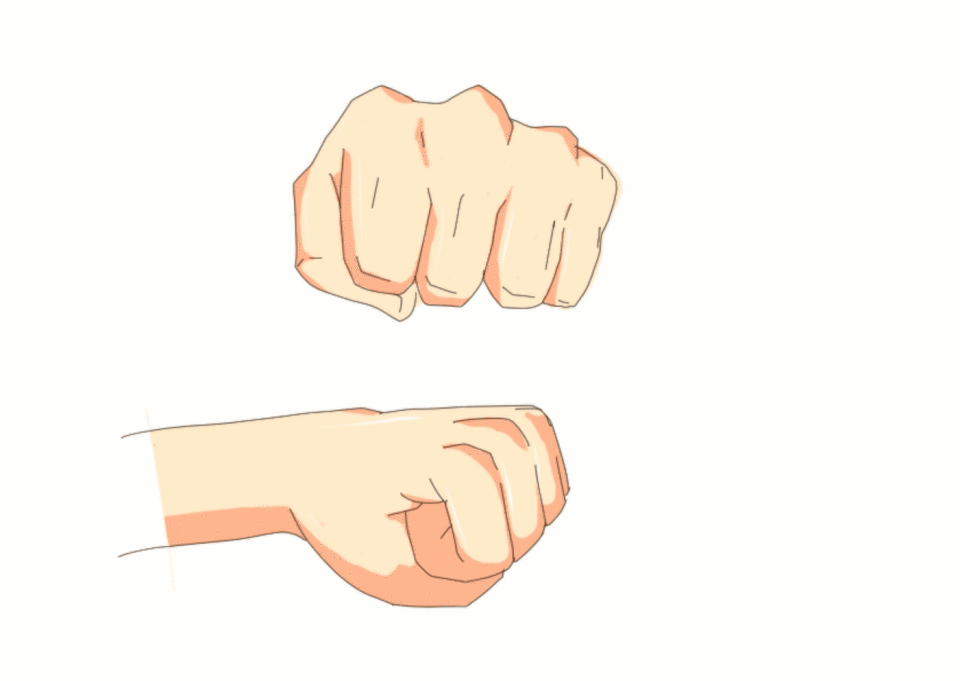
Hand in fist position
Don't forget to draw the geometry, that will help you keep perspective in your drawing.
Hand in closed position
Remember that these are quick, basic examples; you should be able to draw them in no more than 10 minutes. With practice, you will become faster and more efficient.

Hand holding an object/thing

6_Focus on details
Auxiliary Parts
auxiliary anatomy
The palm of the hand is divided into two distinct areas: the thenar and the hypothenar. (let's ignore the concave area and the palmar digit)
The tenar ; It is located on the inner or medial side of the palm, near the thumb. It is mainly composed of three muscles;
Abductor pollicis muscle:
Allows you to move your thumb out and away from the rest of your fingers.
Flexor pollicis brevis muscle: Helps flex the thumb and allows it to move inward.
Opponent thumb muscle: This muscle is responsible for opposing the thumb to the rest of the fingers, which allows for precise grasping of objects.

Hypothenar: is located on the outer or lateral side of the palm, next to the little finger. It is mainly composed of three muscles;
Little finger abductor muscle: Allows the little finger to be separated from the rest of the fingers
Short flexor muscle of the little finger: Contributes to the flexion of the little finger and gives it mobility.
Little Finger Opponent Muscle: Makes it possible to oppose the little finger to the other fingers, which is essential for accurately grasping objects.
knuckles
Aesthetically; knuckles are distinctive features on the hand and can vary in size and prominence from person to person.
They are usually shaped like an oval/egg, while tendons are usually represented as lines.
When drawing hands, it's important to pay attention to the position and appearance of the knuckles to achieve a realistic and well-proportioned drawing.
remember that; Keeping your hand looking flat can make the drawing look unrealistic and unsightly, so don't forget to give it some volume.
The knuckles are seen more prominent when closing the hand, on the contrary, they retract when it is stretched, (Except when the person practices martial arts). Remember that the hand bends from the metacarpal bones.
Here are some examples of different knuckles.
hands through time
When drawing men's hands, squares are used to represent a more robust appearance.
And for the Little Boys, use circles and shorten the fingers to give them a cute and adorable look.
For women, focus on soft curves and long, graceful fingers. It is also often associated with long nails.
These guidelines will help you adapt the hands according to the gender and age of the characters in your drawings, you can add wrinkles and folds for more realism.
types of nails
There are several ways to draw nails, below I will show you 6 of the most common
1_Realistic/Oval Nails ;
Full nails are drawn, these consist of 4 visible sides with an Oval shape.
2_Triangle Nails;
Triangular shaped nails are drawn. Usually used on demons.
3_Sharp Nails;
They are drawn in the shape of a claw, these are represented in demons or beasts.
4_Circular Nails;
They are drawn in the shape of a circle. These have a more rounded edge, so they are used for small children.
5_Rectangular Nails ;
They are drawn in the shape of a rectangle and a rounded base. These have a more defined edge, so they are similar to false nails.
6_Nails without Base ;
The nails are drawn without the base of the same, these consist of 3 visible sides.
Details on the nails
You will notice the numbers on the nails, with the corresponding characteristics.
- Shape and length: 1
Observe the shape and length of the nails, as they can vary from person to person. Some nails may be more rounded, while others more square or pointy. (see image Types of nails)
- Brightness and shadows: 2
Apply lighter shades to the top of the nail (to simulate shine). Also, add darker shadows at the bottom (to give it volume).
- Nail polish: 3
If the character has painted nails, add a layer of color on top of the nails.
(You can easily represent it,
you add 1 new vector tab for the light lines.
One raster for the base color and one for the shadow),
(you can see a result in the image of bones in 2_Anatomy of the hands / 5_Draw hands step by step, gif step 9).
- The cuticle: 4
Adds the cuticle at the base of the nail, it also contributes to the natural and realistic appearance.
7_Hands in motion
Gestures and natural movements
Understanding hand motions is essential (shortly: if your hand can't take that shape, it's unfeasible, unless it's made of rubber or some other material that ignores physics). Avoid exaggerations that affect your anatomy. With practice, you'll be able to achieve attractive exaggerations, without compromising their realistic appearance; nobody wants to be remembered as “The creator of the devil's hand”.
(Dictionary)
unfeasible
adjective
- That can't happen or be done.

3D models in Clip studio
Clip Studio offers preset templates that can be helpful, or you can also browse the store for materials tagged "body" and "Hands."
However, to capture the realistic movement of the skin, muscles and tendons, I recommend supplementing them with images of real hands or those of other artists.
Next, I will explain how to take advantage of 3D models:

1_At the top of Clip studio Click on “Window” (it's next to help).
2_We go down with the mouse to "Materials" and click on "material (3D)".
3_In the tab that was opened, scroll down until you find the 3D body and drag it to the canvas.
change hand pose
There are 4 main ways to change the hand pose:
manual way
Extract pose
apply pose
handheld scanner
Manually, finger by finger.

Applying a pose, These are obtained in the store or you create them.

and the hand scanner, I won't explain much because they are very intuitive.
Tips for drawing hands in different positions and angles
- Study the anatomy of the hand: Using the structure and bones, understand the anatomy to better visualize how the hand behaves in different positions and angles.
- Use references: Search and Observe photographs, illustrations on the internet or you can even take photos of your own hand in different poses to have a visual guide.
- Practice basic hand gestures and poses: Start by drawing basic hand gestures and poses, such as opening and closing the hand, making a fist, or pointing.
- Draw geometric shapes for guidance: Before adding details, draw geometric shapes that resemble the position of the hand. Use circles, rectangles, or any other shape to visualize orientation and proportions.
- Establish reference points: Identifies key points in the hand, such as the position of the knuckles, the joints and the base of the palm.
8_Overcoming common challenges
The images below will represent 2 examples each.
frequent mistakes
- Out of proportion fingers: It's easy to draw fingers that are too long or short in relation to the size of your hand, which can look unrealistic, but since every hand is different, you shouldn't worry too much.
- Unnatural Positions: Sometimes hands can be left in unnatural or awkward positions, which affects the believability of the illustration. It usually happens a lot in 3D models, for more information see on the internet.
- Lack of Detail: Omitting important details, such as skin folds, joints, or fingernails, can make your hand appear flat and unrealistic, although every technique is different.
Incorrect Perspective: Failing to take perspective into account can result in hands that appear flattened or distorted.
It's common to have perspective errors when starting to draw, but don't worry, your hand is the solution! All you have to do is take a photo of him in the desired pose and use it as a reference to improve your drawings."
- Poor hand-wrist connection: The hand-wrist connection can be problematic, especially when proper anatomical structure is not taken into account.
- Stiff Hand: Drawing the hand without regard for movement and flexibility can make it look stiff and inorganic.
- Undefined Knuckles: Not rendering the knuckles properly can make the hand look flat and not detailed.
- Flat Hand: Drawing your hand without giving it a sense of volume and three-dimensionality can make it appear flat and unrealistic.
- Improper Shading: Incorrect shading can make the hand look blurry or unrealistic.
- Omitting the wrist: Not including the wrist in the drawing can give the impression that the hand is floating without connection to the arm.
Advice
The key to improvement is to identify mistakes and work on correcting them as you go through your drawing practice.
Do not be afraid and look at references, study the anatomy, experiment and make mistakes, since these are part of the learning process.
9_Practice and more practice
The importance of daily practice
daily practice in drawing is an invaluable investment in your artistic development. Through consistency and constant effort, you become a more skilled, creative, and self-confident artist.
Here is an example of the importance:
10_Conclusion ;
Remember; every great artist was a beginner who faced his fears and limitations. Each stroke, each imperfection, is an opportunity to polish our skill and find a better technique.
Finally, I would like to apologize to the reader, I still have a lot to improve in the articles, to offer an optimal experience, with nothing else to say, good morning, afternoon, evening.
Users who liked this post


Comment