GRAPHITE PENCIL style animation in Clip Studio PAINT
Hello! In this article I will show you how to make a graphite pencil style animation in Clip Studio PAINT.
Whether you have the PRO or EX version, this tutorial is for you.
The animation we are going to do:

It looks great doesn't it? And the best thing is that we will do it with a free graphite pencil brush that you can download from Clip Studio PAINT Assets. (which I will share with you later)
But the first thing is to invite you to see my super tutorial called:
GRAPHITE PENCIL style animation in Clip Studio PAINT (VIDEOTUTORIAL)
The video is in Spanish but you can activate the subtitles in your language, you will surely find it.
What do you think about the video?
You could see that by making a simple graphite pencil style animation we can achieve a great result.
Step by step of the graphite pencil animation process
Now I invite you to see the step by step through images, surely you will understand it even better.
1. Comparison of graphite pencil brushes
By default we have the graphite pencil called: Pencil. But I have to use a lot of force to draw and to see the line, it's realistic but as time goes by you will force your hand much more and that will make you tire faster.
Below you can see the comparison between one pencil and another.
Left: Pencil (default). On the right: Perfect Pencil.
2. Perfect Pencil
For this reason, I recommend my favorite brush called: Perfect Pencil.
Which you can download below:
Once downloaded it will appear in the Material window.
To install it we must select it and at the bottom we activate: Paste selected material on the canvas.
And we confirm in the window that will appear with OK.
In the toolbar we select the pencil tool and in Subtool we have Perfect Pencil installed. And we select it to use it.
3. Creation of the Animation Project
We go to File - New.
And in the window we select the last option, the Animation option.
In the name of the file we change the name.
And in the size, this time we will do it: 1920 x 1080 pixels. Resolution: 300 dpi
We can rename the story and the timeline.
Finally, in frames per second we select 8.
And the duration will be 13.
Then we activate OK to create the project.
Now we are ready to start with our animation.
4. Animation Cels
The first thing we are going to do is delete the animation folder that is created by default, we do this in the layers panel with the garbage can icon.
And in the timeline we create a new animation folder.
Why did I do it again? We see it below.
We change the name in the layers panel to this new animation folder.
Now we will do something different, we go to the layers panel to create one: New layers folder.
Inside this folder we will create 2 raster layers, called:
Sketch and Effects. We also renamed the layers folder to: 1K.
Why 1K? Why the letter K?
In animation the letter K is used to name the key drawings.
K=Key
Thanks to this we will be able to carry out our animation in an orderly manner.
Now in the timeline we activate Specify Cels.
In the window we select drawing 1K and activate OK.
And ready! Now the layers folder is visible as an animation cel.
It is without a doubt one of my favorite Clip Studio PAINT options.
Finally we select the Sketch layer which is where we will start with the first part of our animation.
5. Save the Animation Project
We go to File - Save.
And we save the project on our computer.
6. Key Animation Poses
We draw the first key pose of our animation.
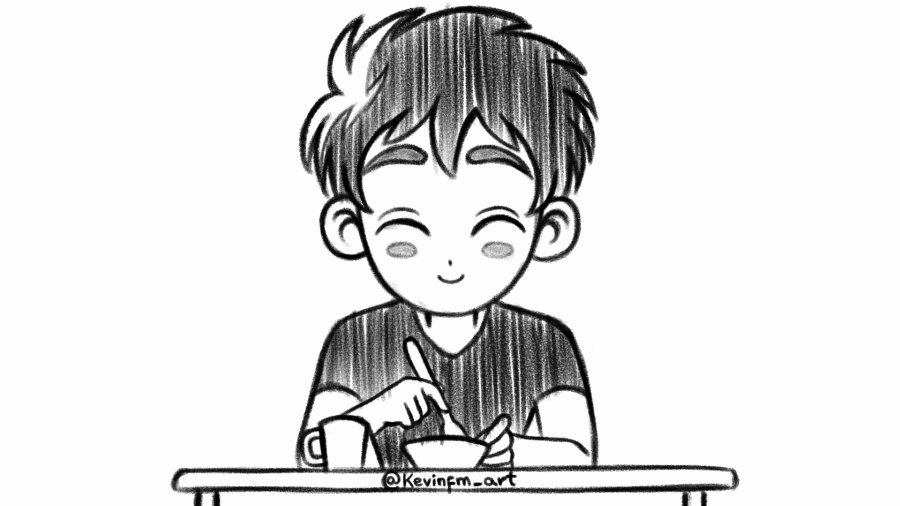
Our animation will show a boy eating.
We draw all the elements in the animation cell called 1K, in the Sketch folder.
In this animation we are going to draw the character and the elements always on the same layer, we will also draw them again, that will produce the movement of the line and the graphite pencil effect that we want to achieve.
Once we have made the first drawing, in the timeline we advance to frame 7 and create a new animation cel.
We renamed it 7K, to identify it in position in time and as a key (K) pose.
We select the Sketch layer and draw this new key pose.
But before drawing, we activate the onion skin, to be able to see the previous drawing.
And ready! We have our new key pose for our animation, where the character already has the food in its mouth.
Now in the timeline we go to frame 8 to create a new animation cel.
We renamed it in the layers panel to: 8K, because it's also a key pose.
We select the Sketch layer and draw this new key pose.
And we have this new key pose, very similar to the previous one, only the jaw changes shape.
And ready! We have managed to create the key poses of our animation.

7. Breakdowns
Now we are going to do the Breakdowns, for this in the timeline we go to frame 5 to create a new animation cel.
We change the name in the layers panel to 5B.
Why the letter B? Because it tells us that it is a Breakdown.
We select the sketch layer, activate the onion skin and make this new drawing.
In this new drawing we make the character with his mouth open about to eat his food.
Undoubtedly this drawing is one of the most important.
Finally, we go to frame 3 to create a new animation cel.
In the layers panel we change the name of this drawing to 3B, we select the Sketch layer to make this new drawing.
And we made this drawing where the boy begins to open his mouth to eat his food.
And we have our animation with the breakdowns:

8. Assign cel to frame
Now we need to repeat the movement of key poses 7 and 8, where the character is chewing his food.
To do this we go to frame 9 and activate: Specify cels.
And we select the drawing 7K
Then we go to frame 10 and turn on specify cels.
We choose the 8K drawing and click OK.
And ready! We have the most important drawings of our animation.
And we have our animation with the most important drawings:

9. Inbetweens
Now we are going to smooth our animation.
In the timeline we go to frame 6 and create a new animation cel.
Like the previous drawings we change the name of this new drawing to 6I.
Why do we add the letter I? To identify it as an Inbetween.
We select the Sketch layer and activate the onion skin.
And we make this new drawing, where the character has his mouth closed with the food in his mouth.
We will make the following drawing in frame 4, for this we go to frame 4 and create a new animation cel.
We change the name to 4I, select the Sketch layer and activate the onion skin.
And we have this new drawing, where the character is about to eat his food.
Now in the layers panel we select the 4I drawing, with the right button we activate: Duplicate layer.
We change the name to 11I and upload this drawing in the layers panel.
And in the time line we activate: Specify cels.
We choose drawing 11I and activate OK.
And we have drawing 11I on the timeline, so we select the Sketch layer to make some changes to the drawing.
But first, to guide us, we select frame 13 in the timeline and activate: Specify Cels.
We select the 1K drawing and click OK.
We have the first drawing of the animation in frame 13, which will serve as a guide to make the following drawings.
We return to drawing 11I and select the Sketch layer, delete the food and make the closed mouth of the character.
Then in the timeline we go to frame 2 to create a new animation cel.
This drawing will be called 2I and we make the last drawing of our animation. Because then we will duplicate it.
In the layers panel we select the 2I drawing and with the right button we activate: Duplicate layer.
We change the name to 12I and put it above all the drawings in the layers panel.
In the timeline we go to frame 12 and activate: Specify cels.
We select drawing 12I and activate OK.
And now we are going to edit this duplicate drawing, we select the Sketch layer and activate the onion skin to guide us through both the previous drawing and the following drawing.
We erase the food from this last drawing and make the mouth closed.
And by adding the inbetweens we have finished with our animation:

10. End animation duration
In the timeline we take the blue bracket and move it leaving it at frame 12.
11. Graphite pencil striped effect
Now we are going to add some vertical lines so that our animation is in the graphite pencil style.
For this we select the layer called FXs of each one of the drawings
And with the same pencil, we make vertical lines for the boy's animation, in this case we will only add the lines to the hair and the shirt. We can also paint the eyebrows and cheeks.
Once we have added the vertical lines to all the drawings we will be done with our animation.
12. Export your Animation
We are going to export our animation as both a video and a .gif
To do this we go to File - Export Animation - Movie.
We put a name to our animation and we can choose between the .mp4 or QuickTime format. This time I will choose .mp4
And in the movie export settings window we leave it as it is, 1920x1080.
In frames per second we leave it at 24.
Why if the original animation is 8 fps?
Because if we leave it at 24 frames automatically our video animation will last 2 seconds.
Now we will export it as .gif
To do this we go back to File - Export animation - Movie.
We name our animation
And in the export settings of the animated gif we can change the size, for this I will leave it at: 1920 x 1080.
We leave the frames per second at 8 just like our original animation. And we click OK.
In the case of the animated gif, when exporting, a window will appear indicating the final size of our .gif animation.
Do not forget that in both ways of exporting you can choose the folder where you want your animation to be exported.
13. Final Animation
This is the graphite pencil style animation that we have been able to do in this article, I hope the tutorial motivates you to create your own animation in this style.

See you in the next TIP!


Comment