
Hola! En este artículo te enseñaré Como animar un personaje en Clip Studio PAINT, sera una animación muy sencilla para que tú también la puedas realizar.
Ya sea que tengas la versión PRO o EX podrás realizar esta animación.
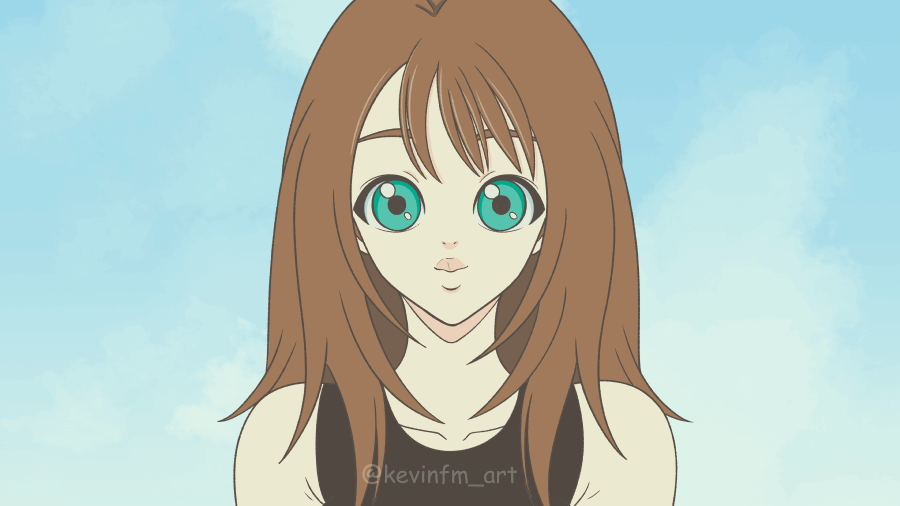
Lo que realizaremos:

Como ves será una animación muy sencilla de hacer, para que tú también te motives a animar a tus propios personajes, comenzando con animaciones tan simples como la que te enseñaré en el siguiente video:
TUTORIAL: Como animar un personaje en Clip Studio PAINT
Recuerda activar los subtítulos en tu idioma, seguro lo encontrarás.
Paso a paso del tutorial:
Ahora realizaremos un repaso a través de imágenes.
1. Creación del Proyecto de Animación
Vamos a Archivo - Nuevo. Elegimos la última opción, la opción de Animación. Y respetamos las medidas que muestro en la siguiente imagen:
2. Configurar proyecto de animación
Al crear un proyecto de animación por defecto viene creada una carpeta de animación con un cel de animación, esta carpeta la vamos a eliminar porque te mostraré una forma genial con la que podemos trabajar los cels de animación en Clip Studio PAINT.
Ahora vamos a la línea de tiempo y creamos una nueva carpeta de animación
Le cambiamos el nombre a la carpeta de animación en el panel de capas y dentro de ella creamos una Nueva carpeta de capas.
Y dentro de esta carpeta de capas creamos la siguientes capas:
COLORLINE
LINE
LIGHT
SHADING
BASECOLOR
SKETCH
Una vez hemos creado todas las capas vamos a ir a la línea de tiempo a activar la opción Asignar cel a frame.
Y en la ventana que aparece seleccionamos el dibujo 1 y le damos a OK.
3. Guardar proyecto
En el icono de la parte superior podemos guardar nuestro proyecto en la carpeta que nosotros queramos de nuestro equipo.
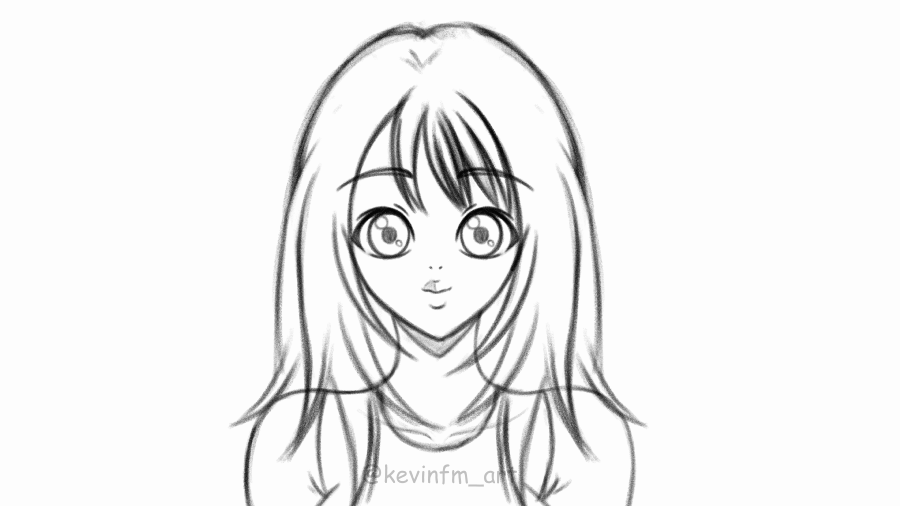
4. Boceto de la Animación
Seleccionamos la capa Sketch y realizamos la primera pose clave de nuestra sencilla animación.
Luego vamos a la línea de tiempo, al fotograma 10 y creamos un nuevo cel de animación.
Al crear un nuevo cel de animación respeta cada una de las capas y de los nombres creados anteriormente, lo cual es genial porque nos ahorra mucho tiempo.
Podemos activar el papel cebolla para ver el dibujo anterior y poder guiarnos al crear esta segunda pose clave.
Y tenemos la pose clave 2 en el fotograma 10.
Luego creamos el Breakdown en el fotograma 6. Activando el papel cebolla podemos ver el dibujo anterior y posterior para hacer este dibujo de la mejor forma.
Vamos al fotograma 4 a crear un dibujo intermedio, activando el papel cebolla sera mucho mas fácil el realizar este dibujo.
Por último vamos al fotograma 23 y activamos Asignar cel a fotograma y seleccionamos el dibujo 4, así será un ciclo de animación.
Si bien no es necesario que se vea como un ciclo de animación, este dibujo será útil al agregarlo en esta posición de la línea de tiempo.
5. Boceto de la Animación
Es una animación sencilla pero que se ve genial
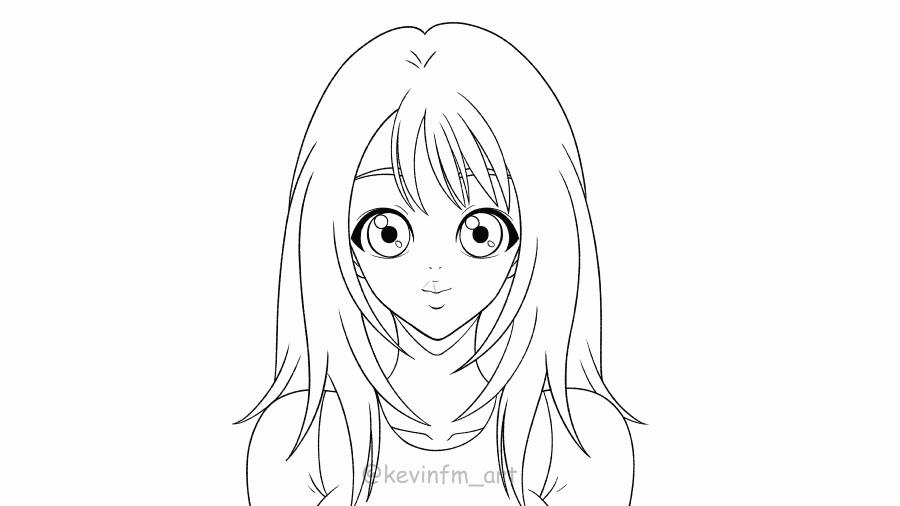
6. Limpieza de la Animación
Ahora iremos seleccionando cada una de las capas llamadas Sketch de todos los dibujos y vamos a activar: Cambiar color de capa
Y le bajamos la opacidad a 25%
Seleccionamos la capa llamada LINE, que es una capa vectorial. Y seleccionamos la herramienta Plumilla.
Y en Subherramienta elegimos Texturizada, en tamaño 10 o 20. Y realizamos la línea de cada uno de los dibujos de nuestra animación.
Así se vea nuestra animación totalmente limpia. Sencilla pero genial!
7. Color de la Animación
En Clip Studio PAINT podemos utilizar paleta de colores y muchas de ellas las puedes encontrar en los Assets de Clip Studio PAINT.
Una de ellas es la siguiente y que te recomiendo mucho utilizar:
Seleccionamos un color y con la herramienta Relleno iremos pintando cada uno de los dibujos de nuestro personaje.
Pero antes debemos asegurarnos de tener seleccionado la opción: Referir a otras capas, para poder pintar de la mejor manera. Esto lo activamos en Subherramienta.
Seleccionamos la capa correspondiente, en este caso la capa BASE COLOR y pintaremos cada uno de los dibujos de la animación tan solo como un clic.
Van a ver ocasiones que quedaran espacios muy pequeños sin pintar, eso lo podemos corregir con la herramienta plumilla.

8. Sombra de la Animación
Ahora iremos seleccionando la capa Shading de cada uno de los dibujos de la animación, para pintar la sombra de nuestro personaje.
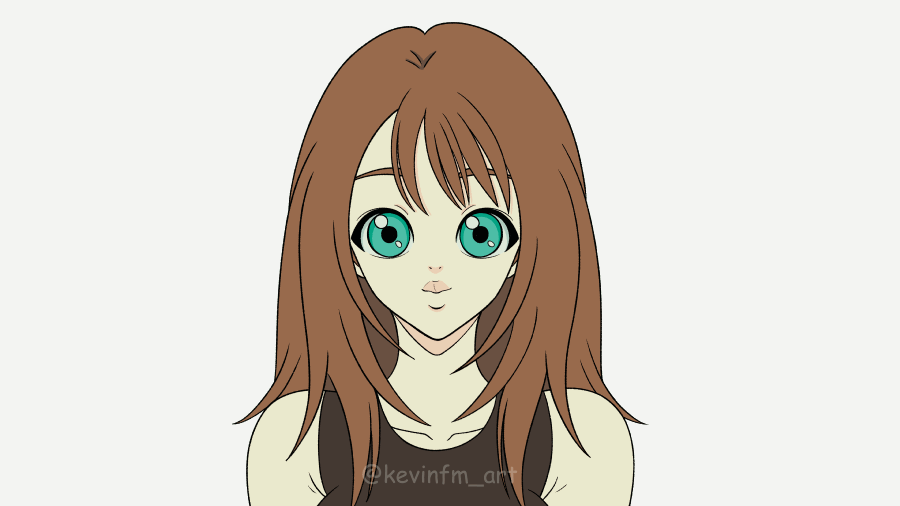
9. Brillos de la Animación
Seleccionamos la capa LIGHT y agregamos unos sencillos brillos.

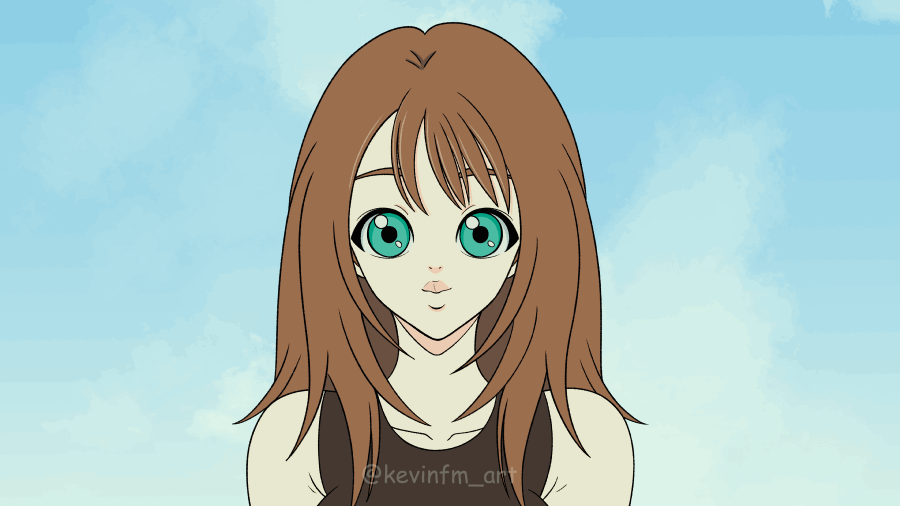
10. Fondo de la Animación
Para el fondo utilizaremos uno de los materiales de Clip Studio PAINT, ya sea uno de los que viene por defecto o descargándolo de los Assets de Clip Studio PAINT.
Lo tomamos y lo arrastramos hacia el área de trabajo.
11. Cámara 2D
Vamos al menú Animación - Nueva capa de animación - Carpeta de Animación 2D
Con la herramienta Operación re encuadramos nuestra cámara.
Y para que nuestra cámara funcione debe tener elementos dentro de ella, para ello tomamos todas las capas de nuestra animación y las ponemo dentro de la capa de la Cámara.

12. Exportación de la Animación
Vamos a Archivo - Exportar Animación - Película
Le ponemos un nombre
Y muy importante, debemos activar: Aplicar efectos de cámara 2D
Y exportamos nuestra animación como video. Si quieres exportar tu animación como GIF animado, es bastante similar, vamos a verlo!
13. Animación Final y conclusiones
Como pudiste ver, hemos aprendido a hacer todo el proceso de una sencilla animación, espero esto te motive a que puedas animar a tus personajes.
Siempre recomiendo comenzar por algo sencillo y este artículo seguro te ayudará :)
Nos vemos en el siguiente TIP!
Users who liked this post


Comment