
Here are some tips on how to create marbles using Clip Studio Paint's filter function (plus more).
Auto actions are also available.
If you think it's too much hassle or difficult to create them yourself, please check out here▼
Prepare
First, prepare an empty layer (raster layer) and select "Filter" ▶ "Draw" ▶ "Perlin Noise" from the top menu.
The numbers can be determined by feel.
*It's best if the pattern size (scale) isn't too detailed, but it's up to your preference.
Transform the Perlin noise image you created into a spiral.
Menu bar "Filter" ▶ Transform ▶ Spiral
Create a spiral starting from the ❌ mark.
We recommend setting the Range item checkbox to "Specify size (use radius and flattening)."
Create more spirals.
Add another spiral using the same procedure.
When doing this, it's easier to create a nice look if you change the size or direction of the spiral from the first spiral you created.
Using the distortion tool, we'll add flow to the mechanical vortex.
You can add a nice accent by distorting the image in a way that breaks up the spiral, or by changing the size and strength of the distortion.
You should also correct any blank spaces that are created by the spiral transformation.
(Setting a larger brush size makes it easier to make corrections naturally.)
The image that will become the marble is now complete.
Marble color creation
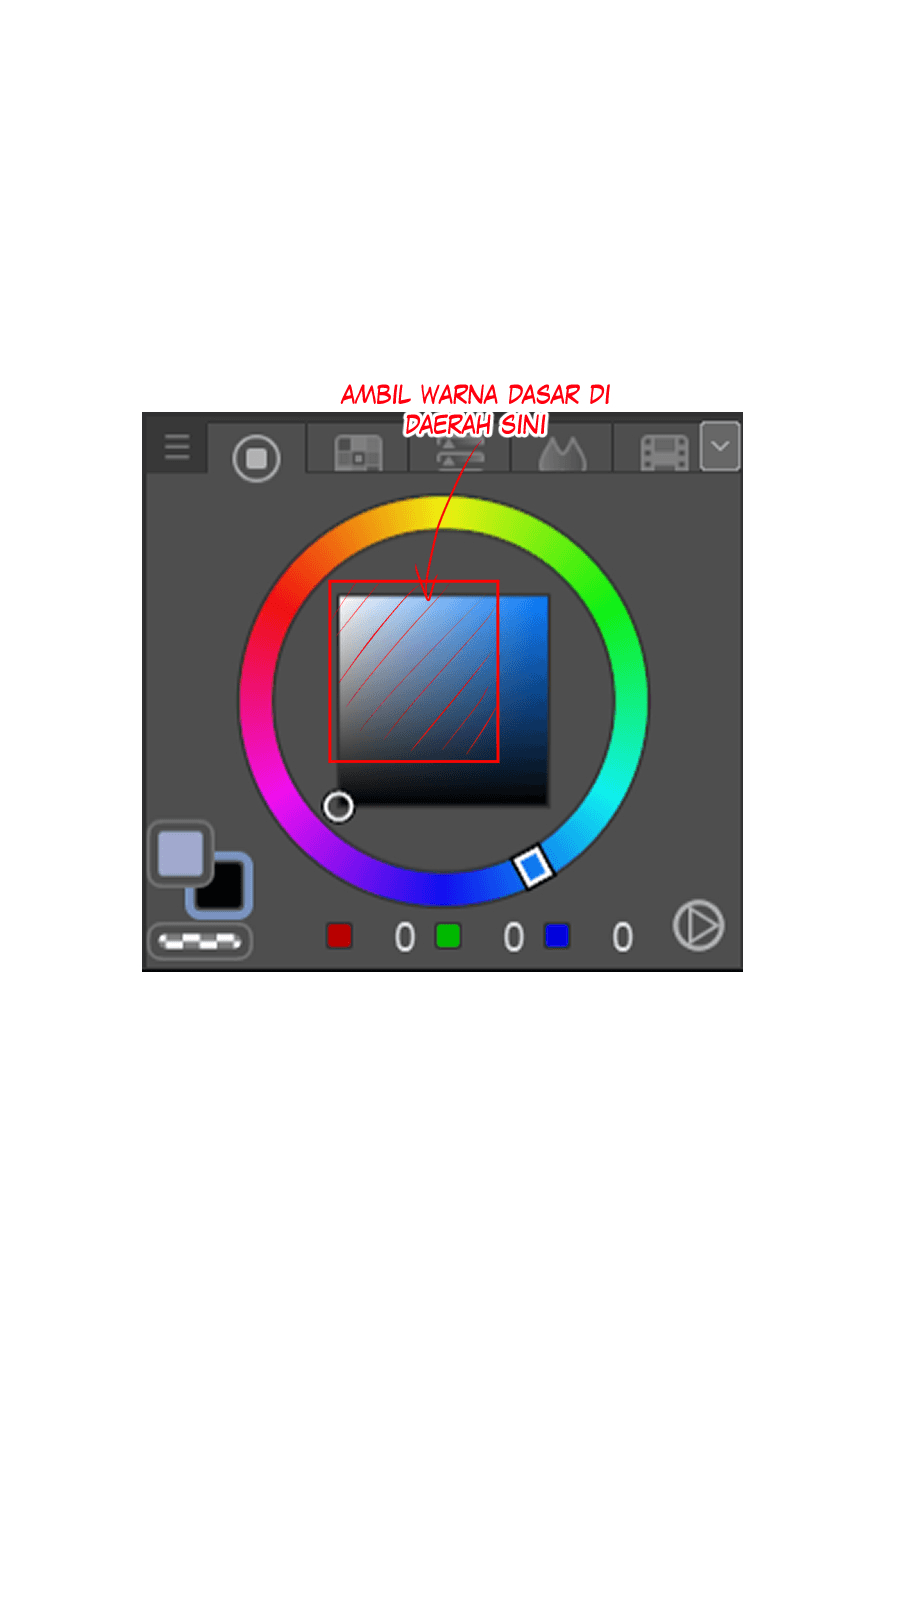
Create a gradient map layer by going to Layer ▶ Tonal Correction Layer ▶ Gradient Map.
Create a gradient map or use a material.
▼This is my personal favorite gradient map material!
Please try out your favorite gradients other than those mentioned above!
Making glitter
Let's create a glittery texture.
Create a new raster layer ▶ Fill with black
↓
Filter ▶ Effect ▶ Noise (values of your choice)
Set the layer mode to "Glow Dodge" and place it below the gradient map layer.
This will create a rough texture.
Create another glitter layer.
Create it with the same capacity as before, but change the values to different from the noise we used earlier.
Do the same with Dodge (Glow) and place this glitter layer all the way to the top.
Light and dark
Create a new layer under the gradient map layer
▶︎Create a gentle gradient with the gradient drawing tool (position and direction as desired)
▶︎Layer mode is "Multiply" → Adjust the color to your liking with color correction
The color will change, so adjust accordingly.
Making haze
Create haze to add detail.
Filter ▶ Render ▶ Perlin Noise
Create haze. (Again, a larger scale is recommended.)
Edit ▶ Convert Luminance to Transparent
to convert the white parts to transparent.
Turn on Protect Transparent Areas and fill with a color other than monochrome.**
Switch to Multiply mode and adjust with tonal correction until you are satisfied with the result.
If you are not satisfied with the result, create a haze again, change the color or layer mode, and add details.
Bordering
We will do **"Edge"**, which has the effect of tightening the image.
Under the glitter layer, create a new layer ▶ Fill (any color is OK)
Then,
Selection ▶ Select all
Click the "Shrink selection" icon in the selection command menu that appears below,
and set a value so that only the border remains.
*Reference → 1000px to 2000px = 50 to 100px
Once you have entered the value, erase it with the "Erase" icon.
Next,
Filter ▶ Blur ▶ Rotational Blur (Gaussian Blur is also OK)
Once you've blurred the image, adjust the color.
Quality UP "Splatter Brush"
Using a Splatter Brush will further improve the quality.
If you want to create a starry sky, Draw with yellow tones ▶︎ Layer mode "Glow-in-the-dark" is the best option.
Finishing
Merge all layers except the top "glitter layer.
Merge all layers except glitter
▼
Filter ▶︎Effect ▶︎Chromatic Aberration
Add chromatic aberration if you like.
If the color has changed due to merging, or if you want to change the color, add a color correction layer to make adjustments.
Finish!
Thank you for reading this far!
By following the steps above, you can create a marble image.
This is a very one-off experience, so if you plan to create a similar effect,
I recommend saving a history or recording the screen.
I've also released an asset that turns this marble generation into an auto-action, so if you found it difficult or couldn't get it to work properly, I'd be happy if you could also check out the asset below.
Users who liked this post


Comment