CSP Elements of Blending Modes that can illuminate Art piece
• OPENING
Hello,
Welcome guys one's again to another of my tutorial. We will be learning [CSP] Elements of Blending modes that can illuminati Art piece.
They elements [Blending modes] is very good and important to both new and old digital artist. If and only if you want to build up or home your art skills and take your style to the Next Level. I will be using Clip Studio Paint [CSP] Blending modes and the reason mention this is because blending modes varies in different painting studios, so what we will be learning can be apply for some studios if that studio has the same Blending modes as CSP.
As this tutorial goes on we be seeing how to use the Blending modes to colors characters with our various blending elements. So follow this illustration till the end if you want to improve your art style because blending modes is one of things that has BOOST my art skills from the ground state[starting point] to where I am today.
In this tutorial, we will be seeing how as a CSP new user[Beginners] and old can effectively use the blending Modes [or elements]. And the for starters, let's see what they are and get to know more about them.
• What are Blending elements [modes] and How to get to them in clip studio paint.
Blending elements is an mode/effect which can change the colors of the upper[up] layers to blend with colors of that on the lower[down] layers. And this can be done by we selecting any of the blending Modes [or elements] and it will change/affect the look of our illustration spontaneously.
Blending Modes also called "Mixing elements" are effect modes which an experience artist use them as an aid to beautiful their art piece, they also help give our art piece good color expression such as either a Warmer expression by set our Blending Modes to [Opacity].
And it also can be setting to have a Colder expression too, also the Blending Modes is set to [Opacity].
◾Where we can get access to the blending modes.
As a new user, we may be confronted with the following thoughts "where are Blending modes found and how can I get to them?" not to worry all we need to do is to create white blank canvas, If we have our created canvas click on [1] [Layer bar] a mini dashboard called [2] [drop-down box] will be displayed.
Which we can now with our layer which we want to get the effect selected, click on the above bar with the [blending modes].
And another mini dashboard [drop-down box] will displayed with the various blending elements.
[Where as we have them are arrange from Normal, Darken, Multiply, Color burn, Linear burn, Subtract, Lighten, Screen, Color dodge, Glow dodge, Add, Add (Glow), Overlay, Soft light, Hard light, Different, Vivid light, Linear light, Pin light, Hard mix, Exclusion, Divide, Darken color, Lighten color, Hue, Saturation, Colour, Brightness].
After know the various blending modes, we can now set the kind of effect we will like to give the layer, But for now we will be setting the Blending Modes to Normal.
At this point, we have know what blending modes are, where we can get them and how to get to them in CSP, but it does not stop there What of how they various modes works, How they can be effectively position and use them.
That takes us to the next aspect.
• The Functionality of the different Blending Elements [Modes]
We now know that, we can change how the colors of our upper layer blend with lower layers by making use of the blending mode. As an artist [new or old] we need to build our self more on how we can use the various blending Modes [or elements] to beautiful or Wow!! our art piece as some may call it.
So on that note let's get to know how the different Blending Elements works so as to know how to implement them in our art work.
We will be using this two images to show how the above following Blending modes works.
◾Set for Normal Mode [default set by studio],
For many painting studios such as CSP has the Blending mode of every layer been set to [Normal Mode] by default with a white blank paper page [which we can not draw on] at the bottom and the transparent layer coming on top as the Normal.
And if layer is set 100% opacity will appear hard/opaque to say, which will not allow anything drawn below to be display, so the layer underneath anything on it will not be visible. But if we reduce the opacity let's say to 50% or 30% less, then anything drawn on the layer below will now be displayed/ visible and this this is applicable to all layer no matter there set Blending mode.
◾Set for Darken Mode,
When layer is set to [Darken Mode], it compares the colors of the blending layer and the base layers, and keeps the darker colors.
◾Set for Multiply Mode,
When layer is set to [Multiply Mode], it multiplies the colors of the blending layer and the base layers, resulting in a darker color. This mode is useful for coloring shadows.
◾Set for Colour Burn Mode,
[Color burn mode] which is named after the photography film development technique of “burning” or overexposing prints to make the colors darker. [Color burn Mode] when set darkens the colors and increases the contrast of the base colors, then blends the colors of the blending layer.
◾Set for Linear Burn Mode,
While for the [Linear burn Mode] when set blends the colors of the blending layer by darkening the colors of the base layers.
◾Set for Subtract Mode,
[Subtract Mode] when set subtracts the color of the blending layer from the base colors, resulting in a darker color.
◾Set for Lighten Mode,
When layer is set to [Lighten mode] it compares the base colors and the colors of the blending layer, and keeps the lighter color.
◾Set for Screen Mode,
When layer is set to [Screen Mode] it inverts the base colors and multiplies with the colors of the blending layer. This creates the opposite effect of the Multiply mode. The resulting colors will be brighter than the original colors.
◾Set for Colour Dodge Mode,
[Color dodge Mode] when set lightens the colors of the base layers and reduces the contrast. This results in saturated mid tones.
◾Set for Glow Dodge Mode,
Also when layer is set to [Glow Dodge Mode] it creates a stronger effect than the Color dodge mode.
◾Set for Add Mode,
[Add Mode] when set adds the color information of the base layers and the blending layer. In digital terms, adding color increases the brightness.
◾Set for Add (Glow) Mode,
[Add (Glow) Mode] when set creates a stronger effect than Add.
◾Set for Overlay Mode,
[Overlay Mode] When set behaves like Screen mode in bright areas, and like Multiply mode in darker areas. With this mode, the bright areas will look brighter and the dark areas will look darker.
◾Set for Soft Light Mode,
While when layer is set to [Soft Light Mode] it depends on the density of the superimposed color. Using bright colors on the blending layer will create a brighter effect like the dodge modes, while dark colors will create darker color like the burn modes. Any color placed above white areas will appear white.
◾Set for Hard Light Mode,
The effect of the [Hard Light Mode] when it set depends on the density of the superimposed color. Using bright colors on the blending layer will create a brighter effect like the Screen modes, while dark colors will create darker colors like the Multiply mode.
◾Set for Different Mode,
When layer is set to [Difference mode] it subtracts the colors of the blending layer from the base colors, keeps the resulting value and combines it with the original base colors.
◾Set for Vivid light Mode,
[Vivid Light Mode] when set this blend mode combines Color Dodge and Color Burn (rescaled so that neutral colors become middle gray). Dodge applies when values in the top layer are lighter than middle gray, and burn applies to darker values. The middle gray is the neutral color.
◾Set for Linear light Mode,
When layer is set to [Linear Light] it blend mode combines Linear Dodge and Linear Burn (rescaled so that neutral colors become middle gray). Dodge is applied when the value on the top layer is lighter than middle gray, and burn applies when the top layer value is darker.
◾Set for Pin light Mode,
When layer is set to Pin [Light mode] it Replaces the colors, depending on the blend color. If the blend color (light source) is lighter than 50% gray, pixels darker than the blend color are replaced, and pixels lighter than the blend color do not change.
◾Set for Hard mix Mode,
When layer is set to [Hard Mix Mode] it applies the blend by adding the value of each RGB channel of the blend layer to the corresponding RGB channels in the base layer. The resulting image loses a lot of detail, and the colors can only be black, white, or any of the six primary colors: red, green, blue, cyan, magenta, or yellow.
◾Set for Exclusion Mode,
[Exclusion Mode] when set is very similar to Difference. Blending with white inverts the base color values, while blending with black produces no change. However, Blending with 50% gray produces 50% gray.
◾Set for Darken Color Mode,
[Darken Color Mode]when set it works like Darken blending modes but it color only display on white areas.
◾Set for Lighten Color Mode,
[Lighten Color Mode] when set it works like lighten blending modes but it color only display on darker areas.
◾Set for Divide Mode,
[Divide mode] when set takes the base layer's pixel value and divides the pixel value of the blending layer. White on the blending layer creates no change as well as pixels with similar colors on both layers. Black on the blend layer will stay black.
◾Set for Hue Mode,
When layer is set to [Hue Mode] it Value is how much white or black has been added to the color to make the new color and it is also the name of the color.
◾Set for Saturation Mode,
[Saturation Mode] when set is how much of the pure color is in the mix (colors get grayer the less saturated they are).
◾Set for Colour Mode,
[Color Mode] when set function is used to change the numerical range used for specifying colors and to switch color systems.
◾Set for Brightness Mode,
[Brightness Mode] when set use the grey scale imaging in ultrasound renders a two-dimensional image in which the organs and tissues of interest are depicted as points of variable brightness.
Now that we now know and understand how the various blending modes [or elements] functions, we can now uses we have learnt above to practice.
So moving in to the main portion of this tutorial, we will be looking at the next aspect.
• Ways to use blending modes Effectively to help Boost and take our Art piece to the Next Level
For this main aspect, we will be learning how to avoid so kind of bad habit and they are somethings we have to consider as an artist when we are to making use of Blending modes probably,
1.) We should try by all means to avoid drawing our effects using free-hand but instead use shape because everything on the world has it own form of shape.
[Wrong] The first one is to be avoided,
[Right] The second we can used.
[Notice that the first one [Wrong] which is the when we use our free hand the colors are not graded well and it's rough but for second one [Right] if we use our rule tools which is available in our line sub tools it graded our color properly with no effort and it is clean and beautiful to see]
2.) Let to experiment/play using the various colors on the color wheel with the different varieties of Blending modes [or elements] either for adding of Light or shadow or both.
[Note that Some blending tool are good for do both the lighting and shadowing like Normal Mode, Brightness and much more, so try them out and see].
3.) We should also avoid creating the same Blending modes over and over again. If we have already set a Blending mode layer and on top that same layer we are still using that same modes effect so as to increase it intensity, pls don't. They are several ways to do that.
[Avoid] the first one, using double identical/duplicated layer.
[Use] the second instead, with we can increase intensity/thickness in this one layers.
But we can set different Blending modes on top each other and lastly when it is allowed to use same Blending modes is when we want to apply the effect on the both the background layer and foreground layer leaving that of the middle ground.
Or setting it for that of the middle ground alone.
Now, they are way in which Blending modes enhance/change the looks of our illustration/Art piece and also add some cool Effect. Also, we are going to be seeing how to properly do so.
◾The Effectively use of blending modes [or elements] to the adding of Light/Glow Effect.
Base on CSP blending modes [drop-down box], we will notice that the are so many modes to choose from and as a beginner is may make things complicated for u, but what I normally do is narrow everything down to so basic construct [like to the kind of Blending modes I use for my lighting, adding of shadow and lastly those I use to combine two images]. But the most commonly used blend modes are Multiply, Screen, Overlay and Soft Light.
So for the Light and Glowing construct, there are the various blending modes [or elements] I tends to choose from they are Lighten, Screen, Color dodge, Glow dodge, Add, Add (Glow), Overlay, Soft light, Hard light, Vivid light, Linear light, Pin light modes they are all good for lighting and glowing effect but they all affect illustration different as shown above in their "Functionality".
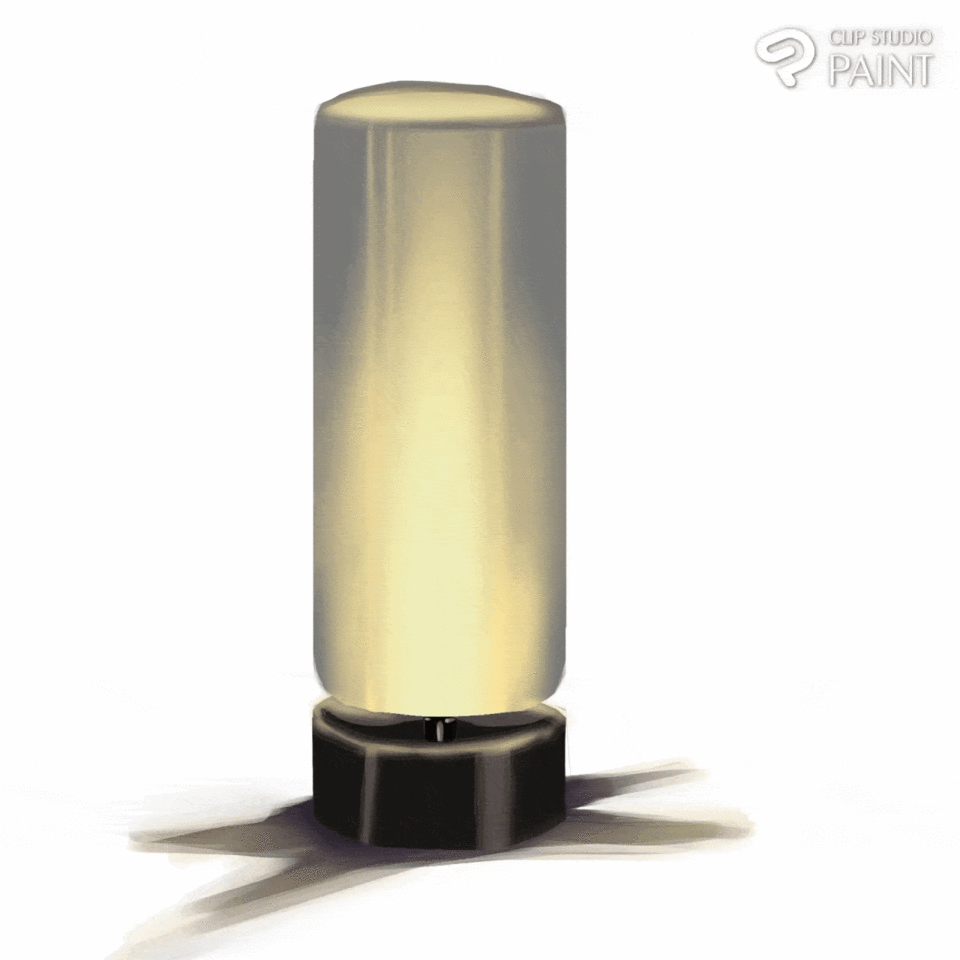
But let's see how we can use one or more of the Lighting and Glowing elements to add a light and also a glow effect to the lantern as a finishing touch to our [Lantern] painting,
[The Layer Blending Mode is set to (Normal)]
Now then, let's give it a dark background so that our light and glow effect will show properly by placing a partially dark brown below our image.
[The Layer Blending Mode is set to (Normal)]
We create a Folder layer on top the lantern folder layer which is set to [Normal Mode], we use a selection tool to select the area we will like to light up/illuminati on the lantern, they are three ways which the light can be apply on the lantern. We can apply the light/glow effect using the [guiding ruler tools] to properly application of blending effect.
And to achieve any of the above, we using the guiding ruler tools,
For the option 1,
We use a gradient Sub tool called Straight line Guide Ruler Tool to draw a straight line from the bottom up for the first lantern light expression.
For the option 2,
We use a gradient Sub tool called Straight line Guide Ruler Tool to draw a straight line from the middle up and another line from the middle down for the second lantern light expression.
For the option 3,
We use a gradient Sub tool called Ellipse Guide Ruler Tool to draw a sphere circle from the bottom up for the third lantern light expression.
We will be making use of that of the options three and leaving the Layer Blending Mode to [Normal] so as to add a yellow color to our lantern to show a low light expression,
[Note that we will set Layer Blending Mode to (Normal)].
And if we want the light of the lantern to shine the more by add a little lighter yellow.
[while this Layer Blending Mode is set to (Opacity)].
In order for our lantern to look realistic, we must display our lantern emit light in different ways. So we create a new layer above, paint the side of our lantern with yellow color.
[Note that this Layer Blending Mode is set to (Light)]
At this point it still ok but If we want to go we finish it up by creating another Layer above, we painting our effects of the kind of light effect we want on the Lantern.
[we will set this layer Blending Mode to [Glow Dodge] and ]
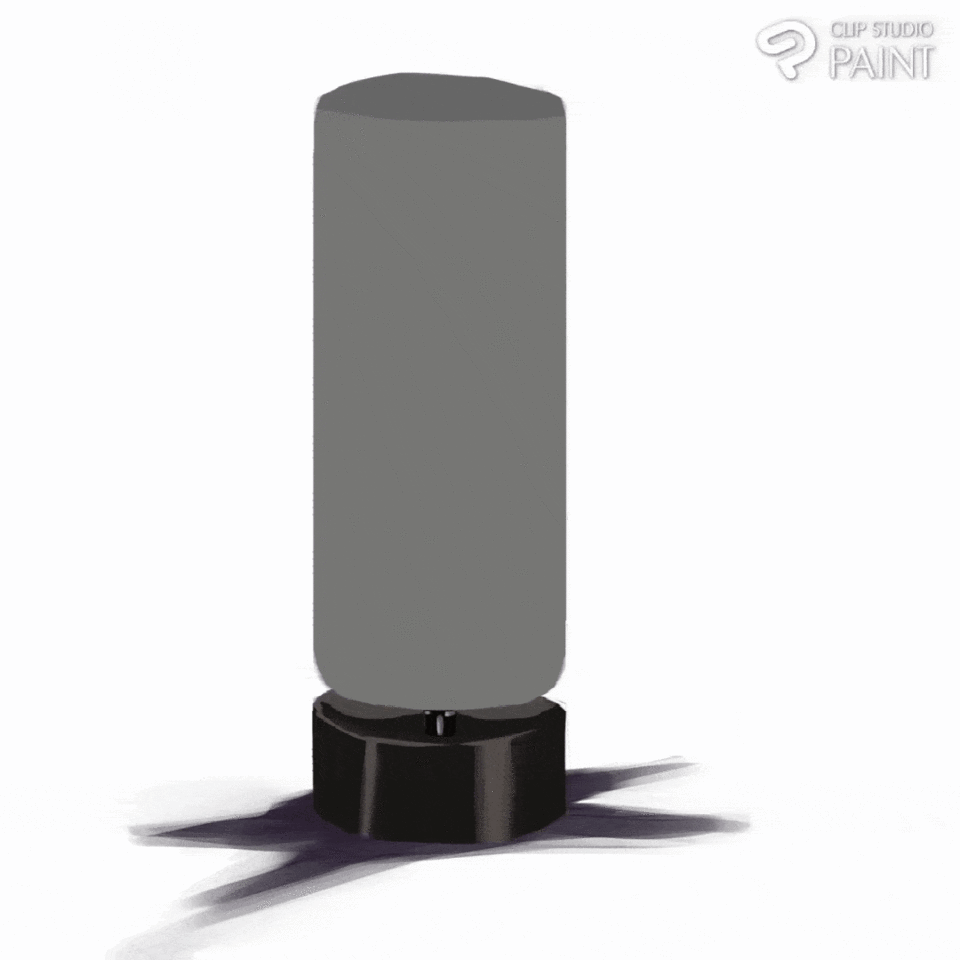
By doing that, we have finish with adding of Light/glow to our Lantern.
◾ The Effectively use blending modes [or elements] to the adding of shadow Effect.
When we are talking about shadow, shadow can be add to character as a result of a Light hitting an object/character from one side,
[Layer Blending Mode is set to (Multiply)]
Or shadow can be add to an object/character as a result of emotional expression like anger or depression and some much more.
[Layer Blending Mode is set to (Multiply)]
So for this tutorial, we will be seeing how to use the various Blending Modes to display the emotional expression of a character [Ghost Rider] I created specially for this tutorial.
Step to creating is as follows,
Finish work
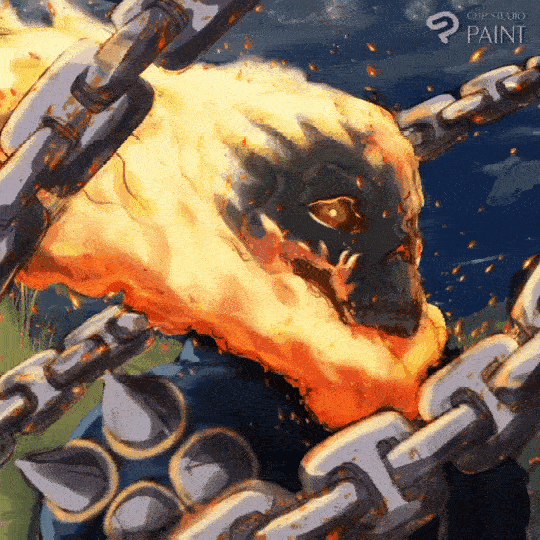
So after we have our image on one layer, we create another layer above it and paint the part of character which shows that our character is angry.
Now this is where the blending mode come into or use to our advantage.
[Layer Blending Mode is set to (Multiply)]
Let's try out they other darkening elements with all of them having their various intensity effects such as
Multiply,
Color burn,
Linear burn,
Subtract,
Different,
Darker color.
We will be use our already male character for this part of the illustration.
[Layer Blending Mode is set to (Normal)]
We create a new layer above our character layer and shade some more dark color to the right side of the character.
[Layer Blending Mode is set to (Multiply)]
At this point, because of the light emitted is obstructed by an object and a little bit was about to pass through the various opening of the obstructing object onto the character/object, the light will take the shape of where the light escape through. So it will be repesented as such below.
Now, we will be painting the shape of the space which the light escape through, so the obstructing object will create a cast shadow on our character which we will use a dark blue color to shade on the character.
[Layer Blending Mode is set to (Multiply)]
Lastly, we add some yellow colors to the edges of the cast shadow showing the color of the Light.
•How create a Character reaction with light and shadow use different Blending Modes to finish it up.
Now that we have see add light and dark shadows to an object let's see how to add light effect on a male character. Let get to know how light work.
[Note that this process can also be done on a female character use the same process]
When light is emit and it goes straight an hit the object/character,
They are some few things which we will notice on our character/object and they are the highlights, half tone, form shadow and cast shadow.
[Note that I will not be explaining details about the forms of light and shadow because they are enough tutorial on CSP which has perfectly explain them. And this likes below will take you to them]
So we will be representing they various form mentioned above on our male character and using some of the different lightening elements [Blending modes] to paint the various forms.
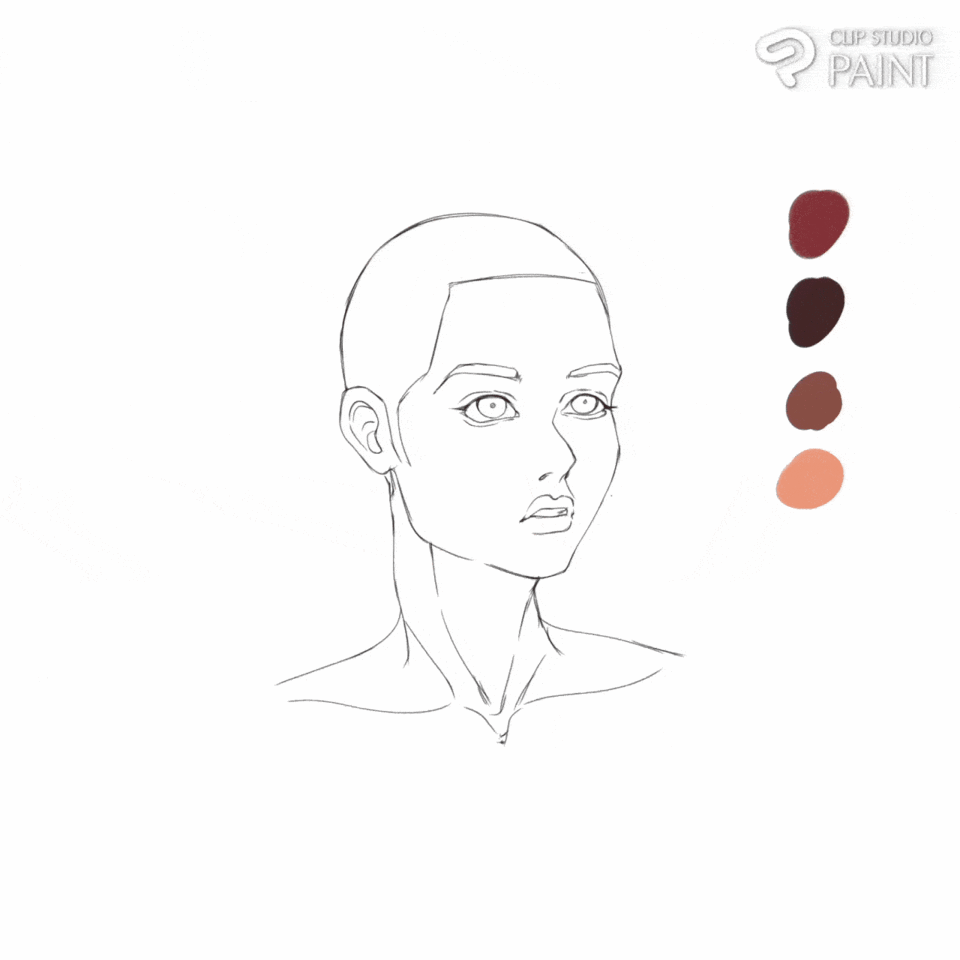
Firstly, we paint the base color of our character with all the necessary features like the eyes, hairs and so others,
Let's say a light is emitted and hit our character from the left of our character, we will need paint the shadow [both the form and cast shadow]. so we create a new layer above the character's layer.
[With the Layer Blending Mode set to (Normal). The reason why I use Normal is because normal is opaque so it works for both lightening and darkening effect]
Next, we paint the warm color of the skin, because the entire body runs on blood and the color of blood is red, so we will be painting some red colors at some of the edges between our shaded and base color.
[Layer Blending Mode is set to (Opacity)]
Following that is the part I like the most it always Make my art piece POP OUT. It is to add another darker color to the shaded part but this time,
[Layer Blending Mode is set to (Multiply)]
When we are done with that, we can now highlights effect but for you can be able to do this properly [if you are a new user/ beginner is to first of all learn about Body Anatomy].
[Layer Blending Mode is set to either (Normal/Opacity/soft light) any of those can be use it is all base on the one that best suit you]
After that, we paint in the ray emitted From the Lantern by using our selection tool to help properly guide our light effect.
[In this also our Layer Blending Mode is set to either (Normal/Opacity/soft light) any of those can be use it is all base on the one that best suit you]
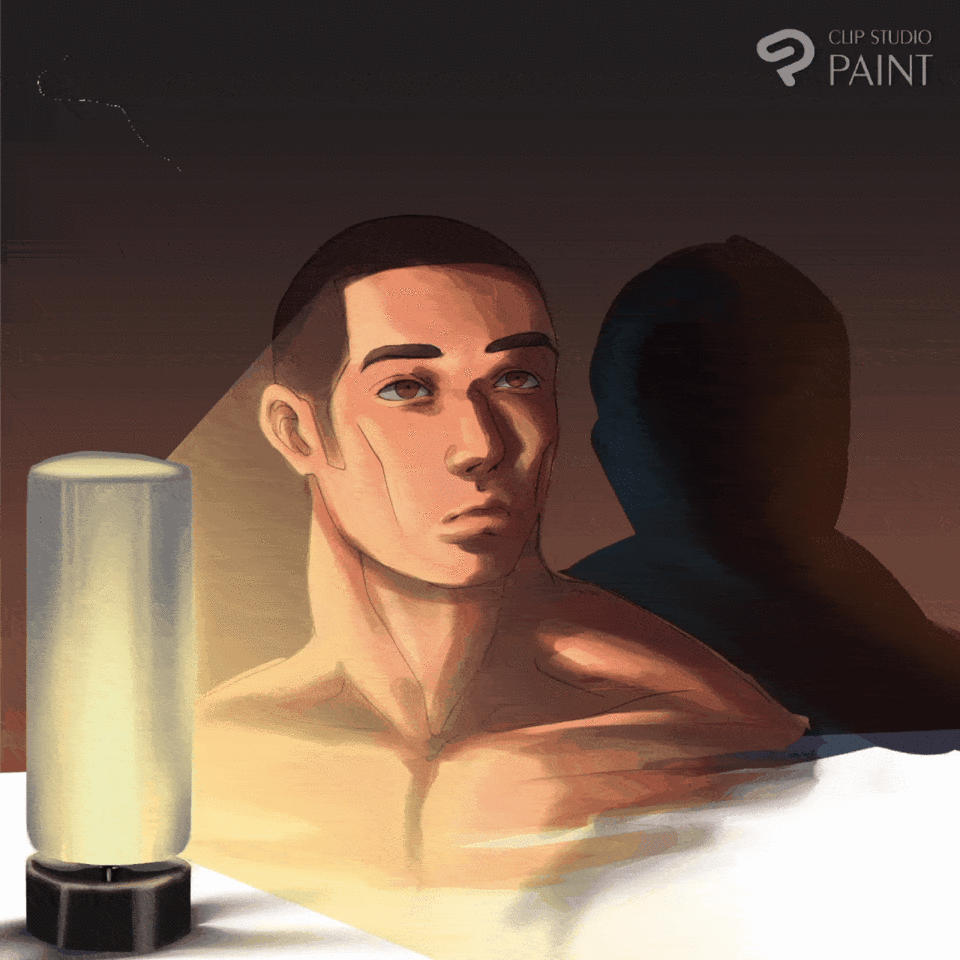
But we can even go further to add a dark background to make our light effect Pop Out more.
And lastly, we are finish it up by adding Ambient light [blue and yellow] to the cast shadow behind our character.
Finish art piece,
• The Effectively use blending modes [or elements] to the joining of two Art piece together.
◾ The Combining of the character [Ghost Rider] with a Background using Blending Modes.
Blending mode is a useful feature used to combine layers together or two images together. In the Sense that viewer would not even notice that the illustration is made up of two images.
And for we to be able apply it, we bring in our two images [the Background at the bottom and Middle ground on top].
Ones our we have our character and background image. If we pay a close attention to the character image we will see that the lineart is standing out let's use the one of the Blending Modes to hide the line.
[Layer Blending Mode is set to (Lighten)]
Then we hide all the Lineart.
Now we can use the darkening elements to add shadow to the right side of the character, so as to hide the edges of the right hand side.
You may ask yourself "what about the left hand side will we use shadow also", the answer is NO because if the right hand side is reflected as shadow, we should know that there is a light projected from the other side that is coursing the shadow.
So all we need to do is to use either of the lightening elements of the Blending modes to blend the edges of the left hand side of our character to avoid it standing out.
Then finish it by add effects and we are done.
Here is the finish work.
◾ The Combining of the character [Ghost Rider] with a Background using Blending Modes.
We can also use the same process for the Glowing Lantern
After we place the background layer at the bottom and the character layer at the top,
#
If we pay close attention the the image, we will notice that the Lantern edges are standing out so let's create another layer above the others and use the Gradient Ellipse Guide tool to add some yellow on the both sides of the Lantern.
[Layer Blending Mode is set to (Normal)]
Next, we add some glow effect to beautiful the Lantern.
[Layer Blending Mode is set to (Glow Dodge)]
After that, we finish it up by using Gradient Ellipse tool to add a sphere shape glow behind the Lantern.
CLOSING
With that comes the conclude of today's tutorial, Thanks guys for sticking and read through till the end. I hope it was helpful and you were able to learn one or two things from today's tutorial. I will like to know what you think and the adjustment you would have made. So for now I will be signing off and if you have any questions comment below👇 or
Reach out to me on any of my social handle
Twitter https://twitter.com/DanielAdakole12?t=Zb1WwytJgwew7JDH4LS6bw&s=09
https://www.facebook.com/daniel.adakole.37
Instagram https://www.instagram.com/invites/contact/?i=sk3svbm4rm2a&utm_content=okfftkg
YouTube
https://youtube.com/channel/UC5F1gDihHLSgDeaGwcZ8KVg
I hoping to see you on the next chapter of my tutorial. So bye-bye
Rg


Comentario