
Introduction
A few days ago I found myself wondering what could be done with all these ink drawings I've posted on social networks lately.
Then I had this idea that I could use the new Share platform in Clip Studio Paint portal to create a small artbook so I can present this artwork in a different manner.
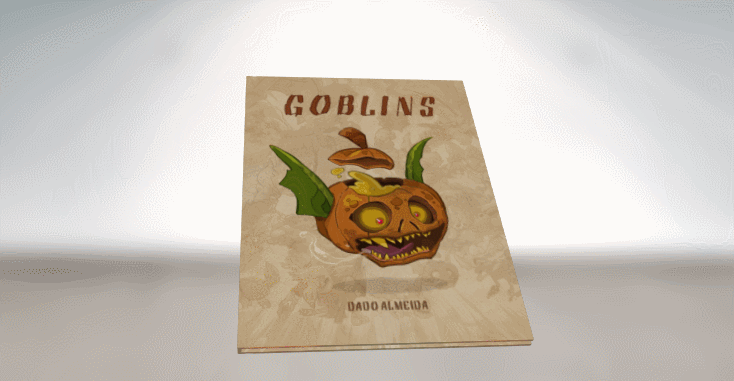
For this project I will use the drawings I made for a creative challenge where the goal was to draw one goblin a day during the whole month.
I found this was an interesting way to practice character design and train art-making with traditional materials.
Scanning and Preparing your Artwork
As these were straight ink drawings, I decided to scan all the images in Greyscale directly. Doing it this way I was able to adjust the grayscale values manually using the LEVELS tool in Clip Studio Paint - note in the graph how I moved the triangles to accentuate the contrast until the background of the image was completely white and the lines were black as possible.
For those who like to use colored pencils to lay out the drawing before putting ink over it here is a tip:
Scan the image in Color mode (instead of Greyscale or BW); In Clip Studio Paint create a Layer and fill it with red (R: 255, G: 0, B: 0); set the layer mode to DARKEN.
Remove Image saturation (Hue Saturation tool) and adjust the contrast with the Levels tool.
If you use another pencil color for sketching simply fill the layer in Darken mode with the most saturated version of the color you used.
All drawings were scanned at 600 dpi because one day I would like to print it all on a physical book. But if you just want to digitally archive them 300 dpi is enough.
If you have multiple pages to adjust you can take advantage of the BATCH PROCESS options in Clip Studio Paint.
In this case I wanted to remove the white background of the images and add a slightly blur effect on the lines - it softens the linework and gives a more anime/cell-shade look.
To automate this task I recorded the following Action:
EDIT - BRIGHTNESS TO OPACITY (to remove the background)
DUPLICATE the current layer
FILTER - GAUSSIAN BLUR on the selected layer
REDUCE the opacity of the current layer to 60%
MERGE the layers
With all the images opened in Clip Studio Paint, go to FILE - BATCH PROCESS… ; here you can choose to run the ACTION (Soft Ink) on all OPEN CANVASES.
Done! All the images has now a transparent background and it’s dark, ink lines are soften ready to proceed.
Batch Processing can be a powerful tool when you decide to create your artbook. You can use this function to automate brightness and contrast correction, rotation of images, placement of text (pasting clipboard content), eg.
Creating the Book Layout
I created a new file in Clip Studio Paint using the default margin and bleed settings based on an A4 size sheet (default paper size here in my country).
I thought of a very simple layout, with the character in the center of the page, his name in the footer and my information (name and website) on the side.
When creating printable materials (comics, zines, etc.) it is important to note that your Art - and everything else that is really important - should be contained within the first rectangle guide of the page. The closer to the crop area, the more chances of content not appearing in the final print.
I saved this layout on a new file and started correcting each of the drawings separately. I chose to include an extra layer of light and shadow (shading), as I would like the end result to have that look of an old RPG book.
Here’s how my workflow turned out: each drawing was scanned, imported, corrected, and saved as it’s own .CLIP file.
Then each artwork was incorporated into the master file using the FILE - IMPORT - CREATE FILE OBJECT option and saved as a new .PNG file.
Having each file separated was the best option as the main layout could become too complex to handle with a large number of layers. Also, by having the artwork separated from the master layout you also have a greater freedom to make adjustments later.
While creating the layout I decided to include some painted versions of these drawings. This would help break the monotony of having black-and-white designs only in the book.
I also created 4 new pages for front covers and back covers.
Publishing the Digital Booklet
I have decided to create a version of this book that can be viewed online without having to export it to PDF (or any other ebook format).
For this I will use a new Celsys platform called CLIP STUDIO SHARE.
You can create your booklet on this online platform by going to the link below and start by clicking on PUBLISH YOUR STORY.
On this platform you can simply upload each page (JPG or PNG format) that will form your book OR upload the .CLIP file created with the Multiple Page (Story) function of the EX version.
In the first step of the upload process you choose the reading direction (left to right, right to left, or top to bottom like most webcomics today).
An important note regarding file size is: as much the platform ensures you can upload files up to 32MB! you should consider using smaller images to speed up the upload process. Click ADD NEW PAGES to proceed.
Organizing the pages on this platform is very easy (and fast), just click and drag the page thumbnail to arrange the layout of the book.
I arranged the spreads in this book so that the pages with the color drawings are well spaced apart. My idea is to keep an interesting pace for readers. Just like making portfolios, always open and close the presentation with your best designs.
TIP: To make page organization easier, use the shortcut key CTRL- (control and minus) to zoom out the view inside the browser and have a better overview of the book.
Upload and add a custom cover page and back cover…
In the following steps you add the Title, short description, thumbnail image (for when you share your book embedded in other sites) and thumbnail for social media.
This is important because it follows the twitter aspect ratio (2x1) - with that in mind, I strongly suggest that you create a proper preview of your book taking advantage of this widescreen layout.
In this same step you configure your virtual book - in the example below the settings I used to get a hardcover, coffee-table feel on it.
To test things out, click on CREATE PREVIEW and then use SHOW PREVIEW to update your changes.
// Ps.: make sure everything is set before publishing your book - at this moment there's no way to edit a book after it's live on the platform. //
To conclude you can 'lock' the view of the booklet for those who have the password and choose what type of visualization people will see the book as default. I chose the 3D option because ... well ... because it's so cool! :))
Click PUBLISH to publish your book.
Done!
You can now simply post this link to your social networks OR use the generated HTML code to embed the book viewer on your personal site.
That's it! Your new artbook can now be seen online and shared with fans of your work.
EXTRA: What about a PDF ?
This is the sequence of steps I used to create a PDF from my booklet; there’s plenty of ways you can achieve this using standalone converters and virtual printers, but this was the simplest workaround for me:
1. Create a lower resolution version of your pages (if you want to present the PDF online only) or keep the high-resolution images if you’re going to print it; in both cases remember to put the order of the files in the correct order of appearance in the book (page_001, page_002, etc.)
2. Use //Google Docs// to create a document; go to FILE - PAGE SETUP and pick one of the printing size that is close to the size of your book; you can also remove the margins and change the background color to match up with the artwork.
3. While still in Google Docs go to INSERT - IMAGE - UPLOAD FROM COMPUTER and select all the pages you have saved.
4. Go to FILE - PRINT and in DESTINATION choose SAVE AS PDF; it may take a while if the resolution of your images are too high.
I hope this tip helps you to give some extra life to all these arts created during the creative challenges of the year.
Take a moment this week to look for art you’ve created and could be collected in a small artbook. Use it to gift your fans, backers or to promote your work in a different way.
See you on a next article.
- Dado
この投稿を「いいね!」したユーザー


コメント