
Youtube Video
Hey guys, in this tutorial we are going to talk about reflective and shiny materials. Specifically, metallic shiny fabrics. Such as silk, satin, cire, …. these fabrics are extremely beautiful and eye catching, but can be tricky to break down and paint.
we designed this tutorial with fashion and fabric enthusiasts in mind as we saw lack of information and tutorials on painting fabrics. But really anyone interested in realistic painting can find it useful.
Part 1: why do we see metallic and reflective materials the way that we do?
In summary the world that we see in a visual sense, is made up of light. And how light interacts with a specific object, dictates how we perceive that object visually. whether it’s light or dark, transparent or opaque, shiny or dull, etc.
In order for us to see an object light rays have to hit it and reflect off its surface and hit our eyes. the way the angle of reflection is calculated is that that you draw the normal of the surface where light ray has hit, from then the angle of incident is equal to the angle of reflection.
Now when we put the surface of a material under a microscope, most materials are full of tiny bumps. Some are deep and acute, some shallow and barely there.
When a surface has bumps, the angle of reflection varies within the surface, causing the light to scatter and the reflection to be diffused as light hits many parts of the surface.
On the contrary if the surface is smooth on the microscopic level, such as metal, the angle of reflection doesn’t change much. Causing the light rays to remain in a concentrated bundle, which when hit our eyes cause those shiny highlights, we call specular reflection.
Part2: breaking the material down
Now let’s get to the fun part. and start to break the material down and talk about how they should be painted. in this part we have used 3d renders to better show how light reacts on a single form with the same lighting, but different materials.
As discussed in the last chapter, the more metallic your material is, the more intense and sharper your highlights get, and the more contrast you see within your form.
Now we see the same material on a more complicated form, like a dress. The principles we discussed remain unchanged.
So, we talked about how light interacts with different materials on a single form. Now what if our shape changes? To put it simply how your highlight and reflections appear on your form highly depends on its shape. Meaning It’s going to distort and stretch to fit on your form.
So, on a flat surface it reflects everything as it is. On a spherical form it warps and distorts around like a fish eye lens. and on a cylindrical form it stretches on one axis and squashes on another to reflect everything it can.
Part 3: painting and demonstration
Now to the actual painting. Before beginning it’s important to note there’s no “correct” way to go about this. artists have many ways to go about the same painting and even an individual artist doesn’t always work the same way. So as long as you stick to some principles you should be ok.
Many artists, still early on the learning curve assume a good artwork is dependent on which brush its creator uses. It’s not the case at all.A good artwork depends on your understanding of design, shapes, value, color, etc.A good artist can create striking paintings using the most basic brushes.
For this purpose, every work in this chapter has been done using the “simple round brush”.we recommend you to practice with this brush as well.
Before starting let us explain a bit about hard edge and soft edge brushes. Hard edge brushes as you can see have hard edges and soft ones have a feathered-out look. You can set the degree of hardness as you see fit.
Soft edge brushes blend your values and colors seamlessly, while hard edge brushes don’t. to transition from one value to another you need to use more values in between.
Both brushes have their own uses depending on the look you are going for.
Think boldness, high contrast, sharpness, close, graphic while using hard edges brushes.
And Softness, diffuse, atmospheric, far when using the soft edge ones.
We start with a simple form then get to more complicated forms such as fabrics and clothes.
1. Put down your base color
This step is really self-explanatory.
2.adding the shadows
The shinier your material is the more of a contrast (which means darker shadows) you’ll get. also, as the light rays are concentrated in shiny materials you are going to have sharper edges between light and shadow. so be sure to use softer brushes for more dull materials (you can start with hard edge brushes and soften them later) and hard-edge brushes for shinier ones.
When your materials become really reflective as it reflecting the environment your reflections become much bolder than you’re lighting. so, use your environment to create lights and shadows.
3.highlights and reflected lights
the highlights are more intense and sharper in shinier materials. and more diffused out and softer in duller ones. (pay attention to the color of your lights). Also reflected lights in dull materials may not be very noticeable. but putting a sharp pronounce reflected light for your metallic materials really helps you in defining your material.
Also putting transitional hues between your highlight and mid tones gives you a more metallic feeling
4. final touches
Always check with your adjustment layers, if you could group your values in a more efficient way. also play with your lights and darks. Push and pull. don’t be afraid to play.
Adding glows to the brightest highlights really helps.
Now that we have the simple forms down let’s have a couple of demonstrations on dresses.
1. Base color
2. Adding shadows
3. Highlights and reflected lights
4. Final touches
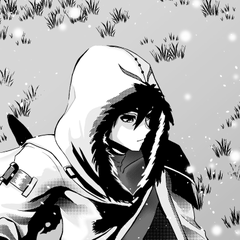
Let’s do one more
Tutorial by :
Nadia Dibaj
instagram.com/nadia_dibaj
and
faranak dhqani
instagram.com/faranak_dhqani
この投稿を「いいね!」したユーザー


コメント