How to paint light? 5 examples step by step.
Introduction
Hi everyone. Today I'm going to show you how to paint light? And I'm going to walk you through 5 examples.
Lighting is the most important part of an illustration. However, shadows and colors are just as important. Color, shadow, and light are fundamentals in an illustration. Without either of them, the drawing will be dull and flat.
Combined they evoke feelings and are often used in storytelling. There are colors that are used to make us feel a certain way. We can see it in our everyday life, whether in a film, a tv show, cartoons or even in advertising. That's why is important to have a better understanding of colors.
As you can see in these examples: number two from left to right, the illustration doesn't have any shadows therefore it looks flat.
And in the third illustration, it doesn't have any light so it looks dull and boring.
Now, can you see how lights and colors give a different feeling in these two illustrations?
If you can I recommend you to take a look at this Instagram account @colorpalette.cinema they show color palettes and different types of lighting from movies and it can help you to get inspiration.
By the way, here are the brushes and tools that I used in this tutorial.
All right, so today I will show you how I apply light to my illustrations, so let's begin.
Different types of lighting
1. Frontal light
This type of light shines directly towards a character from the viewer's perspective. It creates very little shadow on the character. The light can be hard and direct, like a flashlight, or soft and diffuse, like a window. Usually, shadows are form under the lower lips, under the chin and under the nose.
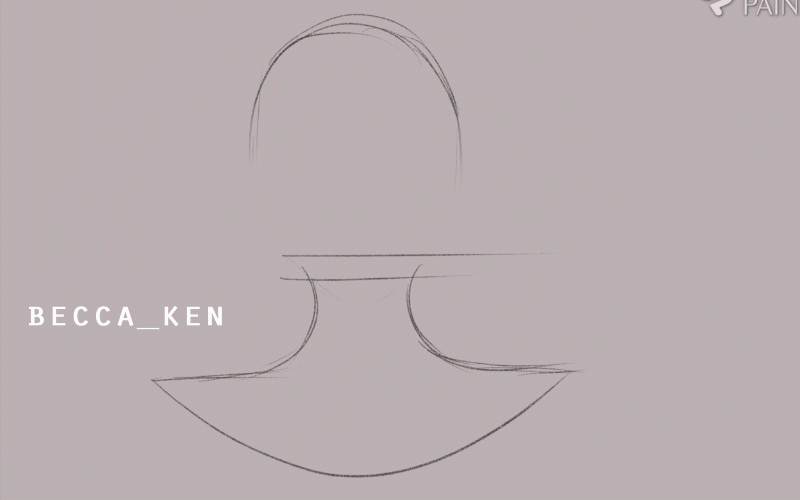
I've already drawn a girl with no light as you can see. You have to paint with cold colors and then we are going to start to give her life with vivid colors, shadows, and of course light.
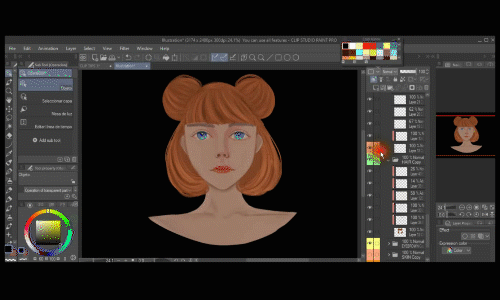
So I'm going to start by going to my skin folder and I'm going to create a new layer above.
I'm going to use the CLIPPING MASK.
and I'll activate a blending mode called MULTIPLY which is used for shadows.
Then I'm going to choose a dark brown color.
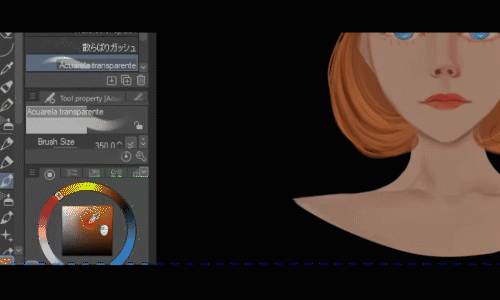
By the way, throughout the whole tutorial, I will use the transparent watercolor brush, but you can use any brush you like.
So I'll add shadows under the nose lightly and with the same brush, I'll blend it so it doesn't look too strong.
Then I'll add a shadow under the lips.
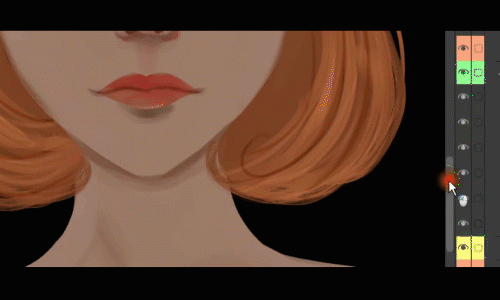
I go back to add more shadows to the nose and I think I overdid it so with the soft eraser I'll fix it. This time, I use the blending tool.
Now I go back to the lips and refine the color a bit more with the transparent watercolor brush.
I'm going to add another layer and I will activate the clipping mask.
Then I start adding the shadow under the chin with the same brown color and the same brush.
Then I lower the opacity to 52% and continue adding shadows.
I feel it's too dark so I lower the opacity even more to 40%.
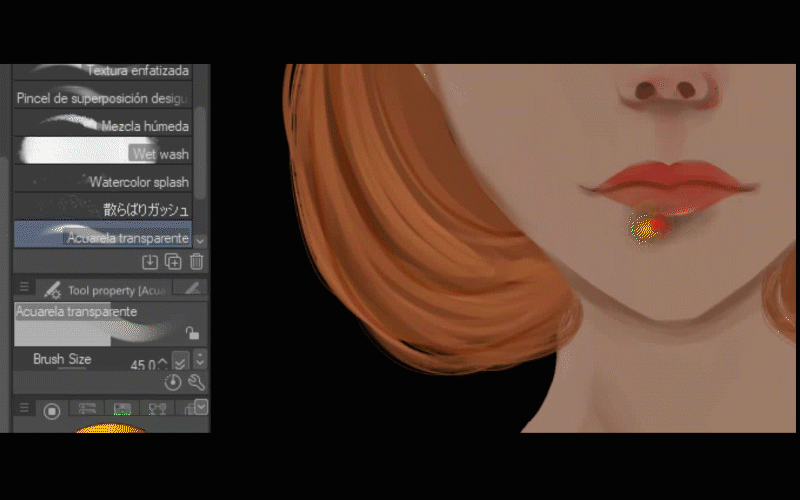
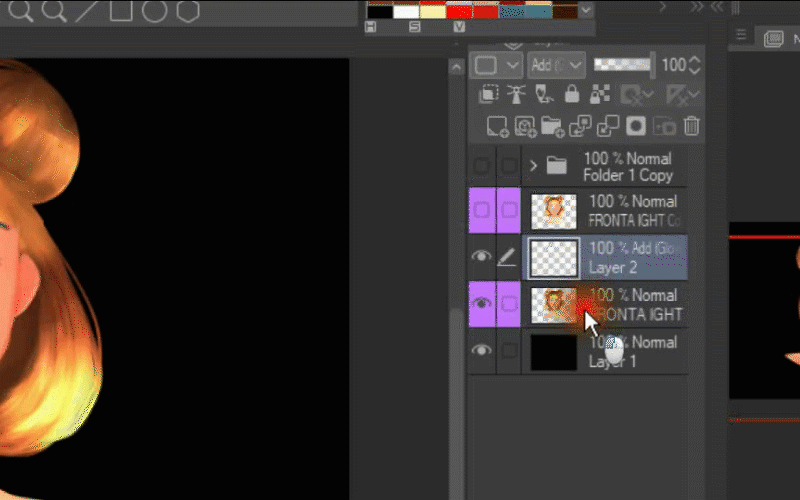
Now it's time to add the light so I create another layer and activate the clipping mask and the blending mode called ADD GLOW.
I choose a pink color and start coloring the skin all over.
I like to change the color layer so I don't get confused with the other layers without having to rename each one.
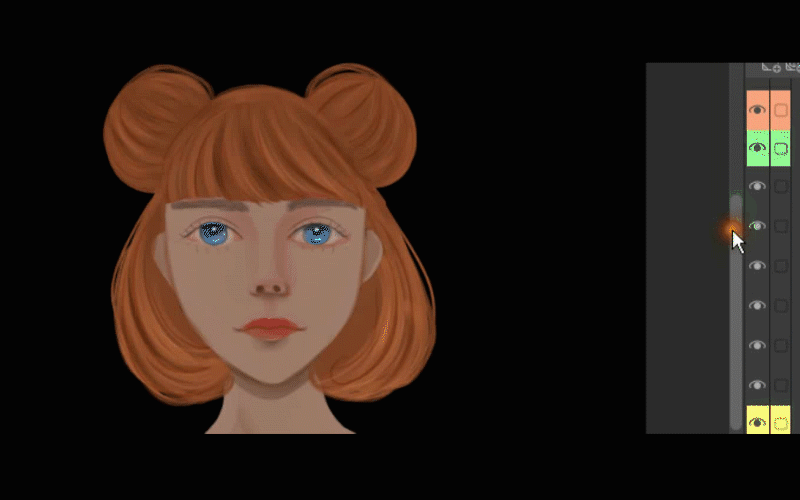
I want to add some red to her skin so it doesn't look dull.
So I'm going to create another layer and I'm going to move the layer I just created, the one with the light, I will move it right on top of the new one.
As always I'm going to change the color of the layer so I don't get confused. So this layer will be red.
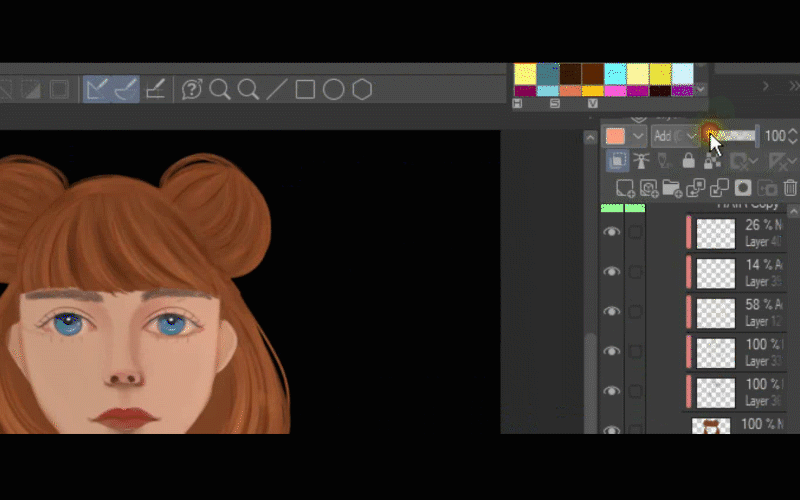
This time, I'm going to use the fill tool to color and I will pick a red tone.
So I paint her skin red and change the blending mode to SOFT LIGHT and lower the opacity to 31%.
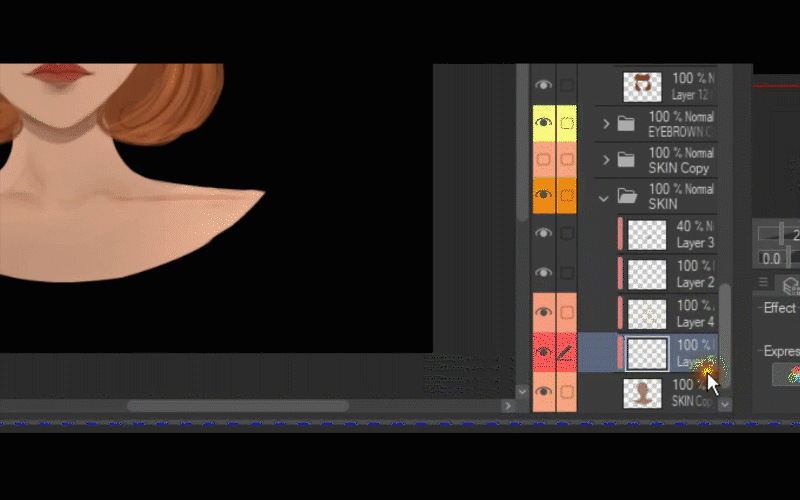
Next, I'll create another layer on top of all the others and change the blending mode to ADD GLOW. Remember to turn on the clipping mask. Otherwise, you'll be coloring outside your skin layer and it'll be quite a mess, so let's keep it clean.
Now, I'm going to use the eyedropper tool and pick her skin color and then choose a lighter color.
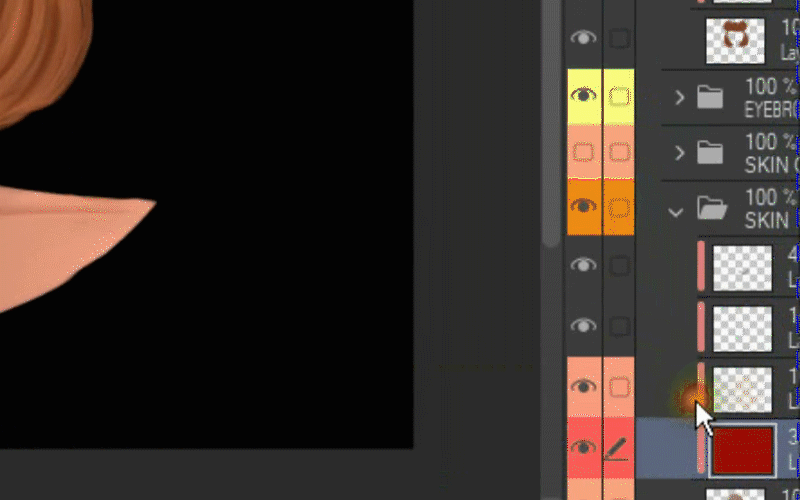
I'm going to start adding light all over her face, neck, and shoulders.
Now I will add another layer and carry on adding light then I will lower the opacity to 76%.
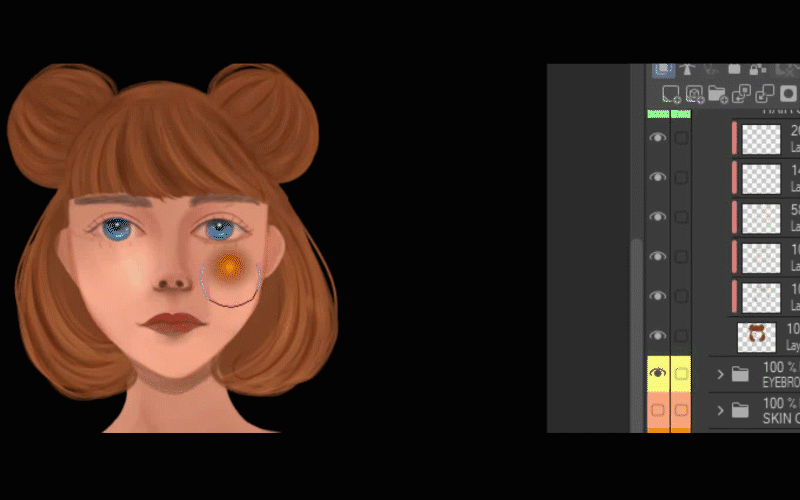
I add another layer because I want to give her some reddish blush on her nose and cheeks.
Note that with the same transparent watercolor brush I can blend the color.
I feel she needs more blush so I add another layer and activate the clipping mask and keep adding red and lower the opacity to 14%.
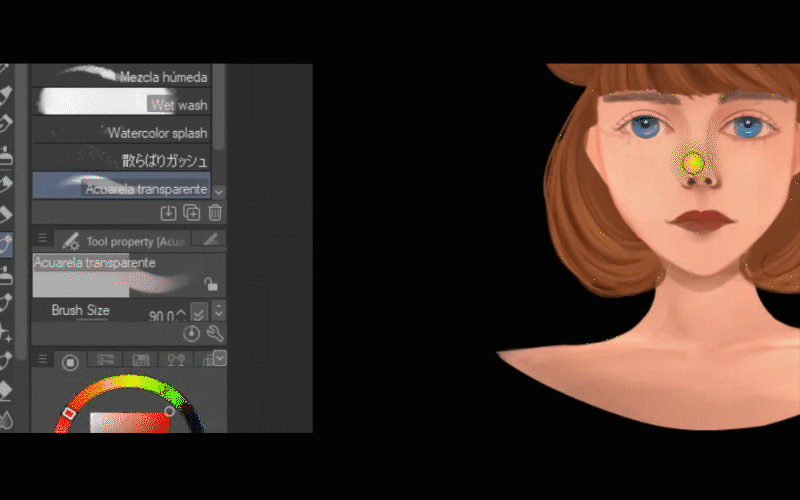
I proceed to work on her hair so I go to the folder where I draw her hair and create a layer on top of the others and I activate the clipping mask. Then, I color pick the darkest color on her hair with the eyedropper tool. Then, I choose an even darker brown tone and I start to add some shadows to her hair.
I'll blend the shadows with the same brush.
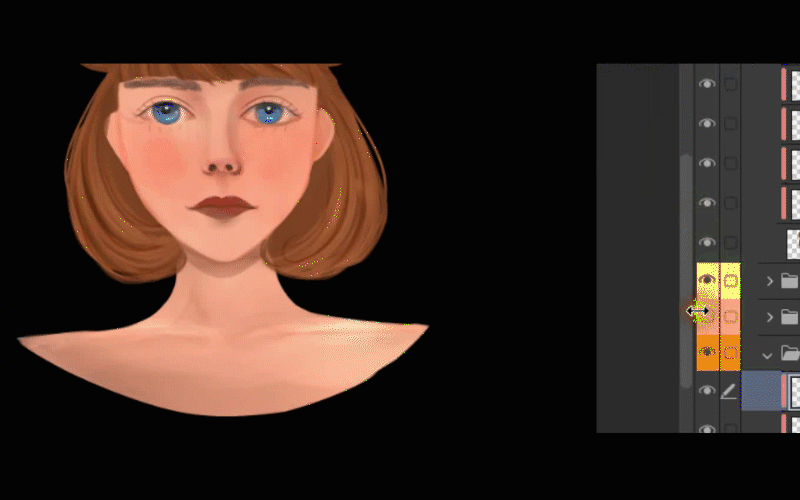
Next, I add another layer and I keep on adding shadows on the sides of her face.
As you can see the color doesn't affect her face just the hair, that's because I have the hair and skin in different folders and also because I've been using the clipping mask so please remember to use it all the time.
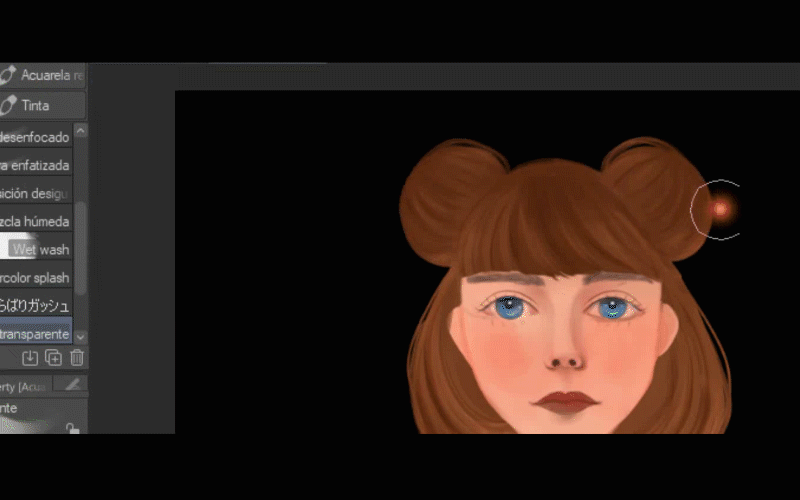
It's time to do the fun part so I'll add another layer, activate the blending mode ADD GLOW, and the clipping mask.
I choose a yellow color and begin adding light with a few strokes on her bangs first, then I keep adding light on the edges of her hair and I blend the color with the same brush. I repeat the strokes once again so it looks brighter.
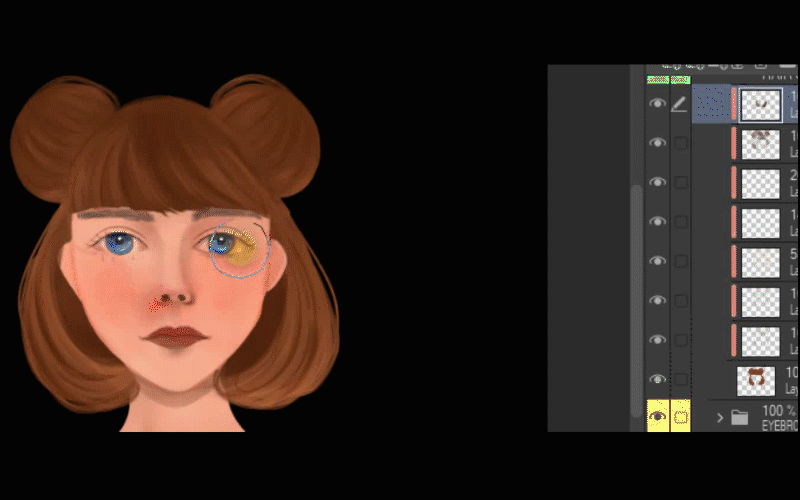
Now, I'll add another layer with the blending mode ADD GLOW and the clipping mask, this time I choose a white color and I paint five lines strokes on her hair and I choose a blending brush call mix moisture and I start to blend in the color following her original hair direction
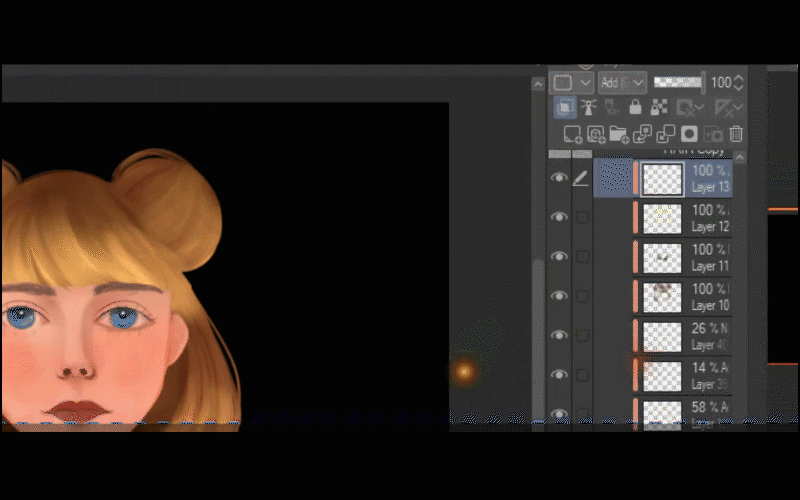
Okay so now I'm going to shrink all the layers so you can see they are all in one folder.
Next, I'll add another layer with the clipping mask and the blending mode GLOW DODGE.
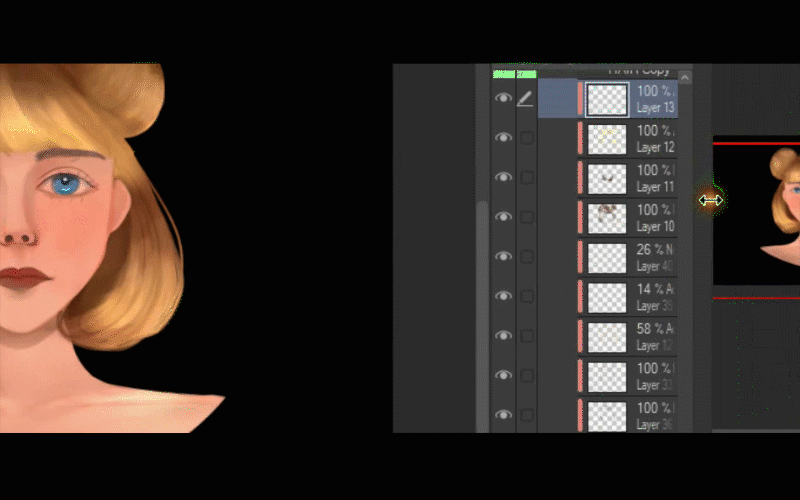
I'll choose the transparent watercolor brush and I start to paint the light on her hair and on her face.
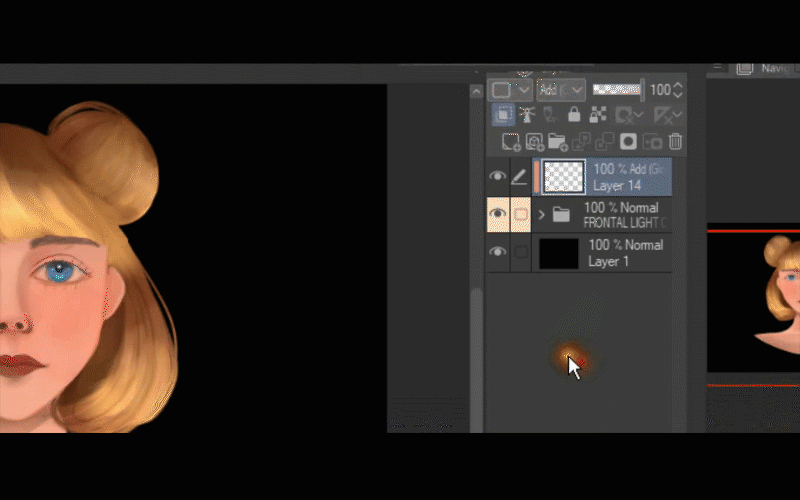
Then I start to add light to her eyes.
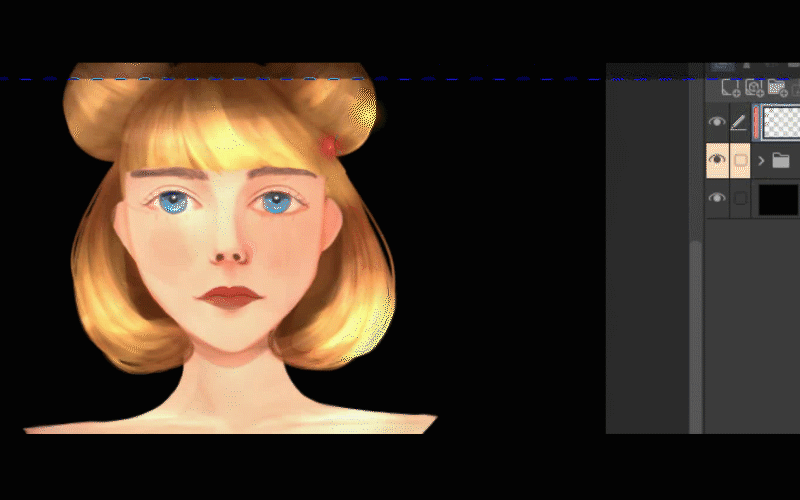
After that, I choose the soft eraser to get rid of the light that wasn't supposed to be there, you know under the lips, nose, and chin.
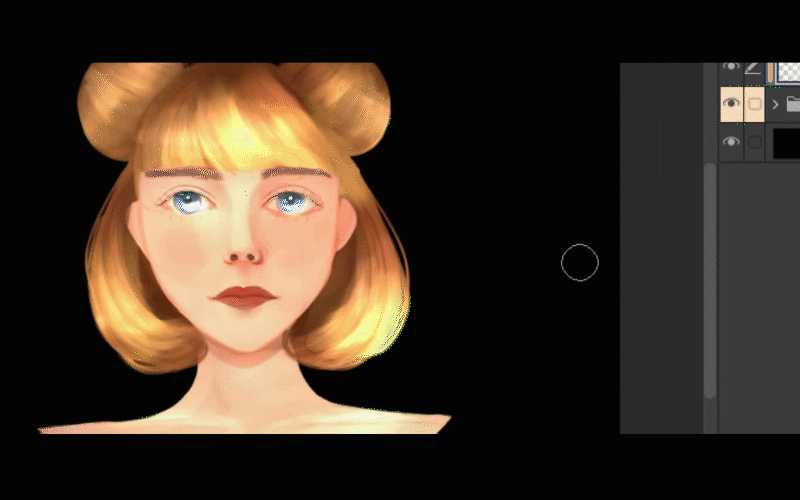
I add another layer with the blending mode ADD GLOW and start to illuminate her lips.
Then I decided to erase some light around her face and cheeks and soften it with the blending tool.
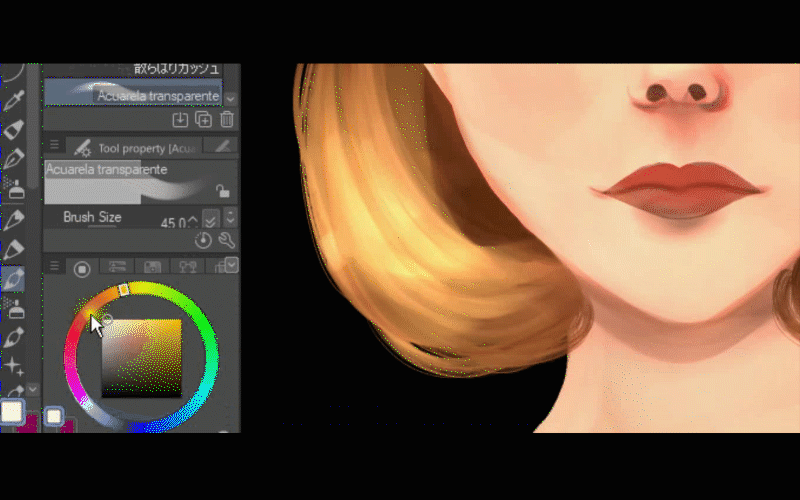
So I'll create another folder and I select the first layer and while holding SHIFT I go down to the folder called, frontal light and you see that it automatically appears the layers in another color. This means they are selected so I just drag them up and boom they are all in another folder.
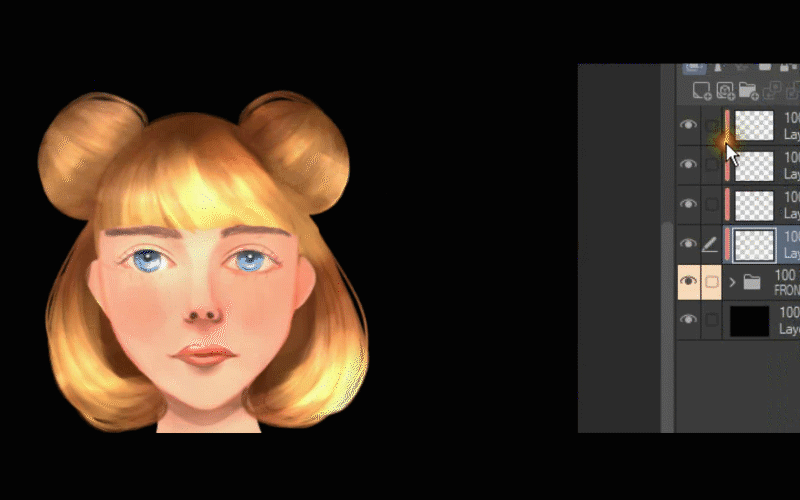
Now I duplicate the folder with CONTROL+ C AND CONTROL+ V
Then I rename the folder and change the color.
I'll merge the folder with
SHIFT + ALT + E
or right-click- merge layers.
So as you can see now I have the illustration in one layer so I'll duplicate this layer and then I will work on one of them and the other will not be visible.
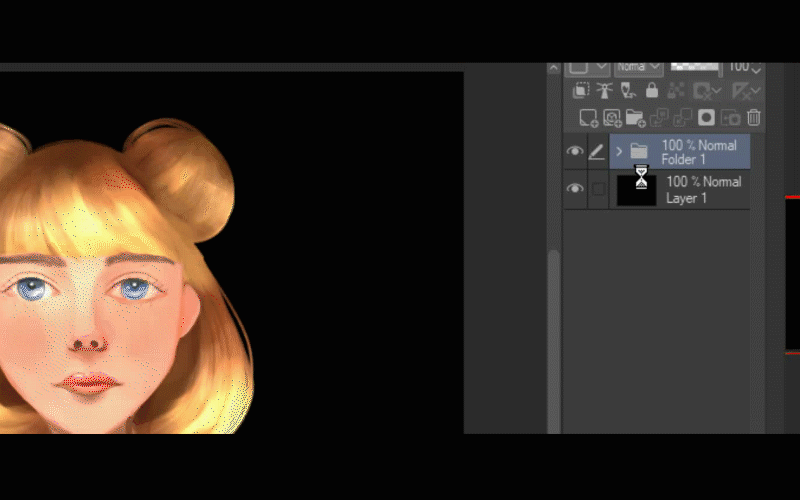
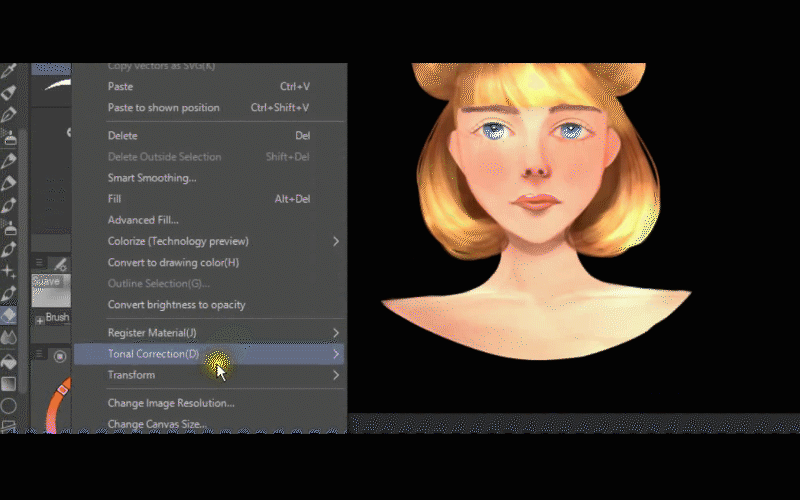
I'll move on to edit-tonal correction-tone curve
Here I'm going to fix the colors so it doesn't look that pale with all that light.
I'm looking for a tone that will work for me.
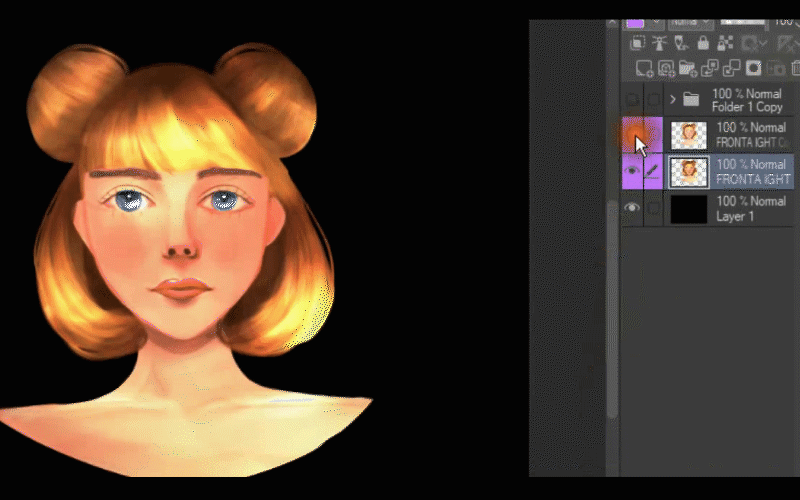
So here's with the tonal correction and without it, so you can see how has changed.
I realize that the nose part looks a bit dark so I create a new layer and I use the blending mode to ADD GLOW and the clipping mask. So with the transparent watercolor brush, I redefined her nose with a light color.

In the end, I combined the new layer where I add light to her nose with the layer where is the whole illustration so
right, click-merge selected layers.
2. 3-Quarter and Back/Rim light
So let's begin, I just work on this one a bit more because I want to use it as the base for the other 4 examples whether is darker or lighter it will work either way.
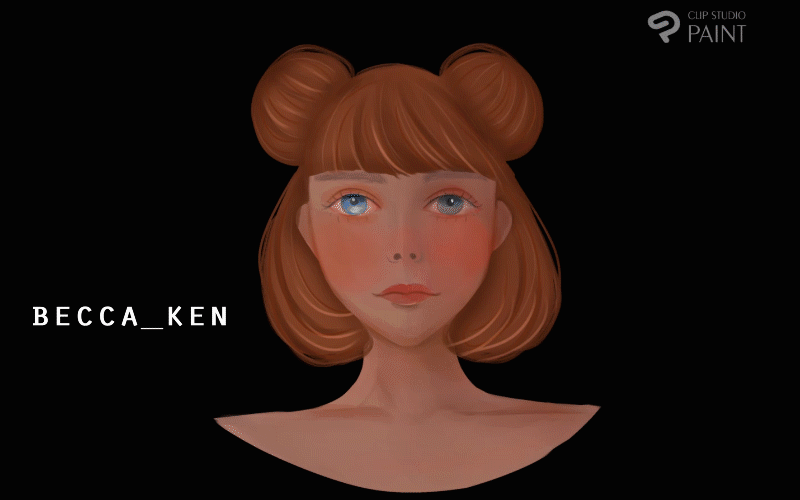
Three-quarter light up most of the face and leave the far side of the face in shadows.
The main characteristic pattern of this lighting is the lighter triangle. Although, the triangle can be big or small.
I'll create a new layer with a clipping mask and set this layer to MULTIPLY mode for shadows.
I'll choose a dark color on the color wheel and I'll paint with the fill tool so I just click on it.
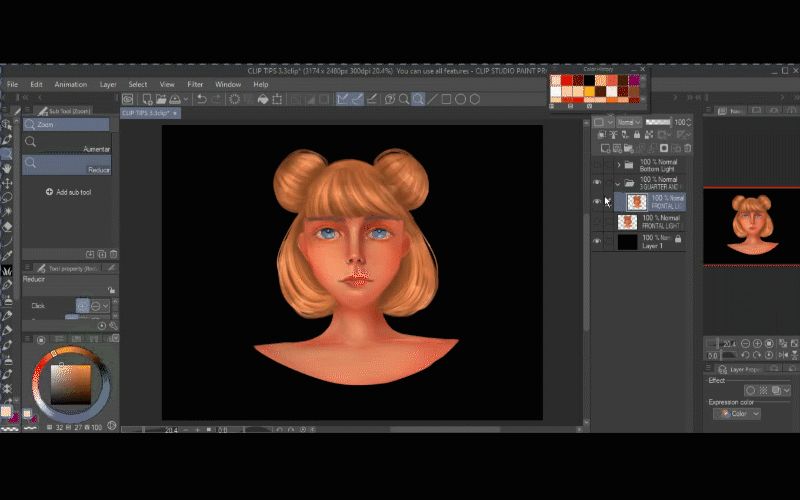
Now, I'll use the soft eraser to delete the parts that have to be brighter.
First I try to create the triangle and then I clean up the nose also the other half of her face. I'll lower the opacity to 63%
I'll add another layer with a clipping mask.
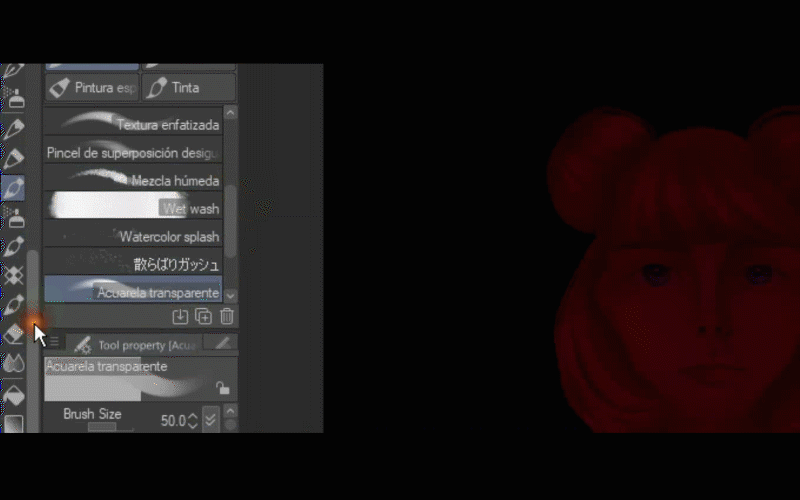
I think I'll change her skin tone so I choose a purple color and with the fill tool I color the layer and set the layer to DARKEN mode and lower the opacity to 9%
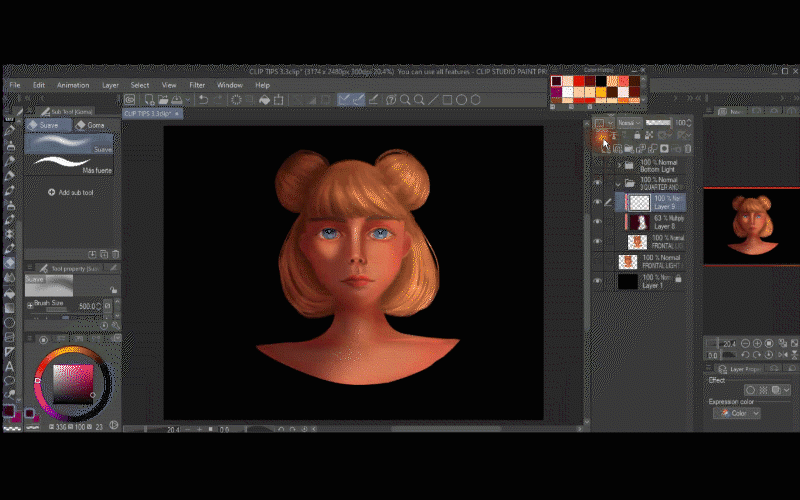
Now, I'm going to redraw the triangle on her left side and I will add more shadows on her nose with the transparent watercolor brush and I will lower the opacity to 56%
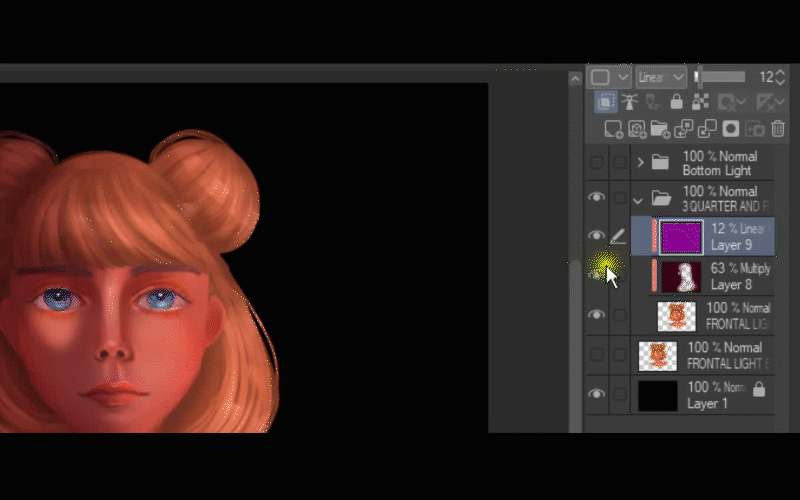
Then I will use the blend tool to soften the shadows.
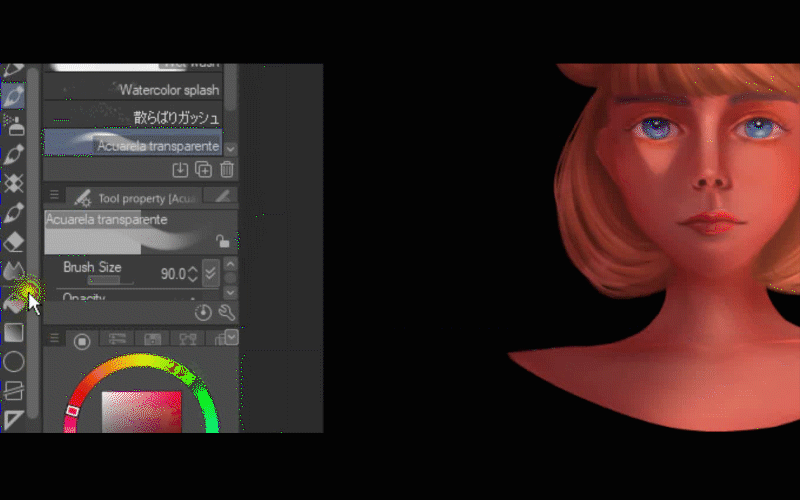
All right, I'm going to add the back/rim light.
Back/Rim light comes from the back or the side, and it lights up the edges of the character. This type of light happens when the person/character is blocking the light.
I'll create another layer and set it to ADD GLOW mode also I'l use the clipping mask. I'm going to use a yellow color and a transparent watercolor brush.
Let's zoom in and paint slightly brighter on the edges of her bun.
After that, I'll use the blend tool to blend the color.
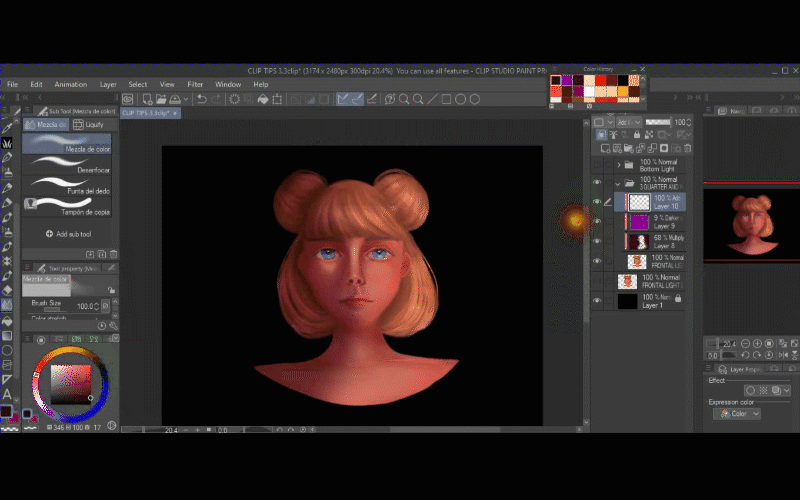
Let's switch to the brush and I'll keep painting the light around her hair.
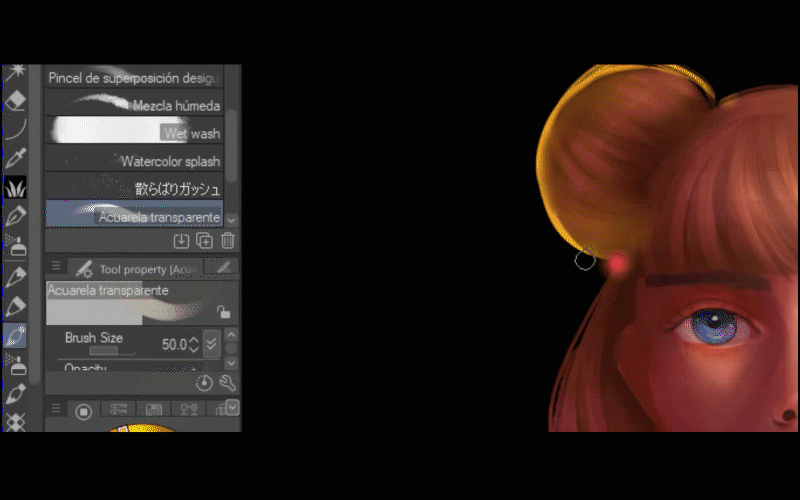
Then around the right side of the face. Then, on her neck and shoulder.
After that, I'll use the blend tool to soften the color.
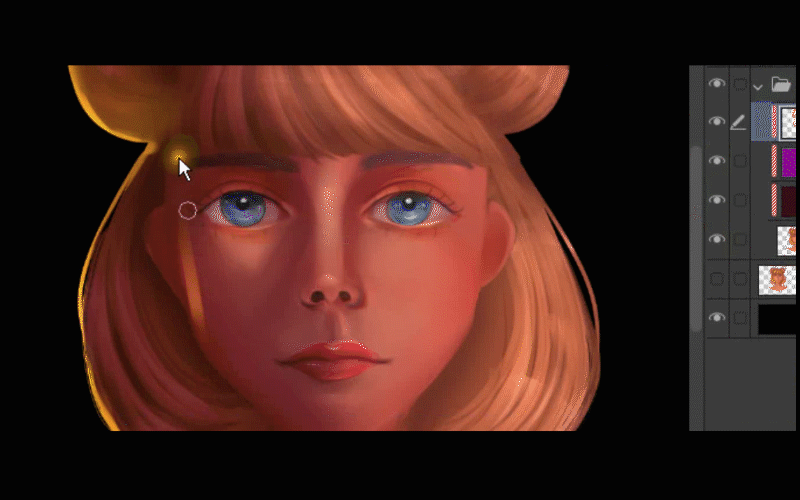
I will create a new layer with a clipping mask and set the layer to ADD GLOW.
I'll go back to the brush and paint a bit stronger.
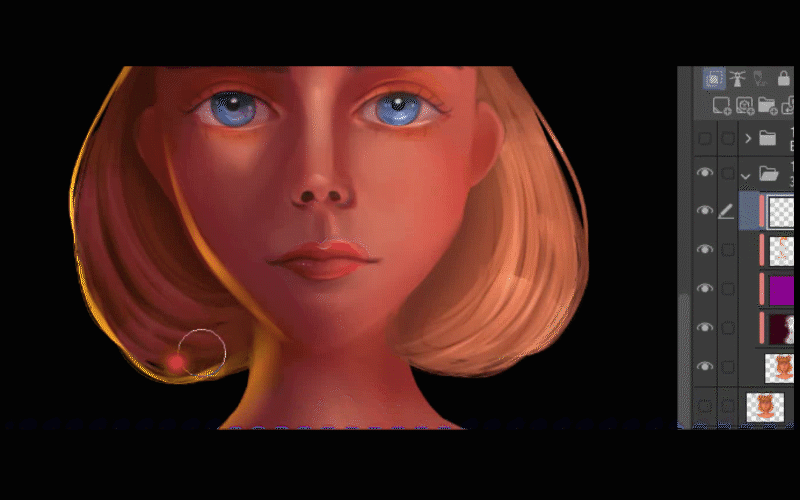
Now, I will use the gaussian blur. Filter-Blur-Gaussian Blur
You adjust it however you want. Then I lower the opacity to 58%
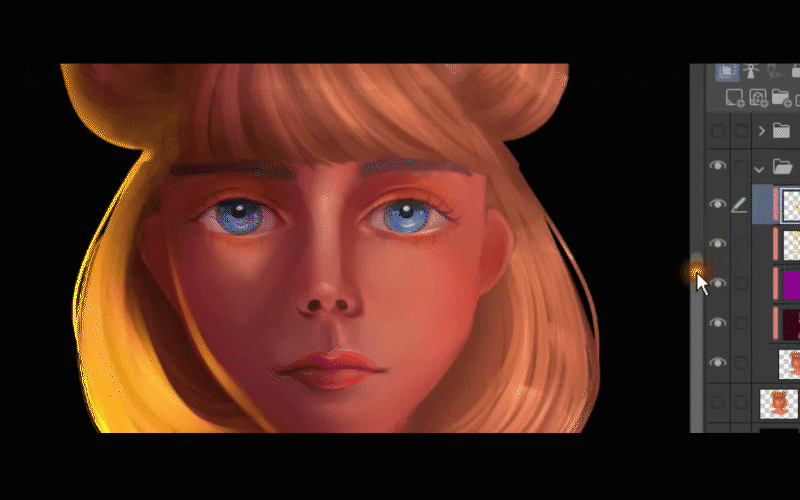
Let's go back to the first layer of rim light and duplicate it with
CONTROL + C
CONTROL + V
or right click-duplicate layer,
I think I want to soften the color of the first layer of rim light so I hide the duplicate layer and with the blend tool, I try to soften the color.
I do the same with the other layer of light.
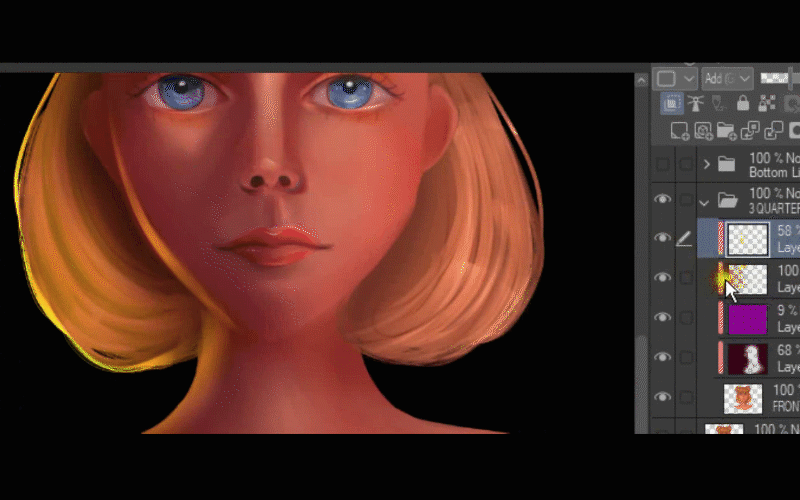
I'll create a new layer with the same configuration as the previous one and I'll add light to the edge of her hair right in the middle between the two buns.
Then I use the blend tool to soften the color.
I'll erase some parts.
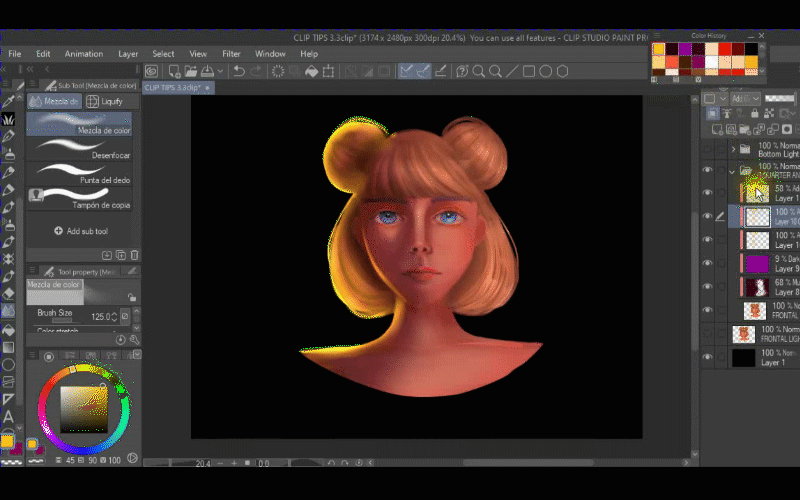
Then, I will create another layer and set it to SATURATION mode I'll use the same color and the same brush to add light in the parts that don't have shadows.
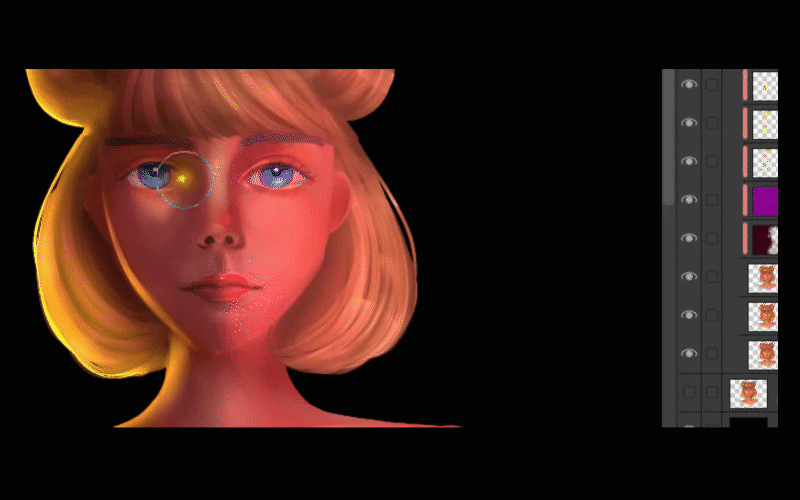
To make the shadows stronger I'll duplicate the layer where I paint the shadows so at the end I have 3 layers of shadows.
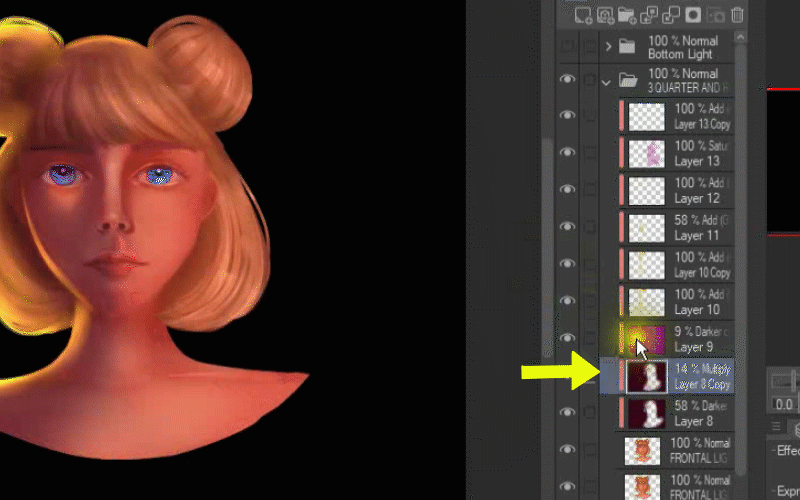
Here's Clip Studio Timelapse
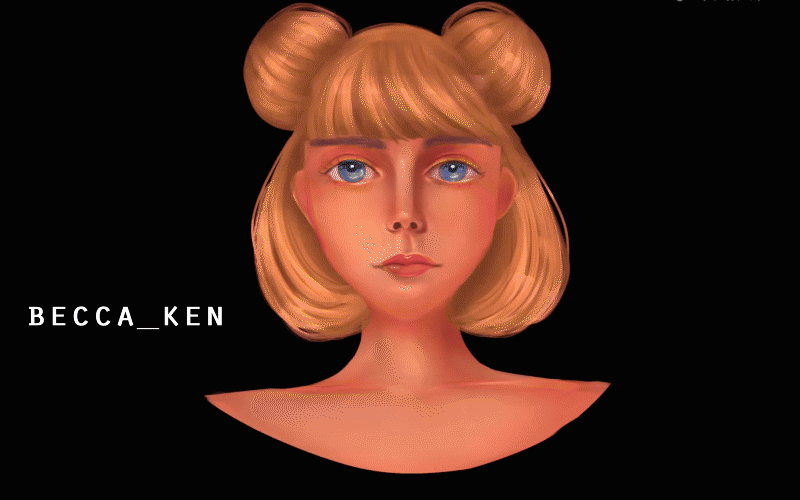
I wanted you to see the difference between the original version and the version with tonal correction specifically I use tone curve.
--------------ORIGINAL VERSION-------------------------------------WITH TONE CURVE-----------
3. Bottom Light
Bottom lighting is when the light is placed below the person/character and is directly pointing up. I've seen it mostly used when someone is telling a scary story and they are holding a flashlight below their faces.
The shadows created by the bottom light feel eerie somehow.
This light will be cast on the bottom part of the nose, top lip, and chin, as well as above the eyes and nose bridge.
I will create a new layer with a clipping mask and I'll use the fill tool, I select a red tone, and then I fill up her silhouette. Next, I'll set the layer to MULTIPLY mode and with the soft eraser, I will be deleting the parts where I do not need a shadow and therefore will be lighter.
Then, with the blend tool, I will soften the shadows around her face.
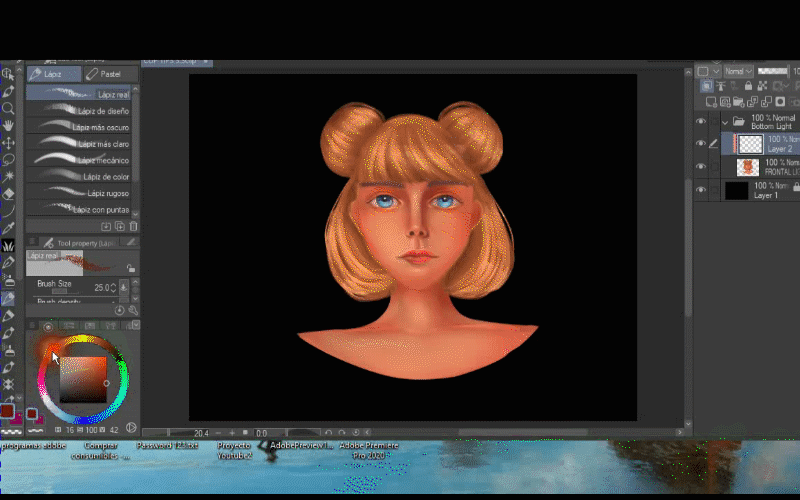
After that, I will continue to erase some more shadows and I'll keep using the blend tool to soften the color.
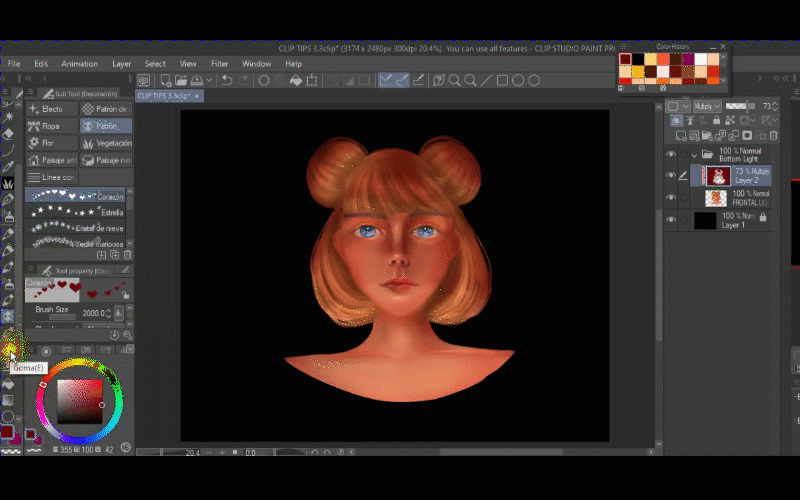
Time to add the light, so I'll create a new layer on top of the others and set the layer to ADD GLOW mode and I choose a skin tone. I'm using as always the transparent watercolor brush to paint the light where I previously erase the shadows in the bottom part of the nose, top lip, and chin, above the eyes and nose bridge.
There are times when I will blend the color with the same transparent watercolor brush and others when I'll use the blend tool but you feel free to choose whichever you like.
When I feel that the light is too strong I'll simply delete it with the soft eraser.
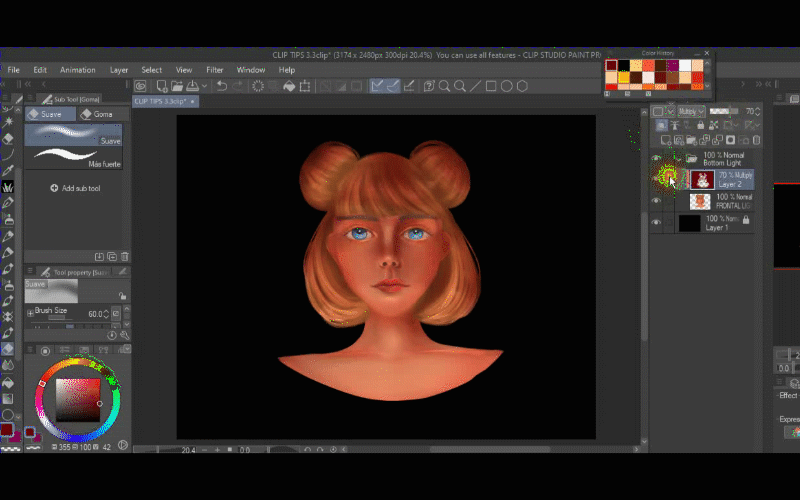
I'll add another layer with a clipping mask and set the layer to ADD GLOW mode.
So I'll start to paint the light on her hair specifically in her bangs with strokes from upside down. Then I do the exact same on her hair ends.
Then I light up her buns.
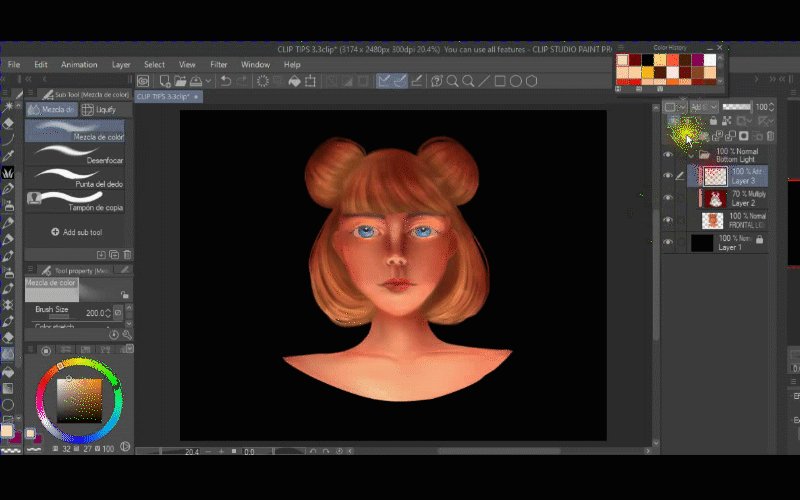
I'll create another layer with another blending mode which is color burn and with the clipping mask.
This time I want to add some reddish tone so I paint on top of the light parts with the same brush and I lower the opacity to 52%.
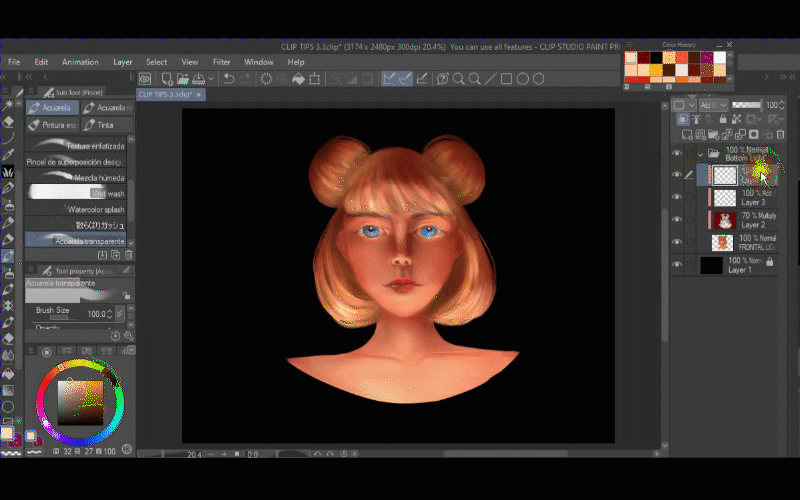
I come back to the first layer where I paint the light and duplicate it so you can see the light it's stronger now. So I select the blend tool to soften the light on the duplicate layer, then I do the same to the original.
I go back and for to soften those strokes.
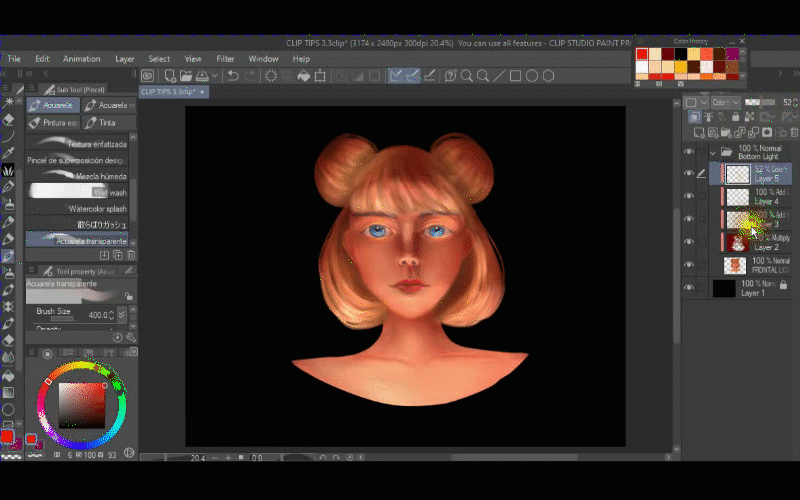
After that, I duplicate the layer where I painted the light on her hair.
And this time, I will use the gaussian blur on the copy.
So go to Filter-blur-gaussian blur then I lower the opacity to 55%
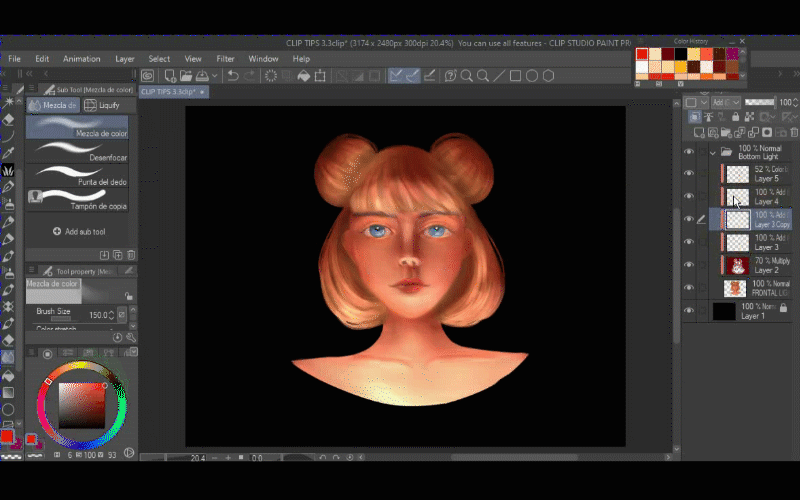
Then I create another layer and set it to ADD GLOW mode and I repaint the light above her eyes, bridge nose, the bottom of the nose, in her lips and chin.
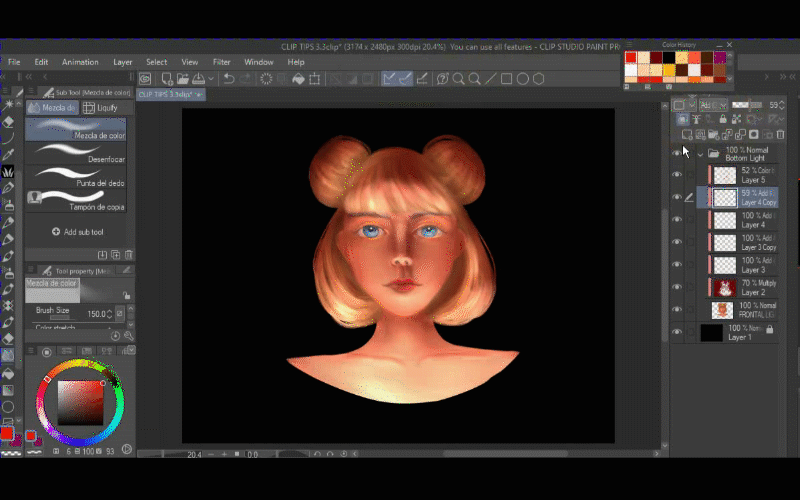
Let's zoom in and erase the part where the light is too strong with the soft eraser.
After that, I'll soften the light with the blend tool.
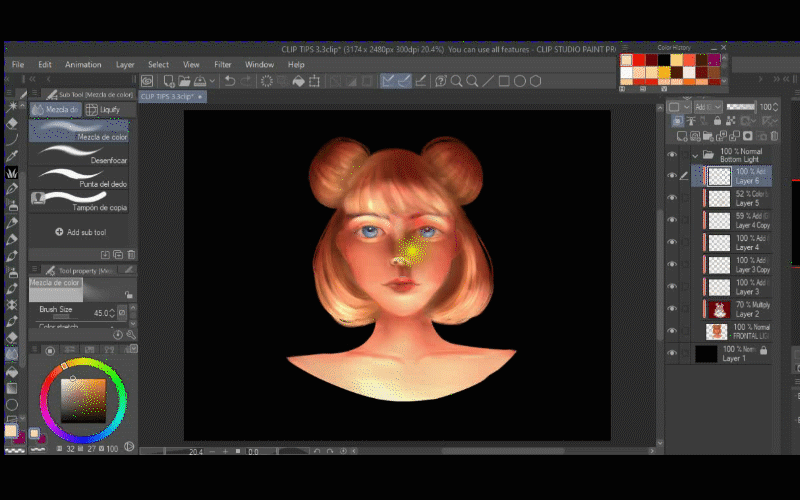
Now I will hide all the layers to clean the parts on her face where there is a problem. So I'm going to fix it.
Then I'll use the blend tool to soften those lights that I just erase.
So I'm just cleaning up everything that seems off to me. That's the good part to have all the parts in different layers because it makes it easier to go back and clean up things at the end.
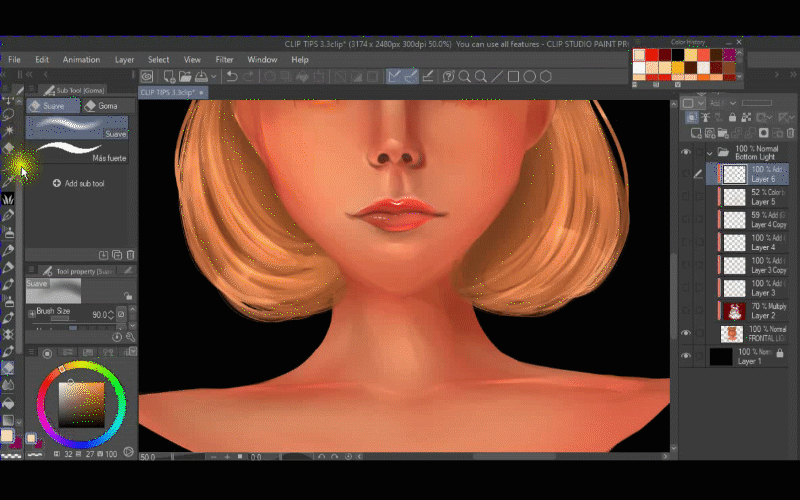
Lastly, I'll create a new layer and set it to ADD GLOW mode and I will color the silhouette with the fill tool.
I will lower the opacity to 25% and I start to erase the light where the shadow is supposed to be.
I'll change the blending mode to glow dodge and lower the opacity to 25%
I advise you to experiment with all the blending modes so you choose the one that best suit you needs.
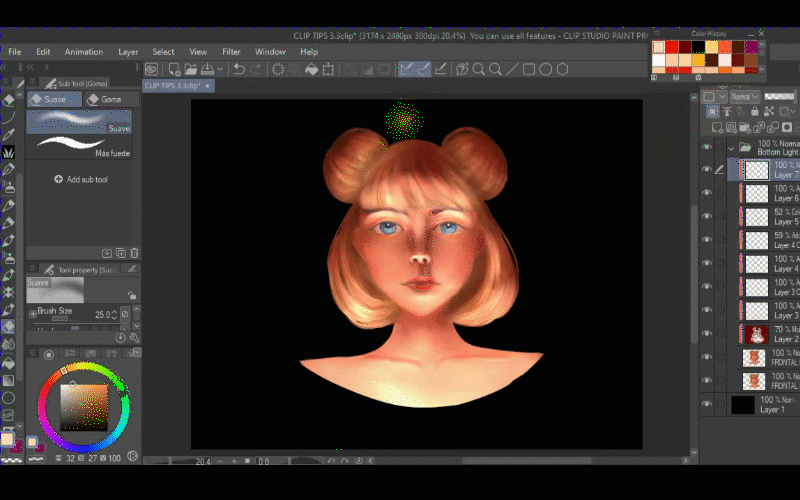
Full video speedpaint.
--------------ORIGINAL VERSION-------------------------------------WITH TONE CURVE-----------
4. Dappled Light
Dappled light is commonly sunlight that comes through gaps in a tree canopy and some parts of it are covered by the tree leaves. The dappled light vary based on:
The position of the sun;
The height of the tree canopy; etc.
If we apply this type of light into a character it will create dapple shadows on the person or character.
Let's begin with the dappled light.
So first of all, I downloaded this pack of brushes on CLIP STUDIO ASSETS and the one I use for this example is called N_LEAF BRUSH 1 and you can have it for 100 CLIPPY.
All right so let's create a new layer with a clipping mask and set the layer to MULTIPLY mode.
I'll be using a brown dark color. So I'll paint the leaf on the right side of her face, hair, neck, and shoulders and I'll lower the opacity to 26%
Then I add some leaves to her left bun.
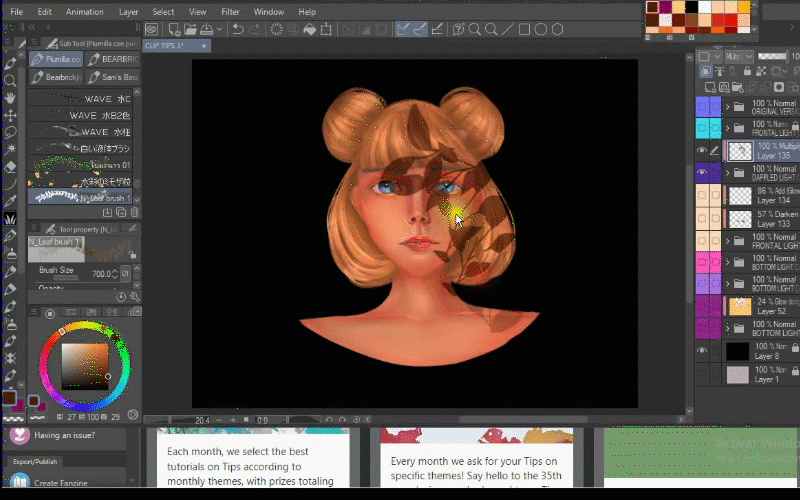
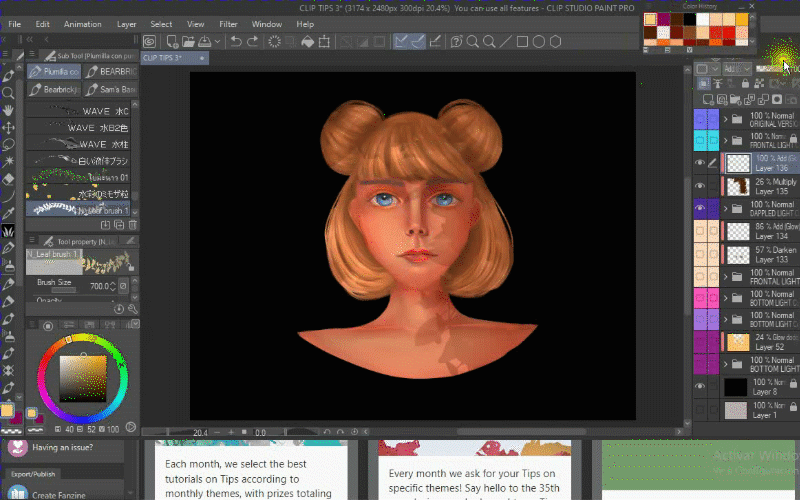
Now I create another layer with the clipping mask and I'll start to paint the light with the transparent watercolor brush.
The color I'm using is a yellowish tone.
Also, I lower the opacity to 40%
Now I duplicate the layer of the shadow with
CONTROL + C
CONTROL + V
or right-click-duplicate layer.
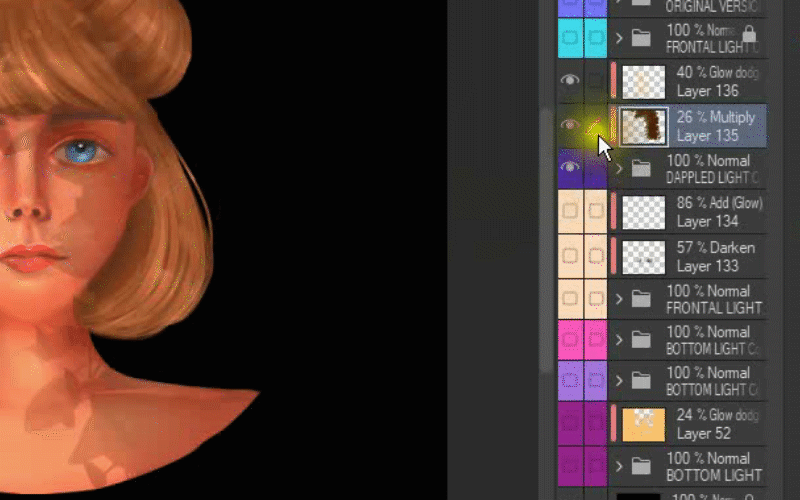
I'll hide the copy and I go back to the original and I'll go to Filter-Blur-Gaussian Blur
I adjust until 50.28 and click ok.
As you can see the lines of the leaf looks undefined so it's just what I was looking for.
I think I'll increase the opacity of the light layer to 76%
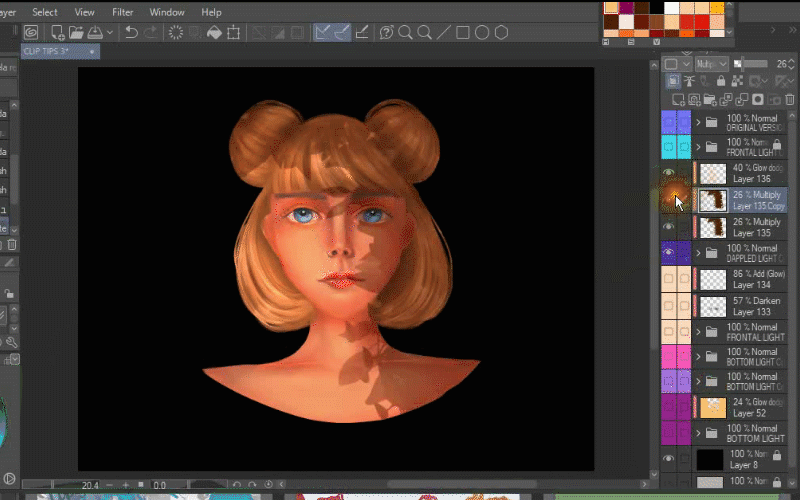
Now, I'm going to create a new layer and set it to ADD GLOW mode.
I'll use the transparent watercolor brush and I'm going to choose a yellow color to paint some dots on her hair on her right side.
I'll go to Filter-Blur-Gaussian Blur
I adjust it to 50.28 and click ok.
Then with the soft eraser, I'll delete the excess.
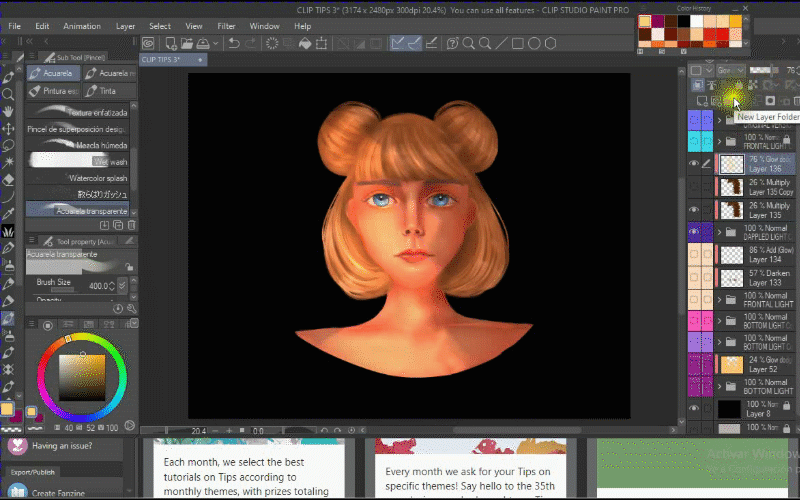
Next, I'll go back to the light layer and duplicate it using the commands
CONTROL + C
CONTROL + V
or right-click-duplicate layer.
I'll hide the copy and in the original one I'll use gaussian blur to 44.20
and I lower the opacity to 83%
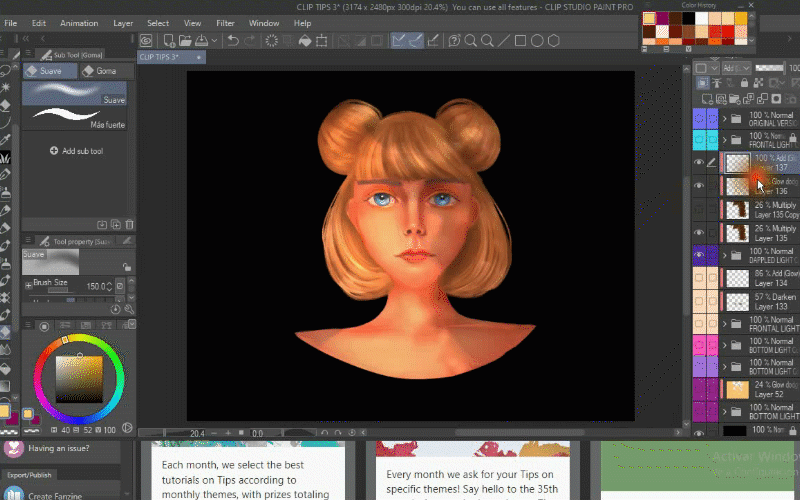
I feel like the shadow should be stronger so I'll duplicate one more time that layer and lower the opacity to 7%
I'll duplicate that one layer again.
So there would be a total of 4 layers of shadows 1 hidden and 3 visible.
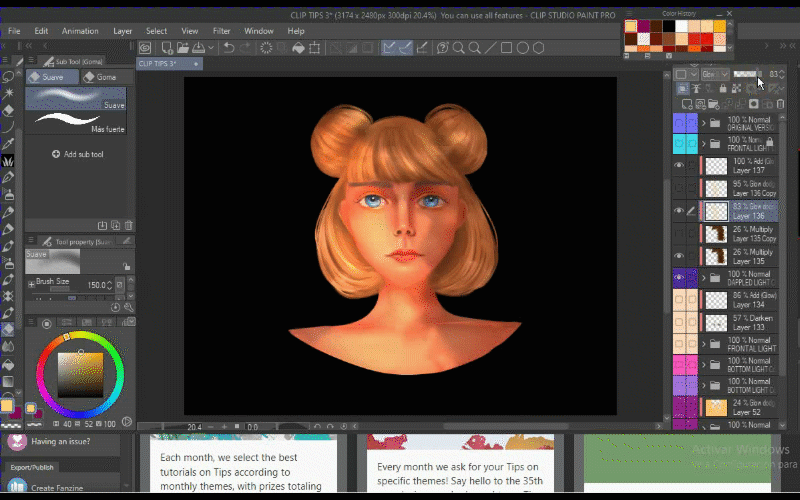
Keeping up with the new layers let's go to select an orange tone and then I choose the fill tool.
Click in the shadows. But let's go to hide the other 2 shadows layers so we can see with clarity the new shadow color.
Now, let's go back to the previous layer and increase the opacity to 100%.
Ok, so as you can see I need to completely fill up those dark spots so I'll click on it until everything is filled up.
Let's make visible those layers again and I'll drag the red shadow layer down then I'll lower the opacity to 29%
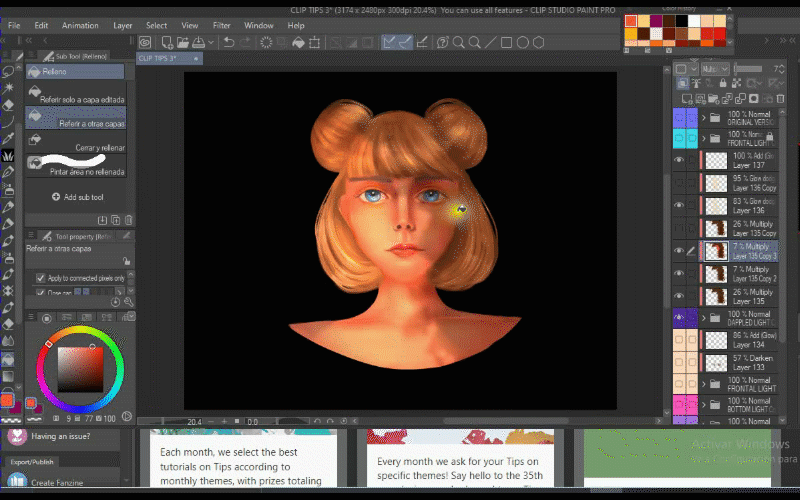
I'll create a new layer and set it to ADD GLOW mode and I draw another 2 small dots on her nose bridge and in her bangs.
I'll use the gaussian blur to soften the colors and I lowe the opacity to 36%
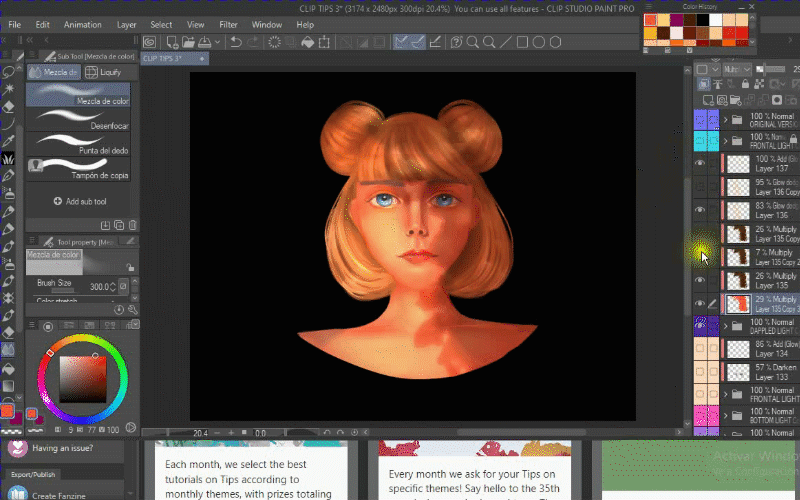
After that, I'll create another layer and set it to DARKEN mode for shadows.
And I'll pick the N_LEAF BRUSH 1 that we have previously used and I will lower the opacity to 52% and I start to paint the leaves on her left side.
Then I duplicate that layer using the commands
CONTROL + C
CONTROL + V
or right-click-duplicate layer.
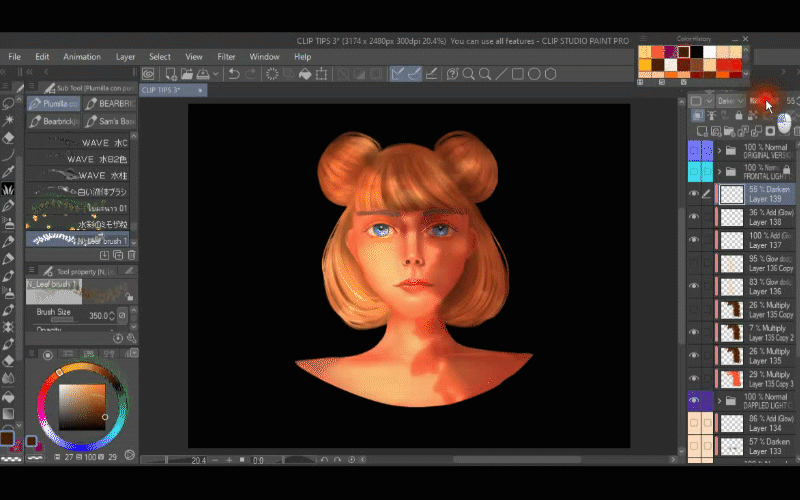
Then I paint the leafs red and I'll use the gaussian blur to smooth the strokes.
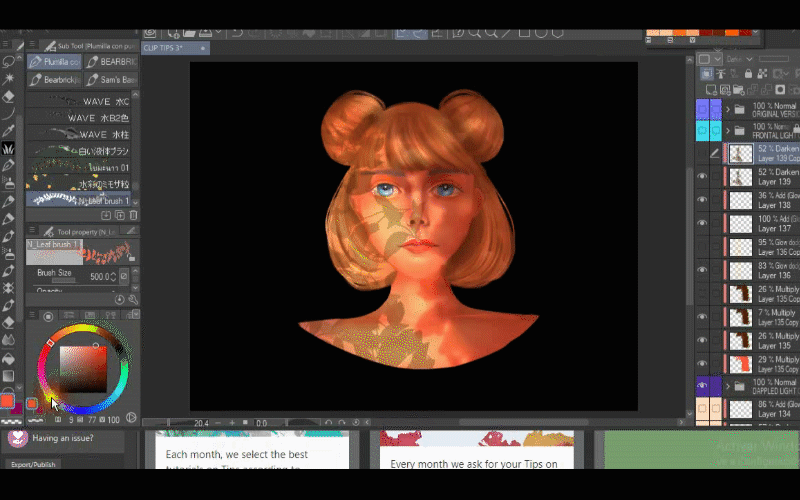
Next, I go back to the darkest leaf in the other layer and I use the gaussian blur as well.
Then I'll go back to the first orange layer and lower the opacity to 21% then I go back to the second orangy layer and lower the opacity to 51%
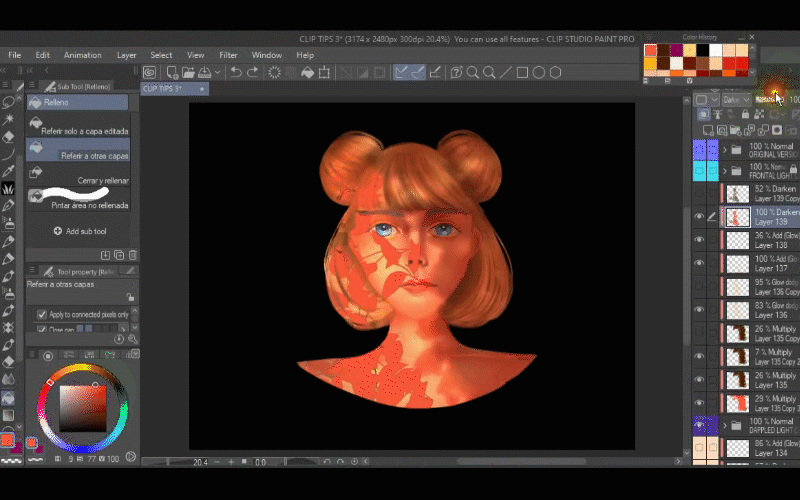
I'll create another layer and set it to ADD GLOW mode and I'm going to use the transparent watercolor brush and I'm going to paint with yellow some dots where the light is coming through.
Kind of redrawing it.
Then I'll use the gaussian blur to smooth the color and I lower the opacity to 68% and I use the blend tool to soften it even more the colors.
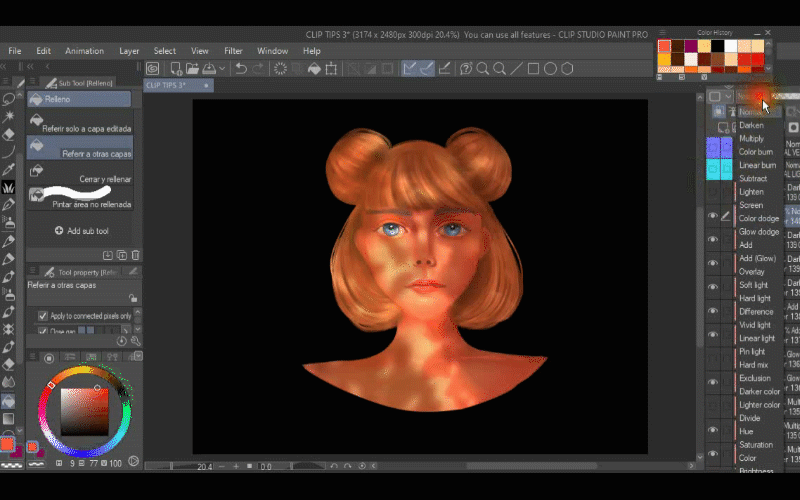
Clip Studio Paint Timelapse
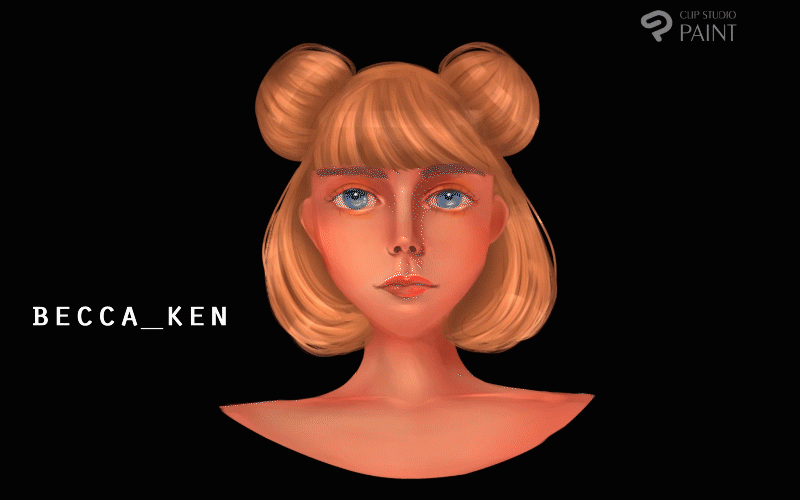
--------------ORIGINAL VERSION-------------------------------------WITH TONE CURVE-----------
5. Hard light
Hard light is a light that casts harsh and well defined shadows. A character/person lit with this type of light has a very abrupt transition between the highlights and the shadows. Hard light typically comes from a small source relative to the subject. Light sources that are further away also produce harder light and sharper shadows.
Let's jump right in.
So I'll create a new layer with a clipping mask I'll set the layer to MULTIPLY mode and I'll use the transparent watercolor brush to paint on her right side,
Sometimes, I'm going to blend the color with the same brush and with the blend tool as well.
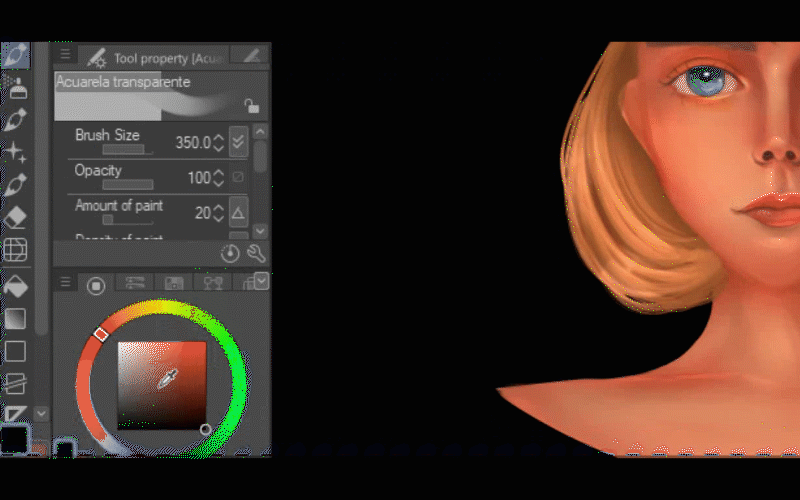
Then with the soft eraser, I'm going to delete some spots on her right side and above her eye as well.
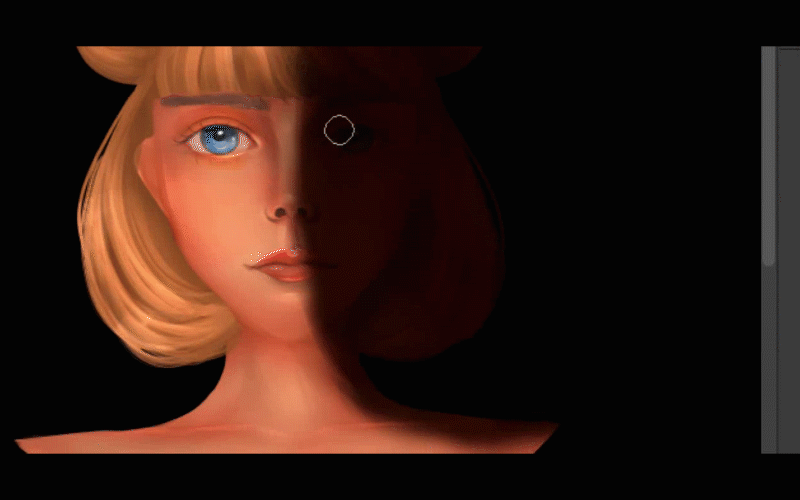
And with the transparent watercolor brush, I'm going to try to paint over her eye again with a brown color.
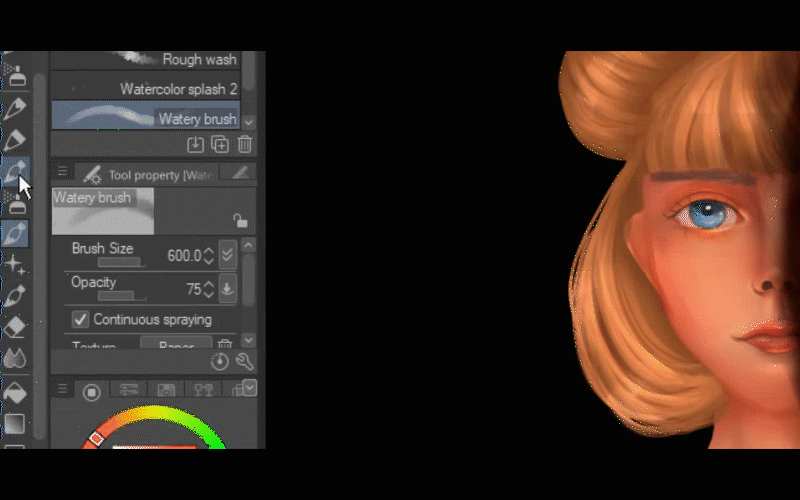
After that, I will paint her chin with a brown color and on down her lips. And I will erase the excess with the soft erase. Then, I will use the blend tool to soften the color.
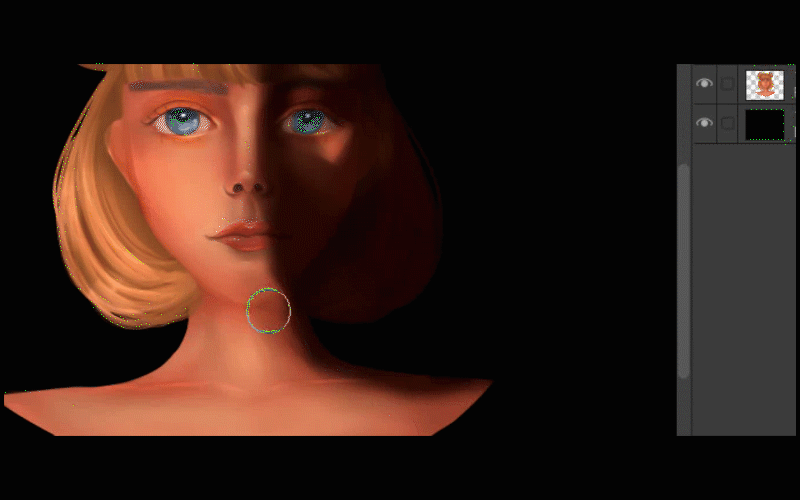
Also, I will duplicate that layer and I'm going to paint dark on that layer with the fill tool. Next, I'm going to use the gaussian blur.
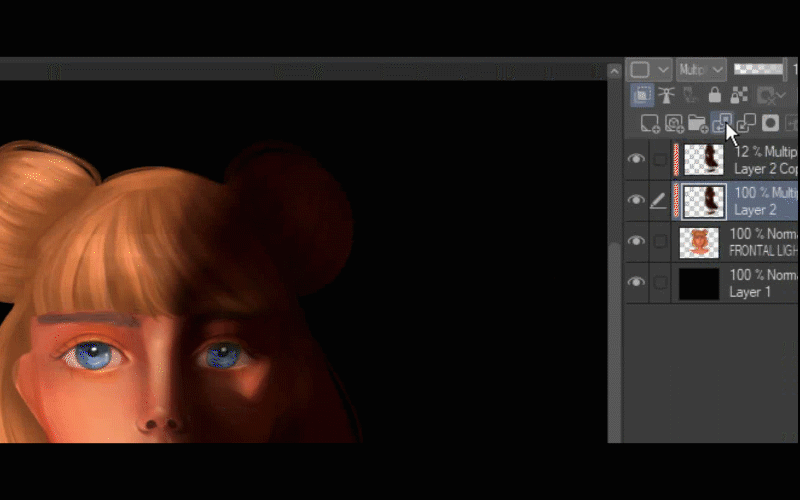
Then, I'm going to create a new layer and set the layer to add glow mode and I will paint with a yellowish tone on her left side and also on her eye lightly, and over her lips.
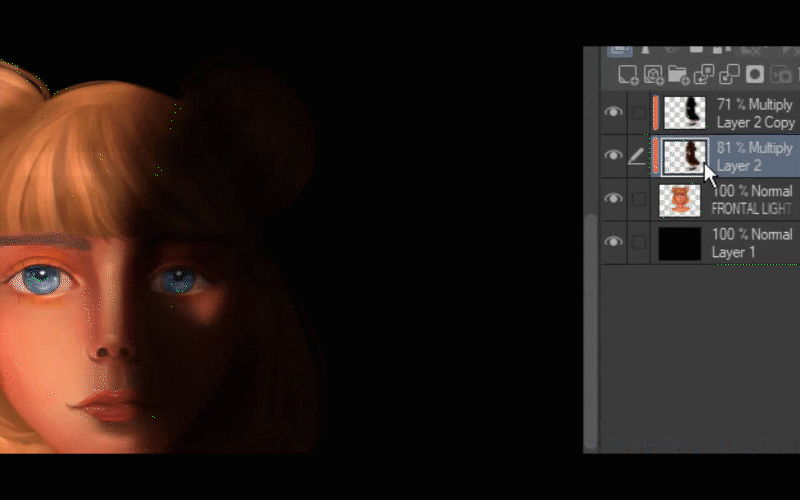
I will keep adding shadows on a new layer with the blending mode called MULTIPLY. I'll use a transparent watercolor brush and a dark color and I will lower the opacity to 60%
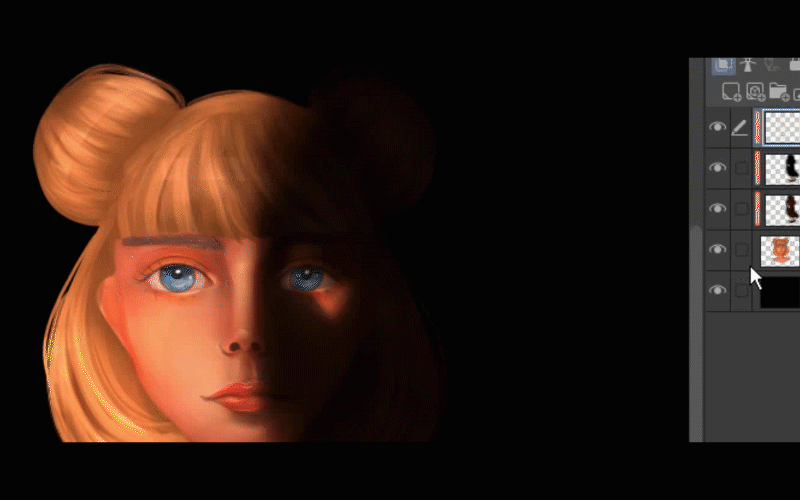
So we have 3 layers with shadows and I'm going to go to the first shadow and change it to OVERLAY mode. And I will lower the opacity to 74%
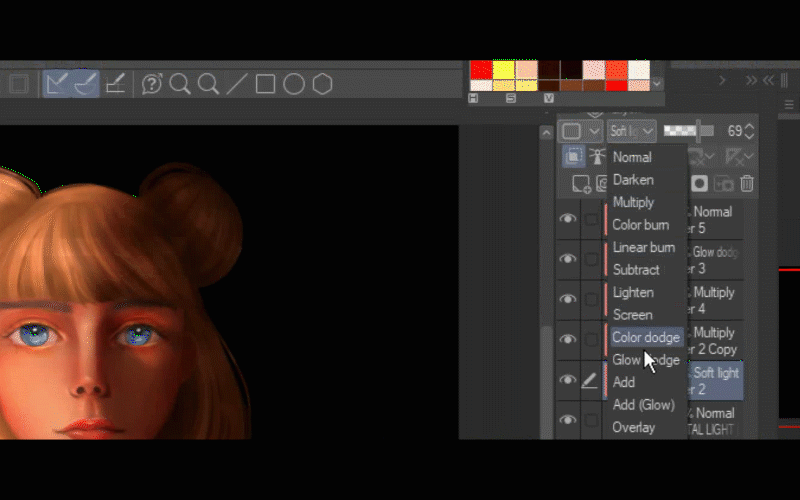
After that, I'm going to create a new folder and drag the layers holding SHIFT up to the folder. Once they are all in one folder and I'm going to duplicate the folder and then I will merge the original so I'll have one layer and I will duplicate it again.
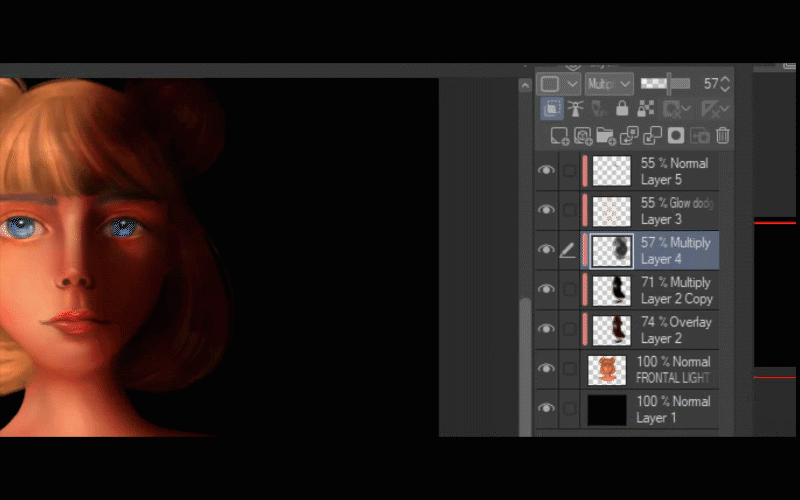
At the end, I will hide one layer and I'm going to work on the original. What I'm going to do is I will fix the colors with the tonal correction and specifically tone curve.
Clip Studio Paint Timelapse
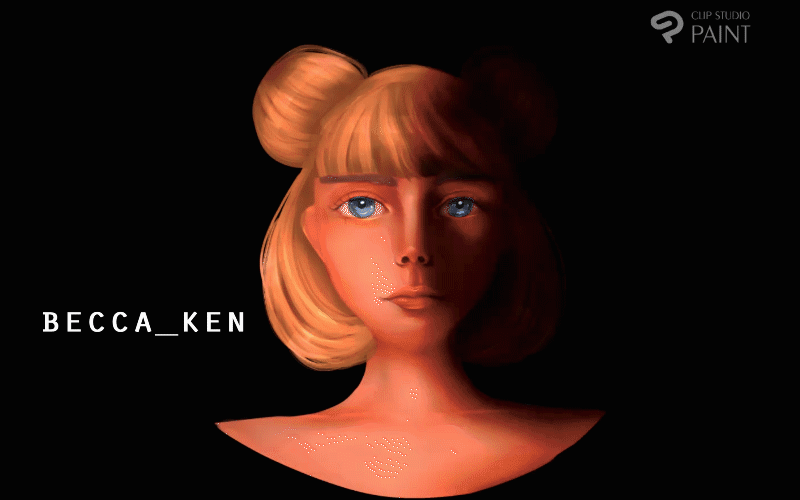
--------------ORIGINAL VERSION-------------------------------------WITH TONE CURVE-----------
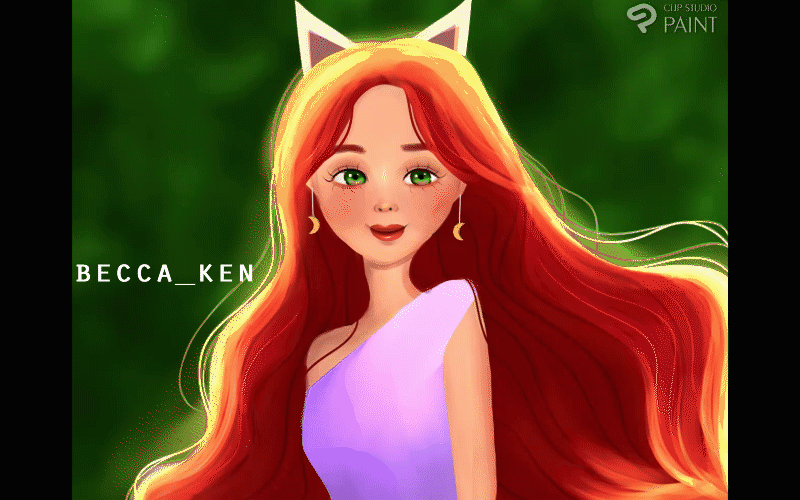
I drew this example using the same step by step that I just showed you.
This time I chose the Back/Rim Light for this illustration.
Okay, that's all guys, I hope you have enjoyed the video so far. Thanks for reading til the end. Bye!!!! Take care :D
https://www.instagram.com/becca_ken/
TikTok
https://www.tiktok.com/@becca_ken?is_from_webapp=1&sender_device=pc
My Shop
https://www.redbubble.com/people/beccakendesigns/shop
Youtube
https://www.youtube.com/channel/UCOKEp2ybemZonxkM755ww9g/featured
BUY ME A KOFI


コメント