Using Transformation Functions to Make Lace
There are plenty of great lace assets on Clip Studio Assets, but sometimes it's nice to make your own! This tutorial will teach you how to make great looking lace with a few clicks of the [Transform] tool in CLIP STUDIO PAINT!
Write a Word!
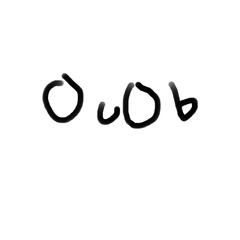
Using a brush that remains at 100% opacity (I like to use the G-pen or Milli brush), write out a word on a brand new layer. The pen shouldn't be too thick, but not too thin. On a 800x800 canvas, I use a brush size of 35, but it'll depend on your handwriting.
Duplicate!
Under "Layer," click "Duplicate Layer." This will create a copy of your word one layer above the original named "Layer Name Copy".
Time to Transform!
Under "Edit," hover "Transform" and click "Scale/Rotate." For Windows users, you can also press the shortcut "Ctrl+T."
In the Transformation menu, click on the button highlighted above: this will flip your current layer horizontally.
Your image should now look like this. Click "Okay" or the checkmark button.
Click on the "Combine to layer below" button in the layers panel. This will flatten the two layers into one.
Do it Again!
Duplicate your layer again and go to the "Scale/Rotate" menu again. This time, click the button that will flip the layer vertically. It's right next to the one that flipped it horizontally.
Here's what it looks like now. It's starting to look a lot less like text! Merge the layers again and duplicate it.
Spin it!
In the "Scale/Rotate" menu, hold the "Shift" key and drag your picture so that it rotates. Holding the "Shift" key will lock the rotation to 45 degree angles. Rotate your image 90 degrees. It should look something like this.
You know what to do next: merge the layers and duplicate it! This time, we'll rotate it at 45 degrees.
Wow! Now we have our own lace pattern!
Finishing Touches!
It can be useful to add a border to lace to make it stand out. Pick a new color that's different from your lace. Select your lace layer and"Ctrl+Left click" to select everything on that layer. You can also use the "Auto-Select" tool.
Under "Edit," click on "Outline Selection."
Depending on how big your canvas and brush are, you might need to change the "Line Width." If you don't like how it looks, hit "Ctrl+Z" and try again with a different size or color!
Looking good! You can use any word or phrase you like! Experiment with different writing styles and pens!
That's All!
Good luck, let's fill the world with lots of lace!


댓글