Easily correct your illustrations with the Liquify sub tool -Clip Studio Ver. 1.11.6-
(1) What is the Liquify sub tool?
The Liquify sub tool, added to Clip Studio Paint Ver. 1.11.6, allows you to change the shape and size of a specific part on an image by simply tracing it with the pen. It is useful for adjusting the balance rough sketches and illustrations painted in a thick oil paint style.
Unlike the filter, the Liquify sub tool allows you to edit directly to a layer on the canvas. It can be used for raster layers, selection layers, and layer masks.
From Ver. 2.0 you will now be able to select multiple layers to manipulate with Liquify.

Depending on when you updated the app, the Color Mixing Sub Tool group be added as the Liquify group and appear behind it.
You can change the size of a part of your image by changing the mode under Liquify in the Tool Property palette. Here, we have selected Pinch.

If you create a selection first, you can apply the effect only inside the selection.
In the image on the right, no selection has been created, so the effect is applied to the hair and outline.
For selections with varied opacity, the Liquify sub tool will have a weaker effect on areas with lower opacity.
(2) Liquify modes
The Liquify sub tool has different Liquify modes. From the Tool Property palette, select Liquify to select the mode.
●Push
As you drag, the image will warp to match the direction of the pen stroke.
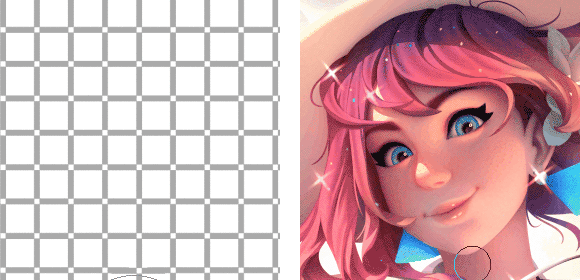
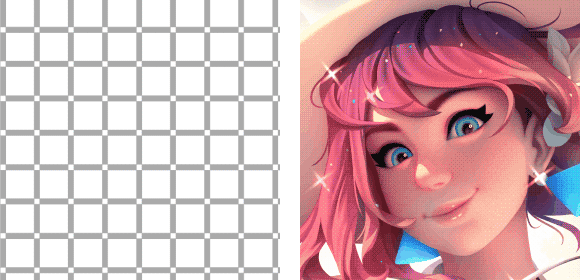
●Expand
As you drag, the image will warp to expand from the center of the pen stroke. This is good for when you want to make a part of your image larger.
Pressing and holding the pen in the same position will create an expansion effect around that position.
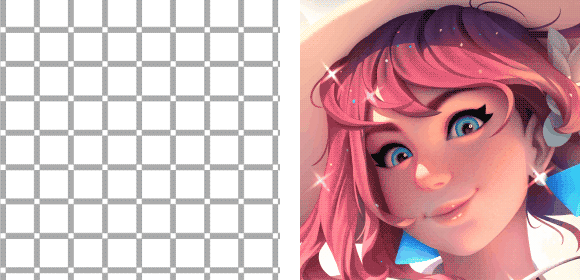
●Pinch
As you drag, the image will warp to pinch from the center of the pen stroke. This is good for when you want to make a part of your image smaller.
Pressing and holding the pen in the same position will create a shrinking or pinched effect around that position.
●Push Left
Dragging will shift the image to the left, in the direction of the pen stroke.
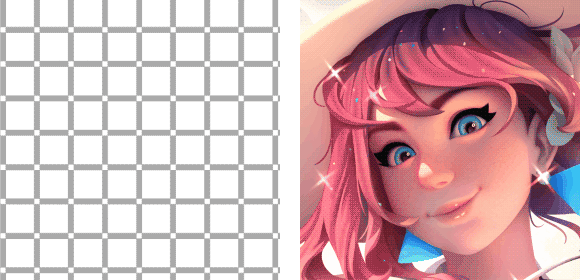
●Push Right
Dragging will shift the image to the right, in the direction of the pen stroke.
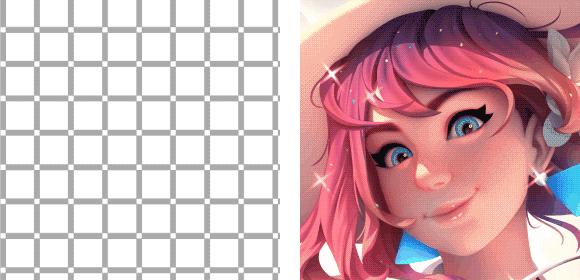
●Twirl Clockwise
Twirls the image so that it rotates clockwise.
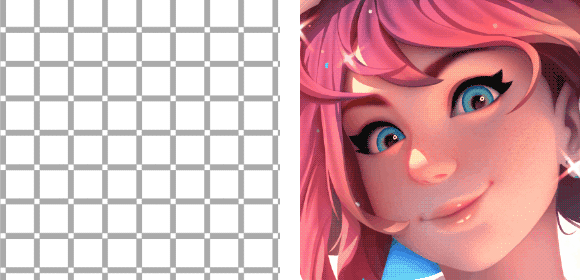
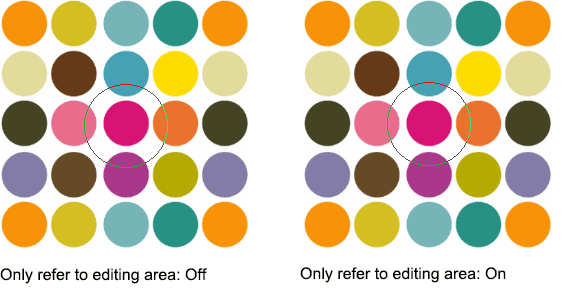
Press and hold the pen in the same position, as shown in the image. When “Only refer to editing area” is turned on, the effect changes.
●Twirl Anti-Clockwise
Twirls the image so that it rotates Anti-clockwise.
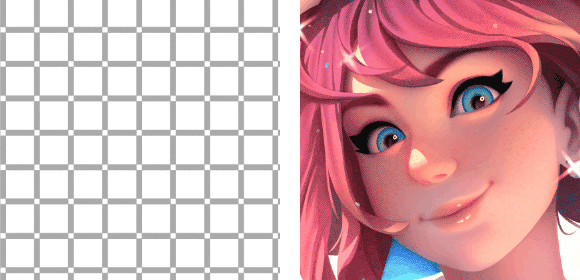
Press and hold the pen in the same position, as shown in the image. When “Only refer to editing area” is turned on, the effect changes.
Note: Hold Alt while dragging to invert the effect. For example, if Liquify is set to Expand, it will Pinch. When Liquify is set to Push, the image will be distorted in the opposite direction of the stroke.
(3) Set Liquify range
From Ver. 2.0 onwards you will be able to use the Liquify tool on multiple layers. Now you can edit multiple layers at once without merging them.
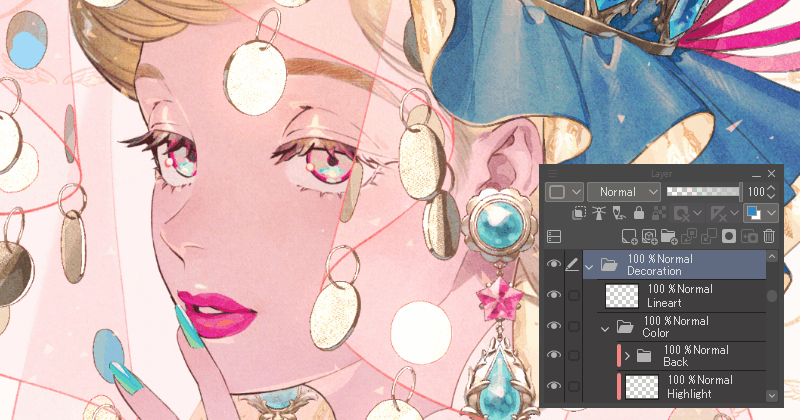
Select the layers you want affected in the [Layer] palette and then use the [Liquify] tool.

- If you have a Layer Mask selected
If a [Layer Mask] is applied you have the option to turn [Link Mask to Layer] on or off to control the area to distort.
- If you have [Link Mask to Layer] turned on
The Layer mask and layer drawing will be distorted together.

- If you have [Link Mask to Layer] turned off
Either the mask or layer can be edited, depending on which is selected.
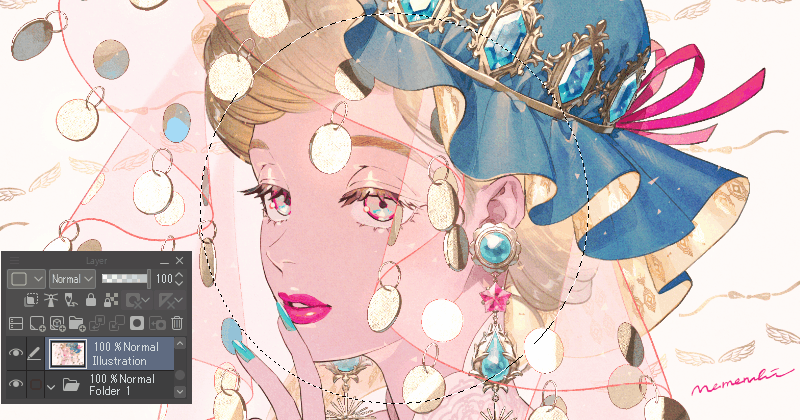
- If you use a Layer Folder
You can Liquify all the contents of a Layer Folder.
You can also Liquify within a mask set on a Layer Folder.
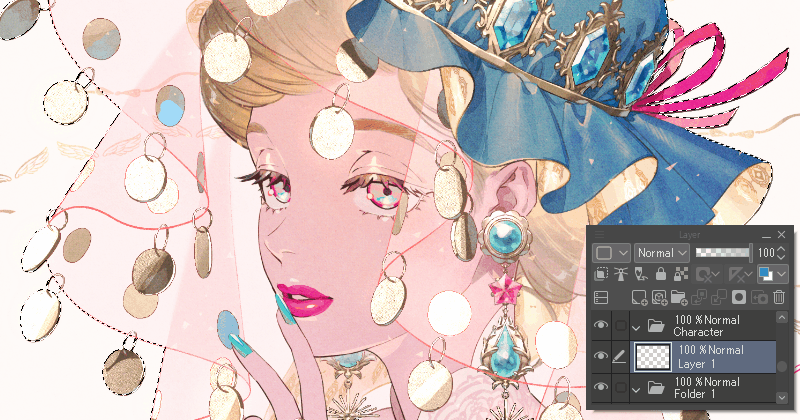
- If you use a Selection layer
Use [Convert to Selection Layer] to use Liquify on the selected area.
(4) Adjust the effects of the Liquify sub tool.
For the Liquify sub tool, you can adjust the strength and hardness of the effect in the Liquify category of the Sub Tool Detail palette or Tool Property palette.
・Strength
This allows you to set the strength of the effect for the Liquify sub tool. The higher the Strength value, the stronger the liquify effect.
・Hardness
This allows you to set the hardness of the effect of the Liquify sub tool. The higher the Hardness value, the more sharply the area around the mouse cursor will distort.
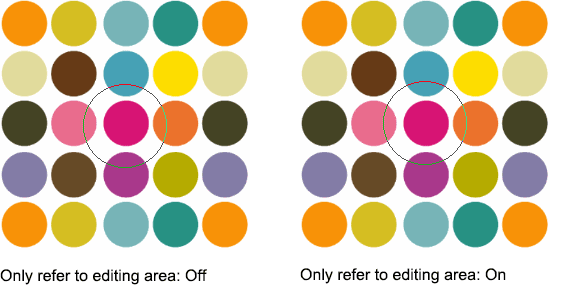
・Only refer to editing area
Sets the range to be referenced when using the Liquify sub tool. If enabled, only areas of the image traced by the Liquify sub tool will be referenced.
The following figure shows an example of creating a selection and using the Liquify sub tool. If turned off, the effect will also be applied to images outside the selection.
・Anti-aliasing
When on, the Liquify tool will have an anti-aliasing effect and be smoother.
When off, the effect can be applied while maintaining the original colors. After application, the color will be distinct, but the color borders may be jagged.
When Anti-aliasing is on, the effect appears as follows.


Comment