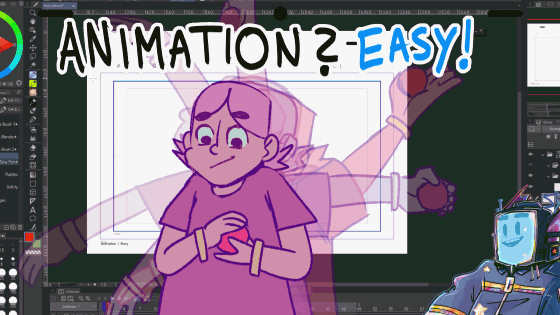
Animation? Easy with Ex

In this Tutorial I will give you tip’s on how to prepare your canvas and workspace for animation and how to animate easily!
01-02 Will contens the prepare of canvas and workspace!
From 03 - Tip´s on how to actually Animate your Character easily!
This tutorial will need the assets from the user @Bungo!
Have Fun!
Animation? Easy! | With Ex
01. Prepare your Animation Canvas
Copythenumbersfrommytemplate-Titleprotectionarea,OverflowframeandEmptyspace
Giveyouranimationprojectacoolstoryname
   + Setyourframesat12or24foracoolresulotion

   + Playtimeshowstheamountofframeswhichisyourtimelength:
300 Frames in 24 fps are about 12 seconds
300 Frames in 12 fps are about 25 seconds
+ Nowaddthedownloadedassetstotherightplace:
Cutting template into Cutting Template
Cel Template into Cel Template
Now your workspace should look like that or similar depending of your own workflow settings.
02. Prepare your workspace
02. A - Prepare the Layers
Thanks to the Assets from @Bungo you already have preset Layers which makes organize your animation way better!
Now click on the layer above the canvas color. In that layer is a template for the frames, but we need to adjust that, so it won´t bother us by the export.
Click on the Lock symbol at the Layer assets. Now click on the pen symbol next to the lock on the left side and put the opacity of that layer around 30%-40%. Then activate the lock again!
02. B - Prepare the Timeline
Select the Cel Layer ‘A:0:Cel’ and add a new Cel to the timeline.
Symbols explained:
Far left: New Animationfolder
Middle left: New Cel
Middle right: Specify Cel
Far right: Delete Specify Cel
Far Far right: Onion Layers
Importend for us now are only the left ones and the Onion Layer!
With the new Cel will be a new folder created in the Animations Folder of that selected Animation layer, thanks to the downloaded assets.
In that folder are diffrent layers which you can use to organize your animation drawings.
03. Keyframes
You probably already has a character design or a character you want to animate! Great!
And an idea what your character should do in the animation? Even better!
Listen up now I will drop some of my steps, at how I create Character Animation!
When you know what your character does in the animation, then doodle the keyposes of the idea on an illustration canvas.
After the finished Keyposes you go back to your animation canvas and into the Timeline with your selected Animation folder and create for each Keypose a new Cel.
Between the Cels should be about space like a second (24frames).
Now you copy the sketches of the keyposes into the associated folder.
Extra Tip: If you copy them in, they won´t fit at first. Copy all the characters in the first Cel, select them all and resize them until it fits!
When they are at the right size and location on the canvas, you can organize them in the blonging folders. And activate the Onion Layers!
Now you can press play and preview the keyposes and rearange them to your feel.
04. Inbetweens
Now create new Cels in the middle between your Keyframes!
Try to find poses between the keyframes!
Pro Tip: Try to draw on between the lines of the shown Cels from before and next frame. Try to avoid draw on the same line as the cels before and after as much as you can while staying inbetween them!
Now add more inbetween cels around the current inbetween cels and draw more the poses at the new cels!
If you think you have enough inbetweens you can rearrange the inbetween animation cels for the right timing.

Without Hold

With hold and fixed leg!
Now you can fix your animation doodle and then continue in the next step!
05. Adding Details to the Character
After you have done the movement in the animation you can start adding details of your character. For that you close the Animationsfolder with the sketch and put the opacity of the Folder at 40%.
Now create at the timeline a new Animation folder and sketch over the doodle while repeat that like in Step 04.
First adding the sketch for the Keyframes and then the inbetweens after and after!

Repeat that process until you are ready for lineart!
06. Lineart and using diffrent layers for certain Bodyparts
What bodyparts should be on an extra Animationsfolder layer ?
         + BasicBodyandHead-Onthehead,thenosecanstayontheface

    + Face-EyeswitheyebrowsandMouthonseperatelayers

   + Clothesonlywhentheyshouldmovethroughair

   + Haironlywhentheyshouldmovethroughair
Note: You only need to put parts on seperat layers when they have delay in movement etc.

With drawing the lineart, try to fix the proportions and the sense of physics/movements.
Tip: Try to avoid gaps in the lineart!
06. Add Color
After you are happy with your linework you can continue to add colors!
My way is the use of the lasso bucket with this settings:
Then I create a layer below the lineart and create a shape around the lineart with the lasso bucket to fill the empty spaces.
Create above the filled area which I name ‘Basic Color’ new layers with the mask selected.
Tip: Each Color should have his own layer!
Now repeat that in every cel of the body!
After that you add color to the mouth and eyes.
If you want you can also add shading or highlights.
07. Export
To export your animation I recommend those three options:
Gif, Film and Cels
Here are my setting for each export I recommend:
Gif:
Film:
Cels:
Note: Cel Export gives you the opportunity to edit each Animation Folder insides in another programm to your liking or add a background in a diffrent programm etc.
Thats it! I hope my way of animation could help you further! Have a nice day!


Kommentar