
This tutorial is going to be a step by step on how to start from a rough sketched idea to a finished fancy illustration with plenty of effects.
My main idea for this painting was to go for a kind of "cursed" sorcerer who controls fire element
I' ll only be using CSP brushes for this tutorial, the painting brushes are really awesome. I use them for all my illustrations, you should try them !
From Idea to sketch
The first step here is to make a really rough sketch with two tones.
Here I used the blue for all my "environement" and black for my character silhouette.
As you can see I kept it really rough, no need to push the drawing too far yet.
Put all the layers you created in a goup and create a new layer, then put in on "multiply" blend mode.
from now on I m just throwing colors on the layer and testing some mood variations, these colors are NOT going to be the final ones so don't spend too much time on this.
You can use this step to fix / add some stuff that you didn't liked about you sketch !
Clean line drawing
now that we have a solid base, we are just going to lower the opacity of our layers, I like to go 20% so that I can focus on my clean line layer
For clean lines I like to use pencil brushes or the G-pen
Creating a clean color base
Let' s fill our lines with flat colors with soft variations, I suggest using the oil paint brush, the bouache brush and any kind of soft brush you can find in this icon menu ->
don't render your Image yet, keep it simple !
IMPORTANT make sure you use separate layers for each part of the illustration
for example:
body
pants
fire arm
axe
smoke
background
If we turn off the lines there is no detail
Rendering
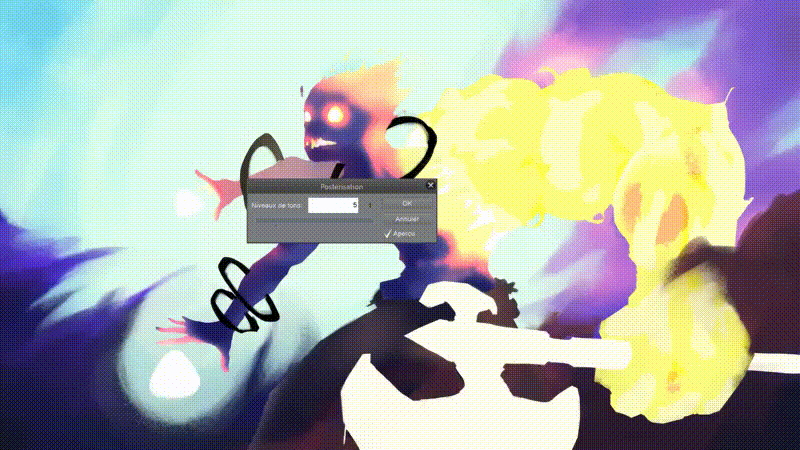
now we can start rendering that arm, I used the Posterization effect, I find it very useful sometimes when I feel like I need quick tones varitations, for fire effects it' s perfect !!!
For the smoke, I use the gouache brush for the color base and the blending watercolor brush to stretch the paint to the direction I want. It adds a cool stylised effect to your smoke / clouds
this is how I use the watercolor blend brushes ->

This is my image fully rendered, I' ll make a tutorial about that later, I think it could be usefull but keep in mind that the way you render your image is going to make up your own style so make it the way YOU like it
don't forget to look at your line drawing sometimes so that you don't get too far from your idea
Adding effects
Now that we have everything looking good, let' s make it look even better !
Let' s add some sparks to the fire arm
Let's use these four brushes and paint with the main color of your fire.
In my case it s a light yellow
(My CSP is in french but dont worry they are in the same menu in the same place)
Once you are finished put your sparks layer in Color dodge to make it more punchy
Keep it light, we don't want to overdo it
Now let's add some glow to it to make it pop !
use the soft brush that's in the same brush mode ->
With the same color you used for the sparks paint on the area you want to make pop and then put the layer in Color Dodge.
Lower the opacity of the layer to 50% / 75% so it s not too hard on the image
Final Image
And here you go, you finished your illustration !!!
If you have any questions feel free to message me on twitter !
Users who liked this post


Comment