[Beginner] How to make animation from illustration file
Introduction
I made a moving picture, but can't I make an animation from that file?
I want to know how to make it!
It is a commentary for those who thought.
As a premise
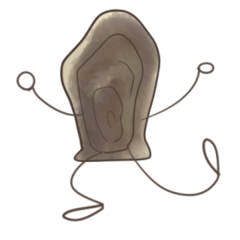
Picture with left foot forward
Picture in the middle
Picture with left foot lowered
How to make when there are multiple pictures like this.
If you want to use it as a tutorial, you can use the above 3 cards in DL.
(Unauthorized reproduction, not for sale)
Display the timeline
Illustration is each
Layer 1 (left foot forward)
Layer 2 (Picture in the middle)
Layer 3 (left foot behind)
And lined up in layers.
The timeline is not displayed if it is an illustration file.
You need a timeline to make animations.
Let's open the timeline.
Select a timeline from the window
The timeline is displayed below.
Create a new timeline
Initially, nothing is displayed on the timeline.
First you need to open a new timeline in the timeline window.
Click the new timeline icon in the timeline window.
Opens a window for setting timeline settings.
Set the frame rate and playback time to 24 and press OK.
The frame rate is a setting for how many seconds are divided.
The playback time is a setting of how many frames to use
- (You can set only up to 24 frames in PRO.)
Then it will be displayed like this.
The picture cannot be switched if this is the case.
(If you use the timeline well, you can actually do it, but it is difficult to manage layers so it is easy to switch)
Open new animation folder
How to make an animation with Krista
You need to create an animation folder.
Click the new animation folder on the timeline.
① Click the new animation folder to add a folder to the layer.
② Drag and drop the picture into it and insert it.
③ Once inserted, the picture will be displayed in the same timeline so that you can switch.
Timeline driving
Enter timeline
Right-click on the timeline to enter the timeline.
You can sort layers.
This timeline is already sorted.
The description will change, but the layers in the layer folder
Because the order changed when I inserted it into the animation folder
From the top
Layer 3 (left foot behind)
Layer 2 (Picture in the middle)
Layer 1 (left foot forward)
Was rearranged.
And on the timeline
Layers 1, 2, 3, 2, 1, 2, 3, 2
And input every 3 frames.
Since the animation is looped from the last picture, there is no need to put a 1 at the end.
Play and export
Let's first check how the animation works
Press the triangle button on the timeline to play.
Press the button with the arrow next to the right to play the loop.
If you're OK with this, start writing.
Export animation from file and select animated GIF
Decide the storage location and name
This screen will be displayed once the storage location and name are determined.
The output range is how many frames to how many frames to export.
Since it is a loop, it will be a loop from 1 to 12,
This time, it is set and output from 1 to 24.

Here is the completed GIF.
Thank you for your hard work
This is the explanation.
If you make an animation file from the beginning,
There is a line called a production frame, and the export is within that range,
If you make from the illustration, there is no setting of the production frame
It will be a full screen export.
If you want a smaller range
Edit → Change Canvas Size
Or
Select the range you want to export with the selection → Edit → Match the canvas size to the selection
Need to be trimmed.
I'm glad if you can use it as a reference.
Thank you for watching until the end.


![[Rown]](https://s3-ap-northeast-1.amazonaws.com/celclipcommonprod/accounts/profile-image/c6/130fa83901ffc444a46342807a43ce29ac098d1192f6ab8f8e13c3b7fe203185.png)


Comment