Automatic coloring - (Illustration and Animation)
Hi, I'm Cherry!
This time I will teach you to use the Automatic Coloring function in a simple way so that you can use it in your illustrations or animations.
Automatic coloring - Illustration
My canvas is A4 size with a resolution of 359 dpi.
I made a sketch and then a drawing with defined line art, you probably already have a lineart or drawing that you would like to color, in that case, just open it in CSP
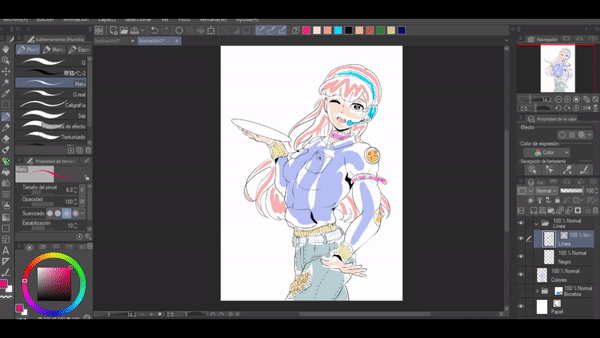
To apply Automatic Coloring you must create a raster layer below your line layer.
On this raster layer paint with the colors you want. It works well if you choose 4 colors, but if you want to choose a little more, no problem.
I also recommend that you paint well-defined lines of color as shown in the following image:
To apply the automatic function, you must first establish your line layer as a reference layer:
Once your lineart is established as a reference layer, go back to the layer where you have the colors selected for your illustration and do the following:
Editing -> Coloring (Technology preview) -> Apply selected colors (H)

And ready!
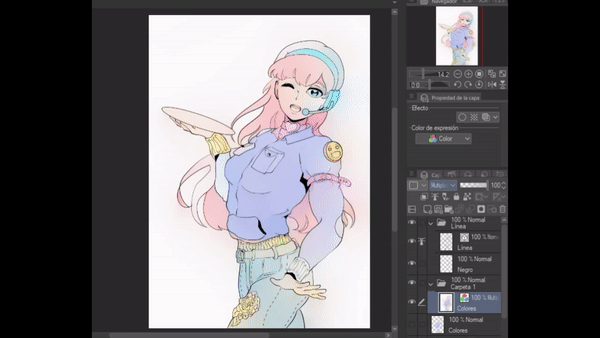
A new layer will be generated that contains the automatic coloring. This layer is automatically placed on top of the Line layer. Personally, I recommend that you place this new layer underneath, in a new folder, but that depends on your taste and your organization.
Tips / Tips
If there are colored spots that don't convince you very much, you can fix them by painting over the same coloring layer or putting on a new top coat and correcting all the things that you don't like or don't like.

You can add some shadows and highlights on top layers.
The shadow layer I used has a "Multiplication" blend mode.
The highlight layer I used has the blend mode "Add (glow)"
To paint both the shadows and the lights I used the Oil brush, "Oil Painting"
The lines layer was in black, but you can change the colors of the lines if you don't like them in black, for example, I placed a top layer, I adjusted it so that it only affected the lines and shadows of my folder. "Line" and I used pastel colors to paint certain parts of my illustration.
Keep in mind that you need to make your main figure have a background because anything you place or draw on lower layers may show through.
I also recommend that you place this background outside of your folder (if you made one).

Bottom
For the bottom line, I chose mint blue.
I made a grid and used the scale function, to look like a floor made of mosaics. I also drew some lines in the background simulating a door and the wall.
In a new layer I painted with different colors, pointing out that each mosaic had a different color.
The advantage of automatic coloring is that all the colors you choose will be present in your illustration, you don't have to worry about them not being able to combine correctly.
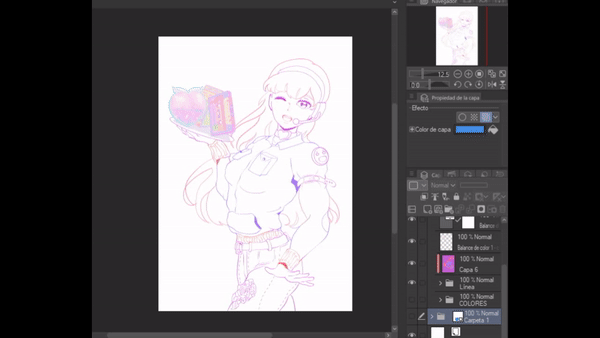
To create this pastel effect I placed my layers in the following order:
-Layer of lines.
-Pastel pink layer with "Hard Mix" combination mode at 60% opacity and adjusted to the lower layer.
-Automatic coloring layer.
As an additional, I advise you to make a color balance, so that the colors look more vivid. You can help you with the tone curve, color balance, saturation, lightness, etc.
Finally, I put in some purple and pink "shadows". I added some objects on the tray and a couple of sentences placed in different places in the image, but keep in mind this is because this is my illustration, maybe your illustration does not need any of this.
The illustration tutorial ends here.
If you want you can continue to the end and thus know the process to create an animation with the help of automatic coloring.
Automatic coloring - Animation
For animations, the same procedure is used, which makes this function very useful and practical.
First, you must create or already have your animation folder ready.
Mine is made up of 5 animation cells.
As in the illustration, you must create a raster layer (outside the animation folder) and on this raster layer paint in lines the colors that you want to have in your animation.
-Then create a new animation folder and place it either above or below the animation folder with the lineart. In my case, I decided to place it OVER the animation folder of the lineart.
-Set the first animation cell as a reference layer and perform the same action seen at the beginning of the tutorial to generate automatic coloring. I'll put it back:
Editing -> Coloring (Technology preview) -> Apply selected colors (H)
(Don't forget that you must be located on the raster layer that contains the colors you selected).
-Arrange each color cell in the same order in which the cells of the art line are arranged.
With these steps, you will finish your animation!

I hope these tips have been very helpful to you.
Please feel free to comment on your impressions.
Links where you can find my work:
-https: //linktr.ee/SadCherry


Comment