
A. Introducing
Hi guys! It’ve a while since my last tutorial was uploaded, and I miss everyone so much. In this time I have received so many DM on instagram that you guy found me after reading my tutorial. I am so honored to hear it from you guys.
So, for the come back tutorial, I wanna try something that I don’t usually do, and look at this month’s theme, I think this is the one that I always long to do: the mechanics one.
So let get’s started.
B. Sketching
Firstly, I have a speed painting video above for the sketching and line progress. Check it out!
So in this part, I gonna show you some highlights about sketching.
Sketching is an indispensable progress when I drawing. So first of all, when I start to thinking about humanoid robot, the first one came to my mind is I need to build it with a human body based.
So here is the first sketch.
As you can see, it looks like a normal human full body sketch. Here is the thing, after sketch it, i gonna have a simplification to turn the sketch in to the simplest shape: it’s just a triangle, rectangle and circle (the 4th).
Now is about the joints.
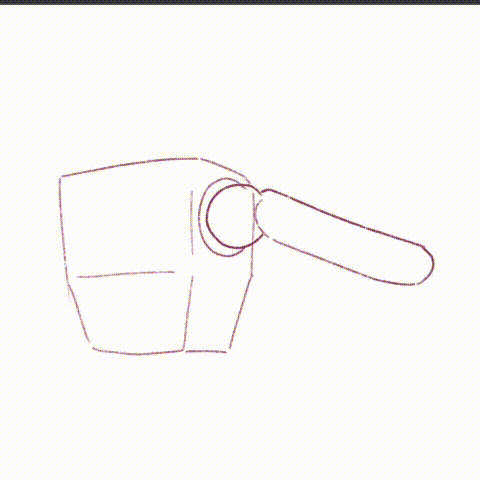
To be easier to draw the joints of our body, I devide into 2 kind: the Flexion Joint and the Ball Joint.
The Flexion Joint can only move up and down, while the Ball Joint can move around.
I hope my description is easy to understand but if it not, I hope those gif can help, about those Joint.
Here is the ball joint:
And the Flexion Joint:
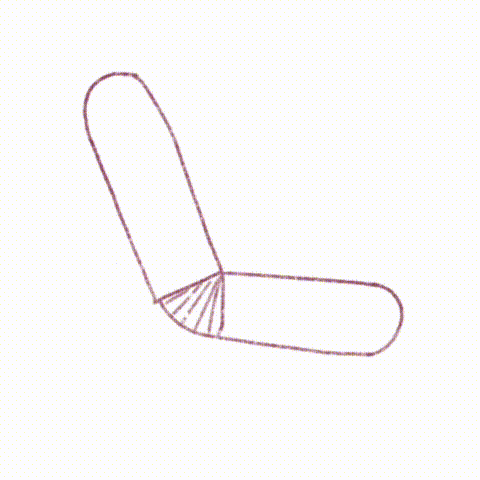
So the thing here is, when you draw your mechanical body, the ball joint can be drawn with the swivel, and the flexion joint can use something like a hinge.
Let move to the next step, when you are done with the based sketch. Let move on to some rough sketch of the humanoid. Here is mine.
When you are satisfied with the general idea, let move to the details.
C. Line and adding Details
In the video above, we have the Line art progress too. But here is some WIP image that I take a screen capture while drawing:
So you can see, when adding details, I have a window for references right beside the working space. You can use any references like photo, video, 3D model, etc.
Here is some keyword that I use to find references on the internet: mecha, mechanic, humanoid, ball joint, hinge, robot, mask, sci-fi, etc.
When I finished the line art, this is the result and I left some closer look for you. And if you like it, please give my video some like on Youtube.
The internet is useful.
I quite like her face with mask.
And she is a Sci-fi AU version of my Original Character, she has horn in the original version so this is why in the ver she has horns too.
You can see her shoulders are ball joints while her elbow is a flexion one.
When I working with the legs, I suddenly think maybe she can have 2 different legs. Like one original design of her, and the other one was lost in a battle so she had to change it. Or she just transformed it.
Idk but i just want my design can be a little bit more interesting. Come on, always symmetry is bored.
D. Based color and Shading
Guys! This is the second video. It have the shading process. And I want to share with you my new favorite line and coloring brush from the talented artists that I used in this artwork! Check it out!!!
Okay back to the progress, I always create a based color layer under the line layer, and fill it with a solid color.
Next, I will color some part which have the darker color.
Okay, then as always, use a multiply layer to give it a shading.
And a Overlay - Add layer for the Shining too
I am happy with this result. But do anyone realize that this time I try to do the grey-scale? Cuz I wanna try something that I’ve never ever did it before:
The correction layer, with Gradient Map.
E. Correction Layer - Gradient map
I have to say, this is marvelous.
I can’t believe that all of those years I didn’t know how miracles the gradient map can be. This is a wasted.
So on the [Menu bar], choose [Layer] => [New Correction Layer] => [Gradient map] to reach the miracle.
And after try many many many gradient map, I choose some of them, let’s take a look:
This is amazing guys!
The color is just like a dream (LoL)....
I also wanna share with you some gradient map that I found in Clip Studio Assets:
These artists are so amazing for creating such a beautiful palette color.
Please take a look and leave them a lot of like and favorite. I really really love those color!
F. Final Result
So here is my final result for designing humanoid robot.
I hope enjoy the speed video and the text tutorial! (づ  ̄ ³ ̄)づ~♥
G. Conclusion & Thank you
Hi, thank you for your patience for another long long long tutorial of mine. I hope I have expression my opinion clearly and easy to understand!
Hope my tips work for you ! And if it does, please give me a heart !!!
You can also follow me on @tokyolondon (IG, dA, weibo) or visit my FB Page @TokyoLondon.Artwork
Thank youuuu <3
Users who liked this post


Comment