Easy and high quality skin application ✨
Webtoon is easier to draw
Hello. This is Kim.
Today's TIP is "Easy and high quality skin application"
This is the method I use when drawing color comics, and is suitable for creating webtoons that need to be as high quality as possible in a limited amount of time.
It's very easy, so even beginners should try it once.
Apply the base of the skin
The first thing to do is to apply the base of the skin.
Create a new layer underneath the line art layer to paint your skin.
When choosing a skin color, it is common to select a light color that exists between red and yellow from the "color circle". Feel free to adjust the color according to the character and painting method.
Once you've decided on a color, choose a pen with 100% opacity and apply the base of your skin. I used "Millipen".
- Explains how to use the "automatic selection tool" in the video!
Makes the skin pale
Now let's make the character's skin look ruddy.
Create a new layer on top of the skin base layer and click on the "Clipping Layer" mark.
- Clipping layer allows you to draw only on the part where the reference layer (the layer below) is already colored.
Choose a color that is a little redder and more saturated than your skin color, and then lightly apply your skin with a soft airbrush. If you add gradation little by little to the lips, eyes, nose, ears, etc., the skin will become pale and the picture will be more complete!
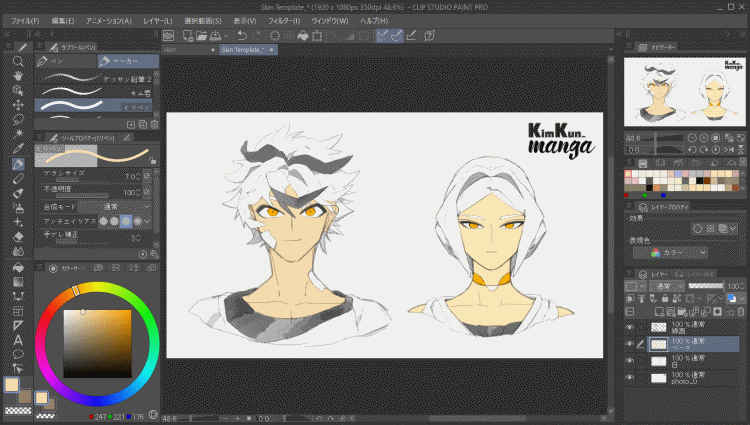
▴ Take a closer look and you'll see the difference
When you finish painting, it will look like this!
Let's change the color and the part to be painted according to the gender and age of the character.
Apply the shadow of the skin
Now let's cast a shadow on the skin.
Create another "clipping layer" and change the layer composition mode to "multiply". All the colors painted in the "multiplication layer" overlap the layer below, so it is very easy to paint shadows.
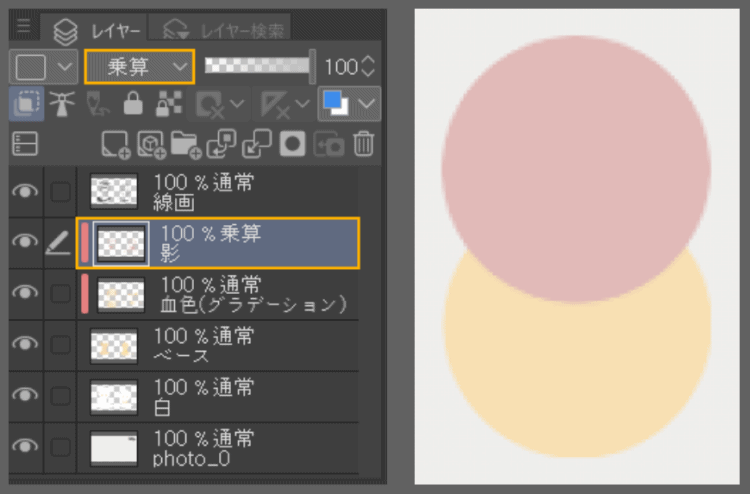
Choose a shadow color in the color circle
Generally, a color between orange and purple is used, but depending on the character's environment, a different color (such as blue) may be used.
After selecting the color, select the brush you like and paint the shadow area.
You can use a brush with a relatively clear border here.
- Please refer to the following reference materials for where and how to put shadows.
When the shadow is formed to some extent, select the color mixing tool (J) and lightly blur the boundary part. The presence of both hard and soft borders in the same picture enriches the picture.
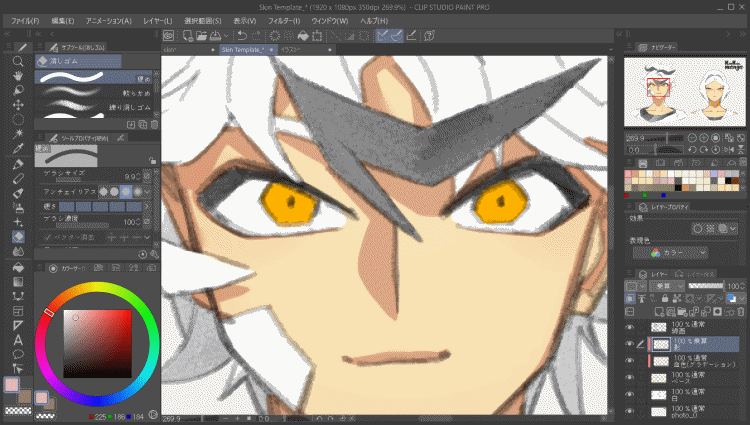
[Hue correction]
One of the biggest advantages of this painting method is that it is easy to modify the picture.
When you have finished painting, try pressing Hue Correction ([Ctrl + u] Windows standard) to adjust the overall color. You can change the mood of the picture just by adjusting the shadow layer.
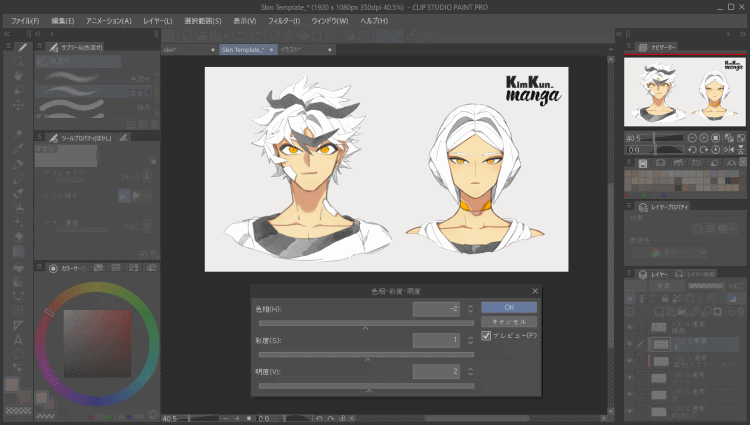
[▴ How to correct hue]
If you want to make the color stronger ▸ Saturation (↑), Brightness (↓)
If you want to lighten the color ▸ Saturation (↓), Brightness (↑)
If you want to change the color ▸ Hue (↑ or ↓)
Paint the highlight
Then create a new clipping layer and change the layer's compositing mode to "overlay".
Then, select the color of the light that hits the character from the color circle and lightly paint the entire face with a large airbrush.
[Tips for overlay layers]
In the overlay layer, you can select a dark color and paint it to make that part stronger. Check out the 6:15 part as it is explained in the video.
If you want to add strong highlights, choose a bright color that is close to white, and use a brush with a clear border to paint the areas that are exposed to strong light.
Change the color of the line
Next, let's adjust the line art to match the skin color.
Create a clipping layer on top of the "line art" and select dark red from the color circle.
Paint with the selected color by tracing over the line art.
Just changing the color of the lines will make your skin tone more subdued and natural.
Add texture
Next, let's add a texture to the picture.
CLIP STUDIO has a very useful texture function.
Open the Materials tab and click "All Materials"-"Solid Color Patterns"-"Textures". Select the one you like and drag it onto the picture to apply the texture.
You can reproduce your favorite texture by clicking the "Texture Composite" icon on the "Layer Properties" tab and adjusting the "Strength". Personally, I think about 10 is appropriate.
- When I didn't know this function, I downloaded the paper material and changed it to a "soft light layer" to give it a texture.
Final correction
Finally, let's check the density of the whole picture. If the picture is too thin, you won't see it very much.
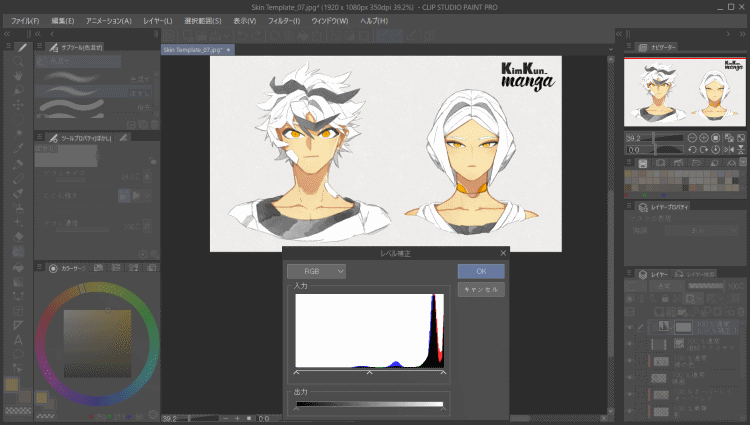
From the software menu, click "Layer"-"New Color Correction Layer"-"Level Correction".
When the level correction screen opens, move the arrow on the Input tab to adjust the density of the picture. Move the arrow on the left to the right to darken the overall color, and move the arrow on the right to the left to brighten it.
[Secret tips]
Try combining and copying the entire layer, placing it on top of this layer, and then changing the layer's compositing mode to "multiply". You can easily change the density of the picture by adjusting the opacity.
the end!
Thank you for your hard work.
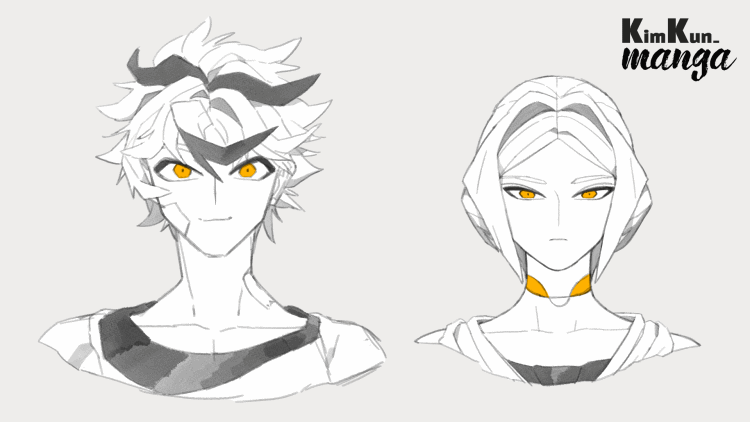
The character's skin is complete!
If you would like to see my other pictures, please check my SNS from the link below.
🍕 Go see the picture ▸ linktr.ee/kimkun_manga
Until the end Thank you for reading.


Comment