
Using 3d render for light study
I modelled and rendered a head character in Blender. I provide the image reference and the 3d object in the link below. Feel free to create your own 3d model in any 3d softwares.
Separate the head in 3 shape: circle, ellipse and rectangle.
Use the polygon tool for head [shift key for a perfect circle] and the jaw. Use the rectangle tool to the neck. Add the 3 shapes into each individual layer.
Add the color a dark grey to each shapes.
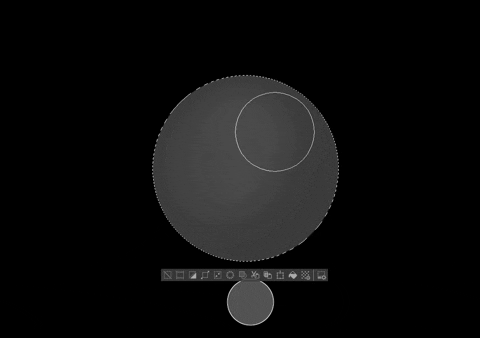
Ambient Occlusion in painting
What is ambient occlusion? In the realm of 3d modelling software, this is a technique of lightning a scene according to the light source point, the object position and his environment. The result in the rendering process looks realistic. Which why it is a good tool to understand light in digital painting techniques.
We can create easily this effect by using the Airbrush tool soft.
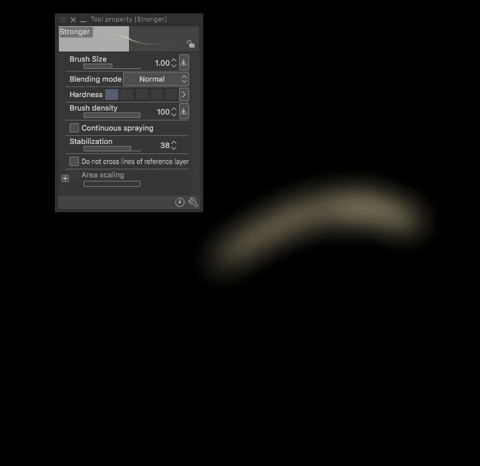
Below, you can see an example of that effect.
The example begins with a dark grey preferably this colour: Hex: 444444
While the circle is selected, I use the airbrush tool with hardness to 1 and brush density to 13. This time in a grey colour: Hex: 5E5E5E. The brush size is 15-17, but it depends on whether you have a big circle. Make sure you paint on just 1 layer all the grey shades colours.
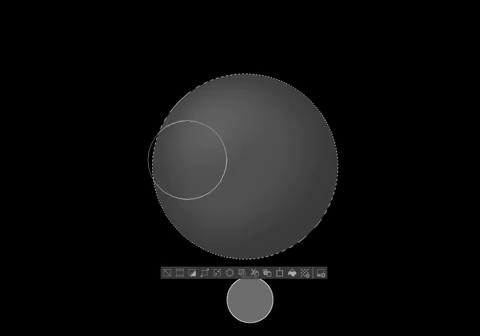
Add a paler grey on top to the previous shade: Hex: 787878 by using the airbrush tool. Don’t forget to keep a little bit of the previous shade to be able to see. The goal of this exercise is to understand how to make a circular gradient onto a sphere shape.
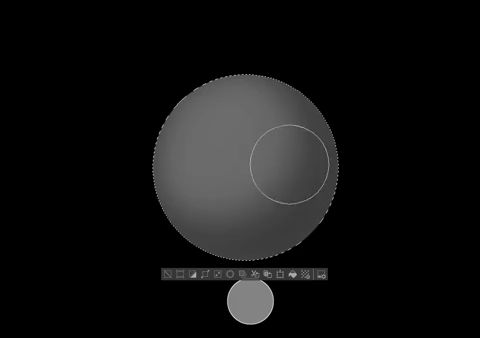
Add the last grey shade onto the top of the sphere and add lightly onto the bottom of the sphere: Hex: 8E8E8E. The bottom shade on the sphere reflects the surface or the environment onto the sphere. That is why we do this.
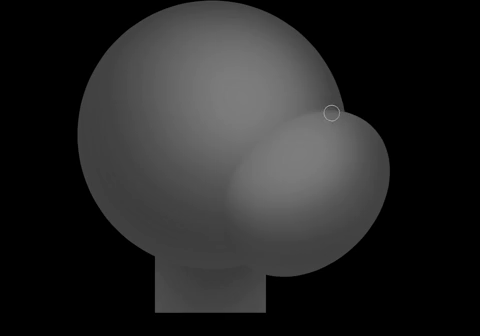
Head, jaw and neck shading in grey
Make the same technique for the head, jaw and neck by using the image of the 3d render for a reference. Paint each shapes individually on their appropriate layer.
Add the 3 layers: head, jaw and neck into a group folder and merge them (layer-merge selected layers). Then, use the blur (Insensity of blur: 0.25 - brush density: 39 - Fix value) and blend tool (Color stretch: 13 - hardness: 1 - brush density: 37). Make sure to unify the 3 shape into a one single shape.
Skin color: shadows, blush, nose and ear
Add a beige orange-brown colour for the skin: Hex: B27156 via the layer color effect on layer property.
Add a pale violet colour on a multiply layer: Hex: DDD1F3 with the airbrush soft. Add this below the jaw shape and on top of the head to the right side.
Add a pale pink onto the multiply layer with the airbrush to create the blushing cheeks: Hex: DDD1F3.
With an airbrush stronger (change only the hardness up to 5), add a nose shape in the beige colour: Hex: D9BAAE on a new layer. You can copy mine or be more creative to create your own nose shape.
Select your nose shape and add a darker pink: Hex: C89B8A with the airbrush soft on below the nose.
Use the blend tool on the left corner of the nose. Unify the nose with the head shape.
On another layer, make a grey ear with the techniques we saw previous steps.
Add the colour skin: Hex: B17159 onto the ear on the layer color effects panel. Use the blend tool onto the ear. Unify it with the head.
Face traits: eyes, eyebrows and mouth
Sketch the face traits with the pencil tool.
Add a new layer, use the g-pen to draw white eye with the color: Hex: FFF6F7
Select the eye layer, add with the airbrush soft a pale brown color: Hex: BEA495
Use the G-pen tool to create the eyebrow and the iris with a brown color: Hex: 29211E
Add a pale brown colour: Hex: 45342E on the right side of the iris with airbrush soft.
Add airbrush stronger with a white colour for the highlight inside the eyes.
On a new layer, create eyebrows by using the airbrush soft first amd airbrush stronger with 2 yellows: Hex: F5E7BD (pale yellow), Hex: E3C289(dark yellow).
Draw the mouth with the airbrush soft with a purple colour: Hex: 936F70
Add red lipstick: Hex: DE6D5F on a multiply layer using airbrush soft.
Add a pink colour: Hex: E0BDB2 gloss on the lips with airbrush stronger.
Add a shadow behind the eyes on the skin part with a dark pink: Hex: C69689 with a airbrush soft.
Hair
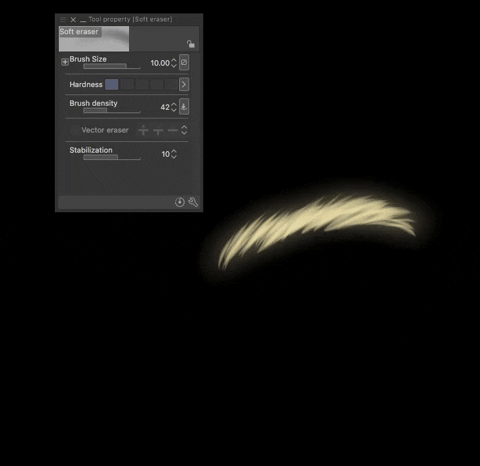
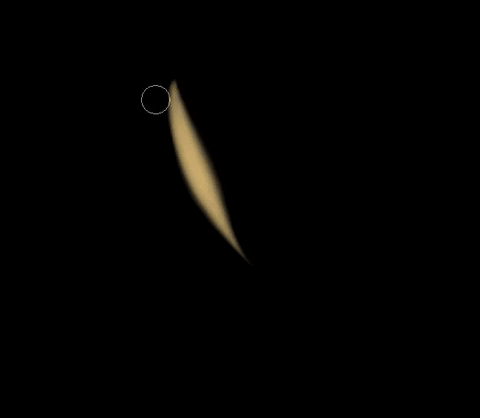
Sketch the hair with the pencil tool. You can create your own haircut too. Be creative.
I use the brush Soft Line/Sketch/Color by Fardros which it creates a cool hair effect. You can download it on the link below. Set the brush at a size: 3.00, opacity: 100%, density paint: 49, anti-aliasing: strong, hardness: 1 and taper: 5. Use a dark yellow: Hex: E3C289. Below it has an example of how to create the hair.
With the same brush, add a pale yellow colour: Hex: F5E7BD onto the hair.
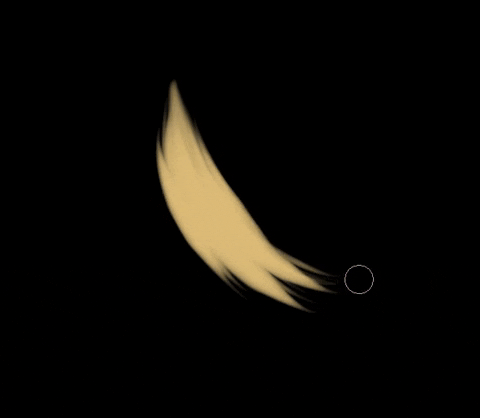
Select your hair layer and add a brown colour: Hex: BE874B on a multiply layer by using the gradient tool foreground to transparent.
Add some shadows inside the clumps of hair in certain places. The same colour: Hex: BE874B in a multiply layer.
Add highlight on the hair with the same brush with a yellow color: Hex: F9F2D8.
Add the same colour of highlight but onto an overlay layer in certain places.
Add some small hair coming out the strands of hair of the end with the hair brush size: 0.15, hardness: 5 (change only that information). The same colour as the highlights: Hex: F9F2D8.
Add shadows in a dark brown: Hex: 774822 in a multiply layer with the airbrush soft. This help to unify the lightning with the head.
Details and refine
Add more shadows from the hair onto the face and the ear in a dark pink: Hex: B28688.
Add some little highlights for the face, lip, nose and the ear with a white colour with the airbrush stronger.
And voilà! Your character's face is done! Hope this tutorial was helpful to you! Now create your own amazing characters with this technique!
Happy drawing!
Users who liked this post


Comment