
Hello, my honeys. This time I will show you how you can decorate objects quickly with the use of patterns and the [Transform] tool of CLIP STUDIO PAINT.
Shoe
To start we need the line art of an object to decorate. I will use a shoe as an example.
Select the area of the object that will contain the pattern with the [Area Selection] tool. (Ignore the colors of the tools please)
(From now on I will use a colored background to appreciate the rest of the process.)
Without deselecting, create a new layer and fill the selection with white. Position this base layer below the line art. It should look like this:
(1): Line art layer.
(2): Base coat. (White)
Create a selection that covers an area larger than the base layer with the [Marquee] tool ➜ [Rectangular Marquee].
Select a pattern of your preference and drag it into the selection. You can download any of these from ASSETS:
This is how it should look.
Place the pattern layer on top of the base layer.
(1): Line art layer.
(2): Base coat. (White)
(3): Pattern layer.
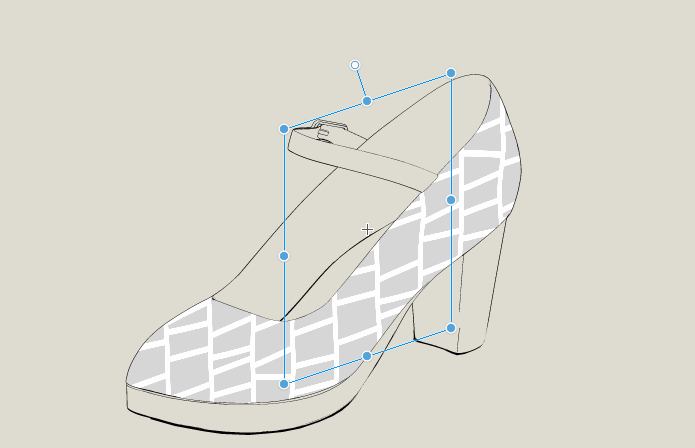
Go to [Edit] ➜ [Transform] ➜ [Free Transform] or select the [Free Transform] icon.
Adjusts the pattern following the direction of the object.
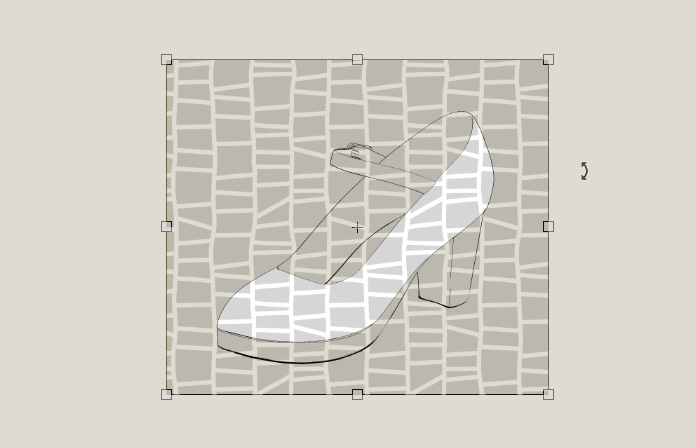
Press the Enter key and, in the layer menu, select [Snap to Layer Below].
At this point, with the [Object] tool, you can select and adjust the pattern once more.
I left it with this size:
I suggest you use a [Eraser] tool to erase areas of the pattern near the line art to give it a less digital finish. I use this tool:
Ready! We have finished applying the pattern.
Final result with additional details:
Smartphone
This is the same process in sequence.

Briefcase
Summary of the process.

Credits
Created by: Naosuke Takasaki.
Twitter: https://twitter.com/tksk_nsk
Program: CLIP STUDIO PAINT PRO
Version: 1.10
Users who liked this post


Comment